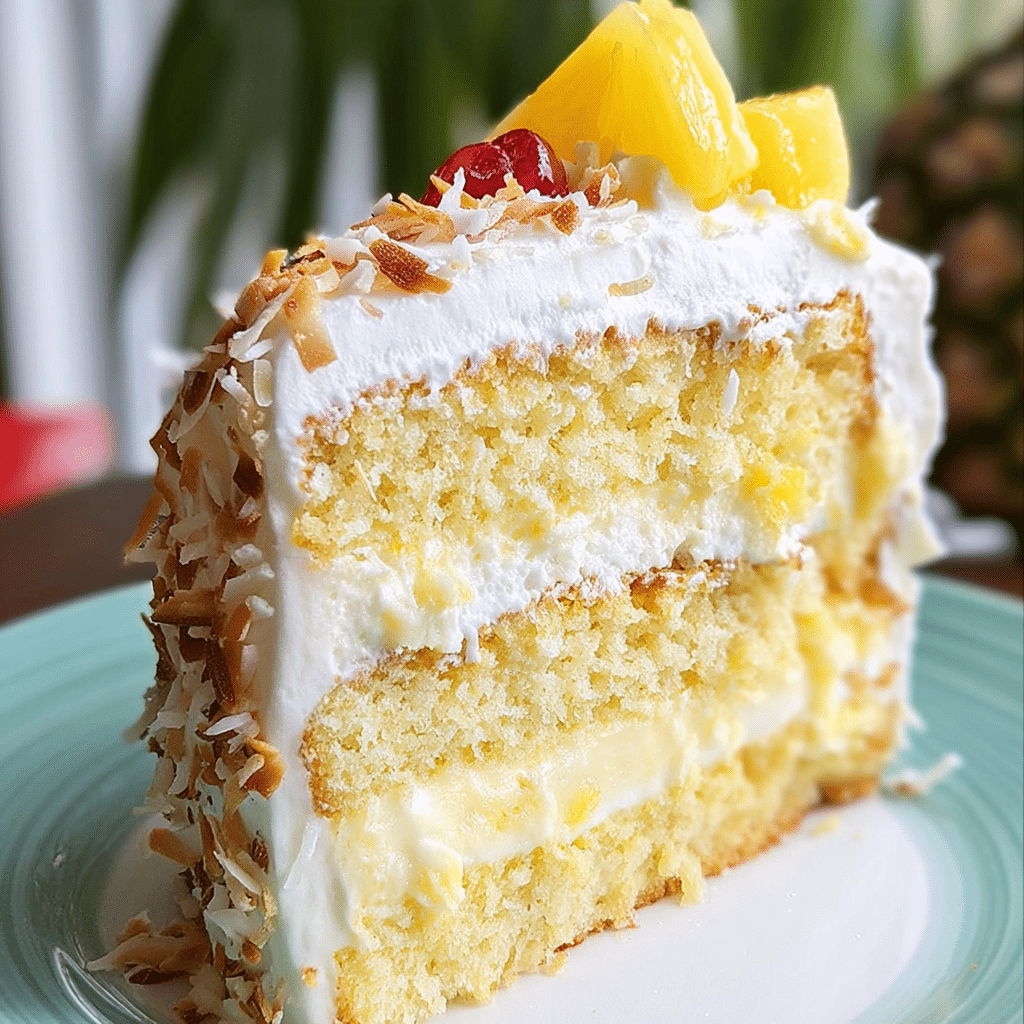
Pina colada layer cake is a delightful dessert that marries the tropical flavors of coconut and pineapple, making it a perfect treat for any occasion. I remember the first time I encountered this enchanting creation; I was at my sister’s beach house, where we spent a lazy summer afternoon sipping on piña coladas, the sun kissing our skin and laughter hanging in the air. As the sun began to set, my sister surprised us with a piña colada layer cake she had been baking all day. The moment I took my first bite, I was transported to a tropical paradise. The moist layers of cake, rich coconut frosting, and zesty pineapple filling were so captivating that I knew I had to learn how to make it myself.
The Story Behind This Recipe
Years later, I found myself at home, craving that unforgettable cake. I decided to recreate it, pulling together ingredients and memories to create something that would not only taste delicious but also remind me of those joyful summer days with my family. This piña colada layer cake recipe became a staple in my household, and whenever I bake it, I feel like I’m sharing a piece of my summer adventures with my loved ones. It’s a cake that brings people together, sparking joy and nostalgia in every slice.
What makes this recipe special is its ability to transport you to a tropical island with every bite. Unlike traditional layer cakes that can be dense and overly sweet, the piña colada layer cake is light and refreshing. The combination of coconut and pineapple creates a flavor profile that feels indulgent yet refreshing, making it perfect for warm weather gatherings or simply when you’re in the mood for a tropical escape.
For busy families looking for quick dinner solutions, this cake stands out as an excellent option. Not only can it be made in advance, but it also serves as a delightful ending to a weeknight meal or a weekend barbecue. The layers can be prepared ahead of time and assembled just before serving, saving you precious time in the kitchen. Plus, it’s a cake that delights both children and adults, making it a win-win for family gatherings.
As the seasons change, this cake shines brightest in the summer months. It’s the perfect dessert for warm-weather celebrations, picnics, and beach parties. However, I’ve found that its charm transcends seasonal boundaries. In the dead of winter, when the snow is falling outside, a slice of piña colada layer cake can bring a slice of sunshine into your home. It’s a reminder that even during the coldest months, we can still enjoy the flavors of summer.
As you dive into this guide, you can expect to learn everything from the intricacies of baking the perfect cake layers to crafting a luscious coconut frosting. I’ll share tips and tricks for achieving that perfect balance of flavors, as well as some personal anecdotes that I hope will inspire you to create your own memories with this delightful dessert. Whether you’re an experienced baker or a novice in the kitchen, I promise you’ll find the joy of making this cake a rewarding experience.
The Rich History and Cultural Significance of pina colada layer
The piña colada layer cake is more than just a delicious dessert; it is a culinary representation of the vibrant culture and traditions of the Caribbean. Its origins can be traced back to the classic piña colada cocktail, which is believed to have originated in Puerto Rico in the 1950s. The drink combines rum, coconut cream, and pineapple juice, embodying the tropical flavors that have become synonymous with the Caribbean lifestyle. This cocktail’s popularity inspired a plethora of desserts, including the piña colada layer cake we cherish today.
Origins and History
The piña colada’s journey began with a blend of native ingredients and colonial influences. The Taino people, the indigenous inhabitants of the Caribbean, cultivated coconuts and pineapples long before European explorers arrived. The arrival of Spanish colonizers introduced rum, which quickly became a staple in the region. The harmonious blending of these ingredients gave birth to the piña colada, a drink that encapsulates the essence of Caribbean culture.
As the piña colada gained international fame, bakers and dessert enthusiasts sought ways to transform the beloved cocktail into a cake. The piña colada layer cake emerged as a delightful tribute, featuring layers of fluffy cake infused with coconut and pineapple flavors, generously frosted with coconut cream frosting. Over time, this dessert has evolved, with variations emerging that include the addition of rum-soaked fruit, toasted coconut flakes, and even creative twists like chocolate or tropical fruit accents.
Cultural Significance
The piña colada layer cake is often associated with celebrations and joyous occasions. In many Caribbean cultures, food plays a crucial role in gatherings, symbolizing hospitality and community. This cake is frequently served at birthday parties, weddings, and family reunions, where the act of sharing food creates bonds and fosters connections. It embodies the spirit of celebration, evoking feelings of warmth and togetherness.
Furthermore, the piña colada layer cake has gained popularity beyond the Caribbean, finding its way into the homes of families around the world. Its tropical flavors resonate with those who seek to escape to a sunny paradise, even if only for a moment. It serves as a reminder of the joy of indulgence and the importance of savoring life’s sweet moments.
Nutritional Benefits
While a piña colada layer cake is undoubtedly a treat, it does offer some nutritional benefits that can make it a more guilt-free indulgence. Pineapples, one of the key ingredients, are rich in vitamins, particularly vitamin C and manganese. They also contain bromelain, an enzyme that can aid digestion. Coconut, another essential component, is known for its healthy fats and fiber content, which can contribute to a well-balanced diet when enjoyed in moderation.
Of course, the cake should be viewed as a dessert, and moderation is key. However, the combination of tropical fruits and coconut can inspire a sense of balance when paired with a wholesome meal. Additionally, the cake often encourages families to gather and share, fostering connections that are essential for emotional well-being.
In conclusion, the piña colada layer cake is a delicious dessert that pays homage to its Caribbean roots while serving as a perfect treat for any occasion. With its rich history, cultural significance, and nutritional benefits, it’s a cake that not only delights the palate but also nourishes the soul. As you embark on your journey to create this dessert, you’ll not only be baking a cake but also participating in a tradition that celebrates flavors, family, and the joy of food.
Essential Ingredients for Perfect pina colada layer
When it comes to creating a stunning Pina Colada Layer Cake, the ingredients you choose are paramount. Each component plays a vital role in bringing together the flavors and textures that make this cake a tropical delight. Below, I’ll walk you through the essential ingredients, their purposes, and how to select the best options for your baking adventure.
Essential Ingredients
- 2/3 cup (138g) sugar: This granulated sugar not only sweetens the cake but also helps to create a tender crumb. When baking, opt for fine, white sugar, as it dissolves easily into the batter.
- 3 tbsp cornstarch: Cornstarch acts as a thickening agent, especially in the filling or frosting. It also contributes to a lighter texture in cakes. Look for a high-quality brand to ensure purity.
- 16 oz crushed pineapple, with juice: The star of the show! This ingredient adds moisture, flavor, and a tropical twist. Choose canned pineapple packed in juice rather than syrup to keep things fresh and less sugary.
- 2/3 cup (160ml) water: Water is essential for hydrating the dry ingredients and ensuring even mixing. Use filtered water for the best results.
- 1/4 tsp vanilla extract: A splash of vanilla adds depth and enhances the flavor profile of the cake. Opt for pure vanilla extract over imitation for the best taste.
- 3/4 cup (168g) unsalted butter, room temperature: Butter contributes to the cake’s richness and flavor. Room temperature butter blends more easily into the batter. Use high-quality unsalted butter to control the salt levels in your recipe.
- 1 1/2 cups (310g) sugar: Used in the cake batter, this sugar will help create a beautiful golden color and a delightful sweetness. Fine granules work best for even mixing.
- 3/4 cup (173g) sour cream, room temperature: Sour cream adds moisture and richness, creating a tender cake. Look for full-fat sour cream for the best results.
- 1 tbsp coconut extract: This ingredient infuses the cake with a delicious coconut flavor. Choose a quality coconut extract for an authentic taste.
- 6 large egg whites, room temperature: Egg whites help provide structure and stability to the cake while keeping it light. Ensure they are at room temperature for optimal whipping.
- 2 1/2 cups (325g) all-purpose flour: The base of your cake, all-purpose flour gives the cake its structure. For the best results, use a high-quality brand.
- 4 tsp baking powder: A leavening agent that helps the cake rise, ensuring a light and fluffy texture. Check the expiration date to ensure effectiveness.
- ½ tsp salt: Salt enhances all flavors and balances sweetness in your cake. Use fine sea salt for even distribution.
- 3/4 cup (180ml) milk, room temperature: Milk hydrates the dry ingredients and contributes to a tender crumb. Whole milk is ideal for richness.
- 1/4 cup (60ml) water, room temperature: Similar to the previous water measurement, this helps ensure the batter comes together smoothly.
- 1 1/4 cup (280g) butter, room temperature: This butter will be used in your frosting, lending richness and stability.
- 1 1/4 cups (237g) shortening: Shortening can help achieve a fluffy texture in frosting. Look for trans-fat-free options for a healthier choice.
- 10 cups (1150g) powdered sugar: This sugar is essential for creating the frosting. Sift it before using to avoid clumps.
- 1 1/2 tbsp coconut extract: Just like in the cake, coconut extract in the frosting enhances the overall flavor.
- 6 – 7 tbsp (90-105ml) water or milk: This will help achieve the desired consistency in your frosting.
- 2 cups (153g) sweetened coconut flakes: These flakes add texture and decoration to the cake. Opt for unsweetened flakes if you prefer less sweetness.
- Cherries: Perfect for garnish, cherries add a pop of color and flavor to each slice of cake.
- Sliced pineapple: Fresh pineapple slices not only enhance the presentation but also reinforce the tropical theme.

Pina Colada Layer Cake
Ingredients
PINEAPPLE FILLING
- 2/3 cup (138g) sugar
- 3 tbsp cornstarch
- 16 oz crushed pineapple, with juice
- 2/3 cup (160ml) water
- 1/4 tsp vanilla extract
COCONUT CAKE LAYERS
- 3/4 cup (168g) unsalted butter, room temperature
- 1 1/2 cups (310g) sugar
- 3/4 cup (173g) sour cream, room temperature
- 1 tbsp coconut extract
- 6 large egg whites, room temperature
- 2 1/2 cups (325g) all purpose flour
- 4 tsp baking powder
- ½ tsp salt
- 3/4 cup (180ml) milk, room temperature
- 1/4 cup (60ml) water, room temperature
COCONUT FROSTING AND DECOR
- 1 1/4 cup (280g) butter, room temperature
- 1 1/4 cups (237g) shortening
- 10 cups (1150g) powdered sugar
- 1 1/2 tbsp coconut extract
- 6–7 tbsp (90-105ml) water or milk
- 2 cups (153g) sweetened coconut flakes
- Cherries
- Sliced pineapple
Instructions
TO MAKE THE PINEAPPLE FILLING:
1. Combine the sugar and cornstarch in a large saucepan.
2. Stir in the pineapple, including the juice, and the water.
3. Cook over medium-high heat, stirring regularly until mixture thickens and come to a boil, about 10 minutes.
4. Allow to boil for 1 1/2 minutes, then remove from heat.
5. Stir in vanilla extract and set aside to cool.
TO MAKE THE CAKE LAYERS:
6. Prepare three 8 inch cake pans with parchment paper circles in the bottom and grease the sides. Preheat oven to 350°F (176°C).
7. In a large mixing bowl, cream the butter and sugar together until light in color and fluffy, about 3-4 minutes. Do not skimp on the creaming time.
8. Add sour cream and coconut extract and mix until well combined.
9. Add egg whites in two batches, mixing until well combined after each. Scrape down the sides of the bowl as needed to be sure all ingredients are well incorporated.
10. Combine dry ingredients in a separate bowl, then combine the milk and water in a small measuring cup.
11. Add half of the dry ingredients to the batter and mix until well combined. Add the milk mixture and mix until well combined. Add remaining dry ingredients and mix until well combined. Scrape down the sides of the bowl as needed to be sure all ingredients are well incorporated.
12. Divide the batter evenly between the cakes pans and bake for about 21-23 minutes, or until a toothpick comes out with a few crumbs.
13. Remove the cakes from the oven and allow to cool for about 2-3 minutes, then remove to cooling racks to cool completely.
TO MAKE THE BUTTERCREAM:
14. In a large mixer bowl, beat the butter and shortening together until smooth.
15. Slowly add half of the powdered sugar and mix until smooth.
16. Add the coconut extract and 5-6 tablespoons of water or milk and mix until smooth.
17. Slowly add the remaining powdered sugar and mix until smooth. Add additional water or milk, as needed.
TO ASSEMBLE THE CAKE:
18. To toast the coconut, preheat the oven to 400°F (204°C). Spread the coconut out evenly over a parchment lined cookie sheet. Bake until toasted, about 5-8 minutes, tossing regularly so that it toasts evenly.
19. To put the cake together, use a large serrated knife to remove the domes from the top of the cakes so that they’re flat. Place the first cake on a serving plate or a cardboard cake round.
20. Pipe a dam of coconut frosting around the edge of the cake, then spread about 1 cup of pineapple filling evenly into the center.
21. Add the second layer of cake and another dam of coconut frosting and cup of pineapple filling. You may end up with a little bit of pineapple filling left over.
22. Top the cake with the remaining layer and frost the outside of the cake.
Shopping Tips
When shopping for your ingredients, consider seasonal availability. Fresh fruits like pineapples may vary in taste and price depending on the season. Canned options are often available year-round but may not have the same flavor profile as fresh. For the best butter and dairy products, sourcing from local dairies or organic farms can provide superior flavor and quality.
For tropical flavors, specialty stores may carry a wider selection of coconut products, including coconut extract and sweetened coconut flakes. Always check packaging for quality indicators; for instance, pure extracts tend to have richer flavors compared to imitation ones.
Substitutions and Alternatives
If you have dietary restrictions, there are several substitutions you can consider. For a gluten-free version of the Pina Colada Layer Cake, you can use a gluten-free all-purpose flour blend. Instead of sour cream, you can use Greek yogurt for a similar texture and tang. For those who are vegan, substitutes like coconut oil can replace butter, and flax eggs can be used in place of egg whites.
When it comes to sweeteners, you can experiment with honey or agave syrup for a natural alternative, though you may need to adjust liquid ratios in the recipe. If you’re avoiding refined sugar, look for coconut sugar or a stevia blend to keep the sweetness without the calories.
Storage tips are also essential. Keep your dry ingredients in a cool, dry place to maintain their freshness. Butter and dairy products should be stored in the refrigerator, while coconut flakes can be kept in an airtight container at room temperature.
Overall, the key to a successful Pina Colada Layer Cake lies in the quality and freshness of your ingredients. Invest a little more in good-quality components, and the flavors will shine through in your finished cake!
Detailed Step-by-Step pina colada layer Cooking Instructions
Creating a Pina Colada Layer Cake is an experience filled with anticipation and joy. The process is as enjoyable as the final product, and I cannot wait to take you through each step. Here, I’ll provide you with a detailed guide to making this tropical delight, ensuring you have all the insights and tips needed for success.
Preparation Steps
- Gather Your Ingredients: Start by gathering all your ingredients and equipment. This includes mixing bowls, measuring cups and spoons, a whisk, and a stand mixer or hand mixer. Prepping beforehand makes the baking process smoother and less stressful.
- Preheat Your Oven: Preheat your oven to 350°F (175°C). This is a crucial step because a properly heated oven ensures that your cake bakes evenly. While the oven heats, you can prepare your baking pans.
- Prepare Your Baking Pans: Grease and flour two 9-inch round cake pans. This prevents the cakes from sticking and helps them release easily once baked. Alternatively, you can line the bottoms with parchment paper for added assurance.
- Mix Dry Ingredients: In a medium bowl, combine the flour, baking powder, and salt. Whisk them together thoroughly to ensure even distribution of the leavening agent and salt.
- Combine Wet Ingredients: In a separate bowl, mix together the sour cream, milk, vanilla extract, coconut extract, and crushed pineapple (with juice). This mixture will provide moisture and flavor to the cake batter.
- Beat Butter and Sugar: In a large mixing bowl, beat the room temperature butter and the first measurement of granulated sugar together until light and fluffy, about 3-4 minutes. This step is critical for incorporating air into the batter, which leads to a lighter cake.
- Add Egg Whites: Gradually add the egg whites to the butter and sugar mixture, mixing until well combined. Ensure the egg whites are at room temperature for optimal blending.
- Alternate Dry and Wet Ingredients: Gradually add your dry ingredients to the wet mixture, alternating with the wet ingredients. Start and end with the dry ingredients. This method helps to maintain the cake’s structure and moisture.
Cooking Process
- Mix Until Just Combined: Be careful not to overmix the batter; stop as soon as you see no dry flour. Overmixing can lead to a dense cake.
- Divide the Batter: Evenly divide the batter between the prepared cake pans. A kitchen scale can help ensure equal portions, resulting in even layers.
- Bake the Cakes: Place the pans in the preheated oven and bake for 25-30 minutes, or until a toothpick inserted in the center comes out clean. Keep an eye on them in the last few minutes of baking to avoid overbaking.
- Cool the Cakes: Once baked, remove the pans from the oven and allow the cakes to cool in the pans for about 10 minutes. Then, gently run a knife around the edges and invert them onto a wire rack to cool completely.
- Prepare the Frosting: While the cakes cool, prepare the frosting. In a large mixing bowl, beat the room temperature butter and shortening together until creamy. Gradually add the powdered sugar, coconut extract, and enough milk or water to reach your desired consistency.
- Frosting Consistency: The frosting should be thick but spreadable. If it’s too stiff, add a bit more liquid. If it’s too thin, add more powdered sugar.
- Layering the Cake: Once the cakes are completely cool, place one layer on a serving plate. Spread a generous layer of frosting on top, followed by a layer of crushed pineapple if desired. Place the second layer on top and frost the top and sides of the cake.
Final Assembly
- Decorate the Cake: Use the remaining frosting to decorate the top and sides of the cake. Sprinkle the sweetened coconut flakes all over the frosting for that tropical flair.
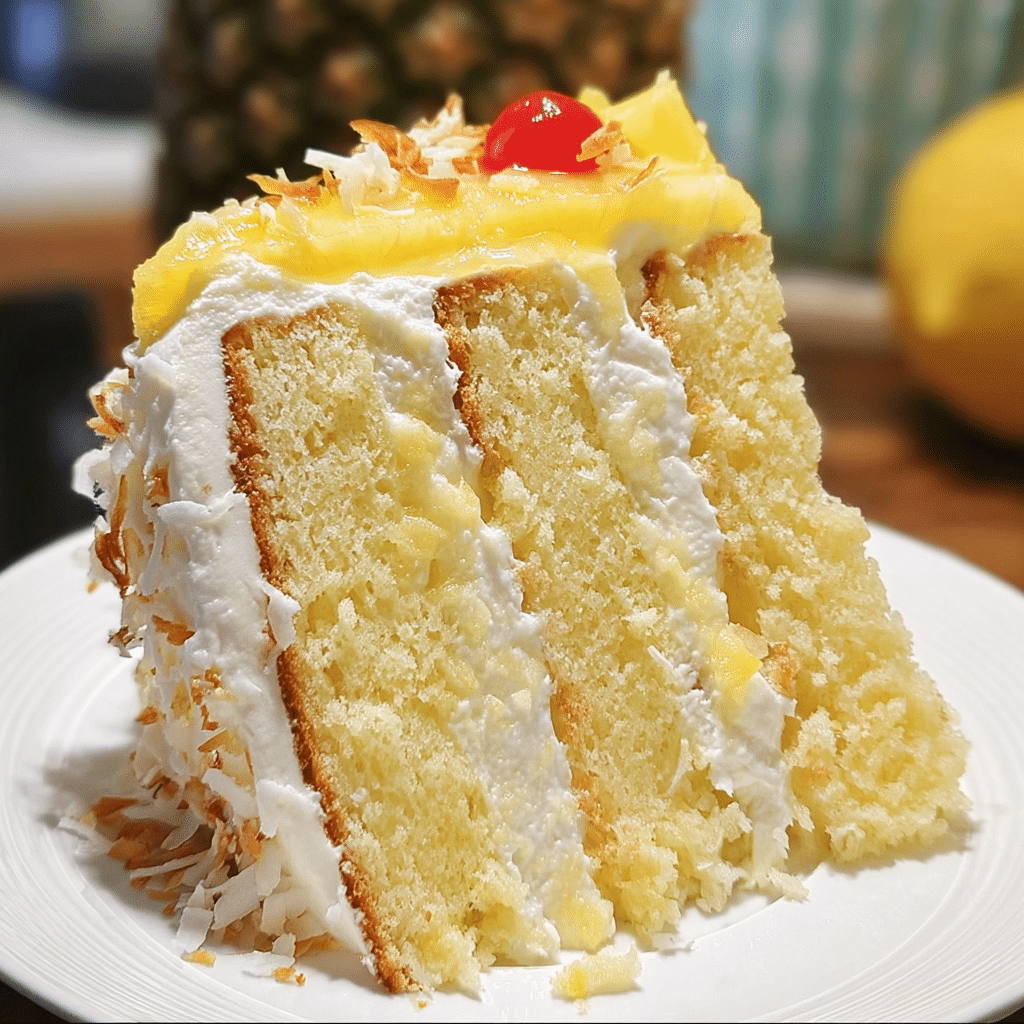
- Garnish: Top the cake with cherries and sliced pineapple for an eye-catching and delicious finish. This not only enhances the presentation but also adds to the flavor profile.
- Chill the Cake: If possible, refrigerate the cake for at least an hour before serving. This helps the frosting set and makes for a cleaner slice.
- Serving Suggestions: When ready to serve, slice the cake with a serrated knife for clean cuts. Pair with a tropical drink or a scoop of vanilla ice cream to elevate the experience.
- Storage: Store any leftover cake in an airtight container in the refrigerator. It can last up to a week, although it’s best enjoyed within the first few days for the freshest taste.
Baking a Pina Colada Layer Cake is not just about following a recipe; it’s about creating an experience filled with delightful aromas and flavors. The joy of sharing this cake with loved ones, perhaps at a summer gathering or a birthday celebration, makes all the effort worthwhile. Enjoy every bite of this tropical treat!
Professional Tips and Techniques for pina colada layer
Creating a stunning pina colada layer cake is an endeavor that not only fills your kitchen with an irresistible aroma but also brings the taste of tropical paradise right to your table. However, mastering this cake requires some professional tips and techniques that can elevate your baking game, ensuring your pina colada layer is not just delicious but also visually stunning. Let’s dive into how you can perfect this delightful dessert.
Professional Techniques
When it comes to baking a pina colada layer cake, understanding the fundamentals is key. Start with the ingredients. Use fresh, high-quality coconut milk and crushed pineapple for the most authentic flavor. The freshness of these ingredients significantly influences the overall taste of your cake.
One of the secrets to achieving a moist cake is the creaming method. Begin by beating the butter and sugar together until the mixture is light and fluffy. This process incorporates air into the batter, giving your cake a wonderful texture. Be sure to scrape down the sides of the bowl frequently to ensure even mixing.
For an added touch of flavor, consider infusing your cake batter with rum. A splash of dark rum can enhance the cake’s tropical essence, while also adding depth to the overall flavor profile. However, if you prefer a non-alcoholic version, you can substitute rum extract for a similar taste without the alcohol content.
Another professional technique is baking your cakes in advance. You can prepare the layers a day or two ahead of time. Once cooled, wrap the cakes tightly in plastic wrap and store them in the refrigerator. This not only saves time on the day of assembly but also allows the flavors to meld together, resulting in an even tastier cake.
Troubleshooting Guide
Even the most experienced bakers encounter issues from time to time. One common problem with layer cakes is uneven layers. To avoid this, use a kitchen scale to weigh your cake pans before baking. This ensures that you distribute the batter evenly among the pans, leading to uniform layers.
If your cake turns out dry, you may have overbaked it. Always check for doneness a few minutes before the recommended baking time. A toothpick inserted into the center should come out clean but not dry. Additionally, brush the layers with a simple syrup (made of sugar and water) after baking to add moisture.
If your frosting is too runny, try chilling it for a bit before applying it to the cake. The cooling will help it firm up, making it easier to spread. Conversely, if your frosting is too stiff, add a few drops of heavy cream until you reach the desired consistency.
Presentation Tips
The final presentation of your pina colada layer cake can take it from ordinary to extraordinary. Consider using a cake stand to elevate your cake, making it the centerpiece of your dessert table. Garnish your cake with toasted coconut flakes, fresh pineapple slices, and maraschino cherries for a tropical flair.
When slicing the cake, use a serrated knife for clean cuts. Dip the knife in hot water and wipe it clean between cuts for an even better presentation. This will keep the layers intact and showcase the beautiful pina colada layer effect.
Pairing beverages with your cake can enhance the overall dining experience. A glass of chilled coconut water or a refreshing mojito works harmoniously with the flavors of your cake. For those who prefer wines, a sweet sparkling wine can complement the tropical notes beautifully.
In conclusion, by incorporating these professional tips and techniques, you can create a magnificent pina colada layer cake that is sure to impress your guests. Whether you’re a novice baker or an experienced chef, these insights will help you avoid common pitfalls, enhance your skills, and present a dessert that is as beautiful as it is delicious.
Creative Variations and Adaptations of pina colada layer
When it comes to desserts, creativity knows no bounds, and the pina colada layer cake is no exception. This cake can be adapted in numerous ways, allowing you to explore various flavors, dietary needs, and seasonal ingredients. Let’s dive into some exciting variations and adaptations that you can try!
Seasonal Variations
Seasonal ingredients can add a unique twist to your pina colada layer cake. In the summer, incorporate fresh berries such as strawberries or blueberries into your cake layers. Not only do they provide a lovely contrast in flavor, but their vibrant colors make for a stunning presentation. You can also enhance the tropical feel by adding fresh mango puree to the frosting for a fruity twist.
During autumn, consider adding spices such as cinnamon or nutmeg into the cake batter. This will give a warm, cozy flavor that is reminiscent of fall gatherings. You can also substitute some of the coconut milk with apple cider for a unique flavor profile that marries tropical and autumnal vibes.
In winter, you might want to experiment with a peppermint twist. Add peppermint extract to your frosting and garnish the cake with crushed candy canes for a festive touch. These seasonal adaptations not only keep the pina colada layer cake exciting but also allow you to savor the flavors of different times of the year.
Dietary Adaptations
With the rise of various dietary preferences, adapting your pina colada layer cake to meet different needs is easier than ever. For those following a vegan diet, substitute eggs with flaxseed meal or a commercial egg replacer. You can also replace dairy products with coconut yogurt or almond milk, which will maintain the cake’s tropical essence.
If you’re looking for a gluten-free option, you can use a gluten-free all-purpose flour blend. Be sure to check the flour’s binding agents, as some may require additional ingredients to ensure the cake rises properly. Additionally, almond flour can be an excellent choice for a denser texture while complementing the flavors of coconut and pineapple.
For a keto-friendly version, consider substituting sugar with erythritol or stevia. Coconut flour can replace regular flour, but be mindful of the different absorption rates; you may need to adjust the liquid ingredients accordingly. This way, you can enjoy a slice of pina colada layer cake without compromising your dietary goals.
Creative Twists
Don’t be afraid to think outside the box! Adding layers of different flavors can create a delightful fusion. For example, a layer of passion fruit curd between the pina colada layers can infuse the cake with a tart sweetness that complements the rich flavors of coconut and pineapple.
Another fun twist is to incorporate a layer of chocolate ganache. The richness of chocolate pairs surprisingly well with the tropical flavors of the pina colada layer cake, creating a decadent dessert that is sure to please chocolate lovers.
If you find yourself with leftover cake, consider transforming it into cake pops! Crumble the leftover cake, mix it with frosting, and form small balls. Dip them in chocolate coating for a fun and portable treat.
In conclusion, the pina colada layer cake is a versatile dessert that can be tailored to suit a variety of tastes, dietary needs, and seasonal ingredients. Embrace the opportunity to get creative in the kitchen, and you’ll discover that the possibilities are endless with this tropical delight!
Storage, Reheating, and Meal Prep for pina colada layer
When it comes to enjoying a luscious pina colada layer cake, the excitement often doesn’t end when you’ve finished cutting and serving it; it extends to how you store the leftovers, ensuring that each slice maintains its delightful flavors and textures. Just like any other cake, proper storage is crucial for preserving its quality and taste. Let’s dive into the ins and outs of storing your pina colada layer cake, whether you’re saving it for tomorrow or planning to enjoy it weeks later.
Short-term Storage
After you’ve baked and assembled your pina colada layer cake, the first step in short-term storage is to let it cool completely. This cooling period is essential, as placing a warm cake in the refrigerator can create condensation, leading to sogginess. I remember the first time I made this cake; I was so eager to taste it that I rushed the cooling process, only to end up with a less-than-perfect texture. Once cooled, if you’re planning to consume the cake within the next few days, it’s best to wrap it properly.
To store your cake, use an airtight container or wrap it tightly in plastic wrap. If you’re using a cake stand with a dome, that works wonderfully too. The goal is to minimize air exposure, which can dry out the cake. If you have frosting on your pina colada layer cake, be careful not to disturb the icing as you wrap it. You can place a piece of parchment paper between the frosting and the wrap to avoid any smudging. Store it in the refrigerator, where it will generally last for about 3 to 5 days.
Freezing and Long-term Storage
For those moments when you might want to save your pina colada layer cake for a special occasion or simply want to prepare in advance, freezing is a great option. Freezing not only retains the flavor but can also extend the life of your cake to several months. Start by slicing the cake into manageable pieces. This allows you to defrost only what you need later, making it super convenient.
Wrap each slice tightly in plastic wrap and then place them in a heavy-duty freezer bag or an airtight container. Make sure to label the bags or containers with the date so you can keep track of how long it’s been frozen. Properly stored, your pina colada layer cake can be kept in the freezer for up to 3 months without a significant loss in quality. When you’re ready to enjoy a slice, simply move it to the refrigerator to thaw overnight or let it sit at room temperature for a couple of hours.
Reheating Best Practices
While this cake is typically enjoyed cold, some may prefer it slightly warmed up. If you’re one of those who enjoys a warm slice of cake, reheating your pina colada layer cake requires a bit of care to maintain its moisture and flavor. Preheat your oven to about 350°F (175°C) and place the cake slice on a baking sheet lined with parchment paper. Cover it loosely with aluminum foil to prevent it from drying out. Heat for about 10-15 minutes, checking frequently to ensure it doesn’t overheat. Alternatively, if you only need to warm a small portion, the microwave is an option. Use a microwave-safe plate, cover it with a damp paper towel, and heat in short bursts of 15-20 seconds, checking in between to avoid overheating.
Another method I’ve tried is to use a steam basket on the stove, which gently warms the cake while maintaining its moisture. I was pleasantly surprised at how this method preserved the light and fluffy texture of the cake. Regardless of the method you choose, make sure to enjoy your pina colada layer cake soon after reheating for the best experience.
Meal Prep and Batch Cooking Strategies
For those who love to plan ahead, making a pina colada layer cake as part of your meal prep can be a delightful strategy. Consider baking a double batch; one to enjoy fresh and one to freeze for later. The beauty of this cake is that it’s perfect for gatherings, whether it’s a summer BBQ or a cozy family dinner.
Another strategy I’ve found useful is to prepare the cake layers in advance. You can bake the layers, allow them to cool, and then wrap them individually for freezing. When you’re ready to serve, simply defrost and assemble with your fresh frosting. You can also prepare the frosting and store it in the refrigerator for up to a week, making assembly a breeze.
Food Safety Considerations and Guidelines
Food safety is paramount when it comes to storing any type of food, including our beloved pina colada layer cake. Always ensure that your cake is stored at the appropriate temperature. The USDA recommends keeping your refrigerator temperature at or below 40°F (4°C) to prevent bacterial growth. Additionally, if your cake has been left out at room temperature for more than 2 hours, it’s safer to discard any leftovers.
As for the shelf life, if stored properly, your cake should maintain its quality for the time frames mentioned. However, always trust your senses; if you notice any off smells or changes in texture, it’s best to err on the side of caution.
In conclusion, storing your pina colada layer cake correctly ensures that each bite remains as delightful as the first. With these tips in mind, you can savor your cake long after it’s been made, enjoying its tropical flavors and textures at your leisure.
Nutritional Benefits and Health Information
When we think about desserts, especially indulgent treats like a pina colada layer cake, it’s easy to overlook their nutritional value. However, understanding the nutritional benefits and health information associated with this cake can help you enjoy it mindfully. Not only is it a delightful dessert, but it also contains ingredients that offer various health benefits when consumed responsibly.
Nutritional Profile
A typical serving of pina colada layer cake contains several key ingredients that contribute to its overall nutritional profile. The cake is primarily made from flour, sugar, butter, eggs, coconut milk, and pineapple. On average, a slice (about 1/12 of a 9-inch cake) contains roughly 400-500 calories, depending on the specific recipe and portion size.
In terms of macronutrients, you can expect around 20-25 grams of fat, 50-60 grams of carbohydrates, and 4-6 grams of protein per serving. The coconut milk adds healthy fats, particularly medium-chain triglycerides (MCTs), which are known for their health benefits, including improved energy levels and potential weight management support.
Aside from calories and macronutrients, the cake is also a source of essential vitamins and minerals. Fresh pineapple provides vitamin C, manganese, and a good amount of dietary fiber, which promotes healthy digestion. Coconut contains important minerals such as copper, selenium, and magnesium, which contribute to overall health.
Health Benefits
Beyond the basic nutritional breakdown, the ingredients used in a pina colada layer cake offer numerous health benefits. Pineapple, for instance, is rich in bromelain, an enzyme that may help reduce inflammation and aid digestion. Including pineapple in your diet can also boost your immune system due to its high vitamin C content.
Coconut milk, a star ingredient in the cake, is a good source of healthy fats that can provide quick energy. The MCTs found in coconut have been linked to various health benefits, including improved brain function and potential weight loss benefits due to their ability to promote a feeling of fullness. In moderation, these fats can be a beneficial addition to your diet.
Additionally, using whole ingredients in your pina colada layer cake, such as fresh pineapple instead of canned, can enhance its nutritional value. Fresh fruit brings more nutrients and reduces added sugars, making your cake a bit healthier.
Dietary Considerations
When enjoying your pina colada layer cake, it’s essential to consider any dietary restrictions or allergies you or your guests may have. The traditional recipe contains gluten due to the flour, which can be a concern for those with celiac disease or gluten sensitivity. Fortunately, gluten-free flour blends are widely available and can easily be substituted in the recipe without compromising too much on taste or texture.
For those who are lactose intolerant or avoiding dairy, using coconut cream or almond milk in place of butter and dairy milk can make the cake just as delicious while accommodating their dietary needs. Vegan substitutes can also be employed, such as flax eggs or applesauce instead of regular eggs, making this a versatile cake suitable for various diets.
Caloric content should also be considered if you are following a specific dietary plan. If you are looking for a lower-calorie option, consider reducing the sugar content or using natural sweeteners like honey or maple syrup. Additionally, incorporating healthier fats, like avocado or using less butter, can reduce calorie intake without sacrificing flavor.
In comparison to similar desserts, such as traditional layer cakes or cheesecakes, the pina colada layer cake can be a lighter alternative, especially if you make modifications to reduce sugar and fat content. The use of fruit and coconut can provide a unique flavor profile that sets it apart from heavier desserts.
In conclusion, while indulging in a slice of pina colada layer cake is undeniably a treat, understanding its nutritional value and health benefits allows you to enjoy it more mindfully. With thoughtful modifications and an appreciation for its wholesome ingredients, this cake can be part of a balanced diet, offering both enjoyment and nutrition to your dessert table.
Conclusion: Mastering the Perfect pina colada layer
Creating the perfect pina colada layer is more than just following a recipe—it’s about understanding the techniques, ingredients, and cultural significance behind this beloved dish. Throughout this comprehensive guide, we’ve explored everything from the historical origins to modern variations, ensuring you have all the knowledge needed to make this recipe your own.
Whether you’re a beginner cook or an experienced chef, the techniques and tips we’ve shared will help you create a pina colada layer that’s not only delicious but also meaningful. Remember that cooking is a journey of discovery, and each time you make this dish, you’ll learn something new.
We encourage you to experiment with the variations we’ve discussed, adapt the recipe to your dietary needs, and most importantly, share it with the people you love. Food has the incredible power to bring people together, and Pina Colada Layer Cake is the perfect dish to create lasting memories around your dinner table.
Don’t forget to share your cooking adventures with us on social media, and feel free to ask questions in the comments below. Happy cooking!
Share this recipe and let us know how it turned out! Tag us on social media for a chance to be featured.