Grilled corn cob is not just a side dish; it’s a celebration of summer, family gatherings, and the joy of cooking outdoors. I still remember the first time I bit into a perfectly grilled ear of corn. The sweet, smoky flavor burst in my mouth, and I was instantly transported back to my childhood. Every summer, my family would pack up the car and head to our favorite campsite, where the smell of charcoal and the sound of laughter filled the air. My dad would always be the designated grill master, and his grilled corn cobs were legendary. He had a secret technique that involved soaking the corn in water before wrapping it in foil and throwing it on the grill. The result was an incredibly tender and flavorful treat that we looked forward to year after year.
As I grew older and began to explore my own culinary interests, I realized that grilled corn on the cob was more than just a seasonal delight; it was steeped in rich cultural traditions. Corn has been a staple food in many cultures for thousands of years, particularly in the Americas. Native Americans revered corn, not only for its nutritional value but also for its cultural significance. They believed it was a gift from the gods and used it in various ceremonies, celebrations, and daily meals. This deep-rooted respect for corn has transcended generations, making corn dishes, especially grilled corn cob, a beloved part of many culinary traditions today.
The Story Behind This Recipe
What makes this specific recipe for grilled corn on the cob so special is its simplicity and adaptability. It’s a dish that invites creativity, allowing you to customize it with various seasonings and toppings. Whether you prefer a classic butter and salt combination or want to venture into something exotic like chili powder and lime, the versatility of the grilled corn cob means it can fit any palate. This adaptability is particularly advantageous for busy families looking for quick dinner solutions. With minimal prep time and a short cooking period, you can have a delicious and satisfying side ready in no time. Just wrap the corn in foil, toss it on the grill, and let the magic happen while you prepare the rest of your meal.
Seasonally, grilled corn cob shines brightest during the summer months when corn is at its peak freshness. But don’t let that limit you; this dish can be enjoyed year-round. I often find myself making it during family gatherings in the fall, where it pairs beautifully with hearty barbecue dishes. The emotional connection I have with this dish is palpable; it reminds me of laughter shared over a grill, the warmth of family, and the joy of simple pleasures. Each bite is not just food; it’s a memory, a moment captured in time.
In this article, you’ll learn everything you need to know about grilling corn on the cob, from selecting the perfect ears to the best techniques for grilling. You’ll discover how to enhance the flavor with various toppings and seasonings that can elevate your dish to new heights. Most importantly, I hope to inspire you to create your own moments around the grill, making your own memories with friends and family while enjoying this delightful dish.
The Rich History and Cultural Significance of grilled corn cob
The rich history and cultural significance of grilled corn cob can be traced back to ancient civilizations, where corn was revered as a sacred crop. Corn, or maize, was first domesticated over 9,000 years ago in southern Mexico and quickly became a staple food for many indigenous peoples across North and South America. It played a crucial role in their diets and was incorporated into their cultural practices, celebrations, and rituals. The importance of corn is evident in many Native American tribes, who have created myths and stories surrounding this grain, viewing it as a gift from the earth. Grilled corn on the cob, as we know it today, is a modern interpretation of these age-old traditions.
Origins and History
As corn spread across the Americas, different regions developed unique ways to prepare and enjoy it. The practice of grilling corn over an open flame likely began with indigenous peoples who cooked the kernels in their natural husks or wrapped in leaves. This method provided a smoky flavor that complemented the sweetness of the corn. It wasn’t until European settlers arrived that corn began to take on new forms, including the popular grilled corn on the cob we cherish today. They embraced corn and incorporated it into their diets, adapting traditional Native American recipes to fit their own culinary styles.
Over the years, grilled corn cob has evolved in preparation methods and flavors. In the Southern United States, for instance, it is often slathered in butter, sprinkled with salt, or even coated in a spicy mayo for an extra kick. Meanwhile, in regions like Mexico, you might find grilled corn cobs topped with cotija cheese, lime juice, and chili powder, known as elote. These variations reflect the adaptability of corn and how it can be embraced by different cultures, each adding its own flair to this beloved dish.
Cultural Significance
Grilled corn on the cob is more than just a dish; it’s a symbol of community, celebration, and the harvest season. In many cultures, it is a staple at fairs, barbecues, and family gatherings. For example, during summer festivals, you’ll often find vendors grilling corn on the cob, serving it up with delicious toppings and attracting crowds eager to enjoy this seasonal treat. The communal aspect of enjoying grilled corn cob brings people together, fostering connections and creating lasting memories.
Traditionally, grilled corn is served during harvest festivals and celebrations. In many cultures, it marks the end of summer and the beginning of fall, a time to gather with family and friends to give thanks for the bountiful harvest. The act of grilling corn, often outdoors, embodies the spirit of togetherness and appreciation for nature’s gifts.
Nutritional Benefits
Beyond its cultural significance, grilled corn cob is also packed with nutritional benefits. Corn is a whole grain, rich in fiber, vitamins, and antioxidants. It is an excellent source of carbohydrates, providing energy, while also being low in fat. The fiber content aids in digestion, making grilled corn a healthy addition to your meals. Additionally, corn contains essential nutrients such as vitamin B6, magnesium, and potassium, contributing to overall health and wellness.
As you can see, grilled corn on the cob is not just a delicious side dish; it carries with it a rich history and cultural significance that deserves recognition. Whether you’re enjoying it at a summer barbecue or experimenting with different toppings, each bite is a nod to the traditions that have shaped this beloved dish over the centuries. So fire up that grill, and let’s continue to celebrate the humble yet remarkable grilled corn cob!
Essential Ingredients for Perfect grilled corn cob
When it comes to creating the perfect grilled corn cob, the quality and selection of your ingredients play a pivotal role. The sweet, juicy kernels of corn are the star of the show, but they need the right accompaniments to truly shine. In this section, we will explore the essential ingredients required for making grilled corn on the cob in foil and how to choose the best ones to elevate your dish.
Print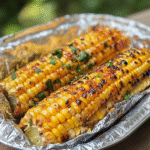
Grilled Corn Cob Recipe
Ingredients
- 4 ears fresh corn husks and silk removed
- ½ cup melted butter
- salt and pepper
Instructions
-
Preheat. Preheat your grill to medium-high heat (around 350-375 degrees F).
-
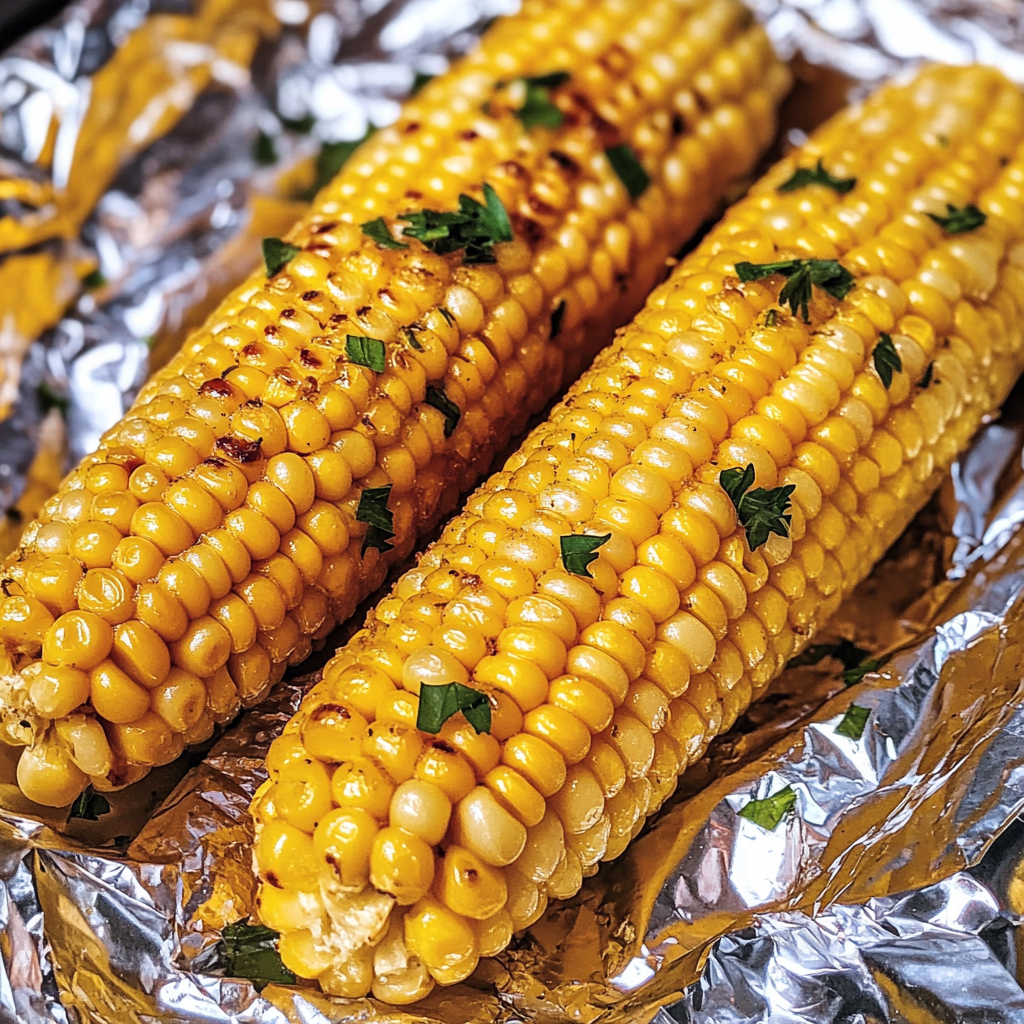
Prep the corn. Lay a large (24-inch long) piece of foil on your work surface. Lay another large piece of foil on top, perpendicular to the first. Place your corn in the center of the foil and drizzle with the melted butter. Roll the corn to coat each cob in butter and season with salt and pepper.
-
Seal the foil. Wrap the edges of the top piece of foil up and seal tightly. Repeat with the bottom layer of foil to create an airtight seal.
-
Grill. Set the package of corn on the grill grates, close the lid, and cook for 8-10 minutes. Use heat-resistant grill gloves to flip the foil pouch over on the grill. Close the lid and cook for an additional 8-10 minutes.
-
Enjoy. Remove the foil pouch to a baking sheet and allow the corn to steam in the package for 5 minutes before carefully opening (watch for hot steam escaping) and serve with additional butter and salt and pepper.
Essential Ingredients
- Fresh Corn on the Cob: 4 ears
- Butter: 4 tablespoons (unsalted is preferred)
- Salt: 1 teaspoon (sea salt or kosher salt works best)
- Pepper: 1/2 teaspoon (freshly ground for optimal flavor)
- Garlic Powder: 1/2 teaspoon (optional, for a savory twist)
- Fresh Herbs: 2 tablespoons (chopped cilantro, parsley, or chives)
- Lemon or Lime Juice: 1 tablespoon (for brightness and acidity)
- Aluminum Foil: Enough to wrap each ear of corn
Each ingredient plays a significant role in enhancing the flavors of the grilled corn cob. Let’s delve into each component and understand its importance.
Fresh Corn on the Cob: The foundation of your dish, fresh corn is the star ingredient. When selecting corn, look for ears with bright green husks and plump, tightly packed kernels. The best time to buy corn is during peak summer months when it’s in season, which usually runs from June to September in many regions. You can tell it’s fresh if the silk at the top is slightly sticky and the kernels burst with juice when you press them. If you’re unsure, ask your local farmer’s market vendor for the freshest batch.
Butter: Butter adds a rich, creamy flavor that complements the natural sweetness of the corn. Unsalted butter allows you to control the seasoning precisely, ensuring your grilled corn cob isn’t overly salty. For an indulgent twist, consider using compound butter—simply mix softened butter with herbs or spices of your choice, like garlic or smoked paprika, to add depth of flavor.
Salt: Salt is a crucial flavor enhancer. It brings out the natural sweetness of the corn, making it irresistible. Sea salt or kosher salt is preferred for its texture and flavor. Keep in mind that the salt will also draw moisture out of the corn, intensifying its sweetness.
Pepper: Freshly ground black pepper adds a hint of heat that contrasts beautifully with the sweetness of the corn. The flavor of freshly ground pepper is far superior to pre-ground varieties, so take a moment to grind it just before using.
Garlic Powder: This optional ingredient can provide an aromatic depth to your grilled corn cob. It can be especially delightful if you’re looking for a savory profile. However, if you’re sensitive to garlic or prefer a fresher taste, feel free to leave it out.
Fresh Herbs: Adding fresh herbs such as cilantro, parsley, or chives introduces a burst of freshness and color to your dish. Not only do they enhance the visual appeal, but they also add layers of flavor. Be sure to chop them finely for even distribution.
Lemon or Lime Juice: A splash of citrus juice brightens the entire dish, balancing the sweetness of the corn and richness of the butter. Freshly squeezed juice is always best, as bottled varieties often contain preservatives that can alter the flavor.
Aluminum Foil: The foil serves to trap steam, keeping the corn moist while it grills. Make sure to use heavy-duty aluminum foil to prevent tearing and leaking during the cooking process.
Shopping Tips
When shopping for these ingredients, consider visiting local farmers’ markets or organic grocery stores. Corn is often sold by the dozen and can be a bit more expensive in supermarkets, especially if you opt for organic. However, the flavor difference is notable. If you’re on a budget, look for sales or consider buying in bulk when corn is in season. Additionally, check the produce section for any discounts on slightly imperfect ears of corn—they’re often just as tasty but are priced lower.
Substitutions and Alternatives
For those with dietary restrictions, there are several substitutions you can consider. If you’re vegan, replace butter with a plant-based option such as olive oil or vegan butter. For a dairy-free option, coconut oil can impart a unique flavor, while still providing that necessary richness. If you’re sensitive to salt, using a salt substitute or simply reducing the quantity can work well. Garlic powder can be substituted with fresh minced garlic if you prefer a more robust flavor, but make sure to adjust the quantity to taste. Lastly, feel free to experiment with different herbs based on what you have available or enjoy—basil or thyme can be lovely alternatives!
By carefully selecting and preparing your ingredients, you set the stage for a delicious, grilled corn cob that will surely impress family and friends. Remember, the key to great flavor starts with the quality of your ingredients, so take the time to source the best!
Detailed Step-by-Step grilled corn cob Cooking Instructions
Now that you have gathered all your essential ingredients for the grilled corn cob, it’s time to dive into the cooking process. This section will provide you with a detailed, step-by-step guide to preparing and grilling your corn in foil. The beauty of this method lies in its simplicity and the rich flavors it produces, making grilled corn on the cob a summer staple for barbecues and family gatherings.
Preparation Steps
- Preheat Your Grill: Start by preheating your grill to medium-high heat, around 350°F to 400°F. This temperature allows for perfect grilling without burning the corn. If you’re using a charcoal grill, ensure the coals are evenly distributed for consistent heat.
- Clean the Corn: Remove the husks and silk from each ear of corn. If you’re using fresh corn, you’ll need to peel away the outer green layers and pull off the fine threads of silk. Rinse the corn under cool water to remove any remaining silk.
- Cut the Corn (Optional): Depending on the size of your grill and how you prefer to serve the corn, you can cut each ear in half. This can make handling and eating easier, especially for kids.
- Prepare the Foil: Cut four pieces of aluminum foil, each large enough to wrap one ear of corn completely. A good size is about 12 inches by 12 inches. If you’re grilling multiple ears at once, consider using wider pieces for easier handling.
- Season the Corn: In a small bowl, mix the softened butter, salt, pepper, garlic powder (if using), and lemon or lime juice. Brush this mixture generously over each ear of corn. Make sure to coat all sides for maximum flavor.
- Add Fresh Herbs: Sprinkle chopped fresh herbs over the buttered corn, pressing them gently into the kernels to adhere. This step not only adds flavor but also a vibrant color.
Cooking Process
- Wrap the Corn: Place each seasoned corn on a piece of aluminum foil. Fold the edges of the foil over the corn, ensuring it’s tightly sealed to prevent steam from escaping. Crimp the edges well to create a secure package.
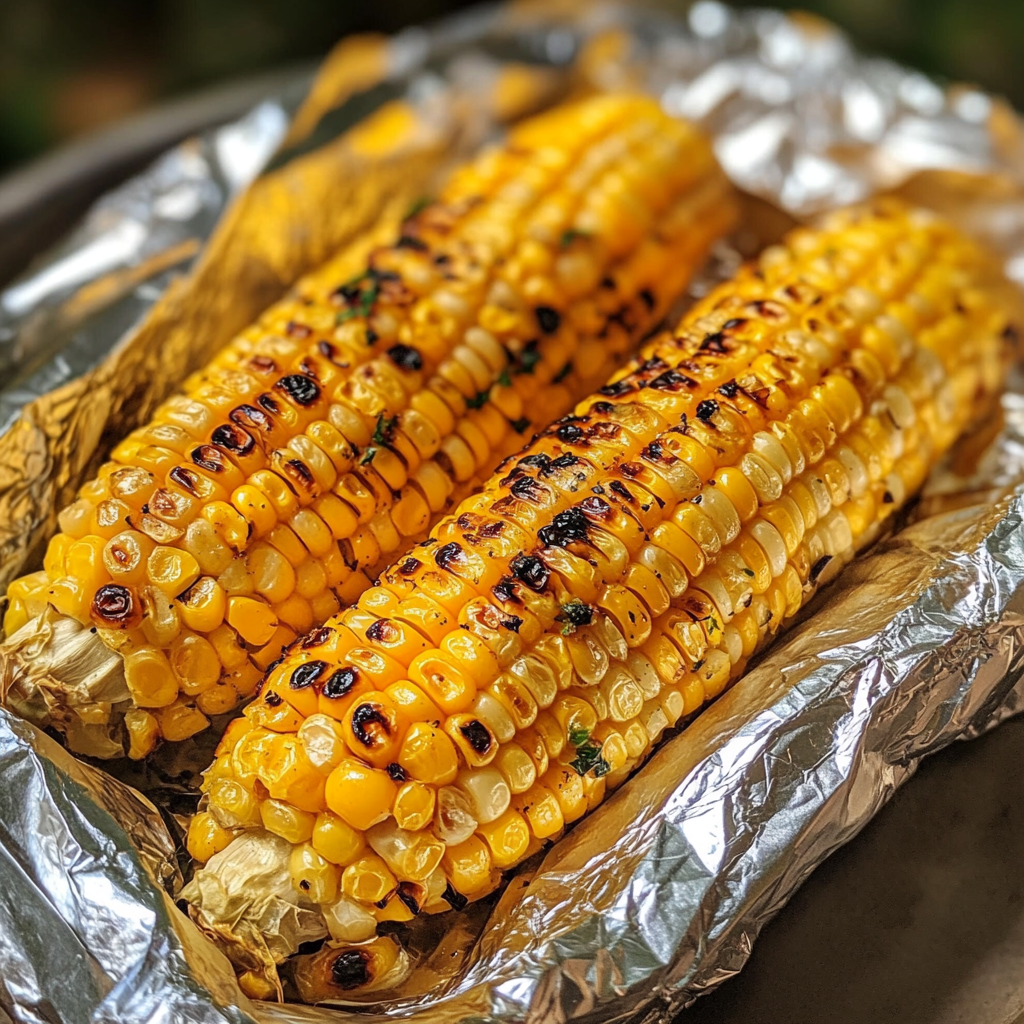
- Grill the Corn: Place the foil-wrapped corn directly on the grill grates. Close the lid and grill for about 30 minutes, turning the corn halfway through to ensure even cooking. You’ll know the corn is done when it becomes tender and fragrant. If you open a package, the kernels should be plump and juicy.
- Visual Cues: As the corn grills, you’ll notice the aroma filling the air. The foil will puff up slightly, indicating that steam is building inside. This is a good sign that the corn is cooking perfectly.
- Common Mistakes: One common mistake is overcooking the corn, which can lead to tough, chewy kernels. Keep an eye on the time and check for doneness after 25 minutes. If you’re unsure, unwrap one ear to test it—just be cautious of the steam!
- Professional Techniques: For an added layer of flavor, consider adding a pinch of smoked paprika or chili powder to your butter mixture. This will give your grilled corn cob a smoky, spicy kick that is simply irresistible.
Final Assembly
- Remove the Corn from the Grill: Once the corn has finished grilling, carefully remove each foil packet from the grill using tongs. Be cautious of the hot steam when unwrapping the foil.
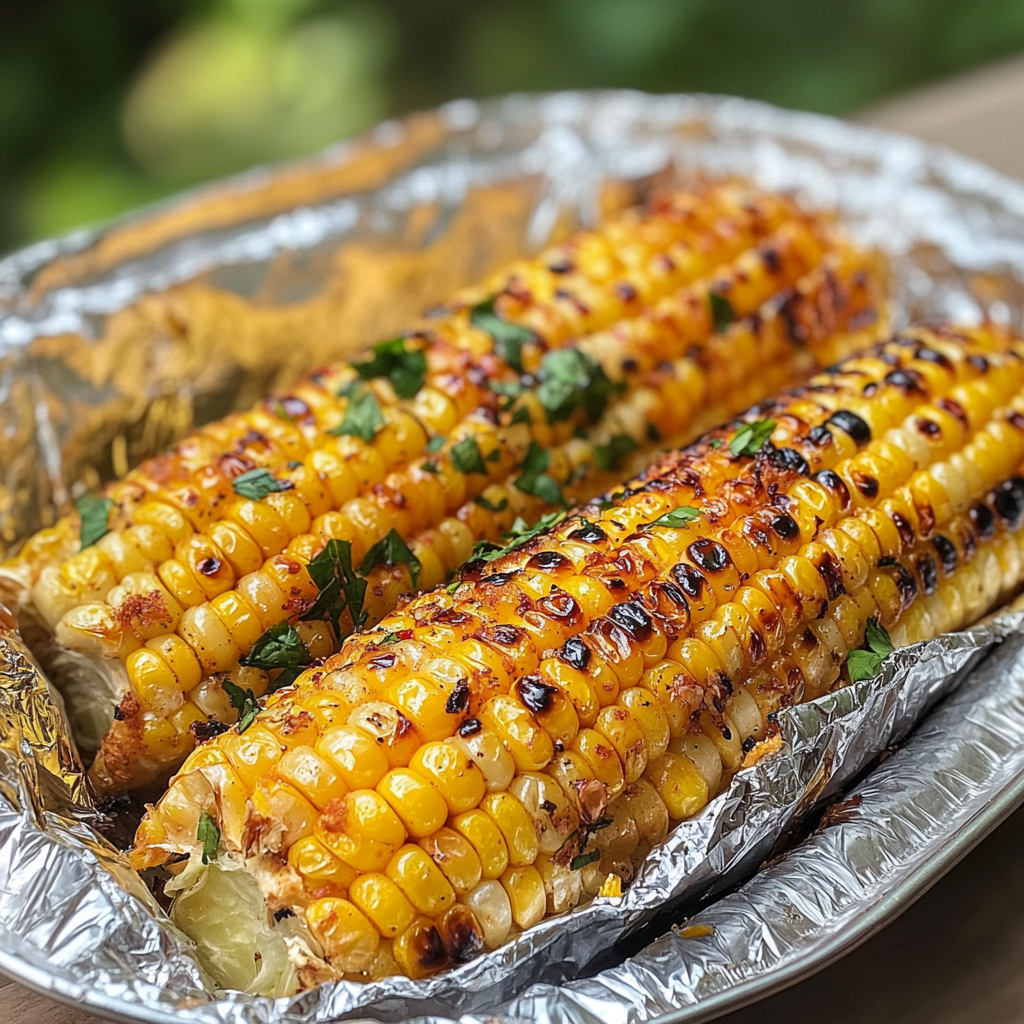
- Serve Immediately: Transfer the grilled corn to a serving platter. You can add extra butter, sprinkle more herbs, or even a squeeze of lime or lemon juice right before serving for an extra flavor boost.
- Enjoy! Serve your grilled corn cob alongside your favorite summer dishes, such as burgers, grilled meats, or a fresh salad. The sweetness of the corn pairs beautifully with savory flavors and bright summer ingredients. Enjoy the burst of flavor with each bite!
In just about 30 minutes, you have transformed simple ingredients into a mouthwatering dish that is sure to impress. Remember, grilling corn in foil is not just a method; it’s an experience that brings people together around the grill. So fire up that grill, gather your loved ones, and enjoy the delightful taste of summer with your perfectly grilled corn cob!
Professional Tips and Techniques for grilled corn cob
Grilled corn on the cob is a delightful summer staple that brings a burst of sweetness and crunch to any barbecue or picnic. As someone who has spent countless afternoons grilling corn while sharing laughter with friends and family, I’ve learned a thing or two about perfecting this dish. Here, I’ll share some professional tips and techniques to elevate your grilled corn cob experience, troubleshoot common issues, and present your creation beautifully.
Professional Techniques
When it comes to grilling corn on the cob, understanding the fundamentals can significantly enhance your results. First and foremost, selecting the right corn is crucial. Look for fresh corn with bright green husks and plump kernels. The best corn is usually harvested in the morning when it’s cooler, which helps preserve its natural sweetness.
Before grilling, you can choose to soak the corn in water for about 30 minutes to an hour. This technique helps steam the corn while it’s on the grill, keeping it moist and tender. If you prefer a charred flavor, you might skip the soaking, but always remember to remove the silk and husks if you’re not soaking the corn. For those who love a bit of smokiness, grilling the corn in its husk can add an incredible depth of flavor.
Another technique is to wrap each ear of corn individually in foil. This method locks in moisture and allows for easier cleanup. Add a slice of butter, a sprinkle of salt, or even some herbs and spices before sealing the foil. Not only does this infuse the corn with flavor, but it also helps to create a steaming effect, which is ideal for ensuring the kernels are juicy and tender.
For those with a little more experience in the kitchen, consider adding additional ingredients to the foil pack, such as garlic or lime juice, for an extra flavor boost. Experimenting with different herbs like thyme or rosemary can also elevate your grilled corn cob to gourmet levels.
Troubleshooting Guide
Even the most seasoned cooks encounter challenges when grilling corn on the cob. One common issue is corn that’s tough or chewy. This usually stems from overcooking. When grilling, keep a close eye on the corn and rotate it every couple of minutes. Depending on your grill’s heat, the corn typically cooks in about 10 to 15 minutes. Removing the corn from heat once the kernels are tender will prevent overcooking.
If you find your corn is sticking to the grill, consider applying a little oil to the grill grates before placing the corn on them. This will help create a non-stick surface. Alternatively, grilling in foil eliminates this problem altogether, while also allowing for a more controlled cooking environment.
Another issue might be uneven cooking. This can happen if the corn is not placed evenly over the heat source. If you’re using a charcoal grill, make sure to have a direct and indirect heat zone. Place the corn over the indirect heat to cook slowly, and finish it off over the direct heat for that desirable char.
Presentation Tips
The way you present your grilled corn cob can elevate the dining experience. Once your corn is ready, remove it from the grill and unwrap it carefully from the foil, as steam will escape. Consider serving the corn on a wooden board or in a rustic basket to create a casual, inviting atmosphere.
For added visual appeal, sprinkle some fresh chopped herbs, such as cilantro or parsley, over the top just before serving. A wedge of lime or lemon alongside each ear allows guests to add a splash of citrus for brightness. And for those who love a kick, consider offering chili powder or hot sauce on the side for guests to customize their grilled corn cob.
Don’t forget about beverage pairings! Grilled corn pairs beautifully with a variety of drinks. A refreshing iced tea or lemonade complements the sweetness of the corn, while a light white wine, such as Sauvignon Blanc, can enhance the flavors beautifully. For those who prefer beer, a crisp lager or even a fruity IPA can make for a delightful combination with grilled corn.
By applying these professional tips and techniques, troubleshooting common issues, and focusing on presentation, your grilled corn cob will not only taste amazing but also look stunning on the table, ready to impress your guests.
Creative Variations and Adaptations of grilled corn cob
Grilled corn on the cob is a versatile dish that lends itself to countless variations and adaptations, making it a canvas for creativity in the kitchen. From seasonal ingredient swaps to international fusion dishes, this section will explore how you can take the classic grilled corn cob and transform it into something uniquely yours.
Seasonal Variations
One of the best parts about grilling corn is the opportunity to incorporate seasonal ingredients. In the summer, fresh herbs like basil and cilantro can be added to the foil pack for a burst of flavor. As autumn approaches, consider sprinkling some grated Parmesan cheese and fresh sage on your corn before wrapping it in foil, giving it a warm, earthy flavor perfect for the cooler months.
In winter, if you’re feeling adventurous, try a spicy Mexican twist by mixing in some cotija cheese, lime juice, and chili powder. This variation brings a fresh taste of summer right to your winter table. Spring is the perfect time to experiment with citrus flavors; consider adding orange zest and a hint of honey for a refreshing take on grilled corn.
Dietary Adaptations
Grilled corn can easily fit into various dietary preferences, making it a fantastic choice for gatherings where guests may have different needs. For those following a keto diet, skip the sugar-laden toppings and instead focus on butter, garlic, and herbs to keep the dish low-carb yet flavorful. A sprinkle of nutritional yeast can add a cheesy flavor without the dairy, perfect for vegan guests.
Gluten-free eaters can enjoy grilled corn without any modifications, as corn is naturally gluten-free. For those looking to spice things up, consider marinating the corn in a mixture of olive oil, lime juice, and your favorite spices before grilling for an extra kick. If you’re looking to reduce calories, consider using less butter or a butter alternative, while still keeping the dish delicious.
Creative Twists
When it comes to creativity, the sky’s the limit with grilled corn on the cob. Some love to try international fusion variations. For instance, a Korean-inspired corn could be slathered with gochujang (Korean chili paste), sesame oil, and a sprinkle of sesame seeds, offering a unique flavor profile that surprises the palate.
If you have leftover grilled corn, don’t let it go to waste! Transform it into a refreshing corn salad by cutting the kernels off the cob and mixing it with diced tomatoes, avocado, red onion, and a zesty vinaigrette. This creates a delightful side dish that can be served at your next barbecue or picnic.
For those who love experimenting, consider grilling corn in different cooking methods. While grilling is the classic approach, using an oven or stovetop can yield great results. For example, roasting corn in the oven with a similar foil method can create a sweet and smoky flavor profile, and slow cooking can allow the corn to soak in even more flavor from spices and herbs.
In conclusion, the possibilities of grilled corn on the cob are endless. By embracing seasonal ingredients, accommodating dietary needs, and getting creative with variations, you can ensure that every grilled corn cob you serve is a memorable experience for you and your guests. With just a little imagination, this humble vegetable can shine in numerous ways, making it a true staple at any gathering.
Storage, Reheating, and Meal Prep for grilled corn cob
When it comes to enjoying a delicious grilled corn on the cob, the experience doesn’t have to end once the last bite is taken. Storing, reheating, and prepping corn properly can allow you to savor the flavors long after that last BBQ party. Let’s dive into how to store your grilled corn cob effectively, ensuring it remains as delectable as the day it was cooked.
Short-term Storage
After a delightful day of grilling and possibly indulging in a few ears of grilled corn on the cob, you might find yourself with leftovers. The first step is to let the corn cool down to room temperature. It’s crucial not to leave it out for more than two hours, as bacteria can grow quickly at room temperature.
Once cooled, you have a couple of options. If you plan to consume the grilled corn cob within a few days, wrap each ear tightly in aluminum foil or plastic wrap. This method not only keeps the corn from drying out but also helps maintain its flavor and tenderness. Alternatively, placing the corn in an airtight container works well, but you may want to separate layers with parchment paper to prevent them from sticking together.
In the refrigerator, grilled corn on the cob can last for about 3 to 5 days. Be sure to label your storage container with the date to keep track of freshness. If you’re anything like me, you may forget what you have in the fridge, so this tip can save you from tossing out perfectly good corn!
Freezing and Long-term Storage
If you find yourself with a bounty of grilled corn and don’t think you’ll consume it within a few days, freezing is your best bet for long-term storage. First, let the corn cool completely, just like before. You can freeze grilled corn on the cob whole or cut off the kernels if you’re short on space in your freezer.
To freeze whole ears of grilled corn, wrap them individually in plastic wrap, followed by aluminum foil. This double wrapping helps prevent freezer burn. For cut kernels, place them in a resealable freezer bag, squeezing out as much air as possible before sealing. Label your bags with the date; corn can typically last in the freezer for up to 6 months, although I find it best to use it within the first 3 months for optimal flavor.
When you’re ready to enjoy your frozen corn, simply move it to the refrigerator to thaw overnight, or for a quicker method, you can run the wrapped corn under warm water for a few minutes. This will help retain moisture and flavor, ensuring your grilled corn cob tastes as fresh as it did on cooking day!
Reheating Best Practices
Reheating your grilled corn on the cob requires a bit of care to keep it succulent and avoid drying it out. The method you choose can depend on your available time and equipment. One of my favorite ways to reheat corn is by using the grill again. Simply place the corn, still wrapped in foil, on the grill over medium heat for about 5 to 10 minutes, turning occasionally. This method revives the smoky flavor while heating it through.
If you prefer using the oven, preheat it to 350°F (175°C). Wrap the corn in foil and place it on a baking sheet. Heat for about 10-15 minutes, checking to make sure it doesn’t dry out. Microwaving is also an option, though it can sometimes lead to uneven heating. If opting for this method, wrap the corn in a damp paper towel and heat in 30-second intervals until warmed through.
When it comes to meal prep, grilled corn on the cob is incredibly versatile. You can batch cook several ears at once during your weekend grilling sessions and store them as described above. This way, you can enjoy a taste of summer any time of year, whether it’s chopped into salads, added to salsas, or served as a side dish. Just remember to follow food safety guidelines; always cool leftovers promptly and store them correctly to avoid any nasty surprises!
In terms of shelf life, grilled corn cob can remain safe to eat for several days in the fridge or months in the freezer, provided that they are stored correctly. Portioning is key; when I batch cook corn, I often separate it into servings that make sense for my meals. This way, I can quickly grab a portion without having to handle a large bulk, which keeps everything neat and easy.
Lastly, always keep food safety in mind. Make sure to wash your hands and any surfaces that come into contact with raw corn before and after cooking. And remember, if it smells off or looks questionable, it’s better to err on the side of caution and toss it out. Enjoy your grilled corn cob, knowing you can make it last and savor every bite!
Nutritional Benefits and Health Information
When you think of grilled corn on the cob, what often comes to mind? For many, it’s a symbol of summer barbecues, family gatherings, and outdoor fun. But beyond its delightful taste and nostalgic memories, this beloved vegetable packs a nutritional punch that deserves a closer look. Let’s explore the health benefits, nutrient profile, and how this simple dish can fit into various dietary plans.
Nutritional Profile
A medium-sized grilled corn cob (about 90-100 grams) contains approximately 90 calories, making it a relatively low-calorie option compared to many other starchy sides. A grilled corn cob is primarily composed of carbohydrates, providing about 19 grams per ear. This makes it a great source of energy, especially for those engaged in outdoor activities or sports.
In terms of macronutrients, grilled corn on the cob contains about 3 grams of protein and less than 2 grams of fat. The fiber content is noteworthy, too; one corn cob can provide around 2 grams of dietary fiber. Fiber is essential for digestive health, helping to keep you full and satisfied, and can assist in maintaining regular bowel movements.
Furthermore, corn is naturally gluten-free, making it an excellent choice for those with gluten sensitivities or celiac disease. It’s also worth noting that the bright yellow color of corn indicates the presence of carotenoids, particularly lutein and zeaxanthin, which are beneficial for eye health.
Health Benefits
Grilled corn on the cob is more than just a tasty treat; it comes with a variety of health benefits. One of the primary advantages is its high antioxidant content. The natural pigments that give corn its vibrant color are known to combat oxidative stress in the body, potentially reducing the risk of chronic diseases.
Additionally, corn is rich in vitamins and minerals, including B vitamins (such as thiamin and folate), vitamin C, magnesium, and potassium. Thiamin plays a crucial role in converting carbohydrates into energy, while folate is vital for DNA synthesis and repair, especially important for pregnant women. Vitamin C is a powerful antioxidant that supports the immune system and skin health, while magnesium and potassium help regulate blood pressure and muscle function.
Eating grilled corn on the cob can also support heart health. The fiber helps to lower cholesterol levels, while the antioxidants may reduce inflammation and improve overall cardiovascular function. For those looking to maintain or lose weight, corn can be a satisfying side that provides volume without a heavy calorie load.
Dietary Considerations
As with any food, it’s essential to consider dietary restrictions and allergen information when incorporating grilled corn on the cob into your meals. Corn is generally safe for most individuals, though some may have an intolerance. If you’re following a specific diet, such as a low-carb or ketogenic plan, you might want to limit your intake, as corn is higher in carbohydrates compared to non-starchy vegetables.
If you’re looking for healthy modifications, consider topping your grilled corn cob with a sprinkle of lime juice and a dash of chili powder for added flavor without extra calories. You can also try using healthy fats like avocado oil instead of butter, or even a sprinkle of nutritional yeast for a cheesy flavor without dairy.
In comparison to similar dishes, grilled corn stands out as a healthier option than many creamy or buttery side dishes. For instance, while a standard baked potato may contain similar calories, it typically has less fiber and fewer essential nutrients. Grilled corn on the cob provides a satisfying crunch and sweetness that can elevate any meal while also being a healthier choice.
In conclusion, grilled corn on the cob is not only a delightful addition to your summer picnics and cookouts but also a nutritional powerhouse. Its ability to fit into various diets and provide essential nutrients makes it a fantastic choice for anyone looking to enjoy delicious food without compromising on health. So next time you indulge in a grilled corn cob, you can relish not just the flavor but also the wholesome goodness it brings to your table!
Frequently Asked Questions About Grilled Corn Cob
Best grilled corn on the cob in foil recipe
The best grilled corn on the cob in foil recipe involves first shucking the corn and removing all the silk. Then, you can spread a thin layer of butter over each ear of corn, and season with salt, pepper, and any other desired spices like paprika or garlic powder. Wrap each ear tightly in aluminum foil to keep the moisture in during grilling. Preheat your grill to medium-high heat and place the foil-wrapped corn on the grill, turning occasionally for even cooking. Grill for about 15-20 minutes, ensuring the corn is tender and juicy. For an extra touch, consider adding grated cheese or fresh herbs right before serving.
Grilled corn on the cob in foil recipe no husk
To grill corn on the cob in foil without husk, start by trimming the ears of corn to fit your grill or cutting them into halves if desired. After shucking and silk-removing, coat each ear with a mixture of olive oil, salt, and pepper, and consider adding lime juice or chili powder for a flavor boost. Wrap each ear tightly in aluminum foil, ensuring no gaps for steam to escape. Preheat your grill to medium heat and place the foil-wrapped corn on the grill grates. Grill for approximately 15-20 minutes, turning occasionally, until the kernels are plump and tender. This method locks in moisture while allowing the corn to absorb the flavors you’ve added.
How long to grill corn in foil, no husk
When grilling corn in foil without the husk, the cooking time typically ranges from 15 to 20 minutes at medium heat. It’s essential to turn the corn occasionally to ensure even cooking and prevent burning. If you prefer a slightly charred flavor, you can open the foil for the last few minutes of grilling. Always check for tenderness by piercing a kernel with a fork; if it’s juicy and tender, your corn is ready to enjoy. Additionally, if the corn is large, you may need to adjust the grilling time slightly longer, so keep an eye on it as it cooks.
Grilled corn on the cob in foil with mayo
For a delicious grilled corn on the cob in foil with mayo, start by shucking the corn and removing the silk. Instead of butter, spread a generous layer of mayonnaise over each ear of corn, and sprinkle with chili powder, lime juice, and a pinch of salt for a zesty flavor profile. Wrap the corn tightly in aluminum foil, sealing the edges well to trap the moisture. Grill on medium heat for about 15-20 minutes, turning occasionally. Once done, you can add a sprinkle of cotija cheese or fresh cilantro to enhance the flavors even further, creating a delightful Mexican street corn-inspired dish.
Conclusion: Mastering the Perfect grilled corn cob
Creating the perfect grilled corn cob is more than just following a recipe—it’s about understanding the techniques, ingredients, and cultural significance behind this beloved dish. Throughout this comprehensive guide, we’ve explored everything from the historical origins to modern variations, ensuring you have all the knowledge needed to make this recipe your own.