Easiest apple crisp is not just a dessert; it’s a warm embrace on a chilly evening, a sweet reminder of simpler times, and a magical creation that has the power to bring families together. I still remember the very first time I stumbled upon this delightful recipe. It was a crisp autumn afternoon, and the air was thick with the scent of fallen leaves and ripening apples. I had just returned from a local orchard with a basket brimming with freshly picked apples, the kind that are crunchy, juicy, and bursting with flavor. Determined to make something special, I rifled through my collection of recipes and came across a simple yet enticing recipe for apple crisp. Little did I know, this would become a staple in my kitchen and a cherished memory for my family.
As I prepared the easiest apple crisp, I felt a wave of nostalgia wash over me. My grandmother used to make a similar dish, and I could almost hear her warm voice guiding me through the steps. She would always say, “Cooking is all about love,” and as I peeled and sliced the apples, I could feel that love infusing into the dish. The way the sweet, cinnamon-sugar mixture melded with the tartness of the apples as it baked in the oven was nothing short of magical. When I finally took that first bite, I wasn’t just tasting a dessert; I was savoring a connection to my family, my childhood, and the beauty of creating something delicious.
The Story Behind This Recipe
The easiest apple crisp is a dish that speaks to the heart of American home cooking. Its origins can be traced back to the early 19th century, when apples were plentiful, and baking was a way for families to preserve the fruits of their labor. While the exact timeline is murky, it’s widely accepted that apple crisp emerged as a variation of apple pie, creating a more approachable and less labor-intensive option. The simplicity of the dish, with its fruit base and crumbly topping, made it a favorite among busy homemakers who wanted to whip up a comforting dessert without spending hours in the kitchen.
What sets this recipe apart from others is its adaptability. Unlike traditional apple pies that require a delicate hand and precise measurements, the easiest apple crisp welcomes improvisation. You can use whatever apples you have on hand, adjust the spices to your taste, and even add in other fruits like berries or pears for a unique twist. This flexibility makes it perfect for families looking to create a delicious dessert with minimal fuss.
Why You’ll Love This Dish
One of the reasons this recipe is so special, especially for busy families, is its quick preparation time. In less than an hour, you can have a warm, bubbling dessert that fills your home with an irresistible aroma. It’s a wonderful way to engage kids in the kitchen, teaching them the joys of cooking while creating lasting memories. As the dish bakes, it gives everyone in the house a moment to gather, talk about their day, and share in the excitement of something delicious coming out of the oven.
Seasonally, the easiest apple crisp is a perfect fit for autumn when apples are at their peak, but it can also be enjoyed year-round. I often find myself making it in the dead of winter, using frozen apples, or in the spring when I want a light dessert that isn’t too heavy. The versatility of this dish is what makes it a go-to recipe in my kitchen. It’s also incredibly easy to store; leftovers can be kept in the fridge and taste just as good the next day, making it an ideal sweet treat for busy weeknights.
Ultimately, the easiest apple crisp is more than just a recipe; it’s a catalyst for connection and comfort. It’s a dessert that invites you to slow down, share with loved ones, and savor each bite. In this article, I promise to guide you through the ins and outs of making this delightful dish, sharing tips and tricks that will ensure your apple crisp turns out perfectly every time. From selecting the best apples to the secret ingredients that will elevate your crisp, I’m here to help you create a dessert that you’ll cherish and return to time and time again.
The Rich History and Cultural Significance of easiest apple crisp
The easiest apple crisp carries with it a rich history that reflects the cultural tapestry of America. This beloved dessert has roots that extend back to the early days of American settlers, many of whom brought apple seeds and traditions from Europe. Apples were a staple in the colonies, not just for eating fresh but also for cooking and baking. As these early settlers began to experiment with their bountiful harvests, the concept of baking fruits into desserts took hold, leading to the evolution of recipes like apple crisp.
Origins and History
In the 1800s, the first recorded recipes for apple crisp began to appear, often referred to as “apple crumble” in some regions. The dish was designed to maximize the use of seasonal fruit, and its simplicity made it a favorite among resourceful home cooks. The recipe typically consisted of baked sliced apples topped with a mixture of flour, butter, and sugar—ingredients that were readily available in every household. Over the years, variations of the dish emerged, incorporating oats, spices, and even nuts, reflecting the regional preferences and available ingredients of the time. Today, the easiest apple crisp stands as a testament to the ingenuity of those early cooks, providing a delicious way to enjoy apples that doesn’t require an extensive baking background.
Cultural Significance
Throughout the decades, the easiest apple crisp has become a symbol of comfort and home. It’s often served at family gatherings, potlucks, and holiday celebrations, evoking fond memories and a sense of belonging. In many American households, apple crisp is a go-to dessert for Thanksgiving, complementing the holiday’s traditional flavors and creating a sweet ending to a savory meal. It’s also a dish that transcends generations; children who grew up eating their grandmother’s apple crisp often find joy in making it for their own families, passing down the recipes and stories that accompany them.
Famous chefs and restaurants have embraced the apple crisp, each adding their own flair to the traditional recipe. Some have introduced gourmet versions featuring exotic spices or unique toppings, while others stick to the classic method that has stood the test of time. Regardless of the variations, the essence of the dish remains the same: it’s about celebrating the simplicity of ingredients and the joy of sharing a homemade dessert with loved ones.
Nutritional Benefits
Not only is the easiest apple crisp a comfort food classic, but it also offers some nutritional benefits. Apples, the star ingredient, are high in dietary fiber and vitamin C, making them a healthy choice for snacking and baking. The fiber in apples aids digestion and can help regulate blood sugar levels, while vitamin C is essential for a healthy immune system. When combined with oats in the crisp topping, the dish provides additional fiber and protein, making it a more balanced dessert option.
However, like any dessert, moderation is key. While the easiest apple crisp is a delightful treat, it’s important to be mindful of added sugars and fats in the topping. By using less sugar or substituting with healthier options like honey or maple syrup, you can create a version that delights your taste buds while still being conscious of your health. The beauty of this recipe is that it allows for personalization, meaning you can tailor it to suit your family’s dietary needs while keeping the heart and soul of the dish intact.
In conclusion, the easiest apple crisp is more than just a dessert; it’s a dish steeped in history and rich with cultural significance. Its evolution reflects the changing landscape of American cooking, while its comforting flavors continue to bring families together. As you embark on your journey to create your own apple crisp, remember that you are participating in a long-standing tradition that celebrates the joys of cooking and sharing.
Essential Ingredients for Perfect easiest apple crisp
When it comes to crafting the easiest apple crisp, the foundation of your dish is undoubtedly the ingredients you choose. Each component plays a crucial role in delivering that perfect balance of sweetness, tartness, and texture that makes this dessert so beloved. Let’s dive into the essential ingredients that will elevate your apple crisp to new heights.
Essential Ingredients
- Apples (6 cups, peeled and sliced): Choose a mix of tart and sweet apples for that perfect flavor balance. Varieties like Granny Smith for tartness and Honeycrisp or Fuji for sweetness work wonderfully together. Aim for fresh, firm apples without bruises—these will yield the best texture and flavor.
- Granulated Sugar (1 cup): Sugar is essential to enhance the natural sweetness of the apples. You can adjust the amount based on the tartness of your apples. For a more complex flavor, consider using brown sugar instead.
- Brown Sugar (1/2 cup): Brown sugar adds moisture and a rich caramel flavor to your apple crisp. Always opt for light brown sugar unless you want a more intense molasses flavor.
- Ground Cinnamon (1 teaspoon): This warming spice complements the apples beautifully, adding depth to the dish. Freshly ground cinnamon offers a more robust flavor than pre-ground varieties.
- Oats (1 cup): Rolled oats create a chewy, hearty texture in the topping. They soak up juices from the apples, ensuring the crisp isn’t overly soggy.
- All-Purpose Flour (1/2 cup): Flour acts as a binding agent in the topping, helping to create that delightful crunch. If you’re gluten-free, you can easily substitute almond flour or a gluten-free all-purpose blend.
- Unsalted Butter (1/2 cup, melted): Butter adds richness and flavor. Using unsalted butter allows you to control the saltiness of your dish. If you’re looking for a lighter alternative, coconut oil can work as a substitute, providing a subtle tropical note.
- Salt (1/4 teaspoon): A pinch of salt enhances the sweetness and balances the flavors. It’s a small but mighty ingredient that should never be overlooked.
Each of these ingredients plays a vital role in creating the easiest apple crisp. For example, the apples are the star of the show, providing the main flavor and texture. When selecting apples, look for those that are in season, as they will be at their peak flavor. In many regions, apples are typically harvested from late summer through fall, so this is the best time to purchase them at local farmers’ markets or orchards.
Print
Easiest Apple Crisp Recipe
Ingredients
Spiced apples
- 6 golden delicious apples peeled and chopped (other varieties can be used, can also be sliced)
- 2 Tbsp granulated sugar
- 3/4 tsp ground cinnamon
- 1 1/2 tsp lemon juice
Crisp topping
- 1 cup light brown sugar
- 3/4 cup old fashioned oats quick oats can be used, but it may have a slightly different texture
- 3/4 cup all-purpose flour
- 1 tsp ground cinnamon
- pinch of kosher salt
- 1/2 cup cold unsalted butter diced into small cubes
Instructions
Prepare
- Preheat oven to 350 F degrees. Butter an 8×8 baking dish, or spray with non-stick cooking spray. Set aside.
Make spiced apples
- In a mixing bowl, add chopped apples, granulated sugar, 3/4 tsp of the cinnamon and lemon juice. Stir to combine, then transfer to prepared baking dish.
Make topping
- In a separate mixing bowl, add topping ingredients (brown sugar, oats, flour, 1 tsp cinnamon, salt, and diced cold butter).
- Use a pastry cutter to cut the butter into the oat mixture, using a slight downward twisting motion, until mixture resembled pea-sized crumbs. Alternatively, you can use two forks or even your hands to cut butter into the mixture.
Bake
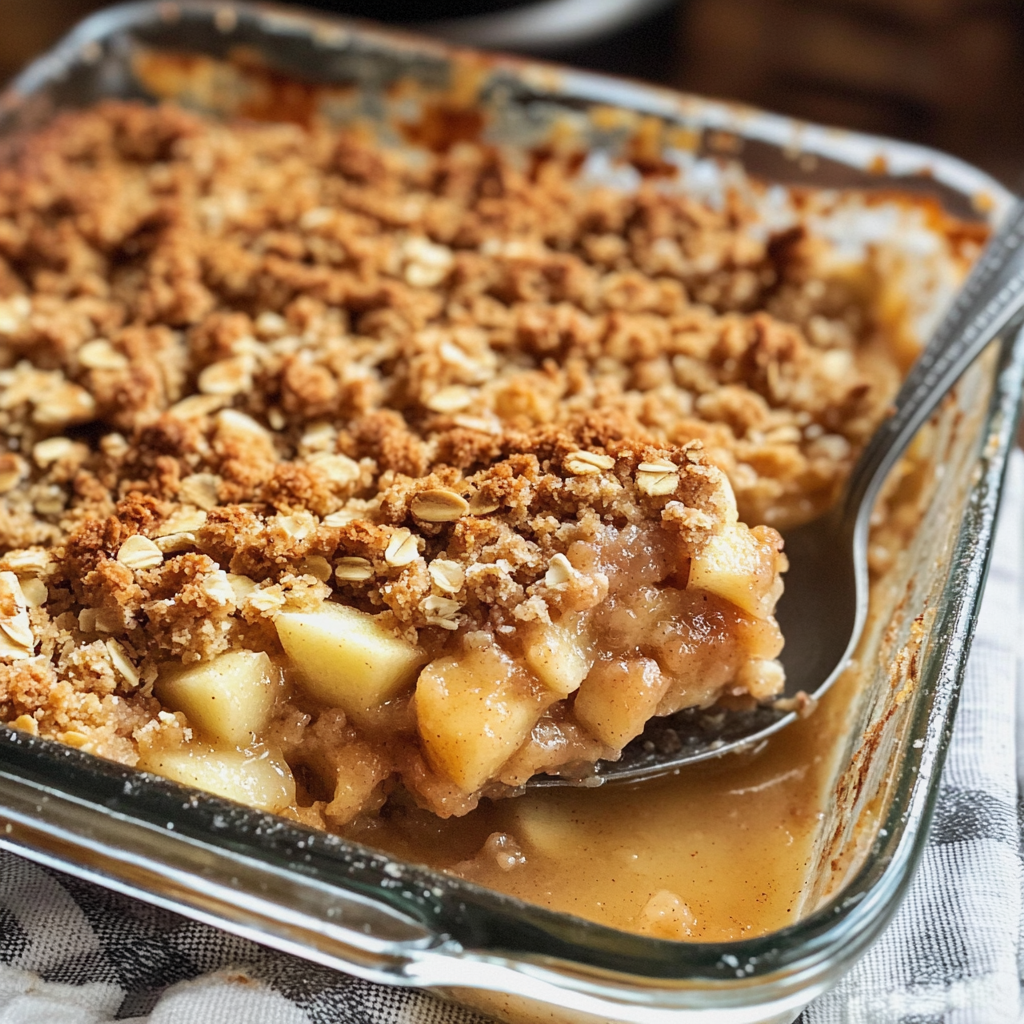
- Spread topping over apples in baking dish, and gently pat to even it out. Bake 40-50 minutes, until golden brown and bubbly.
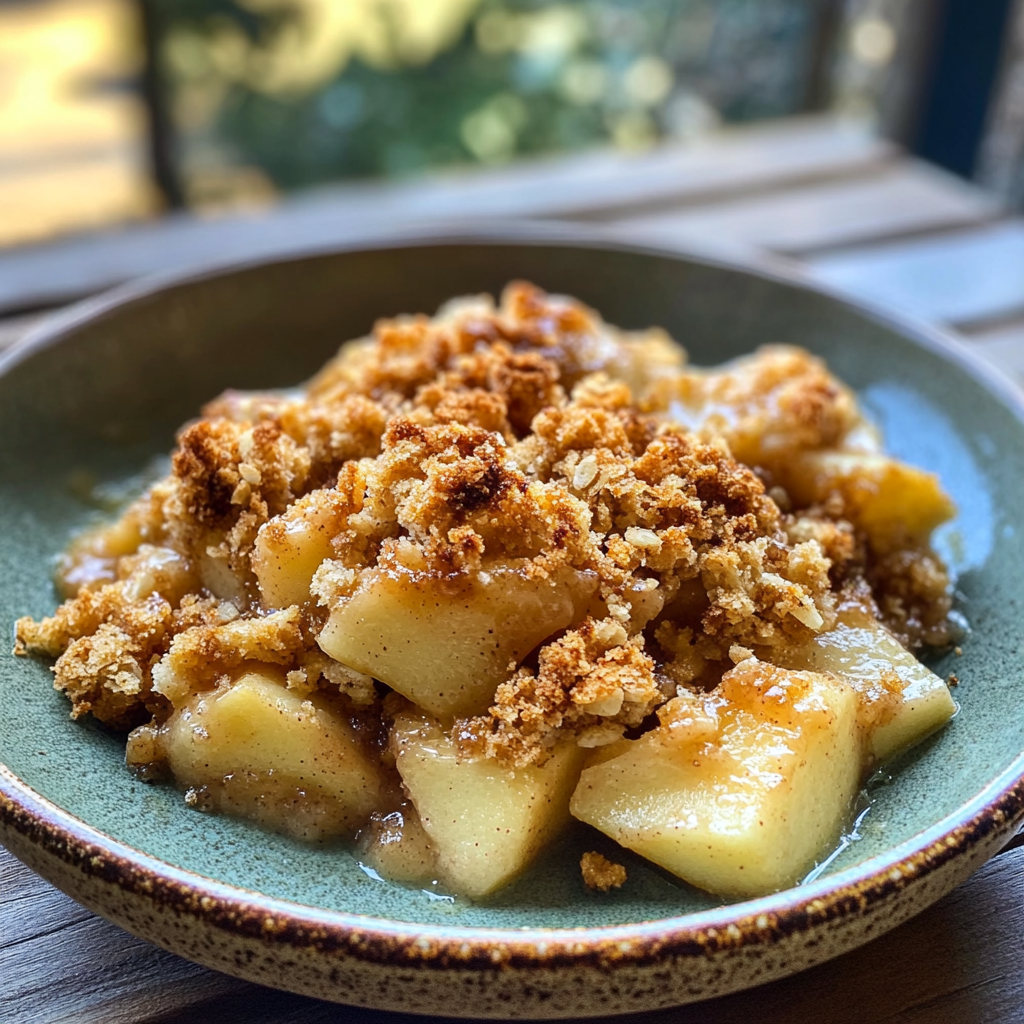
Serve
- Serve warm and enjoy! We love to top ours with some vanilla bean ice cream, or whipped cream.
Shopping Tips
When shopping for your ingredients, always opt for the freshest produce you can find. If possible, visit local farmer’s markets to find seasonal apples that may not be available in grocery stores. Not only do they taste better, but you also support local agriculture. For oats, look for certified gluten-free options if you have gluten sensitivities.
For sugar, consider buying in bulk to save money, as it’s a staple ingredient that you’ll use often. Check for sales on butter and stock up, especially when it’s on sale. This way, you can have it ready for your next baking adventure.
Substitutions and Alternatives
Dietary restrictions can make it challenging to create the easiest apple crisp, but there are numerous substitutions available. For those who are vegan, substitute the butter with coconut oil or a vegan butter alternative. You can also replace the granulated sugar with coconut sugar or maple syrup, adjusting the measurements accordingly since these alternatives are less sweet than regular sugar.
If you’re looking to reduce sugar intake, you can opt for natural sweeteners like stevia or monk fruit sweetener. Just remember to adjust based on the sweetness level you desire, as these sweeteners can be much sweeter than traditional sugar.
As for storage, apples can be kept in a cool, dry place for a couple of weeks, but once you’ve sliced them, it’s best to use them right away or store them in an airtight container in the fridge to prevent browning. Butter should be kept refrigerated, while oats and flour can be stored in a cool, dry place in airtight containers to maintain freshness.
In conclusion, selecting the right ingredients is the first crucial step to achieving the easiest apple crisp. From apples to oats, each element contributes to the overall taste and texture of this classic dessert. By focusing on quality, seasonality, and potential substitutions, you can create a dish that truly shines—regardless of dietary preferences or restrictions.
Detailed Step-by-Step easiest apple crisp Cooking Instructions
Creating the easiest apple crisp is not only a rewarding culinary experience but also an opportunity to fill your kitchen with delightful aromas that will have everyone eagerly waiting for dessert. The process is straightforward, making it perfect for both novice bakers and seasoned chefs alike. Here’s a detailed guide to prepare your apple crisp step by step.
Preparation Steps
- Gather Your Ingredients: Start by assembling all your ingredients on the countertop. This includes your apples, sugars, oats, flour, butter, cinnamon, and salt. Having everything in one place makes the cooking process smoother and more efficient.
- Preheat Your Oven: Set the oven to preheat at 350°F (175°C). This ensures that your apple crisp cooks evenly and develops a lovely golden color.
- Prepare the Apples: Peel, core, and slice your apples into even pieces. Aim for about 1/4-inch thickness. This thickness allows the apples to soften beautifully while maintaining some structure. If you prefer, you can leave the skins on for added texture and nutrition.
- Toss Apples with Sugar and Spices: In a large mixing bowl, combine the sliced apples with the granulated sugar, brown sugar, and cinnamon. Stir gently to coat the apples evenly, ensuring that every slice is kissed with sweetness and spice. Allow the mixture to sit for about 10 minutes. This resting time helps the sugars draw out the natural juices from the apples, creating a delicious syrup.
Cooking Process
- Prepare the Topping: In another bowl, combine the rolled oats, flour, brown sugar, and salt. Stir to mix. Then, pour in the melted butter and mix until the topping is crumbly and resembles wet sand. This mixture should be clumpy but not overly wet.
- Assemble the Crisp: Take a 9×13-inch baking dish and spread the apple mixture evenly across the bottom. Then, sprinkle the oat topping generously over the apples, making sure to cover them completely. This creates a barrier that traps the apple juices during baking.
- Bake: Place the baking dish in the preheated oven and bake for about 30 minutes. Watch for visual cues: the topping should turn a beautiful golden brown, and you’ll notice bubbling juices around the edges of the dish. This bubbling indicates that the apples are cooking down and releasing their natural sweetness.
- Check for Doneness: After 30 minutes, carefully remove the apple crisp from the oven. The topping should be crisp, and the apples should be fork-tender. If they’re still firm, bake for an additional 5-10 minutes, keeping a close eye to prevent burning.
Final Assembly
- Cool Before Serving: Once the apple crisp is done baking, let it cool for about 10-15 minutes. This cooling period allows the juices to settle slightly, making serving easier and preventing burns from hot syrup.
- Serving Suggestions: Serve your easiest apple crisp warm, topped with a scoop of vanilla ice cream or a dollop of whipped cream. The contrast of warm crisp and cold ice cream is simply heavenly!
- Storage: If you have leftovers (which is rare!), store them in an airtight container in the fridge for up to 3 days. Reheat in the oven or microwave before serving again. You can also freeze the apple crisp for up to 3 months. To do this, bake it fully, then let it cool completely before wrapping it tightly in plastic wrap and foil.
Throughout this process, the key is to enjoy the journey. The easiest apple crisp is not just a recipe; it’s an experience filled with warmth, nostalgia, and the sweet smell of baked apples wafting through your home. By taking the time to prepare each ingredient thoughtfully, and by following these detailed steps, you can create a dessert that brings smiles and satisfaction to every table. Happy baking!
Professional Tips and Techniques for easiest apple crisp
When it comes to crafting the easiest apple crisp, there are a few professional tips and techniques that can elevate your dish from simple to spectacular. Apple crisp is a beloved dessert that marries sweet, juicy apples with a crunchy, buttery topping, creating a delightful contrast in textures. In this section, we’ll delve into how to perfect this classic dessert while sharing insider secrets that can make your cooking experience more enjoyable and successful.
Professional Techniques
To create the easiest apple crisp, begin with selecting the right apples. Varieties like Granny Smith, Honeycrisp, or Fuji provide a perfect balance of sweetness and tartness. A common mistake is using only sweet apples which can lead to an overly sweet dish. For the best flavor, consider mixing different types of apples. This technique adds depth and complexity to your crisp.
Next, the preparation of your apples is crucial. Peeling is often a debated topic among bakers. While peeling gives a smoother texture, keeping the skins on can add a slight chewiness and additional nutrients. If you choose to peel, use a sharp vegetable peeler for a clean cut. Slice your apples uniformly to ensure they cook evenly, which is essential for achieving that perfectly tender bite.
One of the most significant secrets to the easiest apple crisp is the topping. A blend of oats, flour, brown sugar, and butter creates that signature crunch. For a flavor boost, consider adding a pinch of cinnamon and nutmeg to your dry ingredients. These spices not only enhance the aroma but also complement the apples beautifully. Use cold butter and cut it into the dry mixture until it resembles coarse crumbs. This technique ensures your topping will bake to a perfect crisp without becoming mushy.
For an extra layer of flavor, think about toasting your oats and nuts before mixing them into the topping. This simple step adds a delightful nutty flavor that takes your easiest apple crisp to the next level.

Troubleshooting Guide
Even with the best intentions, things can go awry while baking. One common issue is a soggy bottom. This can occur if the apples release too much juice during baking. To prevent this, sprinkle a tablespoon of flour over the apples before adding your topping. This will help absorb excess moisture. Additionally, make sure to bake your crisp long enough for the juices to bubble and thicken, which can take anywhere from 30 to 45 minutes depending on your oven.
Another common problem is a topping that doesn’t crisp up. If your topping becomes too brown while baking but isn’t crunchy, the issue might be too much moisture in the mixture or not enough butter. Aim for a crumbly texture and avoid packing the topping too tightly onto the apples. You want it to be airy, allowing heat to circulate and create that desired crispiness.
Presentation Tips
While taste is paramount, presentation can elevate your dessert to a restaurant-quality dish. Serve your easiest apple crisp in individual ramekins for a charming touch. Not only does this make for a beautiful display, but it also allows each guest to have a personal serving. If you prefer a family-style serving, consider using a cast-iron skillet; its rustic charm enhances the homey feel of the dish.
For an added flourish, serve your apple crisp with a scoop of vanilla ice cream or a dollop of whipped cream on top. The cold creaminess contrasts beautifully with the warm crisp, creating a delightful sensory experience. Drizzling a bit of caramel sauce or a sprinkle of cinnamon on top can provide an additional layer of flavor and visual appeal.
Pairing your easiest apple crisp with the right beverage can enhance the dining experience. A sweet dessert wine, such as a late harvest Riesling or a glass of spiced cider, complements the flavors of the crisp. If you’re feeling adventurous, serve it alongside a chai latte for a warm, cozy pairing that evokes the essence of fall.
In conclusion, mastering the art of the easiest apple crisp involves understanding the ingredients, techniques, and presentation methods. With these professional tips, you’ll not only impress your family and friends but also create lasting memories around the dinner table. Happy baking!
Creative Variations and Adaptations of easiest apple crisp
One of the most delightful aspects of the easiest apple crisp is its versatility. While the classic version is always a hit, there are numerous creative variations and adaptations that can make this dish exciting and suitable for various occasions. In this section, we will explore seasonal ingredient swaps, international twists, dietary modifications, and more, offering endless possibilities for your apple crisp adventures.
Seasonal Variations
While apples are the star of the show in the easiest apple crisp, don’t shy away from seasonal fruit swaps. In the summer, consider using peaches or berries, which can be mixed with apples for a delicious twist. The natural sweetness of ripe peaches or the tartness of fresh berries can complement the apples beautifully, creating a fresh, fruity dessert that’s perfect for warm weather.
In the fall, experiment by adding cranberries or pears to your apple mixture. The tartness of cranberries provides a lovely contrast to the sweetness of apples, while pears contribute a delicate flavor. Additionally, during the winter months, you can try incorporating citrus fruits, such as clementines or blood oranges, for a refreshing zing that brightens up the dish.
Dietary Adaptations
Today’s focus on health and dietary restrictions means that many people seek alternatives to classic recipes. Fortunately, the easiest apple crisp is adaptable for various dietary needs. For a gluten-free version, simply substitute regular flour with almond flour or gluten-free oat flour. Ensure that your oats are certified gluten-free to avoid any cross-contamination.
If you’re looking for a vegan option, replace the butter with coconut oil or vegan butter. You can also use maple syrup or agave nectar instead of brown sugar for a natural sweetener. The result is a delicious vegan-friendly crisp that everyone will enjoy, regardless of their dietary preferences.
For a low-carb or keto-friendly version, swap out the sugar for a sugar substitute like erythritol or monk fruit sweetener. Additionally, consider using a mix of almond flour and crushed nuts for the topping instead of traditional flour and oats. This not only lowers the carb count but also adds a delightful crunch to your crisp.
Creative Twists
To add an international flair to your easiest apple crisp, consider infusing your topping with spices from around the world. How about adding cardamom and saffron for an exotic Middle Eastern touch? Or, for an Asian-inspired twist, include ginger and sesame seeds in the topping. These flavors can transport your taste buds to different culinary traditions while still celebrating the humble apple.
Another creative variation is to replace the traditional oats in the topping with granola, which can add a unique texture and flavor profile. For a chocolate lover’s dream, incorporate cocoa powder into the topping, or even add chocolate chips to the apple filling for a decadent dessert experience.
When it comes to cooking methods, don’t limit yourself to the oven. Try using a slow cooker for a no-fuss dessert that fills your home with the aroma of baking apples. Just layer your apple mixture in the slow cooker, top it with your crumbly mixture, and let it work its magic for several hours. This method is particularly handy for gatherings when you want to free up oven space.
For those who enjoy experimenting in the kitchen, consider using leftover apple crisp in creative ways. Crumble it over yogurt for a delicious breakfast parfait, or use it as a topping for pancakes or waffles. You could even blend it into a smoothie for a unique twist on your morning routine.
In summary, the easiest apple crisp is not only a beloved dessert but also a canvas for creativity. With seasonal variations, dietary adaptations, and international twists, the possibilities are endless. Embrace the joy of experimenting with flavors and techniques to make this dessert uniquely yours. Happy baking!
Storage, Reheating, and Meal Prep for easiest apple crisp
When it comes to preparing the easiest apple crisp, one of the most frequently asked questions is about what to do with any leftovers. After all, this delightful dessert—bursting with sweet, tender apples and a crispy, buttery topping—can feed a crowd, and it’s always a good idea to have a plan for storage. Proper storage not only preserves the quality of your dish but also allows you to enjoy that homemade goodness for days to come.
Short-term Storage
Once your easiest apple crisp has cooled down to room temperature, you’ll want to store it in a way that keeps it fresh and delicious. The best way to do this is by using an airtight container. If you made your crisp in a baking dish, you can simply cover it tightly with plastic wrap or aluminum foil. This method helps to prevent the topping from becoming soggy while also keeping any unwanted odors from the fridge at bay.
If you have a smaller portion left, transferring it to a glass or plastic storage container is a smart move. It’s essential to ensure that the container is completely sealed to maintain the crisp’s flavor and texture. In the refrigerator, your easiest apple crisp can last for about 3 to 5 days. If you’re like me and often find yourself with a little leftover, you can feel satisfied knowing that it will still be tasty for a few days!
Freezing and Long-term Storage
For those who plan to keep their easiest apple crisp around for a longer period, freezing is an excellent option. Freezing can extend the shelf life to about 3 months, making it a fantastic choice for meal prep or enjoying your favorite dessert later on. To freeze your crisp, it’s best to prepare and cool it completely first, as this helps maintain the integrity of the dish.
Next, you can either freeze it in the original baking dish (if it’s freezer-safe) or transfer it to a freezer-safe container. I like to divide mine into individual portions so that I can easily grab a serving when the craving hits. Use parchment paper between layers if you’re stacking containers to prevent them from sticking together.
Make sure you label the containers with the date and contents, so you always know what you have on hand. When you’re ready to enjoy it again, let it defrost in the refrigerator overnight. This gradual thawing process helps to preserve its texture.
Reheating Best Practices
Reheating your easiest apple crisp can be just as important as how you store it. The goal is to warm it up without losing that wonderful crispy topping. The best method for reheating is in the oven. Preheat your oven to 350°F (175°C) and place your crisp in an oven-safe dish. Cover it loosely with aluminum foil to prevent over-browning, and heat for about 15-20 minutes or until warm throughout.
If you’re in a hurry, you can use the microwave, but be aware that this method may cause the topping to become a bit chewy. Place your portion in a microwave-safe dish, cover it with a damp paper towel to retain moisture, and heat in short intervals—about 30 seconds at a time—until warmed to your liking.
Regardless of the reheating method, always keep an eye on it to ensure that it doesn’t dry out. This way, you’ll be able to enjoy that delicious balance of warm, spiced apples and a crunchy topping, just as it was when it first came out of the oven!
When thinking about portioning and packaging, consider using smaller containers for individual servings if you know you’ll be eating it over time. This not only makes reheating easier but also helps you control your portions. Plus, it’s a great way to share some with friends or family without needing to defrost the whole batch.
Lastly, it’s essential to keep food safety considerations in mind. Always store your easiest apple crisp promptly after cooling to minimize the risk of bacterial growth. If you notice any off smells or changes in texture after storage, it’s better to err on the side of caution and discard it.
In summary, with the right storage and reheating techniques, your easiest apple crisp can be a delightful treat that lasts well beyond the initial baking. Whether you enjoy it fresh out of the oven or reheated on a cozy evening, knowing how to store and enjoy it properly ensures that every bite is as delicious as the first!
Nutritional Benefits and Health Information
When indulging in the easiest apple crisp, it’s essential to consider not just the delightful flavors and textures but also the nutritional benefits packed within. Although it’s a dessert, the combination of apples and oats brings a wealth of nutrients to the table, making it a surprisingly wholesome option for a sweet treat.
Nutritional Profile
Let’s break down the key ingredients of the easiest apple crisp to understand their nutritional contributions. Typically, this dessert includes apples, oats, flour, butter, and sugar. One serving of apple crisp (about half a cup) generally contains around 200-300 calories, depending on the specific recipe and portion size. The calorie content can vary widely based on how much sugar and butter you choose to incorporate.
In terms of macronutrients, a standard serving of apple crisp usually contains approximately:
- Carbohydrates: 35-50 grams, primarily from the oats and apples.
- Protein: 2-4 grams, mainly from the oats and any nuts you may add.
- Fat: 8-15 grams, depending on the butter used.
In addition to these macronutrients, apples are an excellent source of dietary fiber, which aids in digestion and can help you feel full longer. A single medium apple contains about 4 grams of fiber, making it a significant contributor to the fiber content of your apple crisp.
Health Benefits
Apples, the star ingredient of the easiest apple crisp, provide numerous health benefits. They are rich in antioxidants, particularly quercetin and vitamin C, which are known to support immune function. Furthermore, the fiber in apples can help regulate blood sugar levels, making this dessert a better choice than many processed sweets.
Oats, another key player, are known for their heart-healthy properties. They contain beta-glucans, a type of soluble fiber that has been shown to lower cholesterol levels and improve heart health. Plus, oats are a good source of vitamins and minerals, including iron, magnesium, and B vitamins.
When we think about the overall health impact of the easiest apple crisp, it’s essential to consider portion size and the potential for modifications. By using less sugar or substituting with natural sweeteners like honey or maple syrup, you can make this dessert even healthier. Additionally, swapping out butter for coconut oil or using whole wheat flour instead of all-purpose flour can increase the nutritional value further.
Dietary Considerations
For those with dietary restrictions, there are several ways to adapt the easiest apple crisp. Gluten-free eaters can use certified gluten-free oats and flour alternatives like almond or coconut flour. If you’re vegan, you can replace butter with plant-based alternatives such as vegan margarine or coconut oil, and use flaxseed meal mixed with water as an egg substitute if your recipe calls for eggs.
The versatility of this dessert makes it easy to accommodate various dietary needs while still enjoying the comforting flavors of apple crisp. If you’re watching your sugar intake, consider reducing the sugar content or incorporating fruits like bananas or unsweetened applesauce for natural sweetness.
In comparison to other desserts, the easiest apple crisp tends to be a healthier option. For instance, it typically contains fewer calories and less fat than traditional pies or cakes, making it a suitable choice for a guilt-free indulgence. Plus, the added nutritional benefits of the apples and oats make it a more wholesome dessert overall.
In conclusion, while the easiest apple crisp is undoubtedly a delicious treat, it also has a place in a balanced diet. With mindful modifications and an understanding of its nutritional profile, you can enjoy this delightful dessert while still keeping your health goals in check. So, next time you whip up a batch, remember that you’re not just serving a treat, but also a dish that’s packed with goodness!
Frequently Asked Questions About Easiest Apple Crisp
The easiest apple crisp with oats and melted butter?
The easiest apple crisp with oats involves a simple method where you can combine sliced apples with a mixture of oats, flour, sugar, and melted butter. Start by preheating your oven to 350°F (175°C) and slice your apples, such as Granny Smith or Honeycrisp, to achieve a sweet-tart flavor. In a bowl, mix together rolled oats, brown sugar, flour, cinnamon, and a pinch of salt, then pour in melted butter and combine until crumbly. Once the apples are layered in a baking dish, sprinkle the oat mixture on top and bake for about 30-35 minutes until golden brown and bubbly. For added flavor, consider tossing the apples with lemon juice and a bit of nutmeg before baking!
What is an old-fashioned apple crisp recipe?
An old-fashioned apple crisp recipe typically features a comforting balance of sweet, tart apples topped with a buttery oat and flour mixture. Begin by peeling and slicing about 6 cups of apples, such as McIntosh or Cortland, and toss them with sugar, cinnamon, and a dash of lemon juice. For the topping, combine oats, flour, brown sugar, and softened butter to create a crumbly texture. Spread the apple mixture in a greased baking dish, then evenly distribute the topping over the apples. Bake at 350°F (175°C) for around 45 minutes, and enjoy the delightful aroma wafting through your kitchen as it bakes to a golden perfection.
How to make an apple crisp recipe like the Pioneer Woman?
To make an apple crisp recipe inspired by the Pioneer Woman, you’ll want to focus on using fresh, high-quality ingredients and a rustic presentation. Start by peeling and slicing about 6-8 cups of mixed apples, such as Granny Smith and Fuji, and toss them with sugar, cinnamon, and a hint of vanilla extract. For the topping, blend together oats, flour, brown sugar, and cold butter until it resembles coarse crumbs. Spread the apple mixture in a baking dish, then sprinkle the topping evenly over the apples. Bake in a preheated oven at 350°F (175°C) for 40-45 minutes until the apples are tender and the topping is golden and crispy. Serve warm with a scoop of vanilla ice cream for a delicious touch!
What is the difference between an apple crisp and an apple crumble?
The main difference between an apple crisp and an apple crumble lies in the topping ingredients; while both feature fruit at the base, the crisp topping includes oats, which give it a hearty texture, whereas a crumble typically consists of just flour, sugar, and butter, resulting in a finer, crumbly topping. In an apple crisp, the oats add a chewiness and depth that contrasts beautifully with the soft, cooked apples. Additionally, some recipes for crumble might not use oats at all, focusing instead on a buttery, sandy texture. When preparing either dessert, consider adding spices like cinnamon and nutmeg to the apple layer for enhanced flavor. Ultimately, both are delicious, making them perfect options for a comforting dessert!