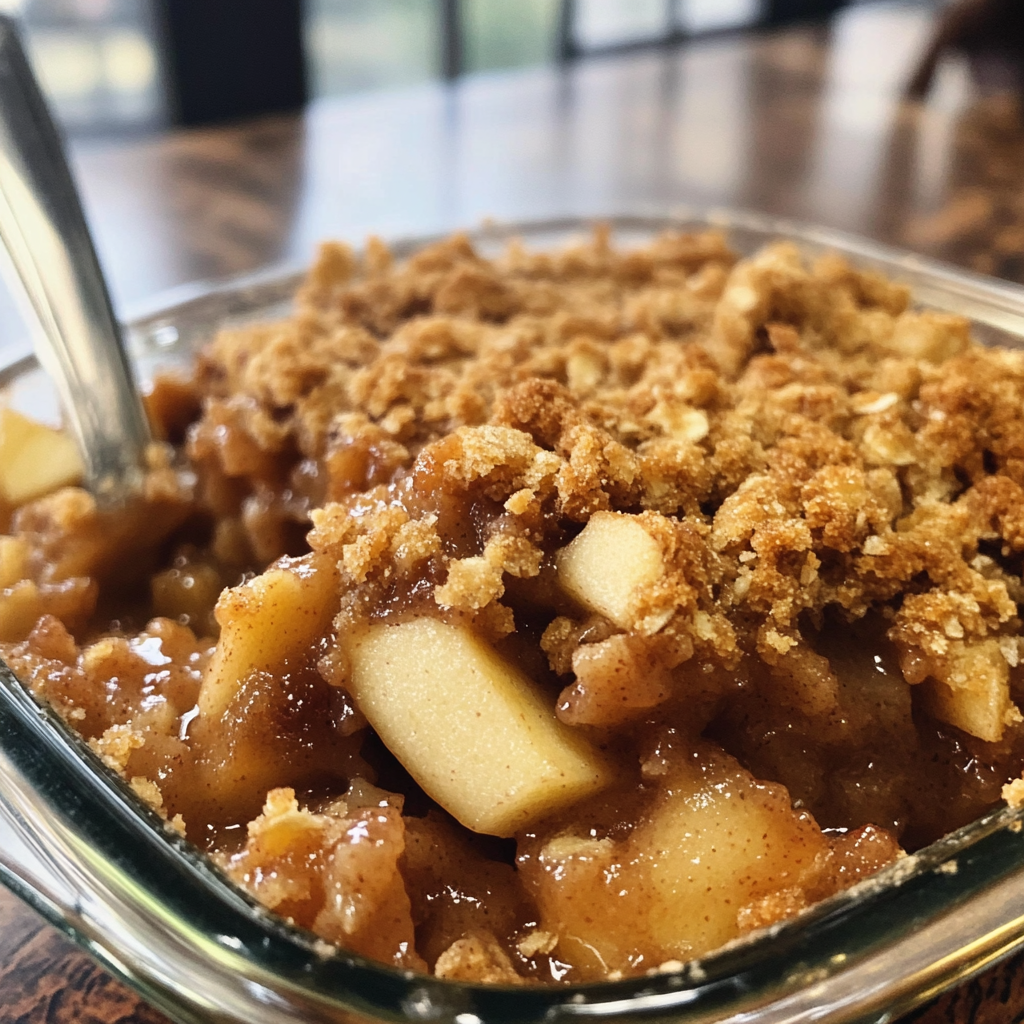
Easy apple crisp is not just a recipe; it’s a heartwarming experience that evokes memories of crisp autumn days and family gatherings. For me, it all began one chilly fall afternoon in my grandmother’s cozy kitchen, where the sweet, cinnamon-laden aroma of baked apples filled the air. I remember watching her expertly slice the apples, her hands moving seamlessly as she mixed the crunchy topping, all while sharing stories of her childhood. Little did I know that this comforting dish would become a staple in my own home, a cherished recipe passed down through generations. This easy apple crisp recipe is not just about the ingredients; it’s about the love and care that go into making it, turning simple apples into a delectable dessert that warms the heart and soul.
The Story Behind This Recipe
This easy apple crisp recipe has a rich history that goes back to the 19th century when American settlers began adapting English recipes to the ingredients available to them. The concept of a fruit crisp likely originated from the English crumble, where the sweet fruit filling was topped with a crumbly mixture of flour, butter, and sugar. However, the American version quickly evolved to include oats and nuts, resulting in a texture that is both crunchy and chewy. My grandmother often told me that this dish represented the abundance of the fall harvest, making it a perfect way to celebrate the season.
When I first attempted to make this easy apple crisp on my own, I was nervous but excited. I wanted to recreate those cherished memories, and I remember standing in my kitchen, surrounded by the warm hues of autumn. I chopped the apples, added a sprinkle of cinnamon, and mixed the topping with my own twists—some chopped pecans for extra crunch and a dash of vanilla for flavor. As the crisp baked in the oven, the smell transported me back to my grandmother’s kitchen, and with each bite, I felt her presence beside me, guiding me through the process.
Why You’ll Love This Dish
What makes this easy apple crisp special is its simplicity and versatility. It’s perfect for busy families looking for quick dinner solutions or a last-minute dessert to impress guests. With just a few ingredients—apples, oats, sugar, and butter—you can have a warm, comforting dessert ready in no time. It can be served warm with a scoop of vanilla ice cream or at room temperature, making it a versatile dish for any occasion.
Seasonal relevance is another reason this dish holds a special place in my heart. Autumn is when apples are at their peak, and you can find an abundance of varieties at local orchards and farmers’ markets. Whether it’s a Honeycrisp, Granny Smith, or Fuji, each apple variety adds its unique flavor to the crisp. It’s a delightful way to celebrate the season and use fresh produce that is readily available.
Moreover, easy apple crisp brings an emotional connection that transcends generations. It’s a dish that invites family and friends to gather around the table, sharing stories and laughter. I recall many evenings spent with loved ones, the crisp bubbling away in the oven, the anticipation building as we waited to dig in. Each bite carries memories of those who came before us, reminding us of the importance of family, tradition, and the joy of sharing food.
In this article, you’ll learn everything there is to know about making the perfect easy apple crisp, including tips for selecting the best apples, secrets to achieving the ideal topping, and variations to make it your own. By the end, you’ll not only have a delicious recipe to share but also a deeper appreciation for this classic dish that has stood the test of time.
The Rich History and Cultural Significance of easy apple crisp
The rich history and cultural significance of easy apple crisp are woven into the very fabric of American culinary traditions. This dessert, which has captured the hearts of many, is a testament to the resourcefulness of early American settlers and their desire to create something delicious using local ingredients. The inception of the easy apple crisp can be traced back to the early 1800s when European immigrants brought their baking traditions to America. They quickly adapted traditional crumble recipes to suit the availability of local fruits and grains, leading to the creation of what we now know as the apple crisp.
Origins and History
The concept of a crisp or crumble dates back to the English kitchen, where fruit was often baked under a layer of flour, butter, and sugar. The term “crisp” became popular in the U.S. as the dish evolved, incorporating hearty oats and nuts into the topping, creating a texture that is both crunchy and satisfying. Historical records indicate that apple crisps became a common dessert in American households by the mid-20th century, particularly during the fall harvest season when apples were abundant.
In my own exploration of this dish, I discovered regional variations that showcase the diversity of American cuisine. For instance, in New England, apple crisp might be made with a blend of spices like nutmeg and allspice, while in the Midwest, you might find it served with a scoop of ice cream on the side, a tradition that has become a staple in many homes. This adaptability is one of the reasons the easy apple crisp has remained a favorite; it can be tailored to fit personal tastes and seasonal ingredients.
Cultural Significance
Easy apple crisp is often served during special occasions, particularly in the fall, when families gather to celebrate Thanksgiving and harvest festivals. It embodies the spirit of gratitude and togetherness, making it a popular choice for potluck dinners and holiday gatherings. The act of preparing and sharing this dish fosters a sense of community, as families pass down their unique recipes and tips through generations. It’s not uncommon for families to have their own secret ingredient or technique that makes their apple crisp special, contributing to the cultural tapestry of this beloved dessert.
As for famous chefs and restaurants, many have put their own spin on the easy apple crisp, elevating it to gourmet status. Notable culinary figures have featured their versions of this classic dessert in cookbooks and on television, each adding their personal touch while honoring the traditional roots of the dish. These interpretations have inspired home cooks to experiment and create their own variations, ensuring that the easy apple crisp continues to evolve while maintaining its essence.
Nutritional Benefits
In addition to its cultural significance, easy apple crisp offers a range of nutritional benefits. Apples are a rich source of dietary fiber, vitamin C, and various antioxidants, making them a healthy choice for dessert. When combined with oats, the topping provides additional fiber and nutrients, contributing to heart health and digestive well-being. While traditional crisp recipes can be high in sugar and fat, there are plenty of ways to lighten the recipe without sacrificing flavor. Using less sugar, opting for whole grain oats, or substituting butter with healthier fats can make this classic dessert a guilt-free indulgence.
In conclusion, the easy apple crisp is much more than just a dessert; it is a dish steeped in history, culture, and personal connections. As you delve into the world of easy apple crisp, you’ll find that it is not only a delicious treat but also a way to celebrate the seasons, honor family traditions, and create new memories with loved ones. Whether enjoyed on a cozy evening at home or served at a festive gathering, this easy apple crisp recipe will surely warm your heart and satisfy your cravings.
Essential Ingredients for Perfect easy apple crisp
Essential Ingredients for Perfect Easy Apple Crisp
Creating a delectable easy apple crisp starts with selecting the right ingredients. Each component plays a vital role in achieving that perfect balance of textures and flavors, which makes this dessert a family favorite. Below, I’ll guide you through the essential ingredients you’ll need, along with tips on how to choose the best options for your dish.
Essential Ingredients
- Apples (6-8 cups, peeled and sliced) – Granny Smith, Honeycrisp, or Braeburn are excellent choices due to their balance of sweetness and tartness.
- Granulated Sugar (1/2 cup) – Enhances the natural sweetness of the apples.
- Brown Sugar (1/4 cup) – Adds moisture and a rich, caramel flavor.
- All-Purpose Flour (1 cup) – Provides structure to the crisp topping.
- Rolled Oats (1 cup) – Adds texture and a wholesome flavor to the topping.
- Ground Cinnamon (1 teaspoon) – Infuses warmth and spice into the dish.
- Salt (1/4 teaspoon) – Balances sweetness and enhances overall flavor.
- Unsalted Butter (1/2 cup, melted) – Binds the topping together and adds richness.
Let’s dive deeper into the importance of each ingredient. The apples are truly the star of the show in any easy apple crisp. When selecting them, look for firm, fresh apples with no bruises. The perfect apple for your crisp should have a balance of sweetness and tartness. Granny Smith apples offer a tart contrast to the sweetness of the sugars in the recipe, while Honeycrisp provides a juicy sweetness. Consider mixing a couple of varieties for a more complex flavor profile.
Granulated sugar and brown sugar are both crucial for developing the right sweetness. Granulated sugar adds a clean sweetness, while brown sugar contributes a deeper, molasses-like flavor that complements the apples beautifully. When choosing sugars, opt for organic varieties if possible, as they often have fewer additives and a more robust flavor.
All-purpose flour serves as the base of your crisp topping, giving it structure and body. You might consider using whole wheat flour for a nuttier flavor, or gluten-free flour if you have dietary restrictions. The rolled oats add a hearty texture and chewiness to the topping, making your crisp feel rustic and homey.
Ground cinnamon is a must-have spice, as it enhances the warm flavors of the apples and creates a cozy aroma while baking. When selecting cinnamon, choose a high-quality product, as the flavor can vary significantly. Freshly ground cinnamon can elevate your dish even further.
Salt may seem like an odd addition to a dessert, but it’s essential for balancing flavors. Just a pinch can elevate the sweetness of the dish and enhance the overall taste. Unsalted butter is recommended for this recipe because it allows you to control the salt content better and ensures a fresh, creamy flavor in the topping.
Print
Easy Apple Crisp Recipe
Ingredients
- 1/2 cup sugar
- 2 tablespoons cornstarch
- 1 teaspoon ground cinnamon
- 1/8 teaspoon ground nutmeg
- 2 pounds firm, tart apples (like Granny Smith), peeled, cored, and diced (4 to 5 medium apples)
- 1 tablespoon orange juice
For the crumble topping:
- 1 1/2 cups old-fashioned oats
- 1 cup all-purpose flour
- 1/2 cup firmly packed light brown sugar
- 1/2 teaspoon salt
- 1/2 cup unsalted butter, melted
Instructions
- Preheat the oven to 350°F and lightly spray a 2-quart baking dish with nonstick cooking spray.
- In a large bowl, whisk together the sugar, cornstarch, cinnamon, and nutmeg. Add the apples and orange juice and toss to coat. Pour evenly into the prepared baking dish. Set aside.
- In a medium bowl, stir together the oats, flour, brown sugar, salt, and melted butter until a crumble forms. Sprinkle over the apple mixture.
Shopping Tips
When shopping for your ingredients, consider the seasonality of apples. They are typically in peak season from late summer through fall, making this the best time to find fresh, flavorful varieties. Visiting local farmers’ markets can yield excellent results, as you can often find apples that are fresher and more flavorful than those sold in grocery stores.
For the oats and flours, check the packaging for freshness dates. Old oats can lose their flavor and texture, while outdated flour can impact the rise and structure of your crisp. If you’re buying in bulk, make sure you store these ingredients in airtight containers to prolong their shelf life.
Substitutions and Alternatives
If you have dietary restrictions, there are several substitutions you can make. For a gluten-free easy apple crisp, swap out the all-purpose flour for a gluten-free blend, and ensure your oats are certified gluten-free. For those who are vegan, replace the butter with coconut oil or a vegan butter substitute. You can also use maple syrup or agave nectar instead of granulated sugars to sweeten your dish without refined sugars.
When it comes to storage, apples should be kept in a cool, dark place or in the refrigerator to maintain their freshness. If you have leftover crisp, store it in an airtight container in the fridge for up to three days. The crisp topping can lose some of its crunch, but reheating in the oven can help revive it. As for the other ingredients, keep them in a cool, dry place, and they should last for several months if stored properly.
Lastly, if you’re on a budget, consider purchasing apples in bulk or looking for sales during the harvest season. You can also make a larger batch of the crisp and freeze portions for a quick dessert option later on. Whether you’re making this for a special occasion or just a cozy night in, these tips will help you create the perfect easy apple crisp.
Detailed Step-by-Step easy apple crisp Cooking Instructions
Detailed Step-by-Step Easy Apple Crisp Cooking Instructions
Now that we’ve gathered all the essential ingredients, it’s time to roll up our sleeves and get cooking. Making an easy apple crisp is not only straightforward but also incredibly rewarding. Follow these step-by-step instructions for a delicious outcome that will impress your family and friends.
Preparation Steps
- Preheat your oven: Begin by preheating your oven to 350°F (175°C). This step is crucial because a properly preheated oven ensures even cooking and helps achieve that delightful golden-brown topping.
- Prepare the apples: While the oven is heating, wash, peel, and slice your apples. Aim for uniform slices, roughly 1/4 inch thick, to ensure they cook evenly. As you slice, toss the apples in a bowl with granulated sugar and cinnamon to coat them nicely.
- Mix the filling: Add the coated apple slices to a greased baking dish, spreading them out evenly. If you like a little extra flavor, you can sprinkle a dash of lemon juice over the apples to enhance their natural tartness and prevent browning.
Having a well-organized workspace, or mise en place, will make the cooking process smoother. Gather all your tools and ingredients before you start. This includes a large mixing bowl, measuring cups, a cutting board, a knife, and a baking dish—ideally, a 9×13 inch dish for this recipe.
Cooking Process
- Prepare the crisp topping: In a separate bowl, combine the rolled oats, flour, brown sugar, ground cinnamon, and salt. Mix these dry ingredients well, ensuring they are evenly distributed.
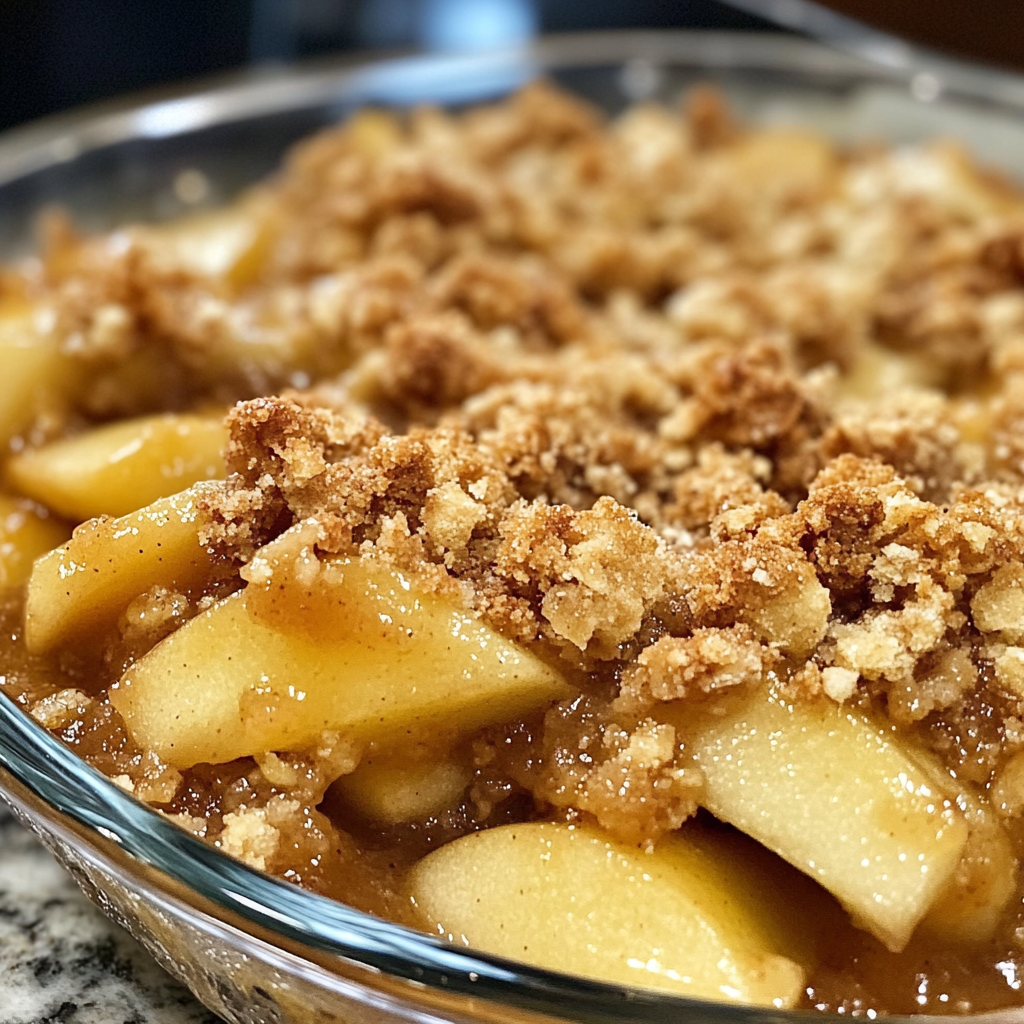
- Add the butter: Pour the melted butter into the dry mixture. Use a fork or your hands to combine everything until the mixture is crumbly. You’re looking for a texture that resembles wet sand; this will create the perfect topping.
- Assemble the crisp: Evenly sprinkle the crisp topping over the apple filling in the baking dish. Make sure to cover all the apples, as this will help create that crunchy, caramelized layer as it bakes.
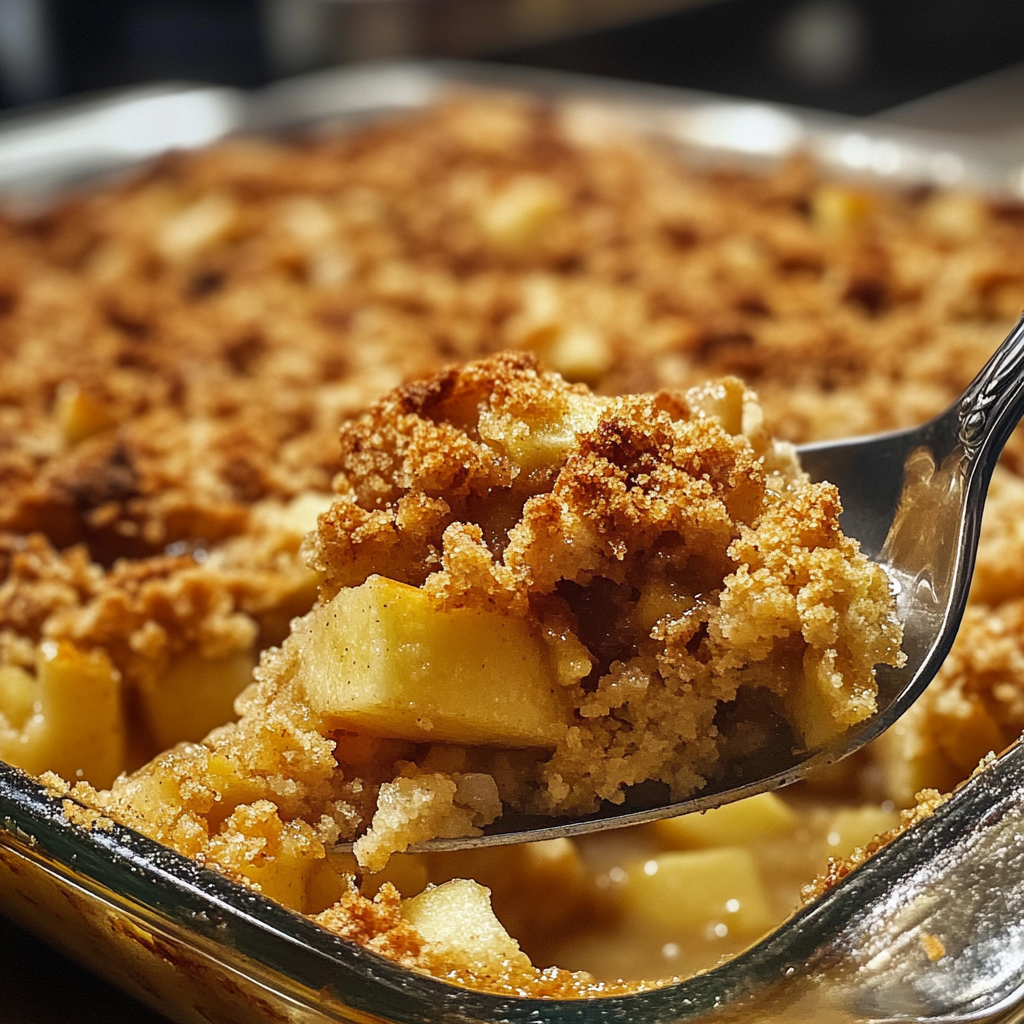
- Bake: Place the baking dish in the preheated oven and bake for approximately 30 minutes, or until the topping is golden brown and the apples are bubbling. Visual cues here are key; look for a beautiful golden crust and the aroma of cinnamon wafting through your kitchen.
One of the most common mistakes at this stage is underbaking, which can leave the apples too firm. If you find that the topping is browning too quickly before the apples are fully cooked, you can cover the dish loosely with aluminum foil to prevent burning.
Final Assembly
- Check for doneness: After 30 minutes, check the crisp by inserting a fork into the apples. They should be tender and soft, yet still hold their shape. If they’re not there yet, continue baking for an additional 5-10 minutes.
- Let it rest: Once done, remove the crisp from the oven and let it sit for about 10-15 minutes before serving. This resting time helps the juices settle and makes serving easier.
- Serve: For an extra special touch, serve your easy apple crisp warm with a scoop of vanilla ice cream or a dollop of whipped cream. The contrast of warm apples and cold ice cream is simply divine!
Throughout this process, it’s essential to keep safety in mind. Always use oven mitts when handling hot dishes and ensure your cooking area is clean. Timing is also crucial; while the recipe suggests a 30-minute bake time, always rely on visual and sensory cues to determine doneness. With these steps, you’ll create a mouthwatering easy apple crisp that brings the warmth of home into every bite!
Professional Tips and Techniques for easy apple crisp
When it comes to whipping up an easy apple crisp, there’s more to the process than simply mixing apples with oats and sugar. This delightful dessert is a perfect way to celebrate the fall harvest or just enjoy a comforting treat any time of year. Drawing from years of experience in the kitchen, I’m excited to share some professional tips and techniques that will elevate your easy apple crisp to a whole new level.
Professional Techniques
To start, let’s talk about the importance of selecting the right apples. The best apples for a crisp are those that balance sweetness and tartness, such as Granny Smith, Honeycrisp, or Braeburn. A blend of different types can also add depth to your dish. When you’re making an easy apple crisp, ensure the apples are sliced evenly; this allows them to cook uniformly and ensures a perfect texture.
Another professional tip is to toss the apple slices with a touch of lemon juice. Not only does this prevent browning, but it also enhances the overall flavor by adding a zesty brightness. For this step, just a tablespoon or two of lemon juice will do wonders for your apples, especially if you’re using sweeter varieties.
When it comes to the crumb topping, don’t be shy about using cold butter. Cut it into your dry ingredients until it resembles coarse crumbs. This technique is crucial as it leads to a crispy topping that contrasts beautifully with the tender apples below. For an added crunch, consider incorporating nuts like walnuts or pecans into the topping.
Troubleshooting Guide
Even the most seasoned cooks can encounter hiccups while making an easy apple crisp. One common issue is a soggy bottom. To combat this, try layering the apple mixture with a sprinkle of flour or cornstarch. These ingredients help absorb excess moisture during baking. Also, make sure to pre-cook the apples slightly if they are particularly juicy, giving them a quick sauté in a pan with a little sugar and cinnamon before layering in your baking dish.
If your topping isn’t browning as expected, consider increasing the oven temperature slightly or broiling it for a few minutes at the end of the baking process. Just keep a close eye on it to avoid burning. Remember, every oven is different, so adjustments may be necessary!
Presentation Tips
Presentation is key when serving your easy apple crisp. A little effort can go a long way in impressing your guests! Serve your crisp warm, directly from the oven, in a beautiful ceramic baking dish. Top each serving with a scoop of vanilla ice cream or a dollop of whipped cream; the contrast of hot and cold is simply divine. For a touch of elegance, consider drizzling caramel sauce over the top just before serving.
When it comes to drinks, pair your easy apple crisp with a sweet white wine like Riesling or a spiced cider. Both complement the warm cinnamon notes in the dish beautifully. If you’re in the mood for something non-alcoholic, a warm chai tea can also create a soothing experience.
Make-Ahead and Meal Prep Strategies
If you’re planning a gathering, consider making your easy apple crisp ahead of time. You can prepare the apple mixture and the topping separately a day in advance and store them in the refrigerator. When you’re ready to bake, simply assemble them in your baking dish and pop it in the oven. This not only saves time but also allows the flavors to meld beautifully.
Scaling the recipe is also quite simple. Whether you want to serve a crowd or just a couple of people, you can easily double or halve the ingredients. Just remember to adjust the baking time accordingly; larger portions might require a bit more time in the oven, while smaller portions will cook faster.
In closing, making an easy apple crisp is not just about following the recipe; it’s about mastering the techniques and understanding the ingredients. With these professional tips, you’ll not only create a delicious dessert but also enjoy the process of making it. Embrace the joy that comes from baking, and let your kitchen be filled with the sweet aroma of baked apples and cinnamon!
Creative Variations and Adaptations of easy apple crisp
While the classic easy apple crisp is a beloved dessert, there’s a whole world of creative variations and adaptations waiting to be explored. As someone who loves to experiment in the kitchen, I’ve discovered countless ways to tweak this recipe to suit different tastes and occasions. Here, I’ll share some of my favorite adaptations that keep the spirit of the original while adding a delightful twist.
Seasonal Variations
Apple crisp is a versatile dessert that can easily adapt to the seasons. In the fall, consider adding spices like nutmeg or allspice to your filling for a cozy, warm flavor. In winter, you might swap out some of the apples for pears or even cranberries to introduce a tartness that complements the sweet apples beautifully. As spring arrives, try incorporating berries like blueberries or strawberries, which can add vibrant color and a fresh taste to your easy apple crisp.
Summer brings opportunities for tropical twists! Pineapple and mango can introduce a juicy sweetness that contrasts nicely with the traditional apple base. You can also consider a mix of fruits, like peaches and plums, for a fruit medley crisp that celebrates the bounty of summer. These seasonal variations not only keep your dessert interesting but also make it a suitable treat for any time of year.
Dietary Adaptations
For those with dietary restrictions, the easy apple crisp can be easily modified without sacrificing flavor. If you need a gluten-free option, simply substitute regular oats with certified gluten-free oats and use a gluten-free flour blend for the topping. For a vegan version, replace the butter with coconut oil or a dairy-free margarine, and use maple syrup or agave nectar instead of honey for sweetness.
Low-carb dieters can enjoy a keto-friendly apple crisp by using almond flour and erythritol as sweeteners, while still achieving that satisfying crumb topping. You can also reduce the sugar in the apple filling by using naturally sweet apples and adding a touch of cinnamon for flavor enhancement. These adaptations ensure that everyone can indulge in this comforting dessert.
Creative Twists
When it comes to adding a unique flair to your easy apple crisp, think outside the box! Consider blending in spices like cardamom or ginger for a spicier kick. Adding a splash of bourbon or rum to the apple filling can elevate the flavor profile and give your crisp a sophisticated edge. You can also experiment with different nuts; a topping made with hazelnuts or almonds can provide a different texture and taste that complements the apples beautifully.
Different cooking methods can also yield exciting results. For a stovetop version, combine the apples and topping in a large skillet, cover, and cook on low heat until the apples are tender and the topping is golden brown. Alternatively, a slow cooker can create a warm, gooey dessert that’s perfect for gatherings. Just layer the apples and topping in the slow cooker, set it on low, and let it work its magic while you prepare the rest of your meal.
Finally, if you find yourself with leftovers (which can be a rarity!), don’t waste them! Transform your leftover easy apple crisp into a delicious breakfast by serving it over yogurt or oatmeal. You can also use it as a filling for homemade pastries or even mixed into pancake batter for an indulgent brunch treat.
In conclusion, the world of easy apple crisp variations is as vast as your creativity allows. Whether you’re tweaking the recipe for dietary needs, embracing seasonal ingredients, or exploring new cooking methods, this dish is a canvas for delicious experimentation. So grab those apples, get your creative juices flowing, and enjoy the delightful journey of crafting your unique version of this classic dessert!
Storage, Reheating, and Meal Prep for easy apple crisp
When it comes to making an easy apple crisp, one of the most satisfying aspects is that you can enjoy it fresh out of the oven, but it’s also a dish that lends itself beautifully to storage and meal prep. Whether you want to save some for later or plan a batch for the week ahead, understanding the ins and outs of storing your apple crisp will ensure that you always have a delicious dessert ready to go. Let’s dive into the best practices for storage, reheating, and meal prep strategies tailored for your easy apple crisp.
Short-term Storage
After baking your easy apple crisp, you might be tempted to dive right in, but what if you want to save some for later? If you find yourself with leftovers, it’s essential to store them properly to maintain their delightful flavor and texture. The first step is to let the apple crisp cool completely at room temperature. This cooling process is crucial as it prevents condensation from forming, which can make your crispy topping soggy.
Once cooled, transfer your apple crisp to an airtight container. If you don’t have one readily available, covering the dish with plastic wrap or aluminum foil will also do the trick. It’s best to store your easy apple crisp in the refrigerator if you plan to eat it within 3-5 days. When stored correctly, the flavors will continue to meld, and the dish will be just as delicious as the day it was made.
Freezing and Long-term Storage
If you’re looking to keep your easy apple crisp for an extended period, freezing is the way to go! However, the key to freezing is preparation. You can freeze apple crisp either before baking or after baking. To freeze before baking, assemble the crisp, cover it tightly with plastic wrap or aluminum foil, and place it in the freezer. When you’re ready to bake, simply remove it from the freezer and bake it straight from frozen, adding a few extra minutes to the cooking time.
If you have leftovers to freeze, ensure that your apple crisp is completely cooled. Portion it into individual servings if desired, then wrap each portion tightly in plastic wrap and place them in a freezer-safe container or a resealable plastic bag. When stored this way, your easy apple crisp can last for up to 3 months in the freezer. Mark the container with the date so you can keep track of freshness.
When you’re ready to enjoy your frozen apple crisp, transfer it to the refrigerator to thaw overnight. For a quick option, you can also reheat it directly from the freezer in the oven or microwave, though the oven will yield the best results in terms of preserving that delightful crispy topping.
Reheating Best Practices
Reheating your easy apple crisp can be done in a few different ways, but the goal is to maintain the integrity of the dish. If you’re reheating a single serving, the microwave is a quick and convenient option. Place the portion on a microwave-safe plate and cover it with a damp paper towel to prevent it from drying out. Heat it in 30-second intervals until warmed through.
For larger portions or if you want to ensure that the topping retains its crispiness, the oven is the preferred method. Preheat your oven to 350°F (175°C), cover the apple crisp with foil to prevent over-browning, and heat for about 15-20 minutes, or until heated through. This method not only warms the filling but also revitalizes that crunchy topping we all love.
When it comes to meal prep, consider making a double batch of your easy apple crisp. You can enjoy one fresh from the oven while freezing the other for a later date. It’s a wonderful way to have a homemade dessert on hand for those busy weeknights or surprise guests. Portioning out your crisp into individual servings not only makes it easy to grab and go but also helps with portion control.
As with all food storage, it’s essential to follow food safety guidelines. Always check for any signs of spoilage before consuming leftovers, and if you’re unsure, it’s best to err on the side of caution and discard it. Generally, if kept at the correct temperatures and stored properly, your easy apple crisp should remain safe to eat for a reasonable amount of time.
In summary, whether you’re enjoying it fresh or saving it for later, knowing how to store, freeze, and reheat your easy apple crisp will enhance your experience and ensure that this delightful dessert can be enjoyed anytime!
Nutritional Benefits and Health Information
When indulging in a comforting dessert like easy apple crisp, it’s easy to overlook the nutritional side of things. However, understanding the health benefits of the key ingredients can bring a whole new appreciation for this classic dish. Let’s explore the nutritional profile, health benefits, and dietary considerations that come with enjoying your easy apple crisp.
Nutritional Profile
The primary ingredients in any basic easy apple crisp include apples, oats, flour, butter, and sugar. The nutritional breakdown can vary depending on the specific recipe and portion sizes, but here’s a general idea of what you might expect per serving:
- Calories: Approximately 250-300 calories
- Carbohydrates: 40-50 grams
- Protein: 2-4 grams
- Fat: 10-15 grams
- Fiber: 3-5 grams
As you can see, the carbohydrate content primarily comes from the apples and oats, while the fat is mainly derived from the butter used in the crisp topping. Apples are naturally low in calories, making them an excellent fruit choice. They are also high in fiber, which aids in digestion and can help keep you feeling full longer.
Health Benefits
Apples, the star ingredient of your easy apple crisp, are not only delicious but also packed with health benefits. They are rich in dietary fiber, particularly soluble fiber known as pectin, which has been shown to lower cholesterol levels and improve gut health. Apples also contain a variety of antioxidants, including flavonoids and polyphenols, which can help combat oxidative stress and inflammation in the body.
Oats, another key ingredient in the crisp topping, are a whole grain that offers numerous health benefits. They are a great source of beta-glucans, which are soluble fibers that can help reduce cholesterol levels and support heart health. Oats are also known for their ability to provide sustained energy, making them a perfect addition to a balanced diet.
When combined, the apples and oats create a dessert that not only satisfies your sweet tooth but also provides essential nutrients and health benefits. While enjoying a serving of easy apple crisp, you can feel good knowing that you’re indulging in a treat that has some redeeming qualities.
Dietary Considerations
As with any recipe, dietary considerations are essential, especially in today’s diverse culinary landscape. For those following a gluten-free diet, you can easily adapt the easy apple crisp by using gluten-free oats and flour. Many stores now offer a variety of gluten-free baking options, making it simple to enjoy this dessert without compromising dietary restrictions.
For those looking to reduce sugar intake, consider modifying the recipe by using less sugar or substituting with natural sweeteners like maple syrup or honey. You can also reduce the amount of butter by using alternatives like coconut oil or unsweetened applesauce, which can make the dish lighter while still retaining flavor.
The calorie content of your easy apple crisp can vary based on these substitutions, but it’s always a good idea to be mindful of portion sizes, especially if you’re watching your caloric intake. Remember, a small serving can still be incredibly satisfying, especially when paired with a scoop of vanilla ice cream or a dollop of whipped cream.
In comparison to similar dishes, like traditional pies or cakes, an apple crisp tends to have a simpler topping, which can make it a more approachable dessert option in terms of preparation and calorie count. Plus, the fruit-forward flavor profile means you’re getting a dose of vitamins and minerals with every bite.
In conclusion, enjoying a homemade easy apple crisp is not just about indulging in a sweet treat but also appreciating the nutritional benefits that come with it. With a few modifications, you can make this beloved dessert fit into a variety of dietary needs while still savoring every delicious bite. So, the next time you whip up a batch of apple crisp, remember that it’s not just a dessert; it’s a wholesome way to enjoy the fruits of the season!
Frequently Asked Questions About Easy Apple Crisp
Easy apple crisp recipe with oats and melted
To make an easy apple crisp with oats, start by preheating your oven to 350°F (175°C). Core and slice about 6-8 medium apples, placing them in a greased baking dish. For the topping, combine 1 cup of rolled oats, 1 cup of brown sugar, 1 cup of flour, 1 teaspoon of cinnamon, and a pinch of salt. Melt 1/2 cup of butter and mix it into the dry ingredients until crumbly. Sprinkle the oat mixture over the apples and bake for 30-40 minutes, or until the apples are tender and the topping is golden brown. Serve warm with a scoop of vanilla ice cream for an extra treat!
Old fashioned apple crisp recipe
An old-fashioned apple crisp recipe typically features a simple blend of tart apples and a crumbly topping. Start by peeling and slicing 6-8 tart apples, like Granny Smith or Braeburn, and toss them with 1/4 cup of granulated sugar and a tablespoon of lemon juice. For the topping, mix 1 cup of all-purpose flour, 1 cup of rolled oats, 1 cup of packed brown sugar, and 1 teaspoon of cinnamon. Cut in 1/2 cup of cold butter until the mixture resembles coarse crumbs. Spread the topping over the apples and bake at 350°F (175°C) for about 40 minutes, ensuring the apples are bubbly and the topping is golden. This classic dessert pairs beautifully with whipped cream or a scoop of ice cream!
Apple crumble recipe
An apple crumble is similar to an apple crisp but often features a more buttery topping. To make this delightful dessert, start by preparing 6-8 sliced apples and mixing them with 1/4 cup of sugar, a tablespoon of flour, and a teaspoon of cinnamon for added flavor. For the crumble topping, combine 1 cup of flour, 1 cup of rolled oats, 1/2 cup of brown sugar, and 1/2 cup of cold, cubed butter. Mix until crumbly and then sprinkle over the apple mixture in a baking dish. Bake at 375°F (190°C) for about 30-35 minutes until the apples are soft and the topping is crisp. Serve warm with cream or custard for a comforting dessert!
Apple crisp recipe Pioneer Woman
The Pioneer Woman’s apple crisp recipe is known for its delightful combination of sweet and tart flavors with a perfectly crunchy topping. Begin by preheating your oven to 350°F (175°C) and peeling about 6-8 medium apples, then slicing them into wedges. In a large bowl, toss the apple slices with 1/2 cup of sugar, 1 tablespoon of lemon juice, and a dash of cinnamon. For the topping, mix together 1 cup of flour, 1 cup of brown sugar, 1 cup of oats, and 1/2 cup of melted butter until crumbly. Pour the apples into a greased baking dish, sprinkle the topping evenly, and bake for 40-45 minutes until the apples are bubbly and the topping is golden brown. This recipe is perfect when served warm with vanilla ice cream or fresh whipped cream!