pumpkin loaf tapped is more than just a delightful treat; it’s a warm embrace that transports you back to cozy kitchen moments filled with laughter and the delightful aroma of spices wafting through the air. I still remember the first time I stumbled upon this recipe, tucked away in a dog-eared cookbook my grandmother gifted me. I was a novice baker at the time, eager to impress my family with something unique. The blend of pumpkin, cinnamon, and a luscious cream cheese icing captivated my curiosity. Little did I know, this would become a staple in our home, a comforting recipe that would bring us together during the bustling fall season.Pumpkin cheesecake banana is not just a recipe; it’s a celebration of flavors, a soothing hug on a chilly day, and a delightful way to embrace the fall season. My journey with this unique and scrumptious dish began one crisp autumn afternoon when I found myself with an abundance of overripe bananas and a craving for something sweet yet comforting. As I rummaged through my pantry, the warm, inviting scent of pumpkin pie spices wafted through my kitchen, inspiring an idea that would lead to one of my family’s favorite desserts – pumpkin cheesecake banana bread.
As I blended the mashed bananas with creamy pumpkin and a touch of cream cheese, I was transported back to my childhood. I remember my grandmother’s kitchen, filled with the aroma of freshly baked goods, especially around Thanksgiving. Her pumpkin pie was a staple at our family gatherings, and it was always accompanied by her signature banana bread. It was during these moments that I realized the power of food to evoke memories and create connections. Combining these two beloved recipes into one seemed like an homage to those cherished memories, and thus began my love affair with pumpkin cheesecake banana.
The Story Behind This Recipe
This recipe is special because it brings together two quintessentially autumnal flavors: pumpkin and banana. While banana bread has roots in the humble tradition of using overripe bananas to reduce waste and create something delicious, pumpkin has been a staple in American kitchens long before the pumpkin spice craze took over. The combination of the two creates a moist and flavorful bread that’s not only appealing to the eye but also a treat for the palate. Adding the cheesecake element elevates it from a simple quick bread to a decadent dessert that can stand on its own.
For busy families, pumpkin cheesecake banana bread is a perfect solution. It’s a one-bowl recipe that requires minimal prep time, making it an ideal option for those hectic weeknight dinners or weekend brunches. You can whip it up in under an hour, and the best part? It keeps well! It can be made ahead of time, stored in the fridge, and enjoyed throughout the week. Each slice is a delightful combination of moist banana bread, creamy pumpkin, and a subtle cheesecake swirl that makes it feel like a special treat without being overly indulgent.
Seasonally, this dish is incredibly relevant. As the leaves turn and the air becomes crisp, our cravings shift toward comforting and warm flavors. There’s something magical about enjoying a slice of pumpkin cheesecake banana bread while sipping hot cider or coffee, wrapped in a cozy blanket. It’s perfect for fall gatherings, Thanksgiving celebrations, or simply as a delightful way to treat yourself after a long day.
Emotionally, this dish resonates with me on a deeper level. It represents a bridge between generations, connecting my memories with those of my children as I pass down the recipe. Watching them help mash the bananas or swirl in the cheesecake mixture brings joy and laughter into our kitchen, creating new memories that I hope they will cherish as much as I do. Cooking is not just about nourishment; it’s about the stories we share and the connections we forge with those we love.
In this guide, you’ll learn everything you need to know to master the art of making pumpkin cheesecake banana bread. From the ingredients you’ll need to tips on how to achieve the perfect texture and flavor, I promise to share my secrets and tricks to ensure that your bread turns out light, moist, and utterly delicious. You’ll also discover variations to suit your taste, ways to serve it, and how to incorporate this delightful dish into your seasonal celebrations. Let’s dive into the rich world of pumpkin cheesecake banana, where every bite tells a story!
The Rich History and Cultural Significance of pumpkin cheesecake banana
The rich history and cultural significance of pumpkin cheesecake banana can be traced back to the origins of its main ingredients – pumpkin and bananas. Both have deep roots in various cultures and cuisines, making this dish a delightful fusion of flavors and traditions. Pumpkins, native to North America, have been cultivated for thousands of years. They were an essential food source for Native Americans long before European settlers arrived. The versatility of pumpkins allowed them to be used in savory and sweet dishes alike, and their vibrant orange hue made them a staple in autumnal celebrations.
Origins and History
Bananas, on the other hand, have a much different journey. Originally cultivated in Southeast Asia, bananas made their way to the Americas through trade routes, becoming a beloved fruit in many households. The concept of banana bread emerged in the United States during the Great Depression, when people sought ways to use overripe bananas instead of discarding them. This practicality gave rise to a beloved tradition that continues to this day. The combination of these two ingredients in pumpkin cheesecake banana bread is a modern take on classic flavors that speaks to the resourcefulness of home cooks throughout history.
As culinary trends evolved, the introduction of cream cheese into recipes marked a significant change in dessert preparation. Cream cheese has its roots in the United States, where it became popular in the 19th century, particularly for use in cheesecakes. The idea of swirling cream cheese into banana bread is a creative evolution that elevates the dish from a simple quick bread to a luxurious dessert. It’s this blend of historical culinary practices that makes pumpkin cheesecake banana bread a unique and culturally rich dish.
Cultural Significance
Throughout the years, pumpkin cheesecake banana bread has found its place in various occasions and celebrations, especially in the fall. In many American households, it graces the table as a comforting breakfast item, an afternoon snack, or a dessert at holiday gatherings. Its warm flavors and inviting texture make it perfect for sharing with family and friends, fostering connections and creating memories around the dining table.
In recent years, the rise of social media has brought desserts like pumpkin cheesecake banana bread into the spotlight. Home bakers from all over have shared their creations, showcasing variations and adaptations that cater to different dietary needs and preferences. This has led to a renewed interest in traditional recipes, encouraging younger generations to embrace the art of baking and the joy it brings.
Nutritional Benefits
Beyond its rich history and cultural significance, pumpkin cheesecake banana bread also offers nutritional benefits that make it a guilt-free indulgence. Pumpkins are packed with vitamins A and C, fiber, and antioxidants, which can contribute to overall health. Bananas add potassium, vitamin B6, and a natural sweetness that reduces the need for added sugars in recipes. When combined with the healthy fats from eggs and the protein from cream cheese, this dish becomes a well-rounded treat that fits into a balanced diet.
In conclusion, the pumpkin cheesecake banana bread is not merely a dessert; it’s a reflection of history, culture, and the beauty of sharing food with loved ones. Its roots are deeply intertwined with traditional practices, and its evolution over time showcases the creativity of home cooks. As you embark on your journey to create this delightful dish, remember that you’re not just baking; you’re participating in a rich culinary heritage that spans generations. Embrace the flavors, share the love, and savor every bite of your pumpkin cheesecake banana creation!
Essential Ingredients for Perfect pumpkin cheesecake banana
When it comes to baking, the ingredients you choose can make or break your dish. In the case of pumpkin cheesecake banana bread, each ingredient plays a vital role in creating a harmonious blend of flavors and textures. This unique recipe marries the creamy richness of cheesecake with the warm spiciness of pumpkin and the comforting sweetness of ripe bananas, resulting in a delightful treat that’s perfect for any season.
Essential Ingredients
- 2 ripe bananas – The bananas should be overripe, with lots of brown spots on the skin. This ensures they are sweet enough to balance the spices in the bread. They provide moisture and natural sweetness.
- 1 cup pumpkin puree – Use pure pumpkin puree rather than pumpkin pie filling, which contains added sugars and spices. This ingredient contributes to the bread’s moisture and rich flavor.
- 8 oz cream cheese – For the cheesecake layer, full-fat cream cheese is ideal as it offers a rich, creamy texture. Make sure it’s at room temperature for easier mixing.
- 1/2 cup granulated sugar – This sweetens the bread and balances the tanginess of the cream cheese.
- 1/2 cup light brown sugar – Brown sugar adds a deeper flavor and moisture due to its molasses content, enhancing the overall taste of the pumpkin cheesecake banana.
- 1/2 cup vegetable oil – This keeps the bread moist and tender. Alternatively, you can use melted coconut oil for a tropical twist.
- 2 large eggs – Eggs act as a binder, helping to hold the ingredients together while adding richness.
- 1 1/2 cups all-purpose flour – The base of your bread, flour provides structure. For a gluten-free option, you can substitute with a gluten-free flour blend.
- 1 teaspoon baking soda – This leavening agent helps the bread rise, resulting in a light and fluffy texture.
- 1 teaspoon baking powder – A secondary leavening agent that works in tandem with baking soda for optimal rise.
- 1 teaspoon cinnamon – Cinnamon adds warmth and a classic fall flavor that complements pumpkin beautifully.
- 1/2 teaspoon nutmeg – Nutmeg enhances the spice profile, contributing a warm, aromatic quality.
- 1/4 teaspoon salt – A crucial ingredient that balances the sweetness and enhances all the flavors.
Each of these ingredients has been thoughtfully selected to create an irresistible pumpkin cheesecake banana bread. For instance, using ripe bananas not only ensures sweetness but also adds a natural flavor that pairs beautifully with pumpkin. When selecting your pumpkin puree, look for brands that offer 100% pure pumpkin with no additives.
Print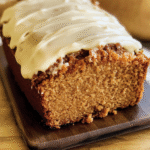
Pumpkin Loaf Tapped Recipe
Ingredients
-
- 2 cups All Purpose Flour
- 1 tsp Baking Soda
- 1/2 tsp Kosher Salt
- 1 tbsp Cinnamon
- 1 tsp Ground Ginger
- 1 tsp Ground Allspice
- 1/2 tsp Nutmeg
- 1/2 tsp Ground Cloves
- 15 oz Pumpkin Puree
- 1 cup Brown Sugar
- 3/4 cup Granulated Sugar
- 1/2 cup Salted Butter, (melted)
- 1/4 cup Vegetable Oil
- 2 Large Eggs
- 1/4 cup Sour Cream
- 1 tsp Vanilla Extract
Instructions
-
- Preheat oven to 350 degrees F. Line a 9×5 loaf pan with parchment paper.
- In a large bowl, combine flour, baking soda, salt, and spices. Whisk ingredients together.
- In a separate large mixing bowl, combine pumpkin puree, brown sugar, sugar, melted butter, vegetable oil, eggs, sour cream, and vanilla extract. Whisk together for 2-3 minutes, until smooth.
- Add the flour mixture to the wet ingredients and mix together until all of the ingredients are incorporated. Pour batter into the loaf pan and bake for 75-80 minutes. Allow the pumpkin bread to cool for 5 minutes in the loaf pan, then remove and place onto a wire rack to cool completely.
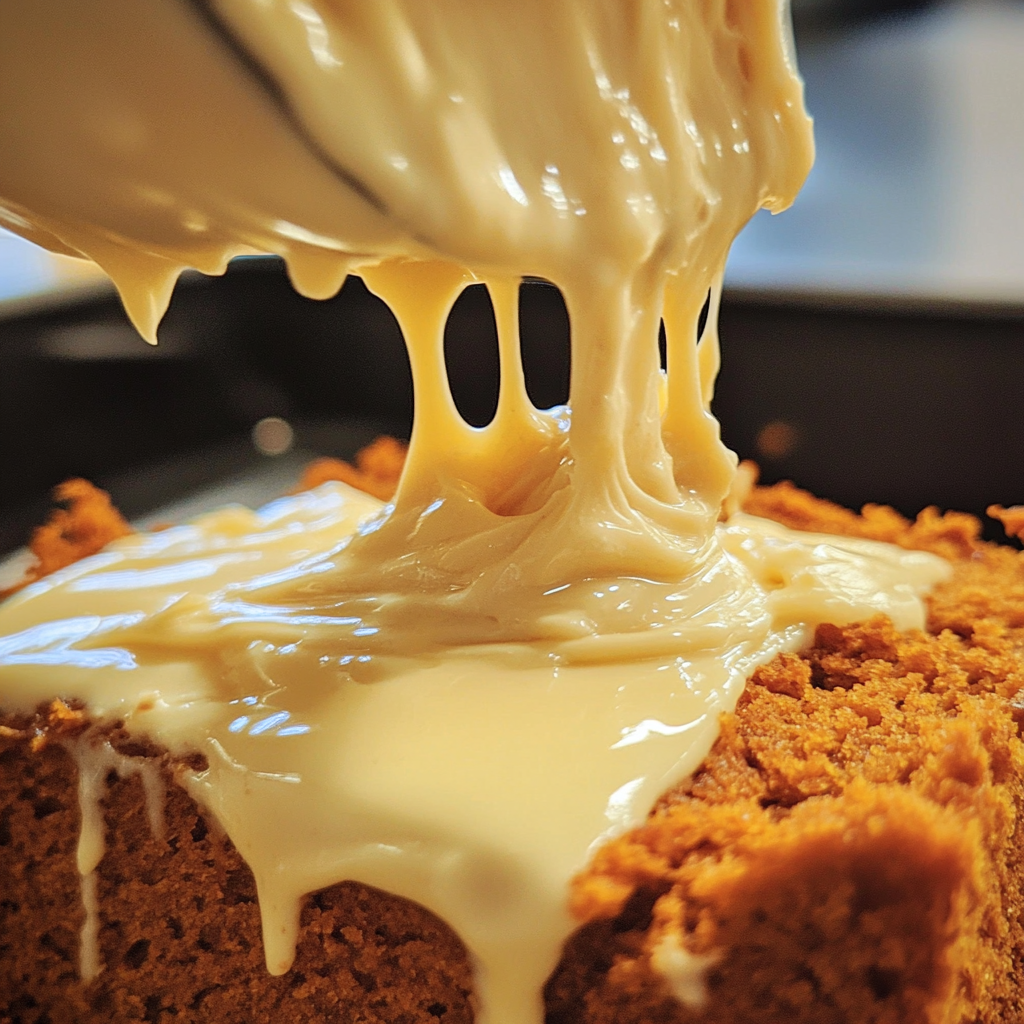
- Make the cream cheese frosting by adding cream cheese and butter to the bowl of a stand mixer fitted with the paddle attachment. Cream together for 2 minutes, then add the powdered sugar, vanilla extract, and heavy cream. Mix until fully combined, about one minute.
- Add the cream cheese frosting on top of the pumpkin bread.
Shopping Tips
When embarking on your ingredient shopping journey, consider visiting local farmers’ markets, especially during the fall season when pumpkins are abundant. Not only will you find fresh, high-quality ingredients, but you’ll also be supporting local farmers. If you’re opting for canned pumpkin puree, brands like Libby’s are often recommended for their consistency and flavor. Also, check the expiration date to ensure freshness.
For the best bananas, look for ones with a rich yellow color and plenty of brown spots, as these indicate optimal ripeness. When it comes to cream cheese, opt for full-fat varieties for the best texture and flavor. Always check to see if the packaging is intact and the expiration date is current.
Substitutions and Alternatives
Not everyone can enjoy traditional ingredients due to dietary restrictions or personal preferences, so here are some substitution options for your pumpkin cheesecake banana bread:
- Bananas: If you’re allergic to bananas or simply dislike them, unsweetened applesauce can be a great substitute, although the flavor will change slightly.
- Cream Cheese: For a dairy-free option, use vegan cream cheese. It’s essential to ensure the texture is similar to traditional cream cheese for the best results.
- Flour: For those on a gluten-free diet, you can use almond flour or a gluten-free all-purpose blend. Just keep in mind that different flours may require adjustments in liquid content.
Lastly, when considering organic versus conventional ingredients, organic options often provide fewer pesticides and may have a better flavor profile. However, it’s essential to balance your budget with quality. Look for seasonal sales or bulk options to save costs while ensuring you get the best ingredients for your pumpkin cheesecake banana bread.
In conclusion, the ingredients for your pumpkin cheesecake banana bread lay the foundation for a dish that is not only delicious but also filled with warmth and comfort. By selecting high-quality ingredients, understanding their roles, and knowing how to source them effectively, you’re setting yourself up for baking success.
Detailed Step-by-Step pumpkin cheesecake banana Cooking Instructions
Now that we have gathered our ingredients, it’s time to roll up our sleeves and dive into the exciting process of creating a delectable pumpkin cheesecake banana bread. This recipe may seem intricate at first glance, but with careful attention to detail and a little bit of patience, you’ll be rewarded with a stunning loaf that will impress anyone lucky enough to try it. Let’s break it down step by step.
Preparation Steps
- Gather Your Ingredients: Start by assembling all your ingredients on the counter. This is known as mise en place, a French term that means “everything in its place.” It’s essential in baking to have everything ready before you start mixing.
- Preheat the Oven: Preheat your oven to 350°F (175°C). Preheating ensures that your bread bakes evenly and achieves the perfect rise.
- Prepare Your Baking Pan: Grease a 9×5 inch loaf pan with butter or cooking spray. You can also line the bottom with parchment paper for easy removal later.
- Mash the Bananas: In a medium bowl, mash the ripe bananas with a fork until smooth. The more mashed they are, the better they will incorporate into the batter.
- Mix the Pumpkin Puree: Add the pumpkin puree to the mashed bananas, blending them together until fully combined.
- Make the Cream Cheese Mixture: In a separate bowl, beat the softened cream cheese with the granulated sugar and brown sugar using a hand mixer or a stand mixer. Mix until the mixture is creamy and smooth, which usually takes about 2-3 minutes.
- Add Eggs and Oil: Once your cream cheese mixture is smooth, add the eggs one at a time, mixing well after each addition. Then, mix in the vegetable oil until fully incorporated.
- Combine Dry Ingredients: In another bowl, whisk together the flour, baking soda, baking powder, cinnamon, nutmeg, and salt. This step ensures that all your dry ingredients are evenly distributed.
- Mix Wet and Dry Ingredients: Gradually add the dry ingredients to the wet ingredients, mixing until just combined. Be careful not to overmix, as this can lead to a dense bread.
Cooking Process
- Add the Banana-Pumpkin Mixture: Gently fold in the banana-pumpkin mixture into the batter. Use a spatula to ensure an even distribution without overmixing.
- Layer the Cream Cheese Mixture: Spoon half of the batter into the prepared loaf pan. Then, add dollops of the cream cheese mixture on top. Use a knife or skewer to swirl the cream cheese into the batter gently.
- Add Remaining Batter: Pour the remaining batter over the cream cheese layer and smooth the top with a spatula. This layering creates a beautiful marbled effect when sliced.
- Bake the Bread: Carefully place the loaf pan in the preheated oven. Bake for about 60-70 minutes, or until a toothpick inserted into the center comes out clean. Keep an eye on it as baking times may vary based on your oven.
- Check for Doneness: Towards the end of the baking time, you can start checking for doneness. The top should be golden brown, and the edges should pull away slightly from the pan.
- Cool the Bread: Once baked, remove the loaf from the oven and let it cool in the pan for about 10 minutes. Then, transfer it to a wire rack to cool completely. This cooling process is crucial as it allows the flavors to meld beautifully.
Final Assembly
- Slice and Serve: Once the bread has cooled, slice it into thick pieces. You can serve it plain or with a smear of butter or cream cheese frosting for an extra indulgent treat.
- Storage: Store any leftovers in an airtight container at room temperature for up to three days or refrigerate for up to a week. You can also freeze slices for later enjoyment; just wrap them tightly in plastic wrap and then in aluminum foil before freezing.
- Enjoy Your Creation: Take a moment to savor your creation. The first bite of this pumpkin cheesecake banana bread will transport you into a world of flavors – it’s sweet, creamy, and spiced just right. Don’t forget to share with friends and family, as they will certainly want a taste of your delicious baking!
Throughout this process, don’t hesitate to taste the batter to adjust flavors if needed. You might find yourself wanting to add a pinch more cinnamon or a splash of vanilla extract. Remember, baking is as much about personal expression as it is about following a recipe. By following these steps closely, you’re on your way to crafting a delightful pumpkin cheesecake banana bread that will impress everyone around you. Happy baking!
Professional Tips and Techniques for pumpkin cheesecake banana
When it comes to creating the perfect pumpkin cheesecake banana bread, a few professional tips and techniques can take your baking from ordinary to extraordinary. The combination of sweet bananas and creamy pumpkin cheesecake layered within a moist bread creates a delightful treat that is perfect for any occasion. Let’s dive into some expert insights that will help you master this recipe!
Professional Techniques
First and foremost, understanding the balance of flavors in a pumpkin cheesecake banana bread is key. To achieve a harmonious blend, make sure to use ripe bananas, as they add natural sweetness and moisture. A good rule of thumb is to use bananas that are heavily speckled, as these are the sweetest. For the pumpkin cheesecake layer, opt for pure pumpkin puree instead of pumpkin pie filling, which contains added sugars and spices that could overshadow the banana flavor.
Another essential technique is to ensure your ingredients are at room temperature before mixing. This includes eggs, cream cheese, and any dairy products you plan to use. Room temperature ingredients blend together more seamlessly, creating a smooth cheesecake layer that will bake evenly. Additionally, when mixing the batter, be careful not to overmix. Overworking the dough can lead to a dense bread, while a gentle fold will keep it light and fluffy.
For those experienced in the kitchen, consider experimenting with a reverse creaming method. This technique involves mixing the dry ingredients with fat (like butter) before adding the wet ingredients. This creates a beautifully tender crumb and enhances the overall texture of your pumpkin cheesecake banana bread.
Troubleshooting Guide
Even the best bakers encounter challenges, so it’s important to know how to troubleshoot common problems when making pumpkin cheesecake banana bread. If your bread is turning out too dense, it might be due to overmixing or using too much flour. To avoid this, measure your flour correctly by spooning it into the measuring cup and leveling it off with a knife.
Another common issue is the cheesecake layer sinking or cracking during baking. To prevent this, ensure your cream cheese is softened properly, and mix it until completely smooth before incorporating the eggs. Also, consider baking in a water bath to maintain even heat distribution, which can help prevent cracking.
If your bread is browning too quickly, consider covering it with aluminum foil midway through baking. This will protect the top while allowing the center to cook through. Always use a toothpick to check for doneness; it should come out clean or with a few moist crumbs.
Presentation Tips
Presentation is key when it comes to desserts, and your pumpkin cheesecake banana bread deserves to shine. Once baked and cooled, consider slicing the bread and arranging it on a beautiful platter. A sprinkle of powdered sugar can add a touch of elegance, while a drizzle of caramel sauce or a dollop of whipped cream can elevate the visual appeal.
Pairing your bread with seasonal fruits like pomegranate seeds or cranberries can add color and freshness. You might also want to serve it with a side of cream cheese frosting for extra indulgence. When it comes to serving, consider offering a range of beverages that complement the flavors of the pumpkin cheesecake banana bread. A spiced chai latte or a warm apple cider can create a delightful pairing, enhancing the overall experience.
Finally, if you’re planning to serve this dish at a gathering, consider baking it in mini loaf pans for individual servings. This not only makes for a beautiful presentation but also allows guests to enjoy their own loaf without the need for slicing. With these tips and techniques, you’ll be well on your way to mastering pumpkin cheesecake banana bread, impressing your friends and family with your baking prowess!
Creative Variations and Adaptations of pumpkin cheesecake banana
The beauty of pumpkin cheesecake banana bread lies in its versatility. While the classic recipe is divine on its own, there are countless ways to put a creative spin on this delightful treat. Let’s explore some variations and adaptations that can cater to different tastes, dietary needs, and seasonal inspirations!
Seasonal Variations
As the seasons change, so too can the ingredients in your pumpkin cheesecake banana bread. In the fall, consider incorporating spices like nutmeg, allspice, or even a hint of maple syrup for a cozy, warm flavor profile. You might also experiment with adding chopped apples or pears for a fruity twist that complements the banana and pumpkin perfectly.
In winter, switch it up with a hint of peppermint extract in the cheesecake layer. This unexpected flavor can create a festive treat that’s perfect for holiday gatherings. Spring and summer can introduce tropical flavors—think coconut or pineapple—to create a fun, sunny version of this bread that’s refreshing and light.
Dietary Adaptations
For those who follow specific dietary plans, adapting the pumpkin cheesecake banana bread to meet your needs is entirely possible. If you’re looking for a gluten-free option, substitute regular flour with a gluten-free all-purpose blend. Ensure that your baking soda and powder are also gluten-free to avoid cross-contamination.
If you’re vegan, you can replace eggs with flax eggs (1 tablespoon of ground flaxseed mixed with 2.5 tablespoons of water equals one egg) and use a plant-based cream cheese alternative for the cheesecake layer. This way, you can still enjoy the creamy, dreamy texture without compromising on dietary preferences.
For a lower sugar option, consider using ripe bananas as your primary sweetener and reducing added sugars in the recipe. You can also swap out traditional sugar for natural sweeteners like honey or agave syrup, though these may alter the texture slightly.
Creative Twists
The heart of culinary creativity lies in exploration. One fun twist on the classic pumpkin cheesecake banana bread is to add a swirl of Nutella or peanut butter through the batter before baking. This not only adds a rich flavor but also creates an eye-catching marbled effect in the finished loaf.
Another idea is to incorporate different nuts or seeds into the batter. Walnuts, pecans, or even pumpkin seeds can add a delightful crunch and additional nutritional benefits. For a fancier touch, try adding a streusel topping made from oats, brown sugar, and cinnamon that will create a sweet crust on top of your bread.
If you’re feeling experimental, explore different cooking methods. Instead of baking, you can try making a slow cooker version of the pumpkin cheesecake banana bread. Grease your slow cooker well, pour in the batter, and set it on low for several hours. The result is a beautifully moist bread with a unique texture that’s a fun twist on the classic baking method.
Lastly, don’t let leftovers go to waste! Transform stale bread into delicious bread pudding by cubing the pumpkin cheesecake banana bread and soaking it in a mixture of eggs, milk, and spices before baking. Serve it warm with a scoop of vanilla ice cream or a drizzle of warm caramel sauce for a decadent dessert that feels entirely new.
With these creative variations and adaptations, your pumpkin cheesecake banana bread will never become stale. Instead, it will always offer something fresh and delightful, ensuring that every bite is as exciting as the first!
Storage, Reheating, and Meal Prep for pumpkin cheesecake banana
When it comes to savoring a delicious slice of pumpkin cheesecake banana bread, the last thing you want is for it to lose its delightful flavor or texture. Proper storage is crucial to ensure that your treat remains moist, flavorful, and safe to eat. In this guide, we’ll explore everything you need to know about storing, reheating, and meal prepping your pumpkin cheesecake banana bread so you can enjoy it at its best, whether it’s just baked or a few days old.
Short-term Storage
After baking your scrumptious pumpkin cheesecake banana bread, you’ll want to cool it completely to room temperature before storing. This step is crucial; if you store it while still warm, moisture will build up in the container, leading to sogginess. Once cooled, wrap the bread tightly in plastic wrap or aluminum foil to prevent air exposure. If you’re like me and tend to get a little distracted in the kitchen, using a good airtight container can also work wonders to keep your bread fresh.
For short-term storage, your pumpkin cheesecake banana bread can be kept at room temperature for about 2-3 days. Just make sure it’s stored in a cool, dry place, away from direct sunlight. I often place it in my kitchen pantry, where it stays perfectly cozy without getting stale. However, if you live in a particularly warm or humid environment, it’s better to store it in the refrigerator to extend its shelf life.
If you decide to refrigerate your pumpkin cheesecake banana bread, use a container that’s suitable for cold storage, like a glass or plastic container with a tight-fitting lid. This will help keep your bread fresh for about a week. Just be aware that refrigeration can slightly alter the texture, making it a bit denser than when it was freshly baked.
Freezing and Long-term Storage
If you find yourself with more pumpkin cheesecake banana bread than you can eat within a week, freezing is an excellent option to preserve its deliciousness. To freeze, first slice the bread into individual portions. This makes it easier to thaw only what you need later. Wrap each slice tightly in plastic wrap or aluminum foil and place them in a freezer-safe bag or container. Remember to label your package with the date; frozen bread is best consumed within 3 months for optimal flavor and texture.
When you’re ready to enjoy your frozen pumpkin cheesecake banana bread, there are a couple of methods for thawing. The quickest way is to remove a slice from the freezer and let it sit at room temperature for about 30 minutes. Alternatively, you can thaw it in the refrigerator overnight. For those who can’t wait, pop a slice in the microwave for about 15-20 seconds, but be cautious not to overheat it, as this can lead to a chewy texture.
Reheating Best Practices
Reheating your pumpkin cheesecake banana bread properly is essential to restoring some of that fresh-baked goodness. If you’re reheating from the fridge, you can use a toaster oven or standard oven for the best results. Preheat your oven to 350°F (175°C), then place the slice on a baking sheet. You can cover it lightly with foil to prevent the edges from browning too much. Heat for about 10-15 minutes or until warmed through. This method not only warms the bread but also revives its lovely aroma.
If you’re in a rush and using a microwave, place the slice on a microwave-safe plate and cover it with a paper towel to retain moisture. Heat it for about 15-20 seconds, checking to make sure it doesn’t become rubbery. While the microwave is convenient, I always prefer the oven method as it brings back the delightful texture of freshly baked bread.
Meal prepping your pumpkin cheesecake banana bread can be a game changer, especially for busy weeks. Consider whipping up a double batch and slicing it for quick breakfasts or snacks. You can also pair it with yogurt or nut butter for a balanced meal. Portioning out your slices and storing them in individual bags can make grabbing a quick bite so much easier.
Lastly, let’s touch on food safety. Always ensure your hands, utensils, and surfaces are clean when handling food. If your pumpkin cheesecake banana bread shows any signs of mold or an off smell after storage, it’s best to err on the side of caution and discard it. By following these storage and reheating tips, you can enjoy your delicious pumpkin cheesecake banana bread for days—or even weeks—without losing any quality or flavor!
Nutritional Benefits and Health Information
When indulging in a slice of pumpkin cheesecake banana bread, it’s good to have an understanding of the nutritional benefits it offers. This delightful dessert combines the rich flavors of pumpkin and banana, resulting in a moist and satisfying treat. In this section, we’ll delve into the nutritional breakdown, health benefits, dietary considerations, and even some healthy modifications you can make to this recipe.
Nutritional Profile
A typical slice of pumpkin cheesecake banana bread contains a variety of ingredients that contribute to its overall nutritional profile. Ingredients such as bananas, pumpkin puree, and cream cheese play vital roles in packing this bread with nutrients. On average, a slice (about 1/10th of a loaf) contains approximately 200-250 calories, depending on the specific recipe and portion size.
Within those calories, you’ll find a mix of macronutrients. A slice typically contains around 3-5 grams of protein, 8-10 grams of fat (mainly from the cream cheese and any added oils), and 30-35 grams of carbohydrates. The carbohydrate content includes natural sugars from the bananas and the pumpkin, making it a sweet indulgence. It’s essential to keep in mind that sugar content varies based on how much sweetener you choose to add.
Health Benefits
Let’s take a moment to appreciate the health benefits of the primary ingredients in pumpkin cheesecake banana bread. Bananas are a fantastic source of potassium, which is essential for heart health and regulating blood pressure. They also contain dietary fiber, which aids digestion and keeps you feeling fuller for longer. The pumpkin puree is rich in vitamins A and C, both of which boost your immune system and promote healthy skin.
Additionally, pumpkin is high in antioxidants, which can help combat oxidative stress in the body. Combined with the cream cheese, which adds a creamy texture and a dose of calcium, you have a treat that not only satisfies your sweet tooth but also delivers some nutritional benefits. If you’re looking for a wholesome snack, this pumpkin cheesecake banana bread can fit the bill!
Dietary Considerations
As with any recipe, there are dietary considerations to keep in mind, especially for those with allergies or specific dietary restrictions. The traditional recipe contains gluten from all-purpose flour, so for those who are gluten-intolerant or have celiac disease, substituting gluten-free flour is an excellent option. You can also use almond flour or oat flour for a slightly different flavor and texture.
For those watching their sugar intake, consider substituting granulated sugar with natural sweeteners like honey or maple syrup, or even using mashed dates for added sweetness without refined sugar. If you want to make this pumpkin cheesecake banana bread dairy-free, you can replace the cream cheese with a dairy-free alternative or a cashew cream that mimics the creamy texture.
In terms of fitting into various diet plans, this bread can be enjoyed in moderation as part of a balanced diet. It can be a suitable addition to a breakfast meal alongside protein sources like eggs or Greek yogurt or as a mid-afternoon snack. If you’re following a specific diet plan, such as paleo or keto, be sure to adjust the ingredients accordingly to align with your goals.
Lastly, if you’re comparing your pumpkin cheesecake banana bread to similar baked goods, you’ll find that it holds its own quite well. Traditional banana bread can be high in sugar and fat, while the addition of pumpkin puree can lower the calorie count and increase fiber content. So, the next time you crave a sweet treat, consider reaching for a slice of this pumpkin cheesecake banana bread, knowing you’re making a deliciously satisfying choice that also brings some nutritional benefits to the table!
Frequently Asked Questions About Pumpkin Cheesecake Banana
Philadelphia pumpkin cheesecake banana bread
Philadelphia cream cheese adds a rich and smooth texture to your pumpkin cheesecake banana bread, elevating its flavor profile. To incorporate it seamlessly, consider softening the cream cheese to room temperature before mixing it with your other ingredients. This will help avoid lumps and ensure a creamy batter. Additionally, you might want to create a marbled effect by swirling the cream cheese mixture into the pumpkin-banana batter, which not only looks appealing but also enhances the taste with each bite. Don’t forget to adjust baking time slightly, as the cream cheese may alter the moisture content.
Pumpkin banana bread
Pumpkin banana bread is a delicious fusion of flavors that combines the natural sweetness of ripe bananas with the warm spices of pumpkin. To make this recipe, use overripe bananas for optimal sweetness and moisture; the darker the peels, the better! Incorporate canned pumpkin puree and spices like cinnamon and nutmeg for that classic autumn flavor. For an extra layer of flavor, consider adding chopped nuts or a sprinkle of oats on top before baking. Remember to check for doneness with a toothpick; it should come out clean when inserted into the center.
Best pumpkin banana bread
The best pumpkin banana bread balances the sweetness of bananas with the rich, spiced flavor of pumpkin, creating a moist and flavorful loaf. Start with a combination of ripe bananas and high-quality pumpkin puree; this will ensure a perfect texture and taste. Experiment with spices, such as ginger or allspice, to enhance the flavor profile. Be mindful of the baking time; every oven is different, so begin checking for doneness a few minutes before the recommended time. Lastly, let the bread cool completely before slicing to achieve the best texture.
Pumpkin banana bread with chocolate chips
Adding chocolate chips to pumpkin banana bread creates a delightful contrast between the sweet, spiced bread and the rich chocolate. Opt for semi-sweet or dark chocolate chips for a balanced flavor that complements the pumpkin and banana. To avoid sinking, toss the chocolate chips in a little flour before mixing them into the batter; this helps distribute them evenly throughout the loaf. You can also sprinkle some on top before baking for a decorative touch. Keep an eye on the baking time, as the chocolate melts and can impact the overall doneness—check with a toothpick to ensure it’s cooked through.
As I flipped through the pages, the vibrant images of golden-brown loaves topped with swirls of cream cheese icing drew me in. I could almost hear my grandmother’s voice guiding me through the steps, her gentle encouragement echoing in my mind: “Don’t be afraid to get a little messy, dear.” That day, flour covered my kitchen counter, and so did the laughter of my children as they helped me mix the ingredients. It was a chaotic yet beautiful mess that turned into a cherished memory, and from that day onward, pumpkin loaf tapped became a beloved family tradition.
The Story Behind This Recipe
Historically, pumpkin bread dates back to the early days of American settlers, who utilized local produce and resources to create nourishing meals. Pumpkins were abundant in North America, and their versatility made them a staple in many households. As recipes evolved, the combination of pumpkin and warm spices like cinnamon and nutmeg began to emerge, giving birth to the pumpkin loaf we know and love today. The addition of cream cheese icing is a modern twist that elevates this classic dish, adding a creamy, tangy contrast to the sweet, spiced loaf.
What makes pumpkin loaf tapped special is the way it seamlessly blends the comforting flavors of fall with the practicality of a quick and easy recipe. For busy families, this loaf serves as an ideal solution for breakfast, snacks, or even dessert. It can be made ahead of time and stored, making it perfect for those hectic weeknights when you need something wholesome yet delicious to share with your loved ones.
Why You’ll Love This Dish
Seasonal relevance is another reason to embrace pumpkin loaf tapped. As soon as the first chill hits the air, and the leaves start to turn golden, this loaf becomes a symbol of fall gatherings, cozy afternoons, and festive celebrations. Whether it’s a potluck, a holiday brunch, or simply a family dinner, this recipe is sure to impress. The emotional connection I feel to this dish is profound; it represents family, tradition, and the joy of sharing something homemade with those you love.
In this article, you’ll learn not only how to make the perfect pumpkin loaf tapped, but also how to customize it to your taste. I’ll share tips for making it healthier, variations that can accommodate dietary restrictions, and the best ways to serve it. By the end, you’ll be equipped with all the knowledge needed to make this delightful loaf a centerpiece of your fall table. So, roll up your sleeves, preheat your oven, and let’s embark on this delicious journey together!
The Rich History and Cultural Significance of pumpkin loaf tapped
The rich history and cultural significance of pumpkin loaf tapped are as layered as the flavors in the loaf itself. This delightful treat has evolved from humble beginnings into a revered dish that epitomizes the spirit of autumn in many cultures. The origins of pumpkin bread can be traced back to early American settlers, who were inspired by Native American cooking techniques. They discovered that pumpkins could be transformed into a variety of dishes, from savory stews to sweet breads, making full use of this versatile gourd.
Origins and History
As settlers adapted their recipes to include local ingredients, pumpkin bread began to emerge as a staple. The earliest versions were often made with cornmeal and sweetened with molasses or honey, reflecting the agrarian roots of the communities that made them. In the 19th century, as the art of baking refined and the use of spices like cinnamon and nutmeg became popular, the pumpkin loaf we recognize today started to take shape. It became a common item in American kitchens, especially in the fall, as families sought to utilize the harvest bounty.
Regional variations of pumpkin loaf tapped have also developed over the years, influenced by local tastes and available ingredients. In New England, for example, recipes might lean towards a denser, spicier loaf, while Southern versions could incorporate pecans or use sweet potato in place of pumpkin for a unique twist. The addition of cream cheese icing is a more contemporary adaptation that adds a rich, indulgent touch to the traditional recipe, making it a favorite at gatherings and celebrations.
Cultural Significance
Across various cultures, pumpkin bread has taken on different meanings. In many American households, it symbolizes the harvest season and is often featured at Thanksgiving tables, where it can be enjoyed alongside other seasonal dishes. The act of baking pumpkin loaf tapped has become a cherished family tradition, with many passing down their recipes through generations, each adding their personal touch along the way. The loaf represents comfort, warmth, and the joy of coming together, making it a perfect dish for family gatherings and celebrations.
In recent years, pumpkin bread has gained popularity in cafes and restaurants, with many chefs putting their unique spin on this classic recipe. It has become a seasonal favorite, often appearing on menus in the fall, enticing patrons with its inviting aroma and comforting flavors. Some famous bakeries have even turned it into a signature item, further solidifying its place in contemporary American cuisine.Pumpkin cheesecake banana is not just a recipe; it’s a celebration of flavors, a soothing hug on a chilly day, and a delightful way to embrace the fall season. My journey with this unique and scrumptious dish began one crisp autumn afternoon when I found myself with an abundance of overripe bananas and a craving for something sweet yet comforting. As I rummaged through my pantry, the warm, inviting scent of pumpkin pie spices wafted through my kitchen, inspiring an idea that would lead to one of my family’s favorite desserts – pumpkin cheesecake banana bread.
As I blended the mashed bananas with creamy pumpkin and a touch of cream cheese, I was transported back to my childhood. I remember my grandmother’s kitchen, filled with the aroma of freshly baked goods, especially around Thanksgiving. Her pumpkin pie was a staple at our family gatherings, and it was always accompanied by her signature banana bread. It was during these moments that I realized the power of food to evoke memories and create connections. Combining these two beloved recipes into one seemed like an homage to those cherished memories, and thus began my love affair with pumpkin cheesecake banana.
The Story Behind This Recipe
This recipe is special because it brings together two quintessentially autumnal flavors: pumpkin and banana. While banana bread has roots in the humble tradition of using overripe bananas to reduce waste and create something delicious, pumpkin has been a staple in American kitchens long before the pumpkin spice craze took over. The combination of the two creates a moist and flavorful bread that’s not only appealing to the eye but also a treat for the palate. Adding the cheesecake element elevates it from a simple quick bread to a decadent dessert that can stand on its own.
For busy families, pumpkin cheesecake banana bread is a perfect solution. It’s a one-bowl recipe that requires minimal prep time, making it an ideal option for those hectic weeknight dinners or weekend brunches. You can whip it up in under an hour, and the best part? It keeps well! It can be made ahead of time, stored in the fridge, and enjoyed throughout the week. Each slice is a delightful combination of moist banana bread, creamy pumpkin, and a subtle cheesecake swirl that makes it feel like a special treat without being overly indulgent.
Seasonally, this dish is incredibly relevant. As the leaves turn and the air becomes crisp, our cravings shift toward comforting and warm flavors. There’s something magical about enjoying a slice of pumpkin cheesecake banana bread while sipping hot cider or coffee, wrapped in a cozy blanket. It’s perfect for fall gatherings, Thanksgiving celebrations, or simply as a delightful way to treat yourself after a long day.
Emotionally, this dish resonates with me on a deeper level. It represents a bridge between generations, connecting my memories with those of my children as I pass down the recipe. Watching them help mash the bananas or swirl in the cheesecake mixture brings joy and laughter into our kitchen, creating new memories that I hope they will cherish as much as I do. Cooking is not just about nourishment; it’s about the stories we share and the connections we forge with those we love.
In this guide, you’ll learn everything you need to know to master the art of making pumpkin cheesecake banana bread. From the ingredients you’ll need to tips on how to achieve the perfect texture and flavor, I promise to share my secrets and tricks to ensure that your bread turns out light, moist, and utterly delicious. You’ll also discover variations to suit your taste, ways to serve it, and how to incorporate this delightful dish into your seasonal celebrations. Let’s dive into the rich world of pumpkin cheesecake banana, where every bite tells a story!
The Rich History and Cultural Significance of pumpkin cheesecake banana
The rich history and cultural significance of pumpkin cheesecake banana can be traced back to the origins of its main ingredients – pumpkin and bananas. Both have deep roots in various cultures and cuisines, making this dish a delightful fusion of flavors and traditions. Pumpkins, native to North America, have been cultivated for thousands of years. They were an essential food source for Native Americans long before European settlers arrived. The versatility of pumpkins allowed them to be used in savory and sweet dishes alike, and their vibrant orange hue made them a staple in autumnal celebrations.
Origins and History
Bananas, on the other hand, have a much different journey. Originally cultivated in Southeast Asia, bananas made their way to the Americas through trade routes, becoming a beloved fruit in many households. The concept of banana bread emerged in the United States during the Great Depression, when people sought ways to use overripe bananas instead of discarding them. This practicality gave rise to a beloved tradition that continues to this day. The combination of these two ingredients in pumpkin cheesecake banana bread is a modern take on classic flavors that speaks to the resourcefulness of home cooks throughout history.
As culinary trends evolved, the introduction of cream cheese into recipes marked a significant change in dessert preparation. Cream cheese has its roots in the United States, where it became popular in the 19th century, particularly for use in cheesecakes. The idea of swirling cream cheese into banana bread is a creative evolution that elevates the dish from a simple quick bread to a luxurious dessert. It’s this blend of historical culinary practices that makes pumpkin cheesecake banana bread a unique and culturally rich dish.
Cultural Significance
Throughout the years, pumpkin cheesecake banana bread has found its place in various occasions and celebrations, especially in the fall. In many American households, it graces the table as a comforting breakfast item, an afternoon snack, or a dessert at holiday gatherings. Its warm flavors and inviting texture make it perfect for sharing with family and friends, fostering connections and creating memories around the dining table.
In recent years, the rise of social media has brought desserts like pumpkin cheesecake banana bread into the spotlight. Home bakers from all over have shared their creations, showcasing variations and adaptations that cater to different dietary needs and preferences. This has led to a renewed interest in traditional recipes, encouraging younger generations to embrace the art of baking and the joy it brings.
Nutritional Benefits
Beyond its rich history and cultural significance, pumpkin cheesecake banana bread also offers nutritional benefits that make it a guilt-free indulgence. Pumpkins are packed with vitamins A and C, fiber, and antioxidants, which can contribute to overall health. Bananas add potassium, vitamin B6, and a natural sweetness that reduces the need for added sugars in recipes. When combined with the healthy fats from eggs and the protein from cream cheese, this dish becomes a well-rounded treat that fits into a balanced diet.
In conclusion, the pumpkin cheesecake banana bread is not merely a dessert; it’s a reflection of history, culture, and the beauty of sharing food with loved ones. Its roots are deeply intertwined with traditional practices, and its evolution over time showcases the creativity of home cooks. As you embark on your journey to create this delightful dish, remember that you’re not just baking; you’re participating in a rich culinary heritage that spans generations. Embrace the flavors, share the love, and savor every bite of your pumpkin cheesecake banana creation!
Essential Ingredients for Perfect pumpkin cheesecake banana
When it comes to baking, the ingredients you choose can make or break your dish. In the case of pumpkin cheesecake banana bread, each ingredient plays a vital role in creating a harmonious blend of flavors and textures. This unique recipe marries the creamy richness of cheesecake with the warm spiciness of pumpkin and the comforting sweetness of ripe bananas, resulting in a delightful treat that’s perfect for any season.
Essential Ingredients
- 2 ripe bananas – The bananas should be overripe, with lots of brown spots on the skin. This ensures they are sweet enough to balance the spices in the bread. They provide moisture and natural sweetness.
- 1 cup pumpkin puree – Use pure pumpkin puree rather than pumpkin pie filling, which contains added sugars and spices. This ingredient contributes to the bread’s moisture and rich flavor.
- 8 oz cream cheese – For the cheesecake layer, full-fat cream cheese is ideal as it offers a rich, creamy texture. Make sure it’s at room temperature for easier mixing.
- 1/2 cup granulated sugar – This sweetens the bread and balances the tanginess of the cream cheese.
- 1/2 cup light brown sugar – Brown sugar adds a deeper flavor and moisture due to its molasses content, enhancing the overall taste of the pumpkin cheesecake banana.
- 1/2 cup vegetable oil – This keeps the bread moist and tender. Alternatively, you can use melted coconut oil for a tropical twist.
- 2 large eggs – Eggs act as a binder, helping to hold the ingredients together while adding richness.
- 1 1/2 cups all-purpose flour – The base of your bread, flour provides structure. For a gluten-free option, you can substitute with a gluten-free flour blend.
- 1 teaspoon baking soda – This leavening agent helps the bread rise, resulting in a light and fluffy texture.
- 1 teaspoon baking powder – A secondary leavening agent that works in tandem with baking soda for optimal rise.
- 1 teaspoon cinnamon – Cinnamon adds warmth and a classic fall flavor that complements pumpkin beautifully.
- 1/2 teaspoon nutmeg – Nutmeg enhances the spice profile, contributing a warm, aromatic quality.
- 1/4 teaspoon salt – A crucial ingredient that balances the sweetness and enhances all the flavors.
Each of these ingredients has been thoughtfully selected to create an irresistible pumpkin cheesecake banana bread. For instance, using ripe bananas not only ensures sweetness but also adds a natural flavor that pairs beautifully with pumpkin. When selecting your pumpkin puree, look for brands that offer 100% pure pumpkin with no additives.
Shopping Tips
When embarking on your ingredient shopping journey, consider visiting local farmers’ markets, especially during the fall season when pumpkins are abundant. Not only will you find fresh, high-quality ingredients, but you’ll also be supporting local farmers. If you’re opting for canned pumpkin puree, brands like Libby’s are often recommended for their consistency and flavor. Also, check the expiration date to ensure freshness.
For the best bananas, look for ones with a rich yellow color and plenty of brown spots, as these indicate optimal ripeness. When it comes to cream cheese, opt for full-fat varieties for the best texture and flavor. Always check to see if the packaging is intact and the expiration date is current.
Substitutions and Alternatives
Not everyone can enjoy traditional ingredients due to dietary restrictions or personal preferences, so here are some substitution options for your pumpkin cheesecake banana bread:
- Bananas: If you’re allergic to bananas or simply dislike them, unsweetened applesauce can be a great substitute, although the flavor will change slightly.
- Cream Cheese: For a dairy-free option, use vegan cream cheese. It’s essential to ensure the texture is similar to traditional cream cheese for the best results.
- Flour: For those on a gluten-free diet, you can use almond flour or a gluten-free all-purpose blend. Just keep in mind that different flours may require adjustments in liquid content.
Lastly, when considering organic versus conventional ingredients, organic options often provide fewer pesticides and may have a better flavor profile. However, it’s essential to balance your budget with quality. Look for seasonal sales or bulk options to save costs while ensuring you get the best ingredients for your pumpkin cheesecake banana bread.
In conclusion, the ingredients for your pumpkin cheesecake banana bread lay the foundation for a dish that is not only delicious but also filled with warmth and comfort. By selecting high-quality ingredients, understanding their roles, and knowing how to source them effectively, you’re setting yourself up for baking success.
Detailed Step-by-Step pumpkin cheesecake banana Cooking Instructions
Now that we have gathered our ingredients, it’s time to roll up our sleeves and dive into the exciting process of creating a delectable pumpkin cheesecake banana bread. This recipe may seem intricate at first glance, but with careful attention to detail and a little bit of patience, you’ll be rewarded with a stunning loaf that will impress anyone lucky enough to try it. Let’s break it down step by step.
Preparation Steps
- Gather Your Ingredients: Start by assembling all your ingredients on the counter. This is known as mise en place, a French term that means “everything in its place.” It’s essential in baking to have everything ready before you start mixing.
- Preheat the Oven: Preheat your oven to 350°F (175°C). Preheating ensures that your bread bakes evenly and achieves the perfect rise.
- Prepare Your Baking Pan: Grease a 9×5 inch loaf pan with butter or cooking spray. You can also line the bottom with parchment paper for easy removal later.
- Mash the Bananas: In a medium bowl, mash the ripe bananas with a fork until smooth. The more mashed they are, the better they will incorporate into the batter.
- Mix the Pumpkin Puree: Add the pumpkin puree to the mashed bananas, blending them together until fully combined.
- Make the Cream Cheese Mixture: In a separate bowl, beat the softened cream cheese with the granulated sugar and brown sugar using a hand mixer or a stand mixer. Mix until the mixture is creamy and smooth, which usually takes about 2-3 minutes.
- Add Eggs and Oil: Once your cream cheese mixture is smooth, add the eggs one at a time, mixing well after each addition. Then, mix in the vegetable oil until fully incorporated.
- Combine Dry Ingredients: In another bowl, whisk together the flour, baking soda, baking powder, cinnamon, nutmeg, and salt. This step ensures that all your dry ingredients are evenly distributed.
- Mix Wet and Dry Ingredients: Gradually add the dry ingredients to the wet ingredients, mixing until just combined. Be careful not to overmix, as this can lead to a dense bread.
Cooking Process
- Add the Banana-Pumpkin Mixture: Gently fold in the banana-pumpkin mixture into the batter. Use a spatula to ensure an even distribution without overmixing.
- Layer the Cream Cheese Mixture: Spoon half of the batter into the prepared loaf pan. Then, add dollops of the cream cheese mixture on top. Use a knife or skewer to swirl the cream cheese into the batter gently.
- Add Remaining Batter: Pour the remaining batter over the cream cheese layer and smooth the top with a spatula. This layering creates a beautiful marbled effect when sliced.
- Bake the Bread: Carefully place the loaf pan in the preheated oven. Bake for about 60-70 minutes, or until a toothpick inserted into the center comes out clean. Keep an eye on it as baking times may vary based on your oven.
- Check for Doneness: Towards the end of the baking time, you can start checking for doneness. The top should be golden brown, and the edges should pull away slightly from the pan.
- Cool the Bread: Once baked, remove the loaf from the oven and let it cool in the pan for about 10 minutes. Then, transfer it to a wire rack to cool completely. This cooling process is crucial as it allows the flavors to meld beautifully.
Final Assembly
- Slice and Serve: Once the bread has cooled, slice it into thick pieces. You can serve it plain or with a smear of butter or cream cheese frosting for an extra indulgent treat.
- Storage: Store any leftovers in an airtight container at room temperature for up to three days or refrigerate for up to a week. You can also freeze slices for later enjoyment; just wrap them tightly in plastic wrap and then in aluminum foil before freezing.
- Enjoy Your Creation: Take a moment to savor your creation. The first bite of this pumpkin cheesecake banana bread will transport you into a world of flavors – it’s sweet, creamy, and spiced just right. Don’t forget to share with friends and family, as they will certainly want a taste of your delicious baking!
Throughout this process, don’t hesitate to taste the batter to adjust flavors if needed. You might find yourself wanting to add a pinch more cinnamon or a splash of vanilla extract. Remember, baking is as much about personal expression as it is about following a recipe. By following these steps closely, you’re on your way to crafting a delightful pumpkin cheesecake banana bread that will impress everyone around you. Happy baking!
Professional Tips and Techniques for pumpkin cheesecake banana
When it comes to creating the perfect pumpkin cheesecake banana bread, a few professional tips and techniques can take your baking from ordinary to extraordinary. The combination of sweet bananas and creamy pumpkin cheesecake layered within a moist bread creates a delightful treat that is perfect for any occasion. Let’s dive into some expert insights that will help you master this recipe!
Professional Techniques
First and foremost, understanding the balance of flavors in a pumpkin cheesecake banana bread is key. To achieve a harmonious blend, make sure to use ripe bananas, as they add natural sweetness and moisture. A good rule of thumb is to use bananas that are heavily speckled, as these are the sweetest. For the pumpkin cheesecake layer, opt for pure pumpkin puree instead of pumpkin pie filling, which contains added sugars and spices that could overshadow the banana flavor.
Another essential technique is to ensure your ingredients are at room temperature before mixing. This includes eggs, cream cheese, and any dairy products you plan to use. Room temperature ingredients blend together more seamlessly, creating a smooth cheesecake layer that will bake evenly. Additionally, when mixing the batter, be careful not to overmix. Overworking the dough can lead to a dense bread, while a gentle fold will keep it light and fluffy.
For those experienced in the kitchen, consider experimenting with a reverse creaming method. This technique involves mixing the dry ingredients with fat (like butter) before adding the wet ingredients. This creates a beautifully tender crumb and enhances the overall texture of your pumpkin cheesecake banana bread.
Troubleshooting Guide
Even the best bakers encounter challenges, so it’s important to know how to troubleshoot common problems when making pumpkin cheesecake banana bread. If your bread is turning out too dense, it might be due to overmixing or using too much flour. To avoid this, measure your flour correctly by spooning it into the measuring cup and leveling it off with a knife.
Another common issue is the cheesecake layer sinking or cracking during baking. To prevent this, ensure your cream cheese is softened properly, and mix it until completely smooth before incorporating the eggs. Also, consider baking in a water bath to maintain even heat distribution, which can help prevent cracking.
If your bread is browning too quickly, consider covering it with aluminum foil midway through baking. This will protect the top while allowing the center to cook through. Always use a toothpick to check for doneness; it should come out clean or with a few moist crumbs.
Presentation Tips
Presentation is key when it comes to desserts, and your pumpkin cheesecake banana bread deserves to shine. Once baked and cooled, consider slicing the bread and arranging it on a beautiful platter. A sprinkle of powdered sugar can add a touch of elegance, while a drizzle of caramel sauce or a dollop of whipped cream can elevate the visual appeal.
Pairing your bread with seasonal fruits like pomegranate seeds or cranberries can add color and freshness. You might also want to serve it with a side of cream cheese frosting for extra indulgence. When it comes to serving, consider offering a range of beverages that complement the flavors of the pumpkin cheesecake banana bread. A spiced chai latte or a warm apple cider can create a delightful pairing, enhancing the overall experience.
Finally, if you’re planning to serve this dish at a gathering, consider baking it in mini loaf pans for individual servings. This not only makes for a beautiful presentation but also allows guests to enjoy their own loaf without the need for slicing. With these tips and techniques, you’ll be well on your way to mastering pumpkin cheesecake banana bread, impressing your friends and family with your baking prowess!
Creative Variations and Adaptations of pumpkin cheesecake banana
The beauty of pumpkin cheesecake banana bread lies in its versatility. While the classic recipe is divine on its own, there are countless ways to put a creative spin on this delightful treat. Let’s explore some variations and adaptations that can cater to different tastes, dietary needs, and seasonal inspirations!
Seasonal Variations
As the seasons change, so too can the ingredients in your pumpkin cheesecake banana bread. In the fall, consider incorporating spices like nutmeg, allspice, or even a hint of maple syrup for a cozy, warm flavor profile. You might also experiment with adding chopped apples or pears for a fruity twist that complements the banana and pumpkin perfectly.
In winter, switch it up with a hint of peppermint extract in the cheesecake layer. This unexpected flavor can create a festive treat that’s perfect for holiday gatherings. Spring and summer can introduce tropical flavors—think coconut or pineapple—to create a fun, sunny version of this bread that’s refreshing and light.
Dietary Adaptations
For those who follow specific dietary plans, adapting the pumpkin cheesecake banana bread to meet your needs is entirely possible. If you’re looking for a gluten-free option, substitute regular flour with a gluten-free all-purpose blend. Ensure that your baking soda and powder are also gluten-free to avoid cross-contamination.
If you’re vegan, you can replace eggs with flax eggs (1 tablespoon of ground flaxseed mixed with 2.5 tablespoons of water equals one egg) and use a plant-based cream cheese alternative for the cheesecake layer. This way, you can still enjoy the creamy, dreamy texture without compromising on dietary preferences.
For a lower sugar option, consider using ripe bananas as your primary sweetener and reducing added sugars in the recipe. You can also swap out traditional sugar for natural sweeteners like honey or agave syrup, though these may alter the texture slightly.
Creative Twists
The heart of culinary creativity lies in exploration. One fun twist on the classic pumpkin cheesecake banana bread is to add a swirl of Nutella or peanut butter through the batter before baking. This not only adds a rich flavor but also creates an eye-catching marbled effect in the finished loaf.
Another idea is to incorporate different nuts or seeds into the batter. Walnuts, pecans, or even pumpkin seeds can add a delightful crunch and additional nutritional benefits. For a fancier touch, try adding a streusel topping made from oats, brown sugar, and cinnamon that will create a sweet crust on top of your bread.
If you’re feeling experimental, explore different cooking methods. Instead of baking, you can try making a slow cooker version of the pumpkin cheesecake banana bread. Grease your slow cooker well, pour in the batter, and set it on low for several hours. The result is a beautifully moist bread with a unique texture that’s a fun twist on the classic baking method.
Lastly, don’t let leftovers go to waste! Transform stale bread into delicious bread pudding by cubing the pumpkin cheesecake banana bread and soaking it in a mixture of eggs, milk, and spices before baking. Serve it warm with a scoop of vanilla ice cream or a drizzle of warm caramel sauce for a decadent dessert that feels entirely new.
With these creative variations and adaptations, your pumpkin cheesecake banana bread will never become stale. Instead, it will always offer something fresh and delightful, ensuring that every bite is as exciting as the first!
Storage, Reheating, and Meal Prep for pumpkin cheesecake banana
When it comes to savoring a delicious slice of pumpkin cheesecake banana bread, the last thing you want is for it to lose its delightful flavor or texture. Proper storage is crucial to ensure that your treat remains moist, flavorful, and safe to eat. In this guide, we’ll explore everything you need to know about storing, reheating, and meal prepping your pumpkin cheesecake banana bread so you can enjoy it at its best, whether it’s just baked or a few days old.
Short-term Storage
After baking your scrumptious pumpkin cheesecake banana bread, you’ll want to cool it completely to room temperature before storing. This step is crucial; if you store it while still warm, moisture will build up in the container, leading to sogginess. Once cooled, wrap the bread tightly in plastic wrap or aluminum foil to prevent air exposure. If you’re like me and tend to get a little distracted in the kitchen, using a good airtight container can also work wonders to keep your bread fresh.
For short-term storage, your pumpkin cheesecake banana bread can be kept at room temperature for about 2-3 days. Just make sure it’s stored in a cool, dry place, away from direct sunlight. I often place it in my kitchen pantry, where it stays perfectly cozy without getting stale. However, if you live in a particularly warm or humid environment, it’s better to store it in the refrigerator to extend its shelf life.
If you decide to refrigerate your pumpkin cheesecake banana bread, use a container that’s suitable for cold storage, like a glass or plastic container with a tight-fitting lid. This will help keep your bread fresh for about a week. Just be aware that refrigeration can slightly alter the texture, making it a bit denser than when it was freshly baked.
Freezing and Long-term Storage
If you find yourself with more pumpkin cheesecake banana bread than you can eat within a week, freezing is an excellent option to preserve its deliciousness. To freeze, first slice the bread into individual portions. This makes it easier to thaw only what you need later. Wrap each slice tightly in plastic wrap or aluminum foil and place them in a freezer-safe bag or container. Remember to label your package with the date; frozen bread is best consumed within 3 months for optimal flavor and texture.
When you’re ready to enjoy your frozen pumpkin cheesecake banana bread, there are a couple of methods for thawing. The quickest way is to remove a slice from the freezer and let it sit at room temperature for about 30 minutes. Alternatively, you can thaw it in the refrigerator overnight. For those who can’t wait, pop a slice in the microwave for about 15-20 seconds, but be cautious not to overheat it, as this can lead to a chewy texture.
Reheating Best Practices
Reheating your pumpkin cheesecake banana bread properly is essential to restoring some of that fresh-baked goodness. If you’re reheating from the fridge, you can use a toaster oven or standard oven for the best results. Preheat your oven to 350°F (175°C), then place the slice on a baking sheet. You can cover it lightly with foil to prevent the edges from browning too much. Heat for about 10-15 minutes or until warmed through. This method not only warms the bread but also revives its lovely aroma.
If you’re in a rush and using a microwave, place the slice on a microwave-safe plate and cover it with a paper towel to retain moisture. Heat it for about 15-20 seconds, checking to make sure it doesn’t become rubbery. While the microwave is convenient, I always prefer the oven method as it brings back the delightful texture of freshly baked bread.
Meal prepping your pumpkin cheesecake banana bread can be a game changer, especially for busy weeks. Consider whipping up a double batch and slicing it for quick breakfasts or snacks. You can also pair it with yogurt or nut butter for a balanced meal. Portioning out your slices and storing them in individual bags can make grabbing a quick bite so much easier.
Lastly, let’s touch on food safety. Always ensure your hands, utensils, and surfaces are clean when handling food. If your pumpkin cheesecake banana bread shows any signs of mold or an off smell after storage, it’s best to err on the side of caution and discard it. By following these storage and reheating tips, you can enjoy your delicious pumpkin cheesecake banana bread for days—or even weeks—without losing any quality or flavor!
Nutritional Benefits and Health Information
When indulging in a slice of pumpkin cheesecake banana bread, it’s good to have an understanding of the nutritional benefits it offers. This delightful dessert combines the rich flavors of pumpkin and banana, resulting in a moist and satisfying treat. In this section, we’ll delve into the nutritional breakdown, health benefits, dietary considerations, and even some healthy modifications you can make to this recipe.
Nutritional Profile
A typical slice of pumpkin cheesecake banana bread contains a variety of ingredients that contribute to its overall nutritional profile. Ingredients such as bananas, pumpkin puree, and cream cheese play vital roles in packing this bread with nutrients. On average, a slice (about 1/10th of a loaf) contains approximately 200-250 calories, depending on the specific recipe and portion size.
Within those calories, you’ll find a mix of macronutrients. A slice typically contains around 3-5 grams of protein, 8-10 grams of fat (mainly from the cream cheese and any added oils), and 30-35 grams of carbohydrates. The carbohydrate content includes natural sugars from the bananas and the pumpkin, making it a sweet indulgence. It’s essential to keep in mind that sugar content varies based on how much sweetener you choose to add.
Health Benefits
Let’s take a moment to appreciate the health benefits of the primary ingredients in pumpkin cheesecake banana bread. Bananas are a fantastic source of potassium, which is essential for heart health and regulating blood pressure. They also contain dietary fiber, which aids digestion and keeps you feeling fuller for longer. The pumpkin puree is rich in vitamins A and C, both of which boost your immune system and promote healthy skin.
Additionally, pumpkin is high in antioxidants, which can help combat oxidative stress in the body. Combined with the cream cheese, which adds a creamy texture and a dose of calcium, you have a treat that not only satisfies your sweet tooth but also delivers some nutritional benefits. If you’re looking for a wholesome snack, this pumpkin cheesecake banana bread can fit the bill!
Dietary Considerations
As with any recipe, there are dietary considerations to keep in mind, especially for those with allergies or specific dietary restrictions. The traditional recipe contains gluten from all-purpose flour, so for those who are gluten-intolerant or have celiac disease, substituting gluten-free flour is an excellent option. You can also use almond flour or oat flour for a slightly different flavor and texture.
For those watching their sugar intake, consider substituting granulated sugar with natural sweeteners like honey or maple syrup, or even using mashed dates for added sweetness without refined sugar. If you want to make this pumpkin cheesecake banana bread dairy-free, you can replace the cream cheese with a dairy-free alternative or a cashew cream that mimics the creamy texture.
In terms of fitting into various diet plans, this bread can be enjoyed in moderation as part of a balanced diet. It can be a suitable addition to a breakfast meal alongside protein sources like eggs or Greek yogurt or as a mid-afternoon snack. If you’re following a specific diet plan, such as paleo or keto, be sure to adjust the ingredients accordingly to align with your goals.
Lastly, if you’re comparing your pumpkin cheesecake banana bread to similar baked goods, you’ll find that it holds its own quite well. Traditional banana bread can be high in sugar and fat, while the addition of pumpkin puree can lower the calorie count and increase fiber content. So, the next time you crave a sweet treat, consider reaching for a slice of this pumpkin cheesecake banana bread, knowing you’re making a deliciously satisfying choice that also brings some nutritional benefits to the table!
Frequently Asked Questions About Pumpkin Cheesecake Banana
Philadelphia pumpkin cheesecake banana bread
Philadelphia cream cheese adds a rich and smooth texture to your pumpkin cheesecake banana bread, elevating its flavor profile. To incorporate it seamlessly, consider softening the cream cheese to room temperature before mixing it with your other ingredients. This will help avoid lumps and ensure a creamy batter. Additionally, you might want to create a marbled effect by swirling the cream cheese mixture into the pumpkin-banana batter, which not only looks appealing but also enhances the taste with each bite. Don’t forget to adjust baking time slightly, as the cream cheese may alter the moisture content.
Pumpkin banana bread
Pumpkin banana bread is a delicious fusion of flavors that combines the natural sweetness of ripe bananas with the warm spices of pumpkin. To make this recipe, use overripe bananas for optimal sweetness and moisture; the darker the peels, the better! Incorporate canned pumpkin puree and spices like cinnamon and nutmeg for that classic autumn flavor. For an extra layer of flavor, consider adding chopped nuts or a sprinkle of oats on top before baking. Remember to check for doneness with a toothpick; it should come out clean when inserted into the center.
Best pumpkin banana bread
The best pumpkin banana bread balances the sweetness of bananas with the rich, spiced flavor of pumpkin, creating a moist and flavorful loaf. Start with a combination of ripe bananas and high-quality pumpkin puree; this will ensure a perfect texture and taste. Experiment with spices, such as ginger or allspice, to enhance the flavor profile. Be mindful of the baking time; every oven is different, so begin checking for doneness a few minutes before the recommended time. Lastly, let the bread cool completely before slicing to achieve the best texture.
Pumpkin banana bread with chocolate chips
Adding chocolate chips to pumpkin banana bread creates a delightful contrast between the sweet, spiced bread and the rich chocolate. Opt for semi-sweet or dark chocolate chips for a balanced flavor that complements the pumpkin and banana. To avoid sinking, toss the chocolate chips in a little flour before mixing them into the batter; this helps distribute them evenly throughout the loaf. You can also sprinkle some on top before baking for a decorative touch. Keep an eye on the baking time, as the chocolate melts and can impact the overall doneness—check with a toothpick to ensure it’s cooked through.
Nutritional Benefits
Beyond its delicious taste and comforting qualities, pumpkin loaf tapped also offers several nutritional benefits. Pumpkin itself is a powerhouse of nutrients, rich in vitamins A and C, potassium, and fiber. These nutrients contribute to overall health, promoting good vision, a strong immune system, and digestive health. When combined with whole grains in the flour and healthy fats from nuts or oils, pumpkin bread can be a wholesome addition to your diet.
Moreover, by using alternative sweeteners or reducing the sugar content, you can make the loaf even more nutritious without sacrificing flavor. This adaptability makes pumpkin loaf tapped an excellent choice for those looking for a guilt-free treat that still satisfies the sweet tooth.
In summary, the rich history and cultural significance of pumpkin loaf tapped are intertwined with the traditions of family and community. As you explore this delightful recipe, you’ll not only be creating a delicious loaf but also embracing a rich tapestry of flavors, stories, and memories that have been passed down through generations.
Essential Ingredients for Perfect pumpkin loaf tapped
When it comes to baking a delightful pumpkin loaf tapped with cream cheese icing, the ingredients you choose can make all the difference. This loaf is not just a treat; it’s a celebration of fall, evoking the warmth of spices and the richness of pumpkin. Let’s dive into the essential ingredients that will help you create this delightful dessert, along with tips on selecting the best quality components.
Essential Ingredients
- All-Purpose Flour: 2 cups
- Granulated Sugar: 1 cup
- Brown Sugar: 1 cup, packed
- Pumpkin Purée: 1 can (15 oz) or 2 cups homemade
- Eggs: 3 large
- Vegetable Oil: ½ cup
- Milk: ½ cup
- Baking Powder: 2 teaspoons
- Baking Soda: 1 teaspoon
- Ground Cinnamon: 1 teaspoon
- Ground Nutmeg: ½ teaspoon
- Ground Ginger: ½ teaspoon
- Salt: ½ teaspoon
- Vanilla Extract: 1 teaspoon
- Cream Cheese: 8 oz, softened
- Powdered Sugar: 2 cups
- Butter: ½ cup, softened
- Milk for Icing: 1-2 tablespoons
Each ingredient plays a pivotal role. For instance, the pumpkin purée is not just the star of the show, but it also adds moisture to the loaf. Opt for 100% pure pumpkin purée, avoiding pumpkin pie filling which contains added sugars and spices. As for the flour, it provides structure and stability; using all-purpose flour is ideal for achieving that perfect loaf texture. If you’re looking to experiment, try substituting half of the all-purpose flour with whole wheat flour for a nuttier flavor and additional health benefits.
Sweetness is achieved through both granulated and brown sugar, with the latter adding depth due to its molasses content. The combination of these sugars not only helps with flavor but also contributes to the loaf’s moistness. The eggs bind the ingredients together and add richness, while the vegetable oil keeps the loaf tender. You can also use melted coconut oil or unsweetened applesauce as alternatives to reduce fat content.
Spices such as cinnamon, nutmeg, and ginger evoke the essence of autumn and are essential for creating that warm, cozy flavor profile. They not only enhance the taste but also carry health benefits, such as anti-inflammatory properties. And let’s not forget the cream cheese icing; it’s the luxurious finishing touch that balances the loaf’s sweetness and richness.
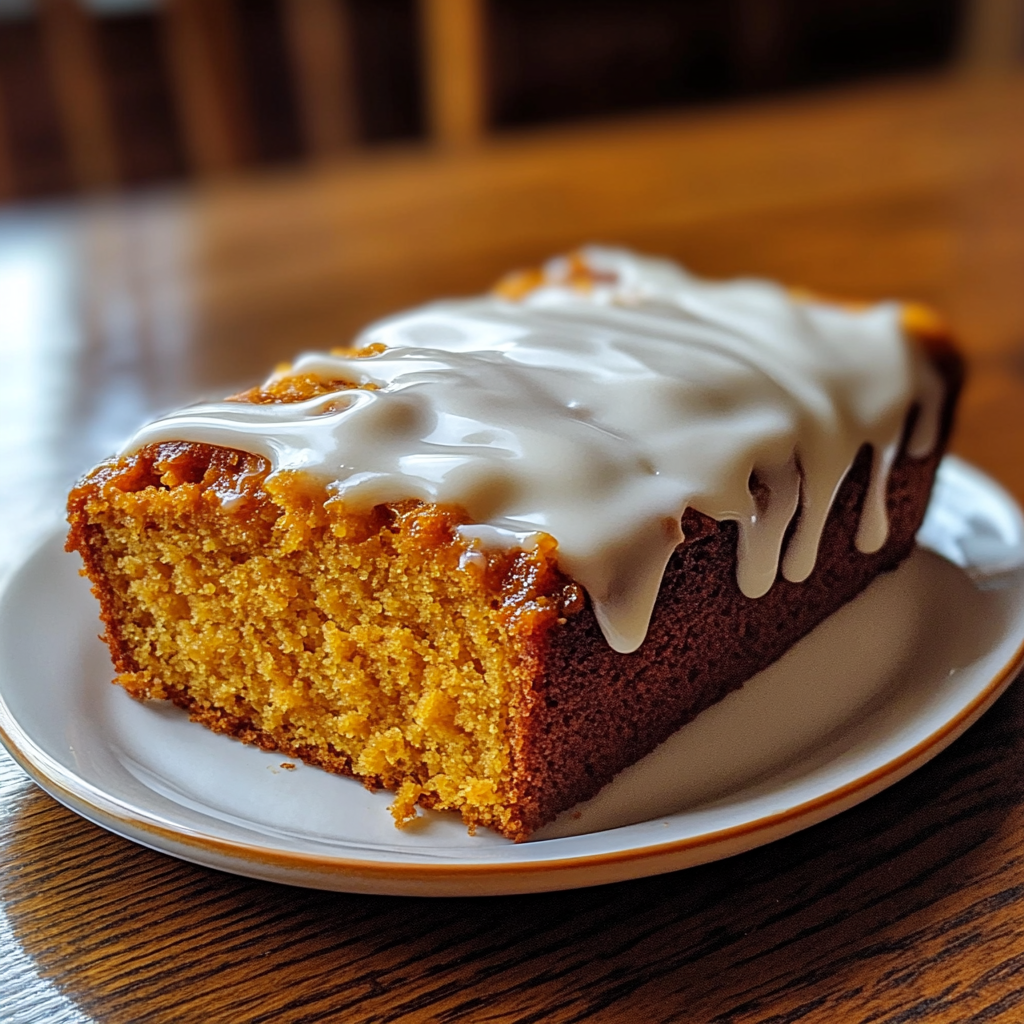
Shopping Tips
When shopping for ingredients, quality is key. For the best results, consider using organic ingredients when possible. Organic flour and sugars are less processed and can yield a more natural flavor. Pay attention to the expiration dates on your baking powder and soda; fresh leavening agents are crucial for achieving that perfect rise in your pumpkin loaf tapped.
Local farmers’ markets are excellent places to source fresh pumpkins during the fall season. If you’re opting for canned pumpkin, look for brands that specifically mention “pure pumpkin” on the label. Check the cream cheese for freshness, as it should be creamy and without any lumps. For butter, choose unsalted to maintain control over the saltiness in your recipe.
Substitutions and Alternatives
For those with dietary restrictions, there are plenty of substitutions available. If you need a gluten-free option, substitute all-purpose flour with a gluten-free flour blend, ensuring it contains xanthan gum for structure. For vegans, you can replace eggs with flaxseed meal (1 tablespoon of flaxseed mixed with 2.5 tablespoons of water per egg) and use plant-based milk in place of dairy milk.
For a lower-sugar version, consider using natural sweeteners like honey or agave syrup, but adjust the liquid content accordingly. If you can’t find cream cheese, a vegan cream cheese alternative or a simple glaze made from powdered sugar and milk can work in a pinch.
Finally, remember that ingredient storage is crucial for maintaining freshness. Keep your flour and sugars in airtight containers in a cool, dark place to prevent spoilage. Pumpkin purée should be refrigerated after opening and can last up to a week. Eggs can be stored in their original carton in the refrigerator for maximum freshness.
In conclusion, the ingredients you choose for your pumpkin loaf tapped will significantly influence the final product. By selecting high-quality items, considering substitutions when necessary, and following expert tips, you’ll be well on your way to creating a delicious and moist pumpkin loaf that showcases the flavors of fall.
Detailed Step-by-Step pumpkin loaf tapped Cooking Instructions
Baking a pumpkin loaf tapped with cream cheese icing is not only a delightful culinary project but also a rewarding experience that fills your home with the warm, inviting scents of autumn. Below, I’ll walk you through the detailed steps to prepare this delicious loaf, ensuring you have all the information you need to create a perfect result.
Preparation Steps
- Preheat Your Oven: Start by preheating your oven to 350°F (175°C). This is a crucial step to ensure your pumpkin loaf bakes evenly. While your oven is heating up, prepare your loaf pan by greasing it with butter or cooking spray, and consider lining it with parchment paper for easy removal later.
- Mise en Place: Gather all your ingredients and tools. Having everything ready before you start mixing will make the process smoother and more enjoyable. You will need mixing bowls, measuring cups and spoons, a whisk, and an electric mixer or a wooden spoon.
- Mix Dry Ingredients: In a medium bowl, whisk together the all-purpose flour, baking powder, baking soda, salt, cinnamon, nutmeg, and ginger. This ensures that the leavening agents and spices are evenly distributed throughout the flour before combining with wet ingredients.
- Mix Wet Ingredients: In a large mixing bowl, combine the granulated sugar, brown sugar, and eggs. Beat them together until the mixture is light and fluffy. This step is essential for incorporating air into the batter, which will help your loaf rise. Next, mix in the pumpkin purée, vegetable oil, milk, and vanilla extract until well combined.
Cooking Process
- Combine Ingredients: Gradually add the dry mixture to the wet mixture, stirring gently with a spatula or wooden spoon. Be careful not to overmix; you want just enough to combine the ingredients without developing too much gluten, which can make the loaf tough.
- Check the Consistency: The batter should be thick but pourable. If it appears too dry, add a tablespoon more of milk until you reach the right consistency. This step is crucial; a well-hydrated batter will yield a moist loaf.
- Pour into the Loaf Pan: Transfer the batter into your prepared loaf pan, smoothing the top with a spatula. Give the pan a gentle shake to level the batter, which helps it bake evenly.
- Bake: Place the loaf pan in the preheated oven and bake for about 60-70 minutes. Keep an eye on it; you may need to rotate the pan halfway through for even baking. To check if it’s done, insert a toothpick into the center; it should come out clean or with a few moist crumbs.
- Cool the Loaf: Once baked, remove the loaf from the oven and let it cool in the pan for about 10 minutes. Then, carefully turn it out onto a wire rack to cool completely. This cooling step is vital for the texture; cutting into a hot loaf can result in a gummy texture.
Final Assembly
- Prepare the Cream Cheese Icing: While the loaf is cooling, prepare the icing. In a medium bowl, beat the softened cream cheese and butter together until smooth. Gradually add the powdered sugar, mixing until fully incorporated. Adjust the consistency by adding milk, one tablespoon at a time, until you achieve a spreadable texture.
- Assemble: Once your loaf has completely cooled, generously spread the cream cheese icing over the top. You can use a spatula or a piping bag for a more decorative look. The icing should be thick enough to hold its shape but smooth enough to spread easily.
- Serving and Enjoying: Slice the loaf and serve it fresh. It’s delightful on its own but pairs wonderfully with a cup of coffee or tea. The flavors of pumpkin and spices will fill your kitchen and warm your heart, making it perfect for gatherings or a cozy night in.
- Storing Leftovers: If you have leftovers, store them in an airtight container in the refrigerator for up to a week. You can also freeze the loaf; wrap it tightly in plastic wrap and then in aluminum foil to prevent freezer burn. It will keep well for up to three months.
By following these detailed steps, you’ll create a wonderful pumpkin loaf tapped with cream cheese icing that will impress your family and friends. Remember to enjoy the process, savor the aromas, and most importantly, indulge in this seasonal treat!
Professional Tips and Techniques for pumpkin loaf tapped
Professional Tips and Techniques for pumpkin loaf tapped
When it comes to baking a delicious pumpkin loaf tapped with cream cheese icing, a little insider knowledge goes a long way. Whether you’re a novice baker or a seasoned pro, there are professional tips and techniques that can elevate your loaf from good to extraordinary. Here’s a deep dive into some of the best practices that will ensure your pumpkin loaf tapped not only tastes fantastic but also looks appealing.
Professional Techniques
Starting with the basics, one of the critical factors in achieving a perfect pumpkin loaf tapped is selecting the right pumpkin. Freshly pureed pumpkin yields a moist and flavorful loaf, but if you opt for canned pumpkin, choose a high-quality brand without additives. The puree should be dense and vibrant in color.
Next, let’s talk about the mixing process. For best results, use the creaming method when incorporating the sugar and butter. This means you should mix the softened butter and sugar together until they are light and fluffy, which introduces air into the batter and contributes to a lighter texture. Afterward, add the eggs one at a time, ensuring each is fully incorporated before adding the next. This process can significantly enhance the structure of your pumpkin loaf tapped.
When it comes to spices, the traditional combination of cinnamon, nutmeg, and ginger is classic, but don’t shy away from experimenting with cardamom or allspice for a more complex flavor profile. Adding these spices at the beginning of your mixing process allows their flavors to meld beautifully into the batter.
Troubleshooting Guide
Even the most experienced bakers face challenges. Let’s address some common issues you might encounter when baking your pumpkin loaf tapped. One common problem is a loaf that sinks in the middle. This can happen if your batter is over-mixed or if there isn’t enough flour to balance the moisture from the pumpkin. Always measure your flour accurately and avoid over-mixing once you add the dry ingredients.
Another issue is a loaf that turns out too dry. This can occur if you bake it for too long or at too high a temperature. Always check for doneness by inserting a toothpick into the center; it should come out clean or with a few moist crumbs, not completely dry. Adjust your oven temperature based on your specific appliance, as some can run hotter than others.
Equipment Recommendations and Kitchen Tools
To execute your pumpkin loaf tapped flawlessly, having the right tools is essential. A quality loaf pan is crucial; a dark, non-stick pan can promote even browning, while a glass or light-colored pan may cause the edges to darken before the center is cooked through. Consider investing in a kitchen scale for precise measurements, particularly if you are scaling the recipe up or down.
Mixing bowls of varying sizes, a good whisk, and a rubber spatula will also enhance your baking experience. A stand mixer can be a great investment for frequent bakers, as it saves time and effort, but a hand mixer works just as well for occasional bakers.
Make-Ahead and Meal Prep Strategies
If you’re anything like me, you love preparing ahead of time, especially during the busy fall season. You can make the pumpkin loaf batter in advance and store it in the refrigerator for up to 24 hours. Just ensure you bring it back to room temperature before baking for the best results. Alternatively, you can bake the loaf in advance and freeze it, wrapped tightly in plastic wrap and aluminum foil. When ready to enjoy, simply thaw it at room temperature and reheat slightly in the oven before serving.
Scaling the Recipe Up or Down
Scaling recipes can be a daunting task, but for your pumpkin loaf tapped, it’s straightforward. If you want to make mini loaves, simply divide the batter into smaller loaf pans and reduce the baking time accordingly. For larger gatherings, doubling the recipe is easy; just ensure you have a mixer that can handle the larger volume and check for doneness earlier, as a larger loaf may bake differently.
Presentation Tips
A beautiful presentation can enhance the enjoyment of your pumpkin loaf tapped. Once cooled, generously ice the top with cream cheese icing and sprinkle with chopped pecans or walnuts for added texture. Consider serving slices on a rustic wooden board, garnished with a few cinnamon sticks and a light dusting of powdered sugar for an autumn-themed display.
Wine and Beverage Pairings
To complement the warm spices and sweetness of your pumpkin loaf tapped, consider pairing it with a lightly sweet dessert wine, such as a late-harvest Riesling. Alternatively, a spiced chai or a rich cup of coffee can enhance the flavors, creating a cozy experience that embraces the essence of fall.
Creative Variations and Adaptations of pumpkin loaf tapped
Creative Variations and Adaptations of pumpkin loaf tapped
While the classic pumpkin loaf tapped with cream cheese icing is certainly delicious as is, there are countless ways to put your spin on this beloved recipe. From seasonal ingredients to dietary adaptations, the possibilities are endless. Let’s explore some exciting variations that will inspire your next baking adventure.
Seasonal Variations
As the seasons change, so can the ingredients in your pumpkin loaf tapped. In the fall, you might use fresh apples or pears to add a fruity twist. Simply dice them and fold them into the batter for added moisture and sweetness. In winter, consider incorporating cranberries or pomegranate seeds for a festive touch. These tart fruits can cut through the richness of the cream cheese icing, creating a delightful balance of flavors.
In the spring, consider swapping out some of the pumpkin for zucchini or carrots, creating a hybrid loaf that retains moisture while adding a different flavor profile. Finally, as summer rolls in, you can experiment with tropical flavors; think about adding crushed pineapple or coconut for a refreshing change. Each of these seasonal adaptations will keep your pumpkin loaf tapped exciting and relevant throughout the year.
Dietary Adaptations
In today’s diverse culinary world, it’s essential to adapt recipes to fit various dietary needs. If you’re looking for a gluten-free version of your pumpkin loaf tapped, simply swap all-purpose flour for a gluten-free blend. You may need to adjust the moisture levels slightly, so keep an eye on the batter consistency.
For those following a vegan diet, you can replace the eggs with flaxseed meal or applesauce, and use a plant-based butter alternative. The cream cheese icing can easily be made with vegan cream cheese and powdered sugar for a guilt-free indulgence. For a keto-friendly version, consider using almond flour and a sugar substitute like erythritol to create a low-carb treat without sacrificing flavor.
Creative Twists
If you’re feeling adventurous, why not try some international fusion variations of your pumpkin loaf tapped? For a Mexican twist, consider adding a hint of chili powder and chocolate chips for a spicy-sweet combination that will surprise and delight your taste buds. Alternatively, a dash of matcha powder can give your loaf a unique green color and an earthy flavor that pairs surprisingly well with pumpkin.
You can also get experimental with different cooking methods. While the traditional oven-baked method is classic, you might try your hand at slow cooking. Placing your batter in a greased slow cooker can yield a moist loaf with a delightful texture. Just be sure to check for doneness as cooking times will vary.
Leftover Transformation Ideas
One of my favorite aspects of baking is finding creative ways to use leftovers. If you find yourself with extra pumpkin loaf tapped, consider transforming it into a decadent French toast. Simply slice the loaf and dip it into a mixture of eggs and milk, then cook on a griddle until golden brown. Serve it with maple syrup and fresh fruit for a delightful brunch option.
Another option is to crumble leftover loaf into a parfait. Layer it with yogurt and fresh berries for a delicious and nutritious breakfast or snack. If you’re in the mood for something decadent, consider making pumpkin loaf truffles. Crumble the loaf, mix it with cream cheese, roll it into balls, and dip them in chocolate for a delightful treat.
Storage, Reheating, and Meal Prep for pumpkin loaf tapped
When it comes to enjoying your delicious pumpkin loaf tapped with cream cheese icing, understanding how to properly store it is essential to maintain its flavor and texture. After all, there’s nothing quite like the warm, spiced aroma of pumpkin bread wafting through your kitchen, and you want to ensure that your loaf remains as delightful as the day you baked it. Let’s dive deep into the storage techniques, reheating methods, and meal prep strategies that will keep your pumpkin loaf tapped fresh and enjoyable for days to come.
Short-term Storage
Once your pumpkin loaf tapped is baked and cooled, you’ll want to store it properly to prevent it from drying out or becoming stale. The best method for short-term storage is to keep the loaf in an airtight container. If you don’t have a container large enough, you can wrap the loaf tightly in plastic wrap or aluminum foil. Before wrapping, it’s advisable to allow the loaf to cool completely. This prevents condensation from forming, which could lead to a soggy loaf.
For those who love to bake in advance, storing your pumpkin loaf tapped in the refrigerator is a viable option. Placing the wrapped loaf in the fridge can extend its freshness for about a week. However, be mindful that refrigeration can sometimes alter the texture, making it slightly denser. It’s a trade-off that’s worth considering, especially if you want to keep your loaf for a longer period.
Freezing and Long-term Storage
If you find yourself with an abundance of pumpkin loaf tapped or if you want to prepare for future cravings, freezing is the way to go. Freezing not only preserves the loaf’s flavor but also maintains its quality for an extended period. To freeze your pumpkin loaf, first, slice it into individual portions. This makes it easier to thaw only what you need without compromising the entire loaf.
Wrap each slice tightly in plastic wrap and then place them in a freezer-safe container or a resealable freezer bag. Don’t forget to label your bags with the date; pumpkin loaf tapped can last in the freezer for up to three months, but it’s always good to keep track. When you’re ready to enjoy a slice, simply remove the desired number of slices and let them thaw in the refrigerator overnight, or for a quicker option, place them on the countertop for a couple of hours.
Reheating Best Practices
Reheating your pumpkin loaf tapped correctly is key to enjoying it as if it were freshly baked. If you’ve frozen slices, once they’ve thawed, you can gently warm them in the oven. Preheat your oven to 350°F (175°C) and place the slices on a baking sheet. Cover them with aluminum foil to prevent them from drying out, and heat for about 10-15 minutes until warmed through. The foil will help retain moisture and keep the loaf tender.
Alternatively, for a quicker option, you can use the microwave. Place a slice on a microwave-safe plate and cover it with a damp paper towel. Heat it in 10-15 second intervals until it reaches your desired warmth. However, be cautious with this method, as microwaving can sometimes lead to a rubbery texture if overheated. To maintain the delightful creaminess of the icing, you might want to add the cream cheese icing after reheating.
Meal prep enthusiasts can take advantage of pumpkin loaf tapped by preparing it in advance. You can make a batch on the weekend and store it as described above, ensuring that you have a delightful treat ready to go for busy weekdays. Portioning your loaf into individual servings not only makes it easy to grab and go but also allows for controlled indulgence. Keeping a stash in the freezer means you won’t have to start from scratch every time a craving strikes.
Food safety is paramount when storing any baked goods. Always ensure that your pumpkin loaf tapped is cooled before wrapping or storing it. Furthermore, be aware of the shelf life; while a loaf can last up to a week in the refrigerator, it’s best consumed within the first few days for optimal taste and texture. Always check for signs of spoilage, such as mold or unusual odors, before indulging.
In summary, proper storage and reheating techniques can significantly enhance your enjoyment of pumpkin loaf tapped. By understanding how to store your loaf short-term and long-term, along with reheating methods that maintain quality, you’ll ensure that this delightful treat remains a staple in your home. Whether you’re enjoying it fresh out of the oven or savoring a frozen slice, the joy of pumpkin loaf tapped is just a storage solution away!
Nutritional Benefits and Health Information
As we savor every bite of the delightful pumpkin loaf tapped with cream cheese icing, it’s essential to take a moment to appreciate not only its comforting flavor but also its nutritional benefits. Pumpkin loaf is not just a treat; it can also be a wholesome addition to our diet when made with care. Let’s explore the nutritional aspects of this beloved dish, uncover its health benefits, and discuss how it fits into various dietary considerations.
Nutritional Profile
The nutritional profile of pumpkin loaf tapped can vary significantly based on the ingredients used. However, let’s break down a standard slice of pumpkin loaf, which typically contains ingredients like pumpkin puree, flour, sugar, eggs, and spices. On average, a slice (about 1/12 of a standard loaf) has around 200-250 calories, depending on the recipe specifics and the amount of sugar and fat used.
From a macronutrient perspective, a slice generally contains:
- Carbohydrates: Approximately 30-35 grams, primarily from flour and sugar.
- Fats: About 8-10 grams, which can come from butter or oil used in the recipe.
- Protein: Roughly 2-4 grams, contributed by the eggs and any added nuts or seeds.
Furthermore, pumpkin itself is a powerhouse of nutrients, packed with vitamins A, C, and E, as well as potassium and fiber. The spices commonly used in pumpkin bread, such as cinnamon and nutmeg, also bring additional health benefits, including anti-inflammatory properties.
Health Benefits
The health benefits of the key ingredients in pumpkin loaf tapped are noteworthy. Pumpkin is loaded with beta-carotene, which the body converts into vitamin A, essential for eye health and immune function. Additionally, pumpkin is high in dietary fiber, which aids in digestion and can help you feel full longer, making it a great option for those looking to manage their weight.
Cinnamon, a staple in pumpkin loaf recipes, has been linked to improved blood sugar control and may even help reduce inflammation. Nutmeg, while often used in smaller amounts, also offers antioxidants and has been traditionally used for its calming effects. When combined, these ingredients create a deliciously satisfying loaf that not only tastes good but can also be part of a balanced diet.
Dietary Considerations
When it comes to dietary considerations, pumpkin loaf tapped can fit into various eating plans with a few modifications. For those watching their sugar intake, consider reducing the amount of sugar in the recipe or substituting it with natural sweeteners like maple syrup or honey. Gluten-free options are also available; substituting all-purpose flour with almond flour, coconut flour, or a gluten-free blend can make this treat accessible for those with gluten sensitivities.
For individuals with dairy allergies, using a dairy-free cream cheese alternative for the icing can keep the essence of the pumpkin loaf intact without compromising dietary restrictions. Moreover, adding nuts or seeds can introduce healthy fats and protein, enhancing the overall nutritional value of the loaf.
Comparatively, pumpkin loaf tapped often outshines similar baked goods like banana bread or zucchini bread in terms of nutrient density. Pumpkin’s rich nutrient profile, combined with spices that offer health benefits, makes it a smart choice for a baked treat that can be enjoyed guilt-free.
In conclusion, pumpkin loaf tapped with cream cheese icing is not only a comforting and flavorful indulgence but also a nutritious option that can fit into a balanced diet. By understanding its nutritional profile and health benefits, we can enjoy each slice with the knowledge that we’re treating ourselves to something truly special. Whether you’re enjoying it as a breakfast option, a snack, or a dessert, the healthful goodness of pumpkin loaf tapped will keep you coming back for more!
Frequently Asked Questions About Pumpkin Loaf Tapped
Cinnamon cream cheese frosting for pumpkin bread
To create a delightful cinnamon cream cheese frosting for your pumpkin bread, start by softening 8 ounces of cream cheese and 1/2 cup of unsalted butter at room temperature. In a mixing bowl, combine the softened cream cheese and butter, then add 2 cups of powdered sugar and 1 teaspoon of vanilla extract. For the cinnamon flavor, incorporate 1-2 teaspoons of ground cinnamon, adjusting to your taste preference. Beat the mixture until it’s smooth and fluffy, and use it generously to top your cooled pumpkin bread for a perfect fall treat!
Pumpkin bread with brown butter cream cheese frosting
Brown butter cream cheese frosting adds a rich, nutty flavor to pumpkin bread that perfectly complements its spices. Begin by browning 1/2 cup of unsalted butter in a saucepan over medium heat, stirring frequently until it turns golden brown and smells nutty. Allow the browned butter to cool slightly before mixing it with 8 ounces of softened cream cheese. Gradually add 2-3 cups of powdered sugar and 1 teaspoon of vanilla extract, beating until smooth and creamy. This frosting not only enhances the pumpkin flavors but also gives a gourmet touch to your baked good!
Pumpkin bread with cream cheese frosting Allrecipes
For a delicious pumpkin bread topped with cream cheese frosting inspired by Allrecipes, first make the pumpkin bread by combining 1 cup of pumpkin puree, 1 cup of sugar, and 1/2 cup of vegetable oil in a mixing bowl. Add in 2 eggs, 1 teaspoon of vanilla extract, and dry ingredients, including flour, baking soda, baking powder, cinnamon, and nutmeg. Once baked and cooled, prepare the cream cheese frosting by beating together 8 ounces of softened cream cheese, 1/2 cup of softened butter, and 2 cups of powdered sugar until smooth. Spread this creamy frosting over your pumpkin bread for a delightful finish!
Pumpkin recipes with cream cheese frosting
There are several delicious pumpkin recipes that pair beautifully with cream cheese frosting! Aside from traditional pumpkin bread, consider making pumpkin cupcakes or a pumpkin sheet cake, which both provide a moist base that complements the frosting perfectly. To make the cream cheese frosting, beat together softened cream cheese, butter, vanilla extract, and powdered sugar until creamy. You can also add spices like cinnamon or nutmeg for extra flavor. These recipes are not only perfect for fall gatherings but also make great treats for any occasion!