Halloween crack is a delightful treat that many families look forward to every fall. My first encounter with this irresistible snack was during a Halloween party at my best friend’s house. The moment I stepped through the door, I was greeted by the sweet aroma of caramel and chocolate wafting through the air. It was as if the spirit of Halloween had taken form in a bowl of this crunchy, sweet, and slightly salty confection. As we gathered around the table, my friend’s mom unveiled the mysterious concoction wrapped in festive orange and black decor, and I was immediately hooked. Little did I know then that this simple mix of ingredients would become a staple in my kitchen and a cherished part of my family’s Halloween tradition.

As I stood there, watching everyone dive into the bowl, I felt a sense of belonging and community. Halloween crack was more than just a snack; it was a symbol of togetherness, laughter, and the joy of sharing. I remember the crunch of the crackers, the smoothness of the chocolate, and the contrast of the salty pretzels, all coming together in a joyous explosion of flavors. It was one of those moments that sticks with you—a memory tied to a taste that you can’t quite forget. From that day forward, I made it my mission to recreate this magical treat in my own home.
The Story Behind This Recipe
What I discovered as I experimented in the kitchen was that halloween crack is not just a simple candy; it’s a brilliant amalgamation of flavors and textures that come together to create something truly special. Traditionally made around Halloween, this recipe has its roots in the idea of using what you have on hand to create a festive treat. The base is often made with saltine crackers, which provide a sturdy foundation and an unexpected crunch. Layered with a rich caramel sauce and topped with chocolate and various candies, it’s the perfect bite-sized indulgence that satisfies both sweet and salty cravings.
What makes this recipe particularly appealing for busy families is its simplicity. You can whip up a batch in under 30 minutes, making it a perfect solution for last-minute Halloween gatherings or just a fun family activity on a crisp autumn afternoon. The process is straightforward: line a baking sheet with crackers, pour over the caramel, bake, and then add your toppings. It’s a great way to involve the kids, too! They love to sprinkle the toppings and, of course, taste-test along the way. It’s a bonding experience that allows us to create not just a treat but a memory that lasts a lifetime.
Why You’ll Love This Dish
Halloween crack is not just for Halloween; its versatility means you can customize it for any occasion. Change the toppings to suit the season or your family’s preferences—think red and green M&Ms for Christmas or pastel sprinkles for Easter. The basic recipe stays the same, but the possibilities are endless. This adaptability makes it a go-to recipe for any busy family looking for quick and delightful dessert solutions.
As the leaves change and the air becomes crisp, there’s something special about making a batch of this treat. The sights and smells of fall are woven into the very fabric of this recipe, making it a seasonal favorite. Whether you’re hosting a Halloween party, going to a potluck, or simply want to enjoy a sweet snack while watching a spooky movie, Halloween crack is the perfect choice. It brings a warm sense of nostalgia and excitement to the table, reminding us of the joys of childhood and the thrill of Halloween.
So, what can you expect to learn from this guide to Halloween crack? You’ll discover the history and cultural significance of this beloved treat, explore various recipes and variations, and find tips for making your own perfect batch. By the end of this article, you will not only be equipped to create your Halloween crack masterpiece but also understand the rich tapestry of traditions that surround this delightful dish. Grab your apron, and let’s dive into the world of Halloween crack!
The Rich History and Cultural Significance of halloween crack
The rich history and cultural significance of Halloween crack is a fascinating story that intertwines culinary creativity with seasonal festivities. Although the exact origins of Halloween crack are somewhat murky, it appears to have roots in the American tradition of using readily available ingredients to create festive treats. The combination of sweet and salty flavors has long been appreciated in various cultures, but the specific creation of this dish seems to have emerged in the late 20th century as a popular Halloween snack.
Origins and History
Cultural Significance
Nutritional Benefits
Essential Ingredients for Perfect halloween crack
When it comes to creating unforgettable treats for Halloween, few recipes capture the spirit of the season quite like halloween crack. This festive delight is a sweet, salty, and utterly addictive treat that’s perfect for sharing at parties or for indulging in during a cozy night in. To embark on this culinary adventure, it’s essential to gather the right ingredients. Let’s dive into the details!
Essential Ingredients
Here’s a complete list of the ingredients you’ll need to whip up a batch of halloween crack. Each component plays a vital role in achieving that irresistible flavor and texture.
- Saltine Crackers: 1 sleeve (about 40 crackers) – These serve as the base of your halloween crack, providing a crunchy texture and a slightly salty contrast to the sweetness.
- Unsalted Butter: 1 cup (2 sticks) – The butter adds richness and helps to bind the ingredients together while providing a luscious mouthfeel.
- Brown Sugar: 1 cup – This ingredient adds a deep sweetness and a hint of caramel flavor, complementing the butter beautifully.
- Chocolate Chips: 2 cups (semi-sweet or milk chocolate) – Chocolate is the star of the show, and the type of chocolate you choose will impact the overall taste of your halloween crack.
- Halloween-themed Sprinkles: 1 cup – These are purely for decoration, adding a festive touch that makes your treat visually appealing.
- Pecans or Walnuts: 1 cup (optional) – Nuts add a crunchy texture and a nutty flavor, elevating the overall experience. If you’re using nuts, be sure to chop them coarsely.
Halloween Crack Recipe
Ingredients
- 1 cup salted butter,
- 1 cup dark brown sugar
- 2 sleeves saltine crackers, salted
- 12 ounce bag semisweet mini chocolate chip morsels
- ½ cup Reese’s pieces
- ½ cup other favorite candies, chopped
- ¼ chopped pecans, optional
Instructions
- Preheat the oven to 400°F.
- Line a 9×13 cookie sheet with aluminum foil or parchment paper.
Expert Tip: If using aluminum foil, spray with a non-stick spray.
- Place 2 sleeves of saltine crackers side-by-side until the baking sheet is filled. Set aside.
- In a large saucepan, melt 1 cup of butter and 1 cup of dark brown sugar on medium-high heat.
- Bring the mixture to a rolling boil for about 3 minutes while stirring to ensure no sticking or burning.
- After the toffee has boiled for about 3 minutes, evenly pour it onto the saltine crackers. Take a spatula and spread the caramel toffee evenly onto the crackers. Do this quickly because the toffee will start to harden.
-
Place the cookie sheet into the oven for about 5 minutes, or until the toffee starts to boil.
Remove the baking sheet from the oven and evenly distribute 12 ounces of semisweet chocolate morsels onto the boiling caramel.
NOTE: The chocolate won’t be completely melted at this point and that’s ok.
-
Add in ½ cup Reese’s pieces, any other candies, and pecan chips. Take a spatula and spread evenly so the candies can start to melt.
-
Put the baking sheet back into the oven and let cook, just long enough for the candies and chocolate to melt, about 5-7 minutes.
-
Once the chocolate morsels have melted, remove the baking sheet from the oven and place in the refrigerator for 2 hours to chill.
-
Once it has completely cooled and is cold, remove the baking sheet from the refrigerator and start to break the crack candy into bite size pieces.
-
Store in the refrigerator or in an airtight container on the counter for up to 2 weeks.
Ingredient Roles and Importance
Each ingredient in this recipe contributes to the overall flavor and texture of halloween crack. The Saltine crackers provide a sturdy foundation, while the butter and brown sugar create a caramel-like topping that binds everything together. Chocolate chips bring that rich sweetness that everyone loves, and the nuts (if added) offer a satisfying crunch. Finally, the sprinkles not only add a festive flair but also enhance the fun aspect of the treat, making it perfect for Halloween gatherings.
Quality Indicators and Selection Tips
When selecting ingredients for your halloween crack, quality matters. Opt for high-quality unsalted butter, as it will enhance the flavor without adding unnecessary salt. Look for brown sugar that feels moist to the touch, as this indicates freshness. For chocolate chips, choose a brand that uses real chocolate rather than chocolate-flavored compounds for the best taste.
As for the Saltine crackers, check the expiration date to ensure they’re crisp and fresh. If you’re including nuts, select raw or lightly roasted varieties—avoid anything overly salted or flavored, as it can overpower the sweetness of the other ingredients.
Seasonal Availability and Sourcing Tips
Most of the ingredients for halloween crack are available year-round, but you may want to stock up on Halloween-themed sprinkles during the fall season. Specialty stores or online retailers often carry a wide variety of festive decorations that can elevate your treat. If you’re looking for organic options, many grocery stores now offer organic versions of sugar, nuts, and even chocolate chips, so keep an eye out for those if you prefer organic ingredients.
Substitutions and Alternatives
If you have dietary restrictions or preferences, there are several substitutions you can make without compromising the essence of halloween crack. For a gluten-free version, swap out Saltine crackers for gluten-free varieties or pretzels. If you’re looking for a healthier option, consider using coconut oil instead of butter and a natural sweetener like maple syrup instead of brown sugar. You can also use dairy-free chocolate chips for a vegan version.
Storage Tips
Once your halloween crack is ready, it’s important to store it properly to maintain its crunchy texture. Keep it in an airtight container at room temperature for up to a week. If you want to keep it longer, consider refrigerating it, although this may alter the texture slightly. For long-term storage, you can freeze individual pieces in a freezer-safe bag; just be sure to layer them with parchment paper to prevent sticking.
Cost-Saving Tips
Creating halloween crack can be budget-friendly! Buy ingredients in bulk, especially staples like sugar and chocolate chips, which can often save you money in the long run. Consider shopping at discount stores or using store brands, which may offer the same quality at a lower price. Additionally, if you have leftover Halloween candy, feel free to chop it up and add it to your halloween crack for a fun twist!
In summary, gathering the right ingredients is crucial for making delicious halloween crack. Each component contributes to the overall flavor, texture, and festive appearance. With some thoughtful shopping and a little creativity, you’ll be well on your way to crafting a treat that’s sure to impress your friends and family this Halloween!
Detailed Step-by-Step halloween crack Cooking Instructions
Now that you have gathered all the essential ingredients for your halloween crack, it’s time to roll up your sleeves and dive into the cooking process. Making this delightful treat is straightforward, and with a little bit of patience and care, you’ll create something that will have everyone clamoring for seconds. Let’s break down the steps!
Preparation Steps
- Preheat Your Oven: Start by preheating your oven to 400°F (200°C). This step is essential to ensure that your butter and brown sugar mixture bubbles and caramelizes properly in the oven, creating that gooey goodness we all crave in halloween crack.
- Line Your Baking Sheet: Take a rimmed baking sheet and line it with parchment paper. This will not only prevent the halloween crack from sticking but also make cleanup a breeze later on. If you don’t have parchment paper, you can use aluminum foil, but be sure to grease it lightly with cooking spray to prevent sticking.
- Arrange the Crackers: On the lined baking sheet, arrange the Saltine crackers in a single layer. It’s okay if they touch or overlap slightly; just make sure they cover the entire surface area of the baking sheet. This will serve as the crunchy base for your halloween crack.
- Melt the Butter and Sugar: In a saucepan over medium heat, combine the unsalted butter and brown sugar. Stir constantly until the butter is melted and the mixture comes to a gentle boil. You’ll want to cook it for about 3-5 minutes until it thickens slightly and becomes bubbly. Keep an eye on it to avoid burning. This step is crucial for achieving that delicious caramel flavor!
- Pour the Mixture Over Crackers: Carefully pour the hot butter and brown sugar mixture over the arranged Saltine crackers. Use a spatula to spread it evenly, ensuring that all the crackers are coated in that sweet, sticky goodness.
- Bake: Place the baking sheet in the preheated oven and bake for about 5-7 minutes, or until the mixture is bubbly and the crackers are slightly golden. Keep a close watch during this time, as ovens can vary. You want the mixture to caramelize without burning, so this step requires a little attention.
Cooking Process
- Remove from Oven: Once your halloween crack is bubbly and golden, carefully remove the baking sheet from the oven. Be cautious as the sugar mixture will be extremely hot!
- Add Chocolate Chips: Immediately sprinkle the chocolate chips evenly over the top of the hot mixture. Allow them to sit for a few minutes to soften. This waiting time is essential as it makes spreading the melted chocolate much easier.
- Spread the Chocolate: Once the chocolate chips have softened, use a spatula to spread the melted chocolate evenly over the entire surface. This will create a luscious chocolate layer that pairs perfectly with the salty crackers and sweet caramel.
- Add Nuts (if using): If you’re adding chopped nuts, sprinkle them over the melted chocolate layer now. Gently press them down to ensure they adhere to the chocolate as it cools.
- Sprinkle with Festive Decorations: For the final touch, sprinkle the Halloween-themed sprinkles over the chocolate layer. This not only adds a pop of color but also gives your halloween crack that festive appeal that’s perfect for the season.
- Cool Completely: Allow your halloween crack to cool at room temperature. If you’re in a hurry, you can place it in the refrigerator for about 30 minutes to speed up the cooling process. Once it’s set, the chocolate will harden, making it easier to cut into pieces.
Final Assembly
- Cut into Pieces: Once your halloween crack is cool and the chocolate has hardened, use a sharp knife or break it into pieces with your hands. Aim for bite-sized portions that are easy to grab and enjoy.
- Storage: Remember to store your halloween crack in an airtight container at room temperature or in the fridge if you prefer a firmer texture. It’s best enjoyed within a week, but I doubt it will last that long!
- Serve and Enjoy: Present your halloween crack on a festive platter or in cute treat bags. It’s perfect for parties, trick-or-treaters, or just as a sweet indulgence for yourself. The combination of sweet, salty, crunchy, and chewy is simply irresistible!
In conclusion, making halloween crack is not just a simple cooking process; it’s a delightful experience filled with sensory cues and the joy of creating something special for the season. With these detailed steps, I hope you feel confident and excited to bring this recipe to life in your kitchen. Happy Halloween and happy snacking!
Professional Tips and Techniques for halloween crack
When it comes to making halloween crack, there’s a delightful blend of art and science involved. This addictive treat, beloved by many, combines the sweetness of chocolate, the crunch of crackers, and the buttery richness that keeps people coming back for more. But to elevate your halloween crack from good to unforgettable, mastering a few professional techniques is essential. Let’s dive into the world of this sweet confection and equip you with the tools and knowledge to become a crack-making pro!
Professional Techniques
One of the first things to understand about halloween crack is that timing is everything. The key to a perfect batch lies in the preparation of your ingredients and the order in which you combine them. Start by preheating your oven to 400°F (200°C). This is crucial as it ensures your toffee layer reaches the right consistency without overcooking. While the oven warms up, line a baking sheet with parchment paper. This simple step prevents sticking and makes for easier cleanup.
Next, lay out your saltine crackers in a single layer on the baking sheet. The choice of crackers is important; you can opt for traditional saltines or even try graham crackers for a sweeter twist. The objective is to have a sturdy base that can hold the toffee and chocolate without becoming soggy.
Now comes the magic of the toffee layer. In a saucepan, combine unsalted butter and brown sugar over medium heat. Stir consistently until the mixture comes to a gentle boil. This is where many home cooks falter; if you rush the process or stop stirring, you might end up with a grainy texture instead of a smooth, glossy toffee. Allow the mixture to boil for about 3-4 minutes, watching closely for that rich caramel color. Pour this luscious toffee over the crackers, ensuring an even spread to create the perfect base for your halloween crack.
Troubleshooting Guide
No matter how experienced you are, issues can arise when making halloween crack. One common problem is separation of the chocolate from the toffee after baking. To prevent this, sprinkle your chocolate chips over the hot toffee as soon as it comes out of the oven. The residual heat will melt the chocolate, allowing for a smooth, cohesive layer. If you find your chocolate isn’t melting sufficiently, feel free to place the pan back in the oven for a minute or two.
Another issue may be the texture of your toffee; if it turns out too hard, this could be due to overcooking. Always keep an eye on your toffee and use a candy thermometer if necessary, aiming for a temperature between 300°F to 310°F for the perfect hard crack stage. Conversely, if it’s too soft, you may not have cooked it long enough. Don’t worry—practice makes perfect, and each attempt is a step towards mastering your halloween crack.
Presentation Tips
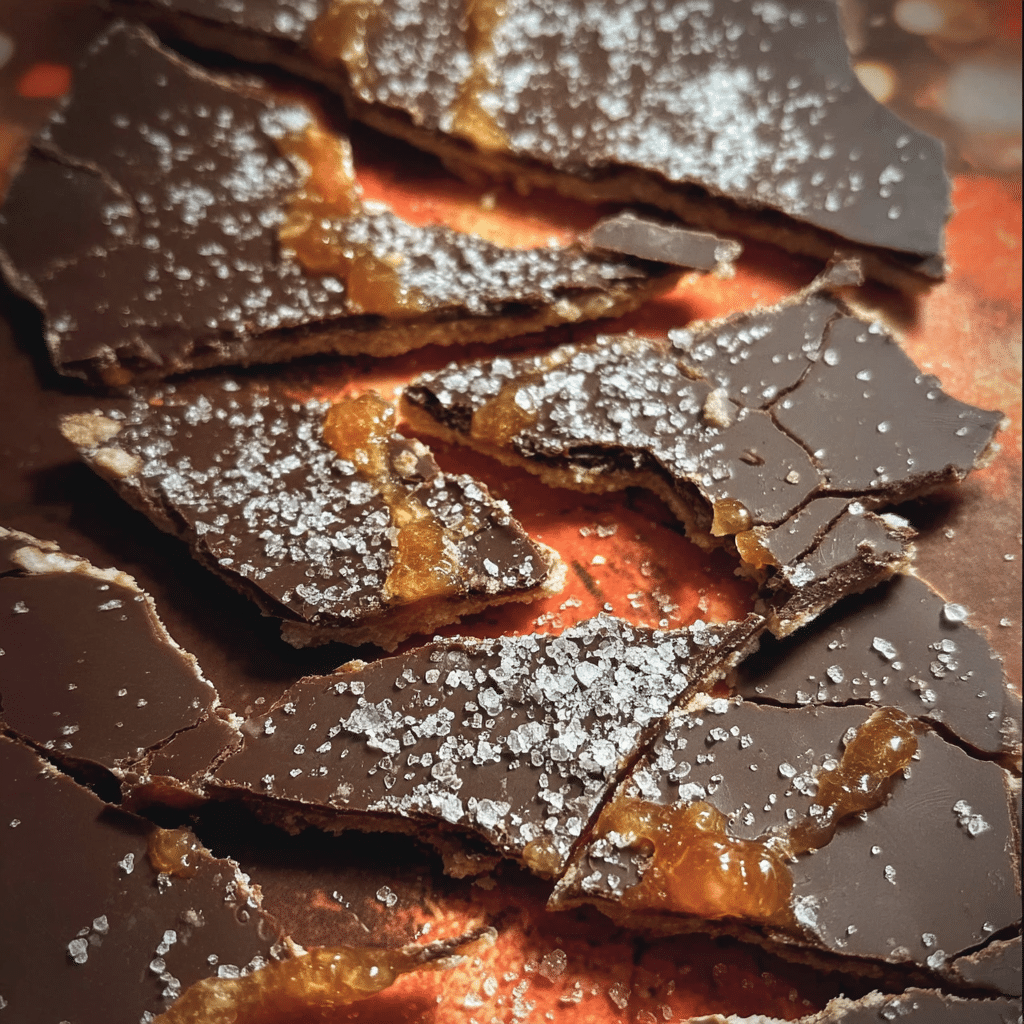
Once your halloween crack has cooled and hardened, it’s time to think about presentation. Cut the crack into uniform squares, which not only look appealing but also make for easy serving. You can enhance the visual appeal by dusting the top with a sprinkle of sea salt or Halloween-themed sprinkles for that festive touch.
For serving, consider placing the pieces in decorative treat bags or on a platter with a festive Halloween theme. This could include spider web designs or pumpkin motifs to match the season. Pair your halloween crack with complementary beverages; a sweet dessert wine or spiced cider can elevate the experience. Remember, the goal is to make your treat as visually enticing as it is delicious!
Lastly, don’t forget about make-ahead strategies. Halloween crack can be prepared days in advance and stored in an airtight container for maximum freshness. This not only saves you time on the day of your Halloween festivities but also ensures that your treat is ready to impress your guests with minimal last-minute effort.
Creative Variations and Adaptations of halloween crack
Now that you have the basics down for creating your halloween crack, let’s explore some creative variations and adaptations that can take your treat to the next level. The beauty of this recipe lies in its versatility; you can easily swap ingredients or add unique flavors to cater to different tastes and dietary needs.
Seasonal Variations
As the seasons change, so can your halloween crack. For a fall twist, incorporate pumpkin spice into your toffee mixture. Just add a teaspoon of pumpkin pie spice to the butter and sugar as they melt. Not only will it enhance the flavor, but it will also evoke all the warm nostalgia of autumn. Alternatively, during the winter holidays, consider using peppermint extract in place of vanilla for a festive peppermint bark variation. You can even top it off with crushed candy canes for that extra crunch and holiday flair.
Don’t forget about the toppings! Instead of the classic chocolate layer, experiment with white chocolate, caramel drizzle, or even butterscotch chips. The combinations are endless, and each one brings its own unique personality to your halloween crack.
Dietary Adaptations
For those with dietary restrictions, making halloween crack can still be a fun and inclusive experience. If you’re catering to a gluten-free audience, simply use gluten-free crackers. There are numerous brands that produce delicious options that work beautifully in this recipe.
For a vegan version, substitute the butter with coconut oil or vegan butter, and use dairy-free chocolate chips. The taste will still be rich and satisfying, and your vegan friends will appreciate the effort you’ve made to include them in the festivities.
If you’re looking to reduce sugar, consider using sugar-free alternatives for the brown sugar and chocolate, but do keep in mind that this may alter the final taste and texture of your halloween crack. Always taste as you go to ensure you achieve the right balance.
Creative Twists
Why not take your halloween crack on an international journey? Try adding a dash of chili powder or cayenne pepper to the toffee for a sweet and spicy kick that will surprise your taste buds. This fusion approach can create a unique experience that guests will rave about.
Another fun twist is to incorporate mix-ins into your chocolate layer. Think nuts, pretzels, or even crushed up candy bars. This not only adds texture but also brings in different flavor profiles that can elevate your treat. Imagine the crunch of pretzels against the smooth toffee and silky chocolate; it’s a delightful combination that will keep everyone coming back for more.
As for leftovers, if you happen to have any halloween crack remaining (though unlikely!), consider crumbling it over ice cream for a decadent dessert, or using it as a topping for cupcakes or cakes. The possibilities are endless, and the creativity you bring to your variations will make this treat a favorite year after year.
Storage, Reheating, and Meal Prep for halloween crack
When it comes to enjoying Halloween Crack, also affectionately known as “Christmas Crack” for its addictive nature, understanding how to properly store and reheat it can significantly enhance your experience. This delightful confection, typically made from saltine crackers, buttery toffee, and chocolate, deserves a spot in your recipe rotation during the spooky season. With the right storage techniques, you can savor Halloween Crack for days or even weeks after making it, ensuring that every bite remains as good as the first. Let’s dive into the details of storage, reheating, and meal prep for this irresistible treat.
Short-term Storage
Once you’ve whipped up a batch of Halloween Crack, you’ll want to ensure it stays fresh for as long as possible. For short-term storage, which typically covers a period of 5 to 7 days, the refrigerator is your best friend. After allowing your Halloween Crack to cool completely, break it into pieces and transfer it to an airtight container. This will help prevent moisture from seeping in and ruining the delightful crunch.
When selecting a container, opt for one that is not too large, as excess air can lead to stale pieces. Glass containers with tight-fitting lids are excellent choices, as they minimize air exposure and help maintain the crack’s texture. If you’re worried about any potential smell absorption from the fridge, consider wrapping the individual pieces in wax paper before placing them in the container. This additional layer of protection can help preserve the flavors and keep the Halloween Crack tasting fresh.
Freezing and Long-term Storage
If you find yourself with an abundance of Halloween Crack or simply want to prepare it ahead of time, freezing is a fantastic option. Halloween Crack can be frozen for up to 3 months without sacrificing its deliciousness. To freeze, break the crack into pieces and layer them in a freezer-safe bag or container. It’s essential to remove as much air as possible before sealing to prevent freezer burn.
For added protection, consider wrapping each piece in plastic wrap before placing it in the bag. This extra step can help keep the Halloween Crack crispy and flavorful. When you’re ready to indulge, simply remove the desired amount from the freezer and let it sit at room temperature for about 30 minutes. There’s no need to reheat it, as the chocolate will soften pleasantly, and the toffee will remain delightfully crunchy.

Reheating Best Practices
If you prefer your Halloween Crack warm, perhaps for a cozy movie night or a gathering with friends, reheating is straightforward. Preheat your oven to 250°F (120°C) and spread the crack pieces on a baking sheet lined with parchment paper. Heat for about 5 to 10 minutes, keeping a close eye on them to avoid burning. This method gently revives the chocolate’s smoothness and warms the toffee without compromising the texture.
Alternatively, if you’re in a hurry, you can microwave a few pieces for about 10 to 15 seconds. However, be cautious, as overheating in the microwave can lead to a gooey mess rather than the delightful candy you desire. Always allow it to sit for a moment after microwaving, as the heat can cause the chocolate to melt unexpectedly.
When it comes to meal prep and batch cooking, Halloween Crack is a fantastic candidate. You can make it in large quantities and store it for later enjoyment. Prepare a big batch on a weekend and divide it into smaller portions to share with family and friends or to have on hand for unexpected guests. This not only saves time but also allows you to effortlessly bring a festive treat to any gathering.
Food safety is paramount, especially when it comes to sweets that contain perishable ingredients. While the sugar content in Halloween Crack acts as a preservative, it’s still crucial to ensure that your ingredients are fresh and that you store it properly. Always check for any signs of spoilage or unusual textures before consuming. The shelf life expectations for Halloween Crack, when stored correctly, is about a week at room temperature and up to three months in the freezer.
Portioning and packaging tips can also enhance your storage strategy. Consider using decorative bags or boxes if you’re planning to gift some of your Halloween Crack. Not only does this make for an appealing presentation, but it also helps keep individual portions fresh until they’re ready to be enjoyed. This is particularly great for Halloween parties or as a sweet treat for trick-or-treaters.
In conclusion, mastering the art of storing and reheating Halloween Crack not only maximizes its deliciousness but also enhances your overall experience. By utilizing airtight containers for short-term storage, following proper freezing guidelines for long-term enjoyment, and employing thoughtful reheating methods, you ensure that every bite is a delightful reminder of the spooky season. So go ahead, make a batch, and enjoy the sweet satisfaction of Halloween Crack, knowing you’ve stored it right!
Nutritional Benefits and Health Information
As we indulge in the sweet, crunchy delight of Halloween Crack, it’s natural to wonder about its nutritional profile. While this treat is undeniably delicious, understanding its nutritional benefits and how it fits into our diets can help us enjoy it more mindfully. Let’s explore the nutritional breakdown of Halloween Crack, its health benefits, and some dietary considerations to keep in mind.
Nutritional Profile
At its core, Halloween Crack is made from a few simple ingredients: saltine crackers, butter, brown sugar, and chocolate. Each of these components contributes to the overall nutritional makeup of the treat. A typical serving size of Halloween Crack (about 1 ounce or approximately 28 grams) contains approximately 150-200 calories, depending on the exact proportions used and any additional toppings, such as nuts or sprinkles.
The main macronutrients in Halloween Crack include carbohydrates, fats, and a small amount of protein. The saltine crackers are primarily composed of carbohydrates, providing a quick source of energy. The butter and chocolate contribute to the fat content, which is essential for flavor and texture but should be consumed in moderation. You can expect around 7-10 grams of fat per serving, with a mix of saturated and unsaturated fats.
Protein content in Halloween Crack is relatively low, generally around 1-2 grams per serving. This is an important aspect to consider if you’re looking for a more balanced treat. While it’s not a protein-rich snack, it can be enjoyed in moderation as part of a varied diet.
Health Benefits
Despite being a sweet treat, Halloween Crack contains ingredients that can offer some health benefits when consumed in moderation. For instance, the butter provides a source of fat-soluble vitamins, such as vitamin A and vitamin E, which are essential for maintaining healthy skin and vision. Additionally, chocolate, particularly dark chocolate, contains antioxidants known as flavonoids, which can support heart health by improving blood circulation and reducing inflammation.
Moreover, the brown sugar used in the recipe can be a better alternative to white sugar due to its mineral content, including calcium, potassium, iron, and magnesium. While these minerals are present in small quantities, they can contribute to your daily intake when paired with a balanced diet. However, it’s essential to remember that Halloween Crack should be enjoyed as an occasional treat rather than a staple in your diet.
Dietary Considerations
When it comes to dietary considerations, Halloween Crack may not suit everyone’s needs. It contains gluten from the saltine crackers, making it unsuitable for those with celiac disease or gluten sensitivity. However, there are gluten-free alternatives available, such as gluten-free crackers or even rice cakes, which can be used to create a similar treat without the gluten.
For individuals with nut allergies, it’s crucial to ensure the chocolate and any toppings used are free from cross-contamination with nuts. Many brands offer nut-free options, so always read labels carefully. Additionally, if you’re watching your sugar intake, consider using sugar substitutes or low-sugar chocolate options to create a version of Halloween Crack that aligns with your dietary goals.
In terms of fitting Halloween Crack into various diet plans, moderation is key. If you’re following a low-carb or ketogenic diet, you might want to limit your intake or opt for a modified recipe using low-carb ingredients. On the other hand, if you’re simply looking for a delightful treat to enjoy during the Halloween festivities, savor each bite and appreciate the joy it brings.
Healthy modification suggestions can also elevate this treat without sacrificing flavor. For instance, you can incorporate nuts for added protein and healthy fats or use dark chocolate instead of milk chocolate for a richer taste and additional health benefits. You might even consider adding a sprinkle of sea salt on top to enhance the flavor profile further.
In conclusion, Halloween Crack is more than just a sugary indulgence; it has a diverse nutritional profile that can offer some benefits when enjoyed mindfully. Understanding its components, health benefits, and dietary considerations empowers you to make informed choices when savoring this delightful treat. So go ahead, embrace the spooky season, and enjoy your Halloween Crack while being aware of its nutritional aspects!
Frequently Asked Questions About Halloween Crack
What is a Halloween bark recipe?
A Halloween bark recipe typically consists of a base layer of melted chocolate topped with various festive decorations such as candy corn, Halloween sprinkles, and nuts. To create your own Halloween bark, start by melting chocolate (dark, milk, or white) in a microwave or double boiler until smooth. Spread the melted chocolate onto a parchment-lined baking sheet, then sprinkle your chosen toppings generously before allowing it to set in the fridge for about 30 minutes. Once hardened, break the bark into pieces and enjoy this colorful, sweet treat that’s perfect for sharing at parties or for trick-or-treaters.
What are some easy Halloween bar recipes?
Easy Halloween bar recipes often incorporate simple ingredients and minimal steps, making them perfect for busy bakers. One popular recipe is for Halloween rice crispy treats, where you combine melted marshmallows and butter with rice cereal, then shape them into bars and decorate with orange and black sprinkles. Another idea is to create no-bake peanut butter bars mixed with crushed graham crackers, topped with chocolate frosting and Halloween-themed candies. These bars are quick to prepare and can be customized with your favorite flavors and toppings to suit your Halloween celebrations.
How can I make monster cookies for Halloween candy?
Monster cookies are a fun and versatile treat for Halloween, combining oats, peanut butter, and a mix of colorful candies. To make them, start by creaming together butter, brown sugar, and sugar, then add eggs, vanilla, and peanut butter. Fold in oats, flour, and baking soda, and lastly, mix in a variety of candies like M&Ms, chocolate chips, and chopped nuts to create a “monster” effect. Bake the cookies until they are golden around the edges but still soft in the center, and allow them to cool before serving. These cookies are not only delicious but also a hit among kids and adults alike!
What are some Halloween treats to make for adults?
When preparing Halloween treats for adults, consider sophisticated flavors and presentations that appeal to a more mature palate. One idea is to create dark chocolate truffles infused with flavors like espresso or spiced pumpkin, rolled in cocoa powder or crushed nuts for a gourmet touch. Another option is to serve caramel apple slices drizzled with dark chocolate and sprinkled with sea salt for a delightful balance of sweet and savory. You could also make spiked pumpkin spice cupcakes topped with cream cheese frosting, perfect for a Halloween-themed gathering. These treats are sure to impress and provide a deliciously festive experience for adult guests.