Grandma’s Thanksgiving stuffing is more than just a dish; it’s a heartfelt tradition that brings families together during the holiday season. I remember the first time I stepped into my grandmother’s kitchen on Thanksgiving morning. The air was filled with the comforting aroma of sage and roasted vegetables, a scent that instantly wrapped around me like a warm hug. As I watched her carefully mix together her secret ingredients, I realized that this was not just food, but a tapestry of memories woven together over decades. It was in that moment that I discovered the true essence of grandma’s Thanksgiving stuffing, a cherished recipe that has been passed down through generations.
In many families, stuffing is an afterthought, a side dish hastily prepared with store-bought bread and a sprinkle of seasoning. But for my grandmother, it was an art form. Each year, she would begin preparing her stuffing weeks in advance, from selecting the finest bread to sourcing fresh herbs from her garden. Her stuffing wasn’t just a filling for the turkey; it was a celebration of flavors and textures, a reflection of our family’s history and her culinary journey. This recipe holds a special place in my heart, not just because of its deliciousness, but because it represents the love and dedication that my grandmother poured into every meal.
The Story Behind This Recipe
The origins of grandma’s Thanksgiving stuffing can be traced back to the early settlers who came to America. They brought with them the traditions of stuffing meats with herbs, spices, and bread, a practice that was practical and delicious. Over the centuries, stuffing evolved, and regional variations emerged. My grandmother’s recipe is influenced by our family’s New England roots, incorporating local ingredients like apples, cranberries, and, of course, fresh herbs. As I watched my grandmother prepare her stuffing, she would often share stories of her own grandmother, who had used similar techniques, adding a layer of familial connection that made the dish even more special.
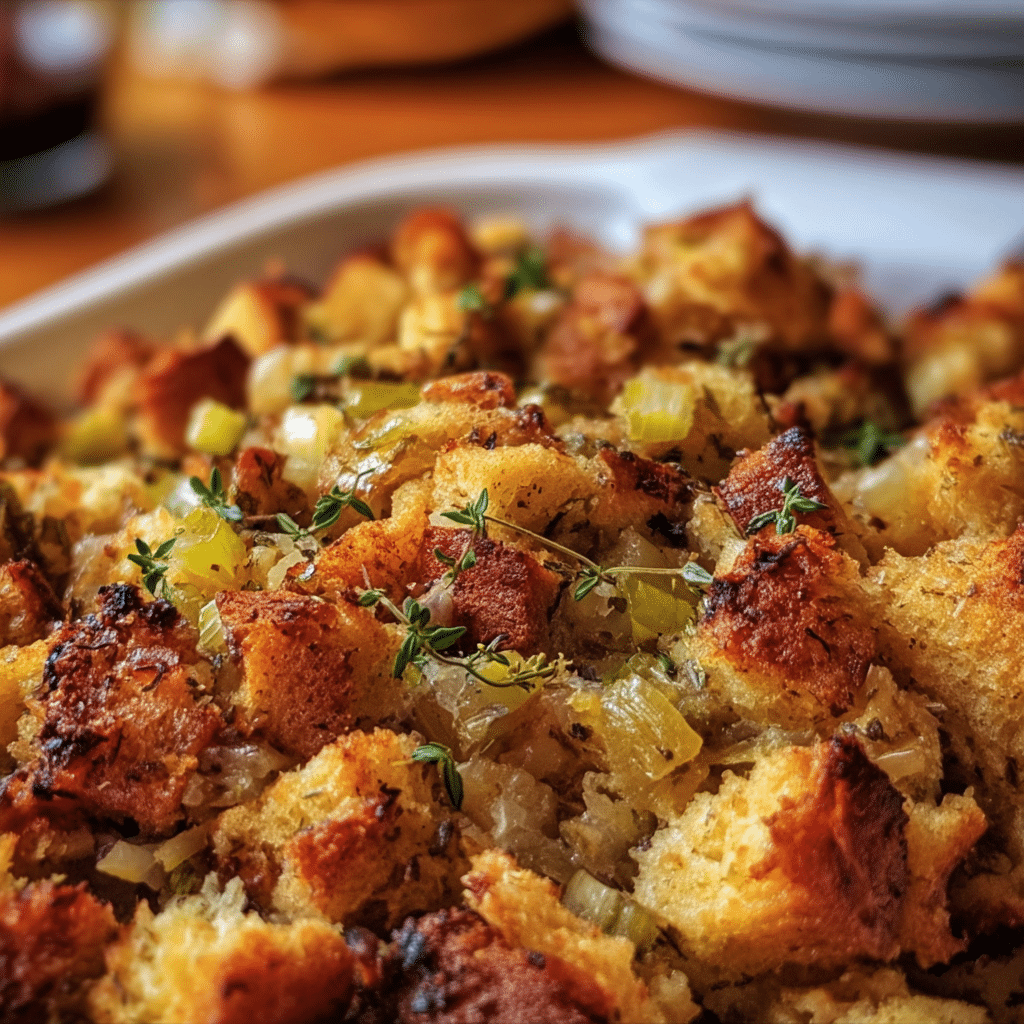
What sets grandma’s Thanksgiving stuffing apart from others is its unique blend of flavors and the care that goes into its preparation. She would often say that the best stuffing starts with quality bread – preferably homemade or artisan bread, that has been left out overnight to dry. This allows the bread to absorb the broth and flavors without becoming mushy. The addition of sautéed onions, celery, and a medley of herbs creates a stuffing that is fragrant and deeply flavorful. Each bite is a reminder of home, of family gatherings filled with laughter and storytelling.
This recipe is particularly perfect for busy families looking for quick dinner solutions because it can be prepared ahead of time. Many of the components can be prepped the day before, allowing families to enjoy quality time together rather than being stuck in the kitchen on Thanksgiving Day. The stuffing can be assembled and stored in the refrigerator, ready to be baked right before the meal. This flexibility is invaluable during the bustling holiday season, making grandma’s Thanksgiving stuffing a go-to dish for families everywhere.
Seasonally, this stuffing is not just confined to Thanksgiving. While it shines brightest on that special day, I have made this dish for family gatherings, potlucks, and even festive dinners throughout the winter months. The warmth and comfort it brings can brighten up any occasion. It’s a dish that evokes nostalgia and warmth, reminding us of cherished moments spent with loved ones.
Why You’ll Love This Dish
Emotionally, grandma’s Thanksgiving stuffing is a connection to my roots. Each bite transports me back to the moments spent in my grandmother’s kitchen, listening to her stories and absorbing her wisdom. It’s not just a recipe; it’s a vessel of love, tradition, and family history. When I make it for my own family, I feel as though I am sharing a piece of my grandmother’s heart with them, keeping her memory alive with every delicious bite.
In this article, I promise you will learn everything you need to know about making your very own grandma’s Thanksgiving stuffing. From the perfect bread selection to the ideal herb blend, you’ll discover tips and tricks that will elevate your stuffing game. Whether you’re a novice cook or a seasoned pro, I hope to inspire you to create your own version of this beloved dish, one that reflects your family’s unique tastes and traditions. Join me on this culinary journey as we delve deep into the heart of grandma’s Thanksgiving stuffing, a dish that truly embodies the spirit of Thanksgiving.
The Rich History and Cultural Significance of grandma’s thanksgiving stuffing
To truly appreciate grandma’s Thanksgiving stuffing, it’s essential to understand its rich history and cultural significance. The origins of stuffing can be traced back to ancient civilizations, where various meats were filled with herbs, grains, and spices to enhance flavor and preserve the meat. In the context of American Thanksgiving, stuffing as we know it today has evolved significantly, shaped by various influences and regional practices.
Origins and History
The practice of stuffing meats dates back to the Romans, who used a variety of ingredients including fruits, nuts, and spices. However, the stuffing we associate with Thanksgiving in America has its roots in the early 17th century when English settlers arrived on the shores of the New World. They brought with them recipes and traditions that combined local ingredients with their European heritage. The first Thanksgiving, celebrated in 1621, likely featured a version of stuffing, although it was not as refined as we know it today.
Over the years, stuffing recipes diversified across the United States, influenced by regional ingredients and cultural practices. In the Northeast, for instance, the use of cornbread and sausage became popular, while in the South, stuffing often included oysters or was made with cornbread. My grandmother’s recipe, rooted in New England tradition, blends these influences, using crusty bread, fresh herbs, and local fruits like apples and cranberries, creating a stuffing that is both unique and representative of our family’s history.
Cultural Significance
Grandma’s Thanksgiving stuffing is not just a dish; it is a cultural symbol of gratitude and togetherness. Thanksgiving itself is a time for family and friends to gather around the table, reflecting on the harvest and giving thanks for the blessings of the year. The act of preparing and sharing food, particularly a dish as special as stuffing, fosters a sense of community and connection. Many families create their own unique stuffing recipes, adapting them to reflect personal tastes and traditions, which adds an element of creativity to the holiday.
In popular culture, stuffing has been celebrated in various forms, from television shows to cookbooks. It has become a staple on Thanksgiving tables across America, often the subject of friendly debates about the best way to prepare it. Some swear by the classic bread stuffing, while others prefer a wild rice blend or even a gluten-free version. This diversity is what makes stuffing such a beloved dish; it can be customized to suit dietary preferences and family traditions, making it a versatile centerpiece for any holiday feast.
Nutritional Benefits
While grandma’s Thanksgiving stuffing is undeniably delicious, it also offers nutritional benefits that can be enjoyed when prepared mindfully. The base of the stuffing, often made from whole-grain bread, provides fiber and essential nutrients. The addition of vegetables like onions and celery not only enhances the flavor but also contributes vitamins and minerals. Fresh herbs, such as sage and thyme, are packed with antioxidants and have anti-inflammatory properties, making them a healthy addition to any meal.
Moreover, by incorporating seasonal ingredients like apples and cranberries, you can add natural sweetness and additional nutritional value. Apples are a great source of dietary fiber and vitamin C, while cranberries are rich in antioxidants and can support urinary tract health. By being conscious of the ingredients you choose, grandma’s Thanksgiving stuffing can transform from a simple side dish into a wholesome component of your holiday meal.
In conclusion, the rich history and cultural significance of grandma’s Thanksgiving stuffing make it an essential part of the holiday experience. Understanding its origins allows us to appreciate the dish not only for its taste but also for its role in bringing families together. As we gather around the table each Thanksgiving, we honor the traditions of those before us while creating new memories with each batch of stuffing we prepare. So, let’s dive deeper into the culinary techniques and tips that will help you create your very own version of this cherished dish.
Essential Ingredients for Perfect grandma’s thanksgiving stuffing
Thanksgiving is a time for family, gratitude, and of course, incredible food. One dish that often steals the show at the Thanksgiving table is grandma’s thanksgiving stuffing. This cherished recipe has been passed down for generations and holds a special place in many hearts. To recreate this culinary tradition, let’s explore the essential ingredients you’ll need to whip up the perfect stuffing.
Essential Ingredients
Every great recipe begins with quality ingredients. Here’s a complete list of what you’ll need to make grandma’s thanksgiving stuffing, complete with detailed measurements:
- 1 loaf of day-old bread (about 10-12 cups when cubed)
- 1 cup unsalted butter
- 1 large onion, finely chopped
- 3-4 celery stalks, chopped
- 1-2 cups chicken or vegetable broth
- 1 tablespoon dried sage
- 1 tablespoon dried thyme
- 1 tablespoon dried rosemary
- 1 teaspoon salt
- 1/2 teaspoon black pepper
- 2 eggs, lightly beaten
- 1 cup chopped nuts (optional, walnuts or pecans work beautifully)
- 1 cup dried fruits (optional, such as cranberries or apricots)
Now, let’s delve into the role each ingredient plays in grandma’s thanksgiving stuffing and why they are important.
The bread is the foundation of your stuffing. Using day-old bread allows it to absorb the flavors of the broth and seasonings without becoming mushy. It’s essential to choose a bread with a crusty exterior, such as sourdough or French bread, as it adds texture to the stuffing.
Butter is the key to richness and flavor. It brings everything together, imparting a depth that you simply can’t replicate with oil. Opt for unsalted butter, as this gives you control over the saltiness of your dish.
Onions and celery are the aromatic base of the stuffing, adding sweetness and crunch. They should be sautéed until soft, releasing their flavors into the butter before mixing with the bread.
The broth serves as the moisture component of the stuffing. You can use chicken broth for a richer flavor or vegetable broth for a lighter, vegetarian option. The amount of broth you add can vary based on how moist you like your stuffing.
Herbs like sage, thyme, and rosemary are the stars of the seasoning show. They contribute that classic Thanksgiving flavor that many of us associate with family gatherings. Feel free to adjust the quantities of herbs to suit your palate.
Salt and pepper are essential for enhancing flavors, while the eggs help bind the stuffing together, ensuring it holds its shape when baked.
If you’re feeling adventurous, you can add chopped nuts for a delightful crunch or dried fruits for a touch of sweetness, making grandma’s thanksgiving stuffing even more special.
Print
Grandma’s Thanksgiving Stuffing Recipe
Ingredients
- 13–15 cups dry bread cubes* about 2 1 pound loaves (We like to use a heavier bread such as French bread so it soaks up more juice)
- 1 1/2 cups unsalted butter
- 1 cup chopped celery
- 1 cup diced yellow onion
- 2 1/4 teaspoons salt
- 1 teaspoon ground black pepper
- 1 1/2 tablespoons poultry seasoning
- 1 1/2 cups chicken stock (I use low sodium chicken broth)
- 2 large eggs
Instructions
- Preheat the oven to 350ºF. Spray a 2 quart casserole or 9×13″ baking dish with cooking spray.
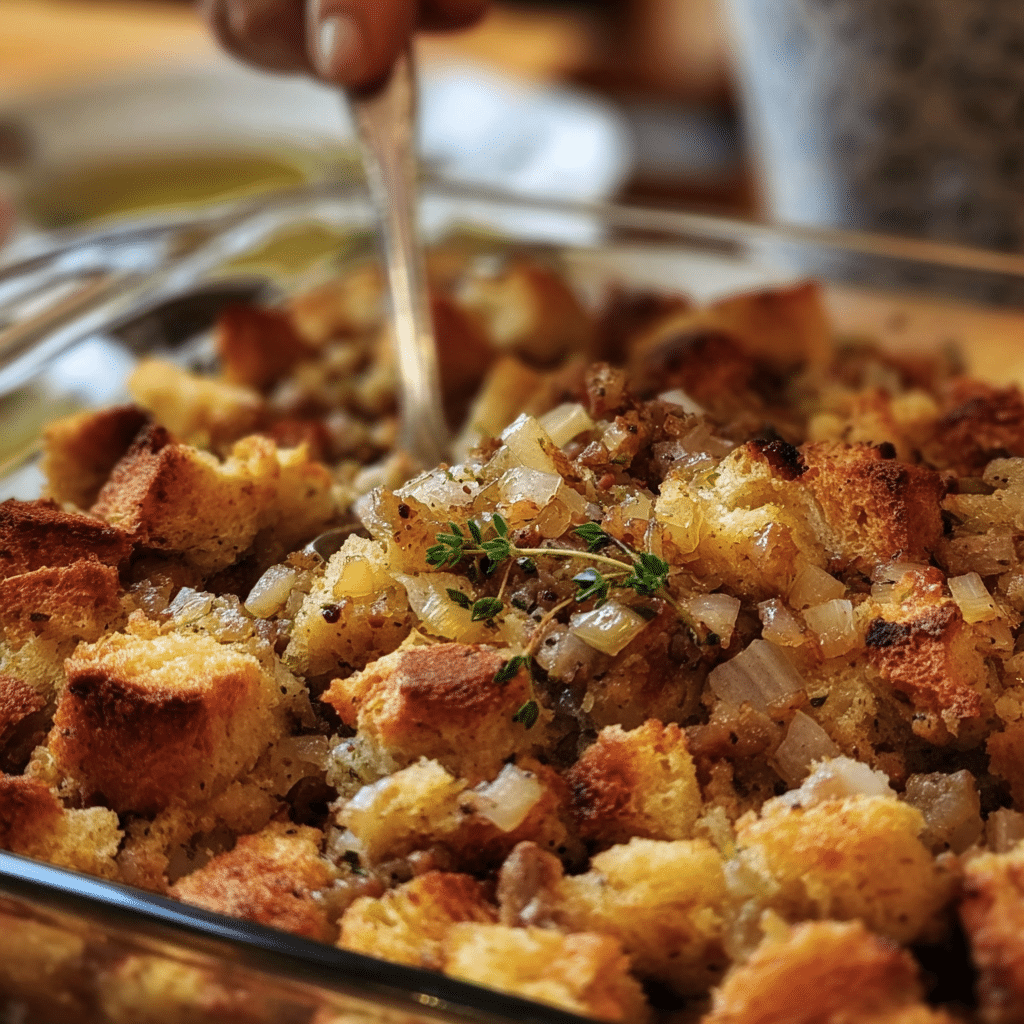
- In a large skillet, sauté the onion and celery in the butter over medium-high heat for 10-12 minutes, or until the onion and celery are tender. 1 ½ cups unsalted butter, 1 cup chopped celery, 1 cup diced yellow onion
- Place the bread cubes in a large bowl. 13-15 cups dry bread cubes*
-
Pour the butter, onion and celery mixture over the bread cubes and mix. Add the remaining ingredients and mix well. 2 ¼ teaspoons salt, 1 teaspoon ground black pepper, 1 ½ tablespoons poultry seasoning, 1 ½ cups chicken stock, 2 large eggs
-
Spread the stuffing evenly in the prepared baking dish. Bake for 30-35 minutes or until golden brown.
-
Garnish with fresh parsley or other fresh herbs such as rosemary if desired.
Shopping Tips
When shopping for your ingredients, quality matters. Here are some tips for selecting the best options:
- For bread, choose artisan loaves from your local bakery or grocery store. Look for breads with minimal preservatives.
- Always smell the butter and check the expiration date. Fresh butter should have a creamy aroma.
- Pick fresh vegetables. Onions should be firm and free from blemishes, while celery should be crisp and green.
- Opt for low-sodium broths, especially if you’re watching your salt intake. You can also make your own broth ahead of time.
- When selecting dried herbs, check for vibrant colors and strong aromas. If they lack scent, they may be stale.
- For nuts, choose ones that are unsalted and store them in the refrigerator to maintain freshness.
Substitutions and Alternatives
Dietary restrictions shouldn’t keep anyone from enjoying grandma’s thanksgiving stuffing. Here are some substitution ideas:
- For gluten-free options, use gluten-free bread or cornbread. Just ensure it’s day-old to absorb the flavors properly.
- Those with dairy allergies can substitute butter with olive oil or a dairy-free margarine.
- Eggs can be replaced with flax eggs (1 tablespoon flaxseed meal + 2.5 tablespoons water = 1 egg) for a vegan version.
- If you’re avoiding nuts, simply omit them or replace them with seeds for added texture.
- For a lower-carb version, consider using cauliflower bread or other veggie-based alternatives.
When it comes to storing your ingredients, keep bread in a cool, dry place, and use it within a few days of purchasing. Fresh vegetables should be kept in the refrigerator, while nuts can be stored in the fridge or freezer to keep them from going rancid. For herbs and spices, store them in a cool, dark place to preserve their flavor.
Lastly, don’t forget about cost-saving tips! Consider buying in bulk for herbs and spices, and take advantage of sales during the Thanksgiving season. Many stores offer discounts on bread and other baking ingredients as the holiday approaches, so stock up while you can.
With these ingredients and tips in hand, you’re well on your way to creating a stuffing that honors grandma’s recipe while adding your unique touch to your Thanksgiving feast!
Detailed Step-by-Step grandma’s thanksgiving stuffing Cooking Instructions
Now that we have a solid understanding of the essential ingredients for grandma’s thanksgiving stuffing, it’s time to move on to the cooking process. Making stuffing may seem straightforward, but there are nuances that can elevate your dish from good to unforgettable. Let’s break it down into detailed steps to ensure your stuffing comes out perfectly every time.
Preparation Steps
- Start by preparing your bread. Cut the day-old bread into 1-inch cubes. Spread the cubes out on a baking sheet and let them sit out overnight to dry out. If you’re short on time, you can bake them in a 250°F oven for about 30 minutes until they’re stale but not browned.
- Next, chop your onion and celery. Aim for uniform pieces to ensure even cooking. This is where mise en place (everything in its place) comes into play—having all your ingredients prepped and ready will make the cooking process smoother.
- In a large skillet, melt the unsalted butter over medium heat. Once melted, add the chopped onion and celery. Sauté for about 8-10 minutes until softened and fragrant. This is a crucial step, as it builds the flavor foundation of your stuffing.
- Add the dried herbs (sage, thyme, rosemary), salt, and pepper to the skillet. Stir for an additional 2 minutes to release the essential oils from the herbs. Your kitchen will start to smell like Thanksgiving!
- In a large mixing bowl, combine the cubed bread with the sautéed vegetable mixture. Gently toss to combine, ensuring the bread is evenly coated in the butter and aromatic mixture.
Cooking Process
- Now it’s time to add the broth. Start with 1 cup and mix it in, checking the consistency. You want the bread to be moist but not soggy. If it seems dry, add more broth, a little at a time.
- In a separate bowl, lightly beat the eggs and then fold them into the bread mixture. This will help bind everything together, so don’t skip this step!
- If you’re adding nuts or dried fruits, fold them in now. They add texture and flavor that can elevate your stuffing significantly.
- Preheat your oven to 350°F. While the oven is heating, prepare your baking dish. You can use a traditional casserole dish or even a cast-iron skillet for a rustic presentation. Grease the dish with a little butter or oil to prevent sticking.
- Transfer the stuffing mixture to the prepared baking dish. Spread it out evenly, but don’t pack it down too tightly; you want it to bake up fluffy and light.
- Cover the dish with aluminum foil to keep moisture in and bake for 30 minutes. This helps the flavors meld together and ensures the stuffing cooks evenly.
Final Assembly
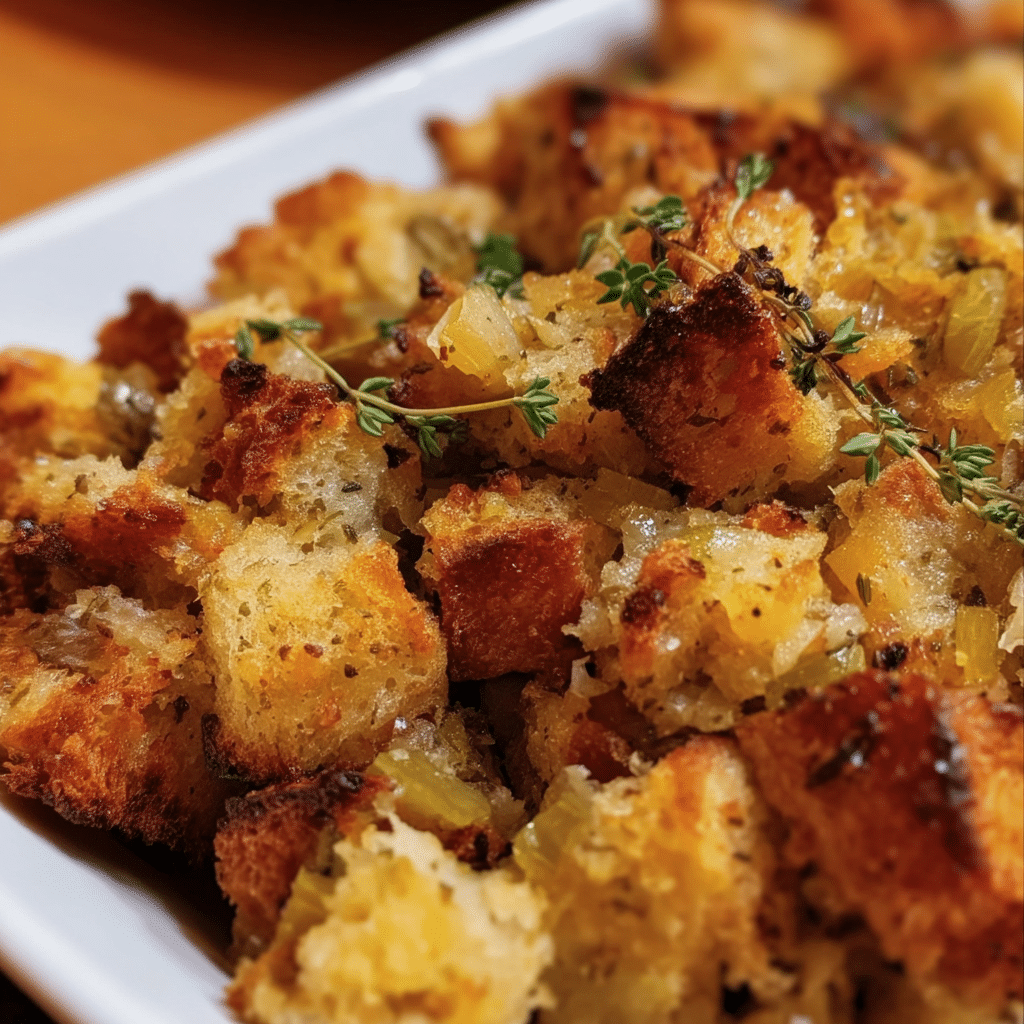
- After 30 minutes, remove the foil and return the stuffing to the oven. Bake uncovered for an additional 15-20 minutes until the top is golden and crispy. This contrast in texture is what makes grandma’s thanksgiving stuffing so delightful!
- Once it’s out of the oven, let the stuffing rest for about 10 minutes. This allows the flavors to settle and makes serving easier.
- When it’s time to serve, fluff the stuffing with a fork to keep it light and airy. You can garnish it with fresh herbs for a pop of color and freshness.
- Don’t forget to taste before serving! Adjust seasoning if necessary, and feel free to add a drizzle of extra broth over the top for added moisture if desired.
- Now, enjoy the fruits of your labor! Grandma’s thanksgiving stuffing is best served alongside turkey, mashed potatoes, and all your favorite sides.
Throughout this process, remember that cooking is as much about the journey as it is about the destination. Enjoy the aromas filling your kitchen, the laughter of family members gathered around, and the anticipation of sharing this delicious dish that embodies the spirit of Thanksgiving.
Incorporating these detailed steps and techniques will ensure that your grandma’s thanksgiving stuffing turns out perfect every time, creating beautiful memories around the table that you and your family will cherish for years to come.
Professional Tips and Techniques for grandma’s thanksgiving stuffing
Thanksgiving is one of the most cherished holidays, and at the heart of any Thanksgiving feast is grandma’s Thanksgiving stuffing. This dish isn’t just a side; it’s a celebration of flavors, memories, and family traditions. As you prepare to create your own version of this classic, there are several professional tips and techniques that can elevate your stuffing from good to unforgettable.
Professional Techniques
First and foremost, understanding the fundamentals of stuffing is crucial. Grandma always emphasized the importance of using day-old bread. Fresh bread contains too much moisture, which can lead to a soggy stuffing. Stale bread, on the other hand, absorbs the broth and flavors perfectly. If you don’t have stale bread on hand, simply cut your bread into cubes and toast it lightly in the oven for about 15 minutes at 300°F. This will create the ideal texture for grandma’s Thanksgiving stuffing.
Another key technique is to sauté your aromatics—onions, celery, and garlic—before mixing them with your bread. This step enhances the flavors and ensures that they are fully cooked, adding depth to your stuffing. Use a mix of butter and olive oil for a rich flavor profile. Grandma would often say, “You can’t rush flavor,” and letting your vegetables sweat in the pan for 10 to 15 minutes is a perfect example of that philosophy.
Incorporating fresh herbs can bring a burst of flavor to your stuffing. Thyme, sage, and parsley are classic choices that pair well with the other ingredients. Chop them finely and add them to the sautéed mixture. For a more intense flavor, consider using a combination of fresh and dried herbs. This insider trick can really set your grandma’s Thanksgiving stuffing apart from the rest.
Troubleshooting Guide
No one wants to face the horror of a dry stuffing, but fear not—there are solutions. If your stuffing ends up too dry, it’s likely that you didn’t add enough liquid. A good rule of thumb is to use about 1 cup of broth for every 4 cups of bread cubes. If you find yourself in a pinch, you can always drizzle a bit more broth over the stuffing just before serving to moisten it up.
On the flip side, if your stuffing is too soggy, you can remedy this by spreading it out on a baking sheet and letting it bake uncovered for a few minutes. This will help evaporate excess moisture and revive the texture.
For those who may be scaling their recipe, whether for a holiday gathering or a simple family dinner, keep in mind that the cooking time may change. A larger batch will likely require a bit longer to bake, so be sure to check for doneness by testing the internal temperature. Stuffing should reach at least 165°F for food safety.
Presentation Tips
Presentation is key, especially for a dish as beloved as grandma’s Thanksgiving stuffing. Consider serving it in a beautiful casserole dish that complements your table setting. You can sprinkle some fresh herbs on top for a pop of color just before serving. Another idea is to mold your stuffing into a ring shape using a bundt pan. This not only makes for an eye-catching presentation but also allows for even baking.
For a touch of elegance, consider pairing your stuffing with a wine or beverage that enhances the flavors. A crisp white wine, such as a Sauvignon Blanc, can cut through the richness of the stuffing, while a light red, like Pinot Noir, offers a delightful contrast. If you want to keep the meal non-alcoholic, serve sparkling apple cider or a fruity mocktail to add a festive flair.
Lastly, don’t forget about the leftovers! Grandma always said that stuffing tastes even better the next day as the flavors meld together. Encourage your guests to take some home, or creatively use leftovers in dishes like stuffed peppers or a savory breakfast casserole. This not only minimizes waste but also allows you to continue enjoying the flavors of grandma’s Thanksgiving stuffing long after the holiday ends.
Creative Variations and Adaptations of grandma’s thanksgiving stuffing
While grandma’s Thanksgiving stuffing is a timeless classic, there’s absolutely room for creativity! Many families have their own unique twists, and exploring different variations can bring new life to this beloved dish. Let’s dive into some creative variations and adaptations that will impress your guests and keep the spirit of Thanksgiving alive!
Seasonal Variations
Thanksgiving is a celebration of the harvest, and there are so many seasonal ingredients that can be incorporated into grandma’s Thanksgiving stuffing. For instance, consider adding roasted butternut squash or pumpkin puree for a touch of sweetness and vibrant color. These ingredients not only enhance the flavor but also add a nutritious element to your stuffing.
Another seasonal addition could be cranberries—dried or fresh—adding a tartness that beautifully contrasts with the savory elements of the stuffing. If you’re feeling adventurous, experiment with adding nuts like pecans or walnuts for a delightful crunch. They provide a wonderful texture and a nutty depth of flavor that can elevate your stuffing to new heights.
Dietary Adaptations
With an increasing number of individuals following various dietary restrictions, it’s essential to consider how grandma’s Thanksgiving stuffing can be adapted. For those on a gluten-free diet, using gluten-free bread or cornbread can create a delicious alternative that still honors the essence of the traditional dish. Just make sure to check the labels to ensure all other ingredients are gluten-free as well.
Vegan adaptations can be just as delightful! Replace the butter with olive oil or coconut oil and use vegetable broth instead of chicken broth. You can even add sautéed mushrooms for an earthy flavor that will satisfy even the most devoted meat-lovers. Don’t forget to include some plant-based sausage or nuts to give your stuffing that hearty, savory component.
Creative Twists
For those looking to infuse a little international flair, consider making an Italian-inspired stuffing with sautéed fennel, Italian sausage, and sun-dried tomatoes. This variation brings a whole new flavor profile to grandma’s Thanksgiving stuffing while staying true to the concept of a hearty, flavorful side dish.
Alternatively, a Mexican twist can be achieved by incorporating chorizo, corn, and black beans. Season your stuffing with cumin and chili powder for a spicy kick that your guests will rave about. Top it off with some cotija cheese and fresh cilantro for a beautiful presentation.
If you’re a fan of experimenting with cooking methods, consider using a slow cooker for your stuffing. Not only does this free up oven space, but it allows the flavors to meld beautifully over a longer period. Simply combine your ingredients in the slow cooker and let it do the work for you while you focus on the turkey and other sides.
Finally, let’s not forget about the transformation of leftovers! Repurpose any remaining stuffing into a savory breakfast dish by mixing it with eggs and baking it in a casserole. You can also stuff bell peppers with the leftover stuffing, top them with cheese, and bake them until bubbly for a delightful twist that feels entirely new.
Whether you stick to grandma’s tried-and-true recipe or venture into new territory with creative variations, the key is to cook with love and intention. This season, let your Thanksgiving stuffing tell a story of tradition, innovation, and the joy of sharing good food with loved ones.
Storage, Reheating, and Meal Prep for grandma’s thanksgiving stuffing
When it comes to Grandma’s Thanksgiving stuffing, the joy of preparing it often goes hand in hand with the joy of sharing it with family and friends. However, once that delicious stuffing has been made, it’s vital to know how to store it properly to maintain its delightful flavor and texture. This section will guide you through the ins and outs of storing, reheating, and meal prepping your beloved stuffing, ensuring that every bite remains as delectable as the first.
Short-term Storage
If you find yourself with leftover Grandma’s Thanksgiving stuffing after the big feast, don’t worry! Proper short-term storage can keep your stuffing fresh for a few days. The first step is to allow the stuffing to cool slightly at room temperature. However, don’t leave it out for more than two hours to prevent foodborne illness.
Once cooled, transfer your stuffing into airtight containers. I always recommend using glass containers with tight-sealing lids or high-quality plastic containers designed for food storage. These containers not only keep air out but also help maintain the moisture in your stuffing. If you have a large batch, consider dividing the stuffing into smaller portions. This way, you can easily reheat just what you need and avoid having to warm up the entire batch, which can lead to dryness.
Store the airtight containers in your refrigerator, where the stuffing will keep well for about 3 to 5 days. Make sure to label each container with the date you prepared the stuffing; having an organized fridge will help you keep track of when it’s time to use those delicious leftovers.
Freezing and Long-term Storage
If you want to keep Grandma’s Thanksgiving stuffing for a longer period, freezing is the way to go! Freezing can extend the shelf life of your stuffing to about 2 to 3 months without sacrificing too much of its flavor or texture.
Start by allowing the stuffing to cool completely. Just like with short-term storage, proper cooling is essential to prevent ice crystals from forming, which can lead to soggy stuffing upon reheating. Once cooled, portion the stuffing into freezer-safe bags or containers. If using bags, try to remove as much air as possible before sealing; this helps prevent freezer burn. For containers, ensure they are airtight and leave a little space at the top for expansion as the stuffing freezes.
Label each bag or container with the date and contents to help you remember what’s inside. When you’re ready to enjoy your frozen stuffing, the best method is to thaw it in the refrigerator overnight before reheating. This gradual thawing process helps retain the moisture and flavor.
Reheating Best Practices
Now that you’ve stored your Grandma’s Thanksgiving stuffing properly, let’s talk about how to reheat it without losing the wonderful texture and taste. There are several methods to consider depending on your time and equipment.
The oven is my preferred method for reheating stuffing. Preheat your oven to 350°F (175°C). Place the stuffing in an oven-safe dish and cover it with aluminum foil to help retain moisture. Heat for about 20 to 30 minutes, or until it reaches an internal temperature of 165°F (74°C). If you prefer a crispy top (who doesn’t?), remove the foil for the last 5 to 10 minutes of reheating.
If you’re in a hurry, the microwave is a convenient option. Place the stuffing in a microwave-safe dish, add a splash of broth or water to keep it moist, and cover it with a microwave-safe lid or damp paper towel. Heat in 1-minute intervals, stirring in between until it’s heated through. Just be careful not to overdo it, as microwaved stuffing can become rubbery if heated too long.
Regardless of your reheating method, always check the internal temperature to ensure it’s safe to eat. If you’re sharing Grandma’s Thanksgiving stuffing with others, maintaining food safety is key!
As a final note, meal prep can be a fantastic strategy for Thanksgiving. If you’re hosting, consider preparing Grandma’s Thanksgiving stuffing a day or two in advance. You can store it in the refrigerator and reheat it on the big day. This not only saves time but also allows the flavors to meld and deepen, making the stuffing even more delicious.
In conclusion, understanding how to properly store, freeze, and reheat Grandma’s Thanksgiving stuffing is as essential as knowing the recipe itself. With the right techniques, you can savor those leftovers and keep the spirit of Thanksgiving alive long after the last plate has been cleared.
Nutritional Benefits and Health Information
As we gather around the table to enjoy Grandma’s Thanksgiving stuffing, it’s easy to focus solely on the comforting flavors and nostalgic memories. However, it’s equally important to consider the nutritional aspects of this beloved dish. Let’s delve into the nutritional benefits and health information associated with Grandma’s Thanksgiving stuffing, providing a comprehensive breakdown that will allow you to enjoy each bite guilt-free.
Nutritional Profile
Grandma’s Thanksgiving stuffing can vary in ingredients and preparation, but it typically includes bread, herbs, broth, and various vegetables like celery and onion. The nutritional content will depend on these components, but generally, a serving (about 1 cup) of traditional stuffing can provide approximately 200-250 calories. Here’s a breakdown of what you might expect:
- Carbohydrates: The primary contributor to the calorie count, coming predominantly from the bread. A typical serving can contain around 30-35 grams of carbs.
- Protein: Depending on any added ingredients like sausage or nuts, you may find 4-10 grams of protein in a serving.
- Fat: If prepared with butter or oil, the fat content can range from 5 to 15 grams, depending on the recipe.
- Fiber: Whole grain breads increase the fiber content, potentially offering 2-4 grams of dietary fiber per serving.
Health Benefits
While Grandma’s Thanksgiving stuffing might not be a superfood, it does have some health benefits, particularly when made with wholesome ingredients. Whole grain bread, for example, can provide more fiber and nutrients compared to white bread, promoting digestive health and helping to keep you full longer.
The herbs and vegetables commonly found in stuffing, such as sage, thyme, celery, and onion, can also add beneficial nutrients. For instance, sage is known for its anti-inflammatory properties, while onions contain quercetin, which may help support heart health. When you include a variety of vegetables, you’re getting additional vitamins and minerals that contribute to overall well-being.
Dietary Considerations
When it comes to dietary preferences, Grandma’s Thanksgiving stuffing can be quite versatile. For those with gluten sensitivities, consider using gluten-free bread as a base. Additionally, if you’re looking to reduce calorie intake, you can substitute butter with olive oil or vegetable broth and add more vegetables to enhance flavor without significantly increasing calories.
For vegetarians and vegans, simply omit any meat-based broth and replace it with vegetable broth. You can also enhance the stuffing with nutrient-dense ingredients like nuts and seeds, which provide healthy fats and protein. If you’re mindful of sodium, opt for low-sodium broth and limit the added salt.
In terms of allergens, it’s important to consider that traditional stuffing may contain gluten, and if using sausage or other meats, it could pose issues for those with food allergies. Always communicate with your guests to ensure everyone can enjoy Grandma’s Thanksgiving stuffing safely.
Healthy modifications can also keep the essence of the dish while making it more nutritious. For example, using whole grain bread, adding more vegetables, or incorporating nuts can uplift the nutritional profile while still delivering that beloved comfort food sensation.
In comparing Grandma’s Thanksgiving stuffing to similar dishes, such as rice or cornbread stuffing, it’s notable that each has its unique flavors and textures. Rice stuffing, for instance, can be lower in calories and gluten-free but may lack the hearty, bread-like texture that many love about traditional stuffing.
In conclusion, Grandma’s Thanksgiving stuffing is not just a tasty side dish; it’s a dish rich in history, flavor, and even nutritional benefits when prepared thoughtfully. Understanding its nutritional profile and making conscious ingredient choices can allow you to enjoy this cherished recipe while staying aligned with your health goals. So, as you gather with family this Thanksgiving, relish every bite of stuffing, knowing that it’s more than just a delicious tradition—it’s a nourishing part of your holiday celebration.
Frequently Asked Questions About Grandma’S Thanksgiving Stuffing
Best grandma’s thanksgiving stuffing recipe
The best grandma’s Thanksgiving stuffing recipe typically features a harmonious blend of bread, herbs, and vegetables, capturing the essence of family gatherings. Start by using a mix of breads—like sourdough and whole wheat—to add depth of flavor and texture. Sauté onions, celery, and garlic in butter for a rich base, then mix in fresh herbs like sage, thyme, and parsley for that classic taste. To achieve the perfect moisture level, gradually add chicken or vegetable broth until the mixture is moist but not soggy, and bake it until it’s golden brown on top. Don’t forget to let it rest for a few minutes before serving; this allows the flavors to meld beautifully.
Traditional grandma’s stuffing recipe
A traditional grandma’s stuffing recipe often honors regional and familial flavors, making it a cherished dish at Thanksgiving. This recipe typically starts with a base of day-old bread, which absorbs the flavors without becoming mushy. Include sautéed onions, celery, and sometimes carrots for added sweetness and texture. Season generously with a mix of dried herbs, such as sage and thyme, and consider adding chopped nuts or dried fruits like cranberries for a delightful twist. For added richness, some families incorporate sausage or giblets, making the stuffing even more flavorful and hearty.
Turkey stuffing recipe traditional
A traditional turkey stuffing recipe is designed to complement the turkey while enhancing the overall flavor of the meal. Begin with a sturdy bread like French or Italian, which holds up well during baking. Sauté onions, celery, and bell peppers in butter, then combine with the bread cubes along with herbs like sage, rosemary, and thyme for that classic Thanksgiving taste. For added depth, consider using chicken broth or even a splash of white wine to moisten the mixture. A good tip is to stuff the turkey just before roasting to keep the stuffing moist and flavorful, but make sure to cook the turkey to an internal temperature of at least 165°F for food safety.
Old fashioned turkey dressing
Old fashioned turkey dressing often evokes nostalgia and family traditions, featuring simple yet robust flavors. This dressing typically includes stale bread, which is torn or cubed and then mixed with sautéed onions and celery for a comforting base. Adding herbs such as sage and thyme is essential for that traditional taste, while keeping the seasoning balanced with salt and pepper. For moisture, use a combination of turkey drippings and broth, ensuring the dressing is flavorful and not overly dry. Bake the dressing separately for a crispy top or inside the turkey for a more moist texture, depending on your family’s preference.