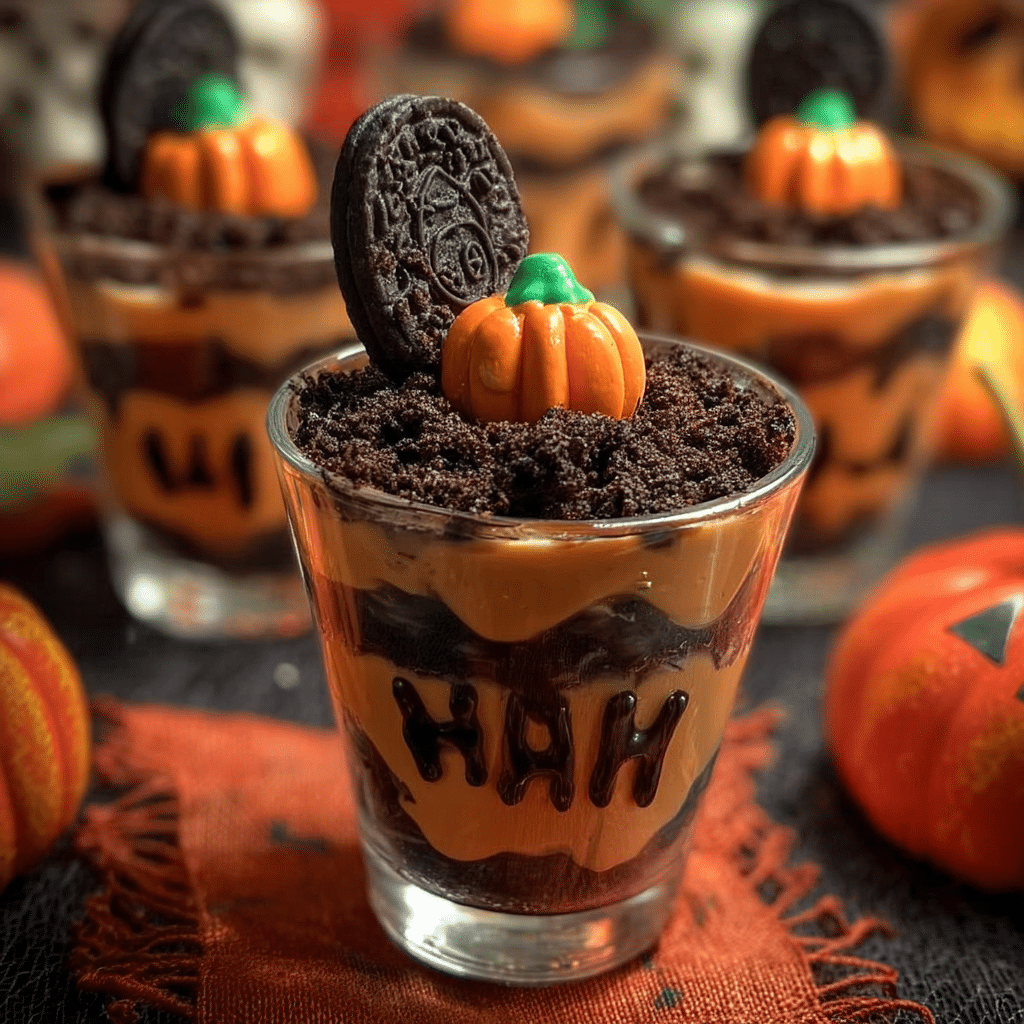
Pumpkin pie cup has become a delightful addition to my autumn recipe repertoire, and it all started one crisp October afternoon. I remember the day vividly. The leaves were turning vibrant shades of orange and gold, and the air carried that unmistakable scent of fall. I had just returned from a local farmers’ market, my arms laden with fresh pumpkins, cinnamon sticks, and bags of nutmeg. As I flipped through a dusty old cookbook, searching for the perfect recipe to highlight my seasonal bounty, I stumbled upon a unique twist on the traditional pumpkin pie—a pumpkin pie cup. It promised all the flavors of my beloved pie but in a convenient, individual serving. Intrigued, I decided to give it a try, and little did I know, it would soon become a favorite in our household.
The first time I made pumpkin pie cups, my kitchen was filled with the warm, spicy aromas of cinnamon and ginger. As I pulled them from the oven, I was greeted by the golden-brown crusts and the rich, creamy filling that looked like a dream. My family gathered around the table, their eyes lighting up with excitement as I presented the mini treats. Each bite was a burst of flavor, a perfect blend of sweetness and spice. The best part? The cups were incredibly easy to make, which made them perfect for busy weeknights when I was juggling work, family, and everything in between. This simple yet delicious dessert quickly became a staple in our autumn celebrations, and I knew I had to share this recipe with fellow food lovers.
The Story Behind This Recipe
The pumpkin pie cup is not just a modern twist on a classic dessert; it carries with it a rich history that dates back centuries. Pumpkin pie itself has its roots in the early American colonies when indigenous peoples introduced European settlers to the versatile pumpkin. They would roast and mash the fruit, creating dishes that celebrated its natural sweetness. Over time, as recipes evolved, the classic pumpkin pie emerged, becoming a beloved dessert at Thanksgiving tables across the United States.
What sets the pumpkin pie cup apart from its traditional counterpart is its individual serving size, making it not only a delightful treat but also a practical solution for busy families. Instead of baking a large pie that requires careful slicing and serving, these cups allow everyone to have their own portion without the fuss. This makes them a fantastic option for family gatherings, potlucks, or even just a cozy night in. They can be made ahead of time and stored in the refrigerator, ready to be enjoyed at a moment’s notice.
Why You’ll Love This Dish
Another reason why the pumpkin pie cup holds a special place in my heart is its seasonal relevance. Autumn is a time for comfort, warmth, and gathering with loved ones, and what better way to celebrate it than with a dessert that encapsulates all those feelings? The vibrant colors and rich flavors of pumpkin, combined with the spices of cinnamon and nutmeg, create an emotional connection that resonates with many of us. Each bite transports me back to my childhood, where pumpkin pie was a staple at family dinners, evoking memories of laughter, stories, and togetherness.
In this guide, you will learn everything you need to know about making your own pumpkin pie cups. From the essential ingredients to tips for achieving the perfect texture, this recipe is designed to be accessible for everyone, regardless of culinary skill level. Whether you’re a seasoned baker or a novice in the kitchen, I promise you’ll find joy in creating these delightful treats. You’ll not only impress your family and friends but also create lasting memories centered around this heartwarming dessert.
So, roll up your sleeves and join me on this culinary adventure as we explore the world of pumpkin pie cups—a delicious homage to a beloved classic that brings the spirit of fall right into your kitchen.
The Rich History and Cultural Significance of pumpkin pie cup
The pumpkin pie cup is a delightful adaptation of a classic dessert that has a rich and storied background. To truly appreciate this delicious treat, it’s essential to delve into the history of pumpkin pie itself, explore its cultural significance, and understand how this recipe has evolved over time to become the popular individual servings we enjoy today. With its roots deeply embedded in American culinary tradition, the pumpkin pie has become synonymous with autumn and Thanksgiving celebrations.
Origins and History
The origins of pumpkin pie can be traced back to the early 17th century when European settlers arrived in North America. They encountered indigenous peoples who had long been utilizing the pumpkin as a staple food source. Initially, pumpkins were roasted, boiled, or used in soups, but as settlers began to adapt their cooking techniques, they incorporated pumpkins into their baked goods. The earliest recipes for pumpkin pie were quite different from what we know today. In fact, the first pumpkin pies were made in a crustless format, where the pumpkin filling was baked directly in a dish.
As the years progressed and recipes were passed down through generations, the modern pumpkin pie began to take shape. By the mid-1800s, cookbooks were publishing recipes that included spices like cinnamon, nutmeg, and ginger, enhancing the flavor profile and making it a comforting dessert. The addition of sweeteners and the creation of a pie crust transformed this dish into the beloved classic we cherish today. The pumpkin pie cup is simply a modern interpretation that allows for a personal touch, perfect for today’s fast-paced lifestyles.
Cultural Significance
In American culture, pumpkin pie is more than just dessert; it symbolizes the spirit of Thanksgiving and harvest festivals. It’s a reminder of gratitude, family gatherings, and the joy of sharing food with loved ones. The pumpkin pie cup embodies this spirit by providing a personal serving that allows each guest to indulge in their own slice of happiness without the hassle of slicing a traditional pie. This individual serving makes it easier to cater to different tastes and dietary restrictions, ensuring everyone at the table can enjoy a taste of fall.
Regions across the United States have their own variations of pumpkin pie, contributing to the dish’s rich tapestry. For instance, in New England, you might find recipes that incorporate maple syrup for added sweetness, while in the South, some chefs may add a touch of bourbon for a unique twist. Each variation showcases the versatility of pumpkin as an ingredient and reflects the local flavors and traditions of the area.
Nutritional Benefits
Beyond its delicious taste and cultural significance, the pumpkin pie cup also offers nutritional benefits. Pumpkins are packed with vitamins, particularly vitamin A, which is essential for eye health and immune function. They are also a great source of fiber, which aids in digestion and helps maintain a healthy weight. The spices commonly used in pumpkin pie, such as cinnamon and nutmeg, are not just flavorful; they are also known for their antioxidant properties and can contribute to overall well-being.
As health-conscious cooking becomes more prevalent, the pumpkin pie cup can be easily adapted to suit various dietary needs. Substitute traditional pie crusts with gluten-free options, or use natural sweeteners to reduce sugar content. By making these small adjustments, you can enjoy the comforting flavors of pumpkin pie while still being mindful of your dietary choices.
In conclusion, the pumpkin pie cup is more than just a dessert; it’s a celebration of history, culture, and health. As we embrace the fall season, this delightful treat serves as a reminder of the connections we share through food, making it a perfect addition to any family gathering or festive occasion. Embrace the joy of baking and create your own pumpkin pie cups—a sweet homage to a classic that continues to evolve and bring people together.
Essential Ingredients for Perfect pumpkin pie cup
When it comes to creating the perfect pumpkin pie cup, the right ingredients are crucial. Not only do they determine the flavor and texture of your dessert, but they also contribute to the overall experience of enjoying this seasonal treat. Below, we’ll explore the essential ingredients, their roles, and tips for selecting the best ones.
Essential Ingredients
- Canned Pumpkin Puree: 1 cup
- Granulated Sugar: ½ cup
- Brown Sugar: ¼ cup
- Eggs: 2 large
- Heavy Cream: ½ cup
- Vanilla Extract: 1 teaspoon
- Pumpkin Pie Spice: 1 tablespoon
- Salt: ¼ teaspoon
- Graham Cracker Crumbs: 1 cup (for the crust)
- Butter: 4 tablespoons, melted (for the crust)
Let’s break down each ingredient to understand its significance:
- Canned Pumpkin Puree: The star of our pumpkin pie cup! It provides that rich, earthy flavor and creamy texture. When selecting canned pumpkin, look for 100% pure pumpkin and avoid pumpkin pie filling, as the latter contains added sugars and spices.
- Granulated Sugar: This sweetener balances the natural earthiness of the pumpkin. Adjust the sugar based on your taste preference, but remember that some sweetness is essential for a classic dessert flavor.
- Brown Sugar: This adds a deeper, more complex sweetness with hints of caramel. The moisture in brown sugar also contributes to a softer filling.
- Eggs: Eggs act as a binder and help set the filling as it bakes. They provide structure and richness to the pumpkin pie cup.
- Heavy Cream: This adds creaminess and richness to the filling. You can substitute half-and-half for a lighter option, though it may affect the texture slightly.
- Vanilla Extract: A splash of vanilla enhances the overall flavor profile, rounding out the sweetness and adding warmth.
- Pumpkin Pie Spice: A blend of cinnamon, nutmeg, ginger, and cloves, this mix gives the pumpkin pie cup its signature taste. You can make your own blend or purchase it pre-made.
- Salt: A small amount of salt is critical in enhancing flavors and balancing the sweetness.
- Graham Cracker Crumbs: These form the base of your pumpkin pie cup crust. They provide a crunchy texture that contrasts beautifully with the smooth filling.
- Butter: Melted butter is mixed with the graham cracker crumbs to bind them together and add richness to the crust.

Pumpkin Pie in a Cup
Ingredients
For the crust
- 2 cups crumbled graham crackers can also use ginger snaps or digestive cookies
- 5 tablespoon melted butter
For the pumpkin pie filling
- 1 package unflavored gelatin
- 1 teaspoon ground cinnamon plus extra for sprinkling on before serving
- ½ tsp ground ginger
- ½ teaspoon ground nutmeg
- ½ tsp salt
- 1 cup heavy cream
- ⅛ cup sugar
- 2 eggs beaten
- 15 oz canned pumpkin puree
For serving
- whipped cream for serving
Instructions
- Make your crusts by adding the graham crackers to a large ziplock bag. Using a rolling pin, crush the graham crackers into small pieces until they resemble sand.
- Pour the graham cracker crumbs into a medium-sized bowl. Add the melted butter to the graham cracker crumbles and mix to combine. Set aside.
-
Make the pumpkin pie filling by combining the gelatin, cinnamon, ginger, nutmeg and salt in a heavy saucepan. Add the heavy cream, sugar, and eggs, mixing well to combine. Heat over low heat, stirring continuously until the gelatin dissolves and the pie mixture thickens (about 10 minutes). Remove from heat and stir in the pumpkin into the gelatin mixture.
-
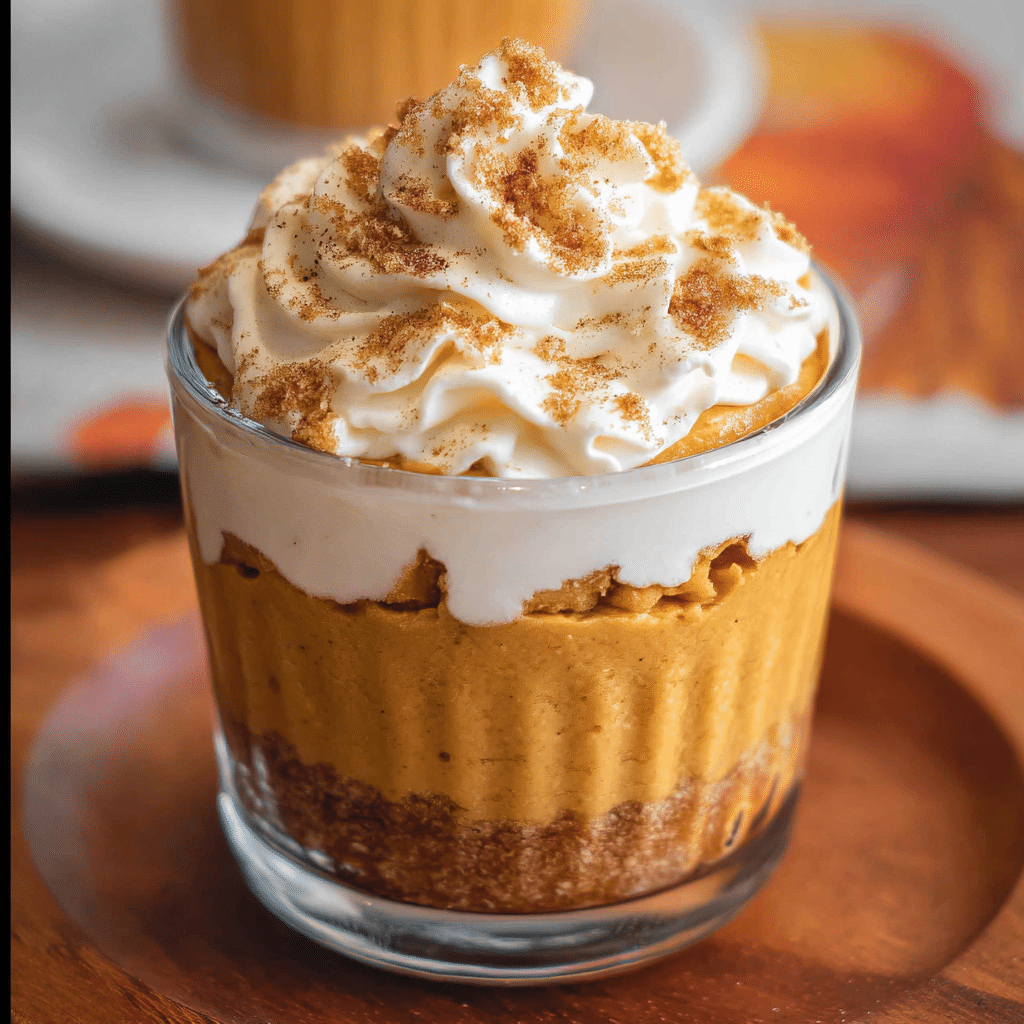
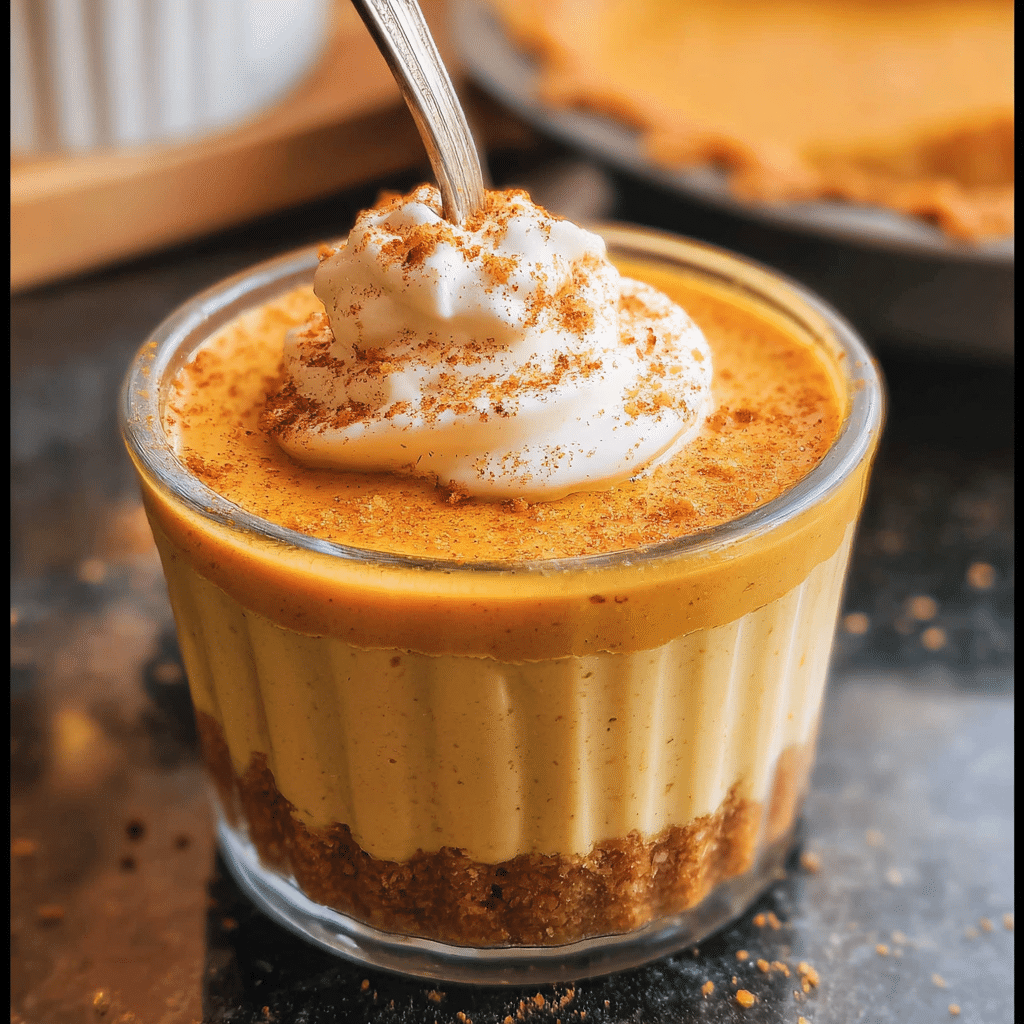
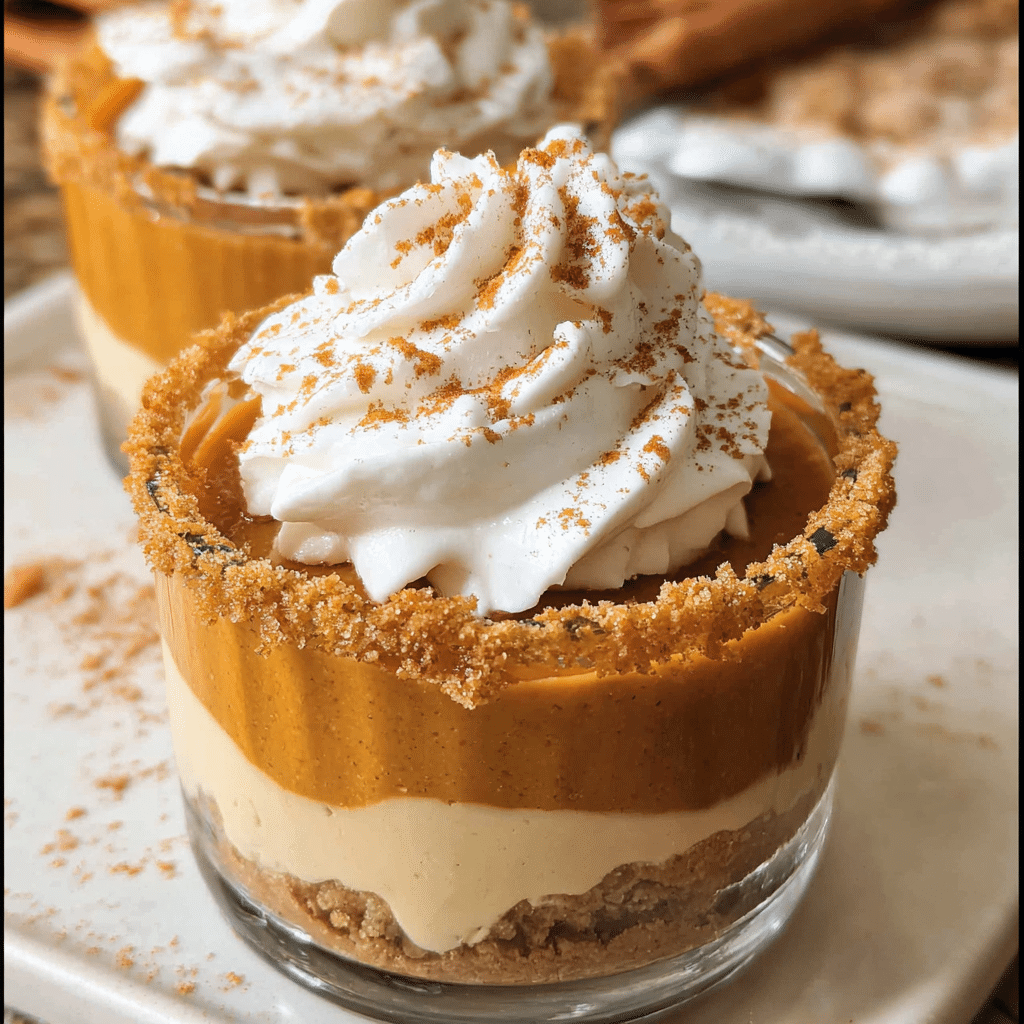
Assemble the cups. Add the cookie crust to the bottom of each cup. Top with the pumpkin pie filling, then cover each cup with foil and place in the refrigerator to chill for at least 2 hours.
-
When ready to serve, top each cup with whipped cream and serve. Add a sprikle of cinnamon sugar if you’re feeling fancy!
Shopping Tips
When shopping for your ingredients, consider the following:
- Choose organic canned pumpkin if available, as it often has a richer flavor and is free from preservatives.
- For sugars, look for brands that offer unrefined or organic options for a more natural taste.
- When selecting eggs, try to find free-range or organic eggs for better quality and taste.
- Check the expiration date on the heavy cream and vanilla extract to ensure freshness.
Substitutions and Alternatives
Not everyone can enjoy the same ingredients due to dietary restrictions. Here are some alternatives:
- Gluten-Free: Use gluten-free graham crackers or crushed almonds for the crust.
- Dairy-Free: Substitute heavy cream with coconut cream or a dairy-free alternative like almond milk, though the texture may vary.
- Lower Sugar: To reduce sugar, use a sugar substitute like stevia, but be cautious as it can alter the flavor and texture.
Lastly, proper storage of your ingredients is crucial for maintaining their quality. Store canned pumpkin in a cool, dry place, and refrigerate any leftovers once opened. For spices, keep them in airtight containers away from sunlight. Butter can be kept in the fridge for several months, while eggs should be used within their sell-by date for best results.
With these essential ingredients and tips, you’re well on your way to creating a delicious pumpkin pie cup that will delight your family and friends!
Detailed Step-by-Step pumpkin pie cup Cooking Instructions
Now that we’ve gathered our ingredients, it’s time to dive into the step-by-step cooking process to create the mouthwatering pumpkin pie cup. This dessert is not only delicious but also relatively quick to prepare, taking about 30 minutes from start to finish. So roll up your sleeves, and let’s get cooking!
Preparation Steps
- Preheat the Oven: Start by preheating your oven to 350°F (175°C). Proper temperature control is crucial for ensuring your filling sets correctly and your crust is perfectly baked.
- Prepare the Crust: In a mixing bowl, combine 1 cup of graham cracker crumbs and 4 tablespoons of melted butter. Use a fork to mix until the crumbs are evenly coated and resemble wet sand.
- Form the Crust: Spoon the graham cracker mixture into your serving cups or ramekins and press it down firmly with the back of a spoon or your fingers to create an even layer. This step is essential for a sturdy crust that holds together when you dig in.
- Chill the Crust: Place the cups in the refrigerator while you prepare the filling. Chilling the crust helps it firm up and prevents it from becoming too soft when the filling is added.
Cooking Process
- Mix the Filling: In a large mixing bowl, combine 1 cup of canned pumpkin puree, ½ cup of granulated sugar, ¼ cup of brown sugar, and 2 large eggs. Use a whisk or electric mixer to blend the ingredients until smooth. Make sure there are no lumps for a creamy texture in your pumpkin pie cup.
- Add Cream and Spices: Gradually add ½ cup of heavy cream, 1 teaspoon of vanilla extract, 1 tablespoon of pumpkin pie spice, and ¼ teaspoon of salt to the mixture. Continue whisking until everything is well combined. The aroma of the spices should start to fill your kitchen at this point!
- Fill the Cups: Carefully pour the pumpkin filling into each prepared cup, leaving a little space at the top for expansion during baking. Be gentle to avoid disturbing the crust.
- Bake: Place the cups on a baking sheet and bake in the preheated oven for 25-30 minutes, or until the filling is set around the edges but slightly jiggly in the center. This is where you need to keep an eye on them; overbaking can lead to a dry filling!
- Cool: Once baked, remove the cups from the oven and allow them to cool at room temperature for about 10-15 minutes. This cooling time helps the filling set further.
Final Assembly
- Chill: After cooling, transfer the pumpkin pie cups to the refrigerator to chill for at least an hour before serving. Chilling not only enhances the flavors but also improves the texture.
- Serve: When ready to serve, top each cup with a dollop of whipped cream and a sprinkle of pumpkin pie spice or crushed nuts for added texture. This finishing touch makes your dessert even more inviting!
- Enjoy: Gather your family or friends, and dig into your delicious pumpkin pie cups. Share stories and create memories while savoring each bite of this delightful fall treat.
Common mistakes to avoid include not properly mixing the filling (which can lead to a lumpy texture) or overbaking the cups. Remember, the filling will continue to firm up as it cools, so don’t be tempted to bake them until they are rock solid. With these detailed instructions and tips, you’ll be well on your way to impressing everyone with your homemade pumpkin pie cups!
Professional Tips and Techniques for pumpkin pie cup
When it comes to crafting the perfect pumpkin pie cup, there are some professional tips and techniques that can elevate your dessert from good to exceptional. Whether you’re a novice baker or a seasoned chef, these insights will help you create a delicious and visually appealing treat that will leave everyone asking for seconds.
Professional Techniques
First and foremost, let’s talk about the importance of quality ingredients. The flavor of your pumpkin pie cup is heavily influenced by the ingredients you choose. Opt for fresh pumpkin puree instead of canned when possible. While canned pumpkin is convenient, nothing beats the taste of a freshly roasted pumpkin. To make your own puree, simply roast a small pie pumpkin until tender, scoop out the insides, and blend until smooth.
Additionally, spices are crucial in developing the warm, comforting flavors we associate with pumpkin pie. A combination of cinnamon, nutmeg, and ginger can be easily adjusted to suit your taste. I personally love adding a pinch of cardamom for an unexpected twist that adds depth to the flavor profile of the pumpkin pie cup.
Texture is another important aspect. To achieve a creamy and smooth filling, make sure to blend your ingredients thoroughly. Use an immersion blender or a food processor to avoid any lumps. This is especially critical if you’re incorporating cream cheese or whipped cream into your filling, as you want a silky consistency that will easily fill your cups.
Troubleshooting Guide
Even the best bakers encounter challenges. One common issue is the filling overflowing during baking. To prevent this, make sure to not overfill your cups. Leave about a quarter-inch space at the top to allow for rising. If you find your filling too runny, consider adding a bit more cornstarch or adjusting the amount of cream. A thicker filling will hold its shape better and provide a more satisfying bite.
Another common problem is a crust that turns out soggy. To combat this, pre-bake your crust for about 10 minutes before adding the filling. This will help to set the crust and keep it crisp. You can also brush the inside of the crust with a bit of beaten egg before filling it, which acts as a barrier to moisture.
Presentation Tips
Presentation is key when serving your pumpkin pie cup. Consider using clear cups or glasses that showcase the beautiful colors of your layers. You can create a lovely layered effect by alternating between the pumpkin filling and whipped cream or crumbled ginger snaps. A dollop of whipped cream on top, garnished with a sprinkle of cinnamon or a few pecans, adds the perfect finishing touch.
For an added layer of sophistication, consider drizzling caramel or chocolate sauce over the top. Not only does it enhance the flavor but it also adds a visual appeal that will impress your guests. Use a squeeze bottle for precise drizzling, or simply use a spoon for a more casual look.
As for beverage pairings, a pumpkin pie cup pairs beautifully with a spiced chai tea or a glass of sweet dessert wine. For those who prefer a non-alcoholic option, try serving it with an apple cider or even a spiced latte. The warmth and spices in these beverages complement the flavors of your dessert seamlessly.
Finally, if you’re planning to make these cups ahead of time, assemble them without the whipped cream topping. This keeps everything fresh and prevents the cream from becoming soggy. Just add the whipped cream right before serving for maximum impact.
In summary, creating the perfect pumpkin pie cup involves choosing quality ingredients, mastering your techniques, and paying attention to presentation. With these professional tips in mind, you’ll be well on your way to impressing family and friends with a dessert that is not only delicious but also visually stunning.
Creative Variations and Adaptations of pumpkin pie cup
Now that you’ve mastered the classic pumpkin pie cup, let’s explore some creative variations and adaptations that will keep your dessert game exciting and fresh. The beauty of this dessert lies in its versatility, allowing you to play with flavors, textures, and dietary needs.
Seasonal Variations
The fall season is synonymous with pumpkin, but that doesn’t mean you can’t incorporate other seasonal ingredients. For instance, try adding some roasted apples or pears to your pumpkin pie cup for a delightful twist. The natural sweetness and tartness of these fruits pair wonderfully with the spiced pumpkin filling.
In winter, consider infusing your filling with peppermint or chocolate. A hint of peppermint extract can transform your classic pumpkin filling into a festive treat that’s perfect for holiday gatherings. You can even layer crushed peppermint candies on top for an extra crunch.
Dietary Adaptations
In today’s world, accommodating various dietary needs is essential. Fortunately, the pumpkin pie cup can easily be modified to fit different diets. For a vegan version, substitute eggs with a flaxseed meal or applesauce and use coconut or almond milk instead of dairy. You won’t lose any of the creamy texture or flavor!
If you’re looking for a gluten-free option, simply swap out traditional pie crust for a gluten-free graham cracker crust or make a crustless version. This also simplifies the preparation and reduces calories without sacrificing taste. For those on a keto diet, consider using almond flour for the crust and a sugar substitute in the filling. These adjustments will keep the flavors intact while making the dessert compliant with dietary restrictions.
Creative Twists
There are endless ways to get creative with your pumpkin pie cup. One of my favorite adaptations is to incorporate a layer of cheesecake in the middle. The richness of the cheesecake balances perfectly with the spiced pumpkin filling, creating a decadent dessert experience. Just prepare a basic cheesecake batter and pour it into the cups before adding the pumpkin layer on top.
Another twist is to experiment with the spices. While cinnamon and nutmeg are classic choices, consider adding a bit of chili powder or cayenne for a spicy kick. This unexpected heat can beautifully contrast with the sweetness of the pumpkin.
If you have leftovers, don’t let them go to waste! Transform remaining pumpkin pie cup filling into pancakes or waffles for a unique breakfast treat. Simply mix the filling into your pancake batter, cook as usual, and serve with maple syrup for a delightful morning surprise.
Lastly, consider the cooking method. While baking is traditional for pumpkin pie, you can also prepare your pumpkin pie cup in a slow cooker. This method allows for a creamy, custard-like filling that is incredibly forgiving and perfect for those who may be intimidated by the oven. Just layer your ingredients in the slow cooker and let it do the work for you!
In conclusion, the pumpkin pie cup is a canvas for creativity. From seasonal swaps to dietary adaptations and unique twists, you can easily customize this dessert to suit your tastes and occasions. Embrace the versatility of this delightful treat, and don’t hesitate to experiment with different flavors and presentations. Your taste buds will thank you!
Storage, Reheating, and Meal Prep for pumpkin pie cup
When it comes to enjoying a delicious pumpkin pie cup, knowing how to store it properly can make all the difference in maintaining its flavor and texture. Whether you’ve whipped up a batch for a family gathering or just want to treat yourself, understanding storage, reheating, and meal prep techniques is essential. Let’s dive into the details!
Short-term Storage
If you find yourself with leftover pumpkin pie cups after a cozy family dinner, the first step is to store them correctly. Pumpkin pie cups can last in the refrigerator for about 3 to 5 days. To ensure they stay fresh, transfer them into airtight containers. I recommend using glass or BPA-free plastic containers that seal tightly. This helps prevent any absorption of odors from other foods in the fridge, which can alter the delightful pumpkin flavor.
Before placing the pumpkin pie cups in the refrigerator, allow them to cool completely at room temperature. I remember the first time I made these delightful treats; I was so eager to taste them that I rushed the cooling process. The result? A soggy bottom and a less-than-ideal flavor. Give them at least 30 minutes to cool before sealing them up. If you’re portioning them out for individual servings, consider using small mason jars or even silicone muffin cups. These not only help with portion control but also make for a cute presentation when serving to guests.
Freezing and Long-term Storage
If you want to keep your pumpkin pie cups for a more extended period, freezing is a fantastic option. Properly stored, these treats can last in the freezer for up to 3 months. When freezing, ensure that each cup is placed in a freezer-safe, airtight container. You can also wrap them tightly in plastic wrap and then place them in a heavy-duty freezer bag. This double-layer protection ensures that freezer burn doesn’t get a chance to spoil your delicious creation.
One important tip for freezing is to slightly under-bake the pumpkin pie cups if possible. This technique allows the cups to maintain their texture when reheated. I always make a note to do this when preparing for a big gathering. It makes it easier to reheat later without losing the creamy consistency that makes pumpkin pie cups so enjoyable.
Reheating Best Practices
When the time comes to enjoy your stored pumpkin pie cups, reheating them correctly is crucial to preserve that delightful flavor. The best method is to use the oven or microwave. If you’re using the oven, preheat it to 350°F (175°C). Place the pumpkin pie cups on a baking sheet and cover them with aluminum foil to prevent over-browning. Heat for about 10-15 minutes, or until warmed through. This method allows the cups to reheat evenly and gives them a nice, warm texture.
If you’re short on time, the microwave is a quick alternative. Place the pumpkin pie cup in a microwave-safe dish, cover it with a damp paper towel to keep moisture in, and heat for about 30 seconds to 1 minute, checking frequently to prevent overheating. I’ve made the mistake of microwaving too long before, resulting in a rubbery texture that was far from enjoyable. So, patience is key here!
As with any food item, food safety considerations are paramount. Always check for signs of spoilage, such as an unusual odor or changes in texture, before consuming. It’s also wise to label your containers with the date they were made, so you can keep track of how long they’ve been stored.
In terms of shelf life, pumpkin pie cups can be expected to last up to a week in the refrigerator and up to three months in the freezer. When portioning for meal prep, consider using single-serving containers to make it easy to grab a quick dessert or snack. This strategy not only helps with portion control but also makes it easier to keep track of how many you have left.
In conclusion, storing your pumpkin pie cups properly ensures that you can enjoy their deliciousness at any time, whether freshly made or pulled from the freezer. With these tips, you’ll be well-equipped to handle meal prep like a pro, making your pumpkin pie cups a staple treat that you can indulge in whenever you like.
Nutritional Benefits and Health Information
Understanding the nutritional value of your food is crucial, especially when indulging in treats like pumpkin pie cups. Not only are they delicious, but they also pack a surprising amount of nutrients. Let’s explore the details together, shall we?
Nutritional Profile
A standard pumpkin pie cup is a delightful blend of ingredients that typically includes pumpkin puree, sugar, eggs, and spices like cinnamon and nutmeg, all enveloped in a creamy filling. The primary ingredient, pumpkin, is a nutritional powerhouse. One cup of cooked pumpkin contains about 49 calories, 2 grams of protein, 12 grams of carbohydrates, and a mere 0.2 grams of fat. This makes the pumpkin pie cup a relatively low-calorie dessert option compared to many others.
Moreover, pumpkin is incredibly rich in vitamins and minerals, including vitamin A, which is essential for eye health, and vitamin C, which supports your immune system. It also contains potassium, which is great for heart health. If you’re someone who keeps an eye on macronutrients, you’ll appreciate that pumpkin pie cups can fit into various dietary plans, including low-calorie and high-fiber diets.
Health Benefits
Beyond its nutritional profile, pumpkin is known for its health benefits. The bright orange color indicates a high level of carotenoids, particularly beta-carotene, which converts to vitamin A in the body. This vitamin is crucial for maintaining good vision and skin health. As a child, I vividly remember my grandmother always saying that eating carrots and pumpkin would help me see in the dark. At the time, I thought it was a myth, but as I learned more about nutrition, I realized she was onto something!
Furthermore, pumpkin’s fiber content aids digestion and promotes a feeling of fullness, making it a smart choice for those watching their weight. The spices commonly used in pumpkin pie cups, such as cinnamon and nutmeg, also come with their own health benefits, including anti-inflammatory properties and blood sugar regulation.
Dietary Considerations
When crafting your pumpkin pie cups, it’s essential to consider dietary restrictions and allergies. For those with gluten sensitivities, using gluten-free graham cracker crumbs or almond flour for the crust can be a delightful alternative. You can also substitute sugar with natural sweeteners like maple syrup or coconut sugar for a healthier twist.
For individuals who are lactose intolerant or following a dairy-free diet, almond milk or coconut cream can replace traditional milk and cream, allowing everyone to enjoy this treat without discomfort. In my own kitchen experiments, I’ve found that substituting ingredients can lead to exciting new flavors and textures. It’s all about finding what works for you!
Additionally, if you’re concerned about the calorie content, consider reducing the sugar or using a sugar substitute. However, be mindful of the balance; too much alteration can impact the flavor and consistency of your pumpkin pie cups. This balance is something I’ve learned through trial and error, so take your time experimenting!
In comparison to similar desserts, pumpkin pie cups may come out healthier than traditional pumpkin pie, primarily due to portion control and the potential for ingredient substitutions. The smaller size means you can savor the flavor without overindulging.
In summary, pumpkin pie cups are not only a delightful treat but also a nutritious option that can fit into various dietary needs. With a bit of creativity and knowledge about substitutions and portion control, you can enjoy this delicious dessert guilt-free. So, the next time you whip up a batch, remember that you’re not just enjoying a sweet treat; you’re nourishing your body with wholesome ingredients!
Frequently Asked Questions About Pumpkin Pie Cup
Is pumpkin pie in a cup healthy?
Pumpkin pie in a cup can be a healthier alternative to traditional pumpkin pie, especially if you focus on using wholesome ingredients. Opt for a crustless version to reduce calories and carbohydrates, or use a whole grain or nut-based crust for added fiber. Additionally, you can sweeten it with natural sweeteners like maple syrup or honey instead of refined sugars. Incorporating Greek yogurt can also add protein and creaminess, making it a nutritious option. Don’t forget to add spices like cinnamon and nutmeg, which not only enhance flavor but also have health benefits.
What is a good pumpkin pie recipe?
A classic pumpkin pie recipe typically includes pureed pumpkin, eggs, sugar, and spices like cinnamon, nutmeg, and ginger, all mixed into a pie crust. For a delicious pumpkin pie cup, combine 1 cup of pumpkin puree, 2 eggs, 1/2 cup of brown sugar, 1 teaspoon of cinnamon, and 1/4 teaspoon of nutmeg in a mixing bowl. Pour the mixture into individual serving cups and bake at 350°F (175°C) for about 25-30 minutes or until set. To elevate the flavor, consider adding a splash of vanilla extract and using a pinch of salt to enhance the sweetness.
How can I create a visual recipe for pumpkin pie in a cup?
Creating a visual recipe for pumpkin pie in a cup can be done effectively by breaking down the process into clear, step-by-step images or videos. Start by photographing each ingredient along with its measurements, then capture the mixing process, highlighting the texture of the batter. Next, take shots of pouring the mixture into cups and placing them in the oven. Finally, showcase the finished product, garnished with whipped cream or a sprinkle of cinnamon. You can use platforms like Instagram or Pinterest to share these visuals, along with concise captions that guide viewers through the recipe.
What is a pumpkin pie in a mug?
A pumpkin pie in a mug is a quick, single-serving dessert that captures all the flavors of traditional pumpkin pie in an easy-to-make format. To prepare it, combine ingredients such as pumpkin puree, eggs, milk, sweetener, and spices directly in a microwave-safe mug. Microwave for about 1-2 minutes, checking for doneness, until the mixture is set. This method is perfect for those looking for a fast treat without the need for baking an entire pie, and you can customize it by adding chocolate chips or nuts for added texture and flavor.