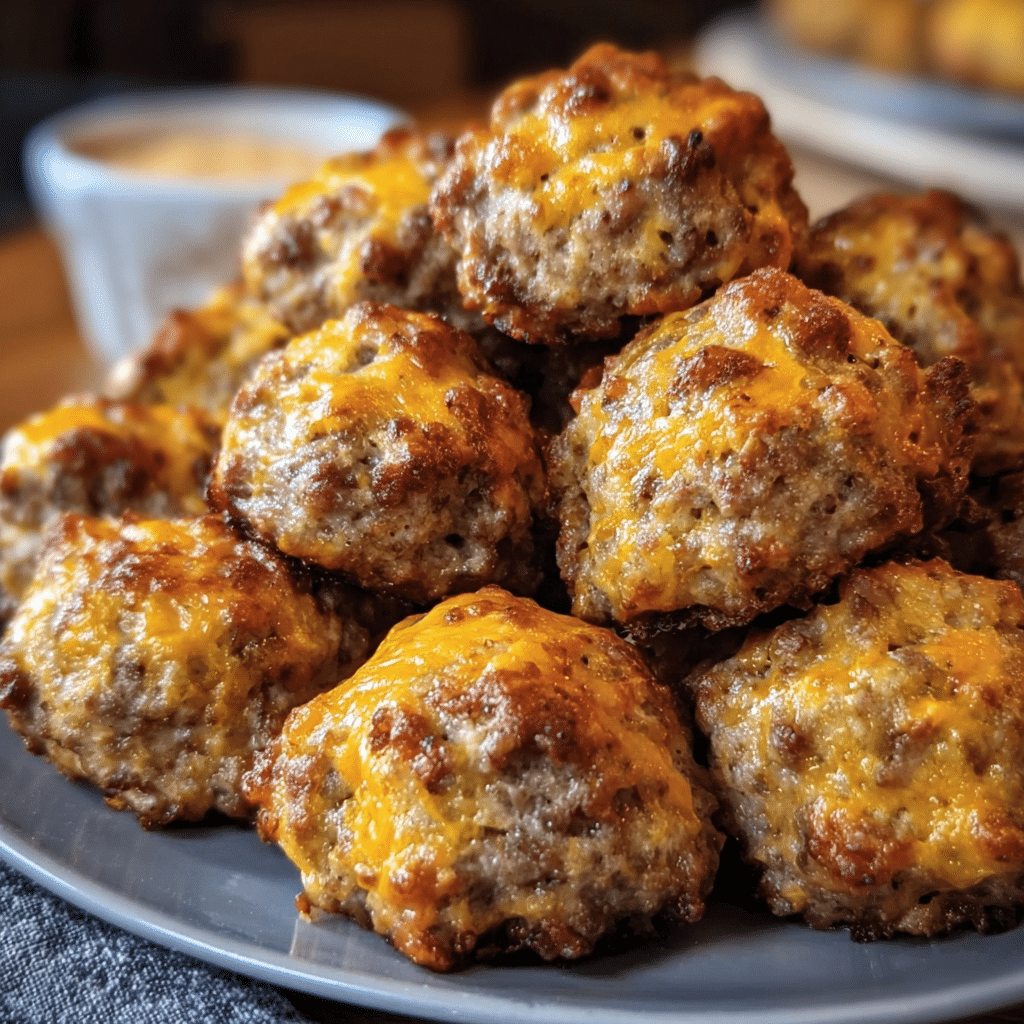
Bisquick sausage balls have a special place in my heart, and I bet they will find a cozy spot in yours too. I vividly remember the first time I tasted these delightful bites. It was a chilly Saturday morning, and my grandmother was bustling around the kitchen, her apron dusted with flour and her hair tied back in a messy bun. The aroma of seasoned sausage danced through the air, luring me toward the kitchen like a moth to a flame. She had just pulled a tray of golden-brown sausage balls from the oven, and my mouth watered in anticipation. As I bit into one, the crispy exterior gave way to a savory filling that was both rich and satisfying. From that moment on, I was hooked.
Fast forward to today, and I find myself making bisquick sausage balls for my own family. The recipe has become a staple at our gatherings, whether it’s a casual brunch, a game day snack, or a cozy family dinner. What I adore about this dish is not just its scrumptious taste, but the memories it conjures of laughter-filled kitchens and warm family gatherings. In many ways, these sausage balls symbolize the comfort of home and the joy of sharing food with loved ones.
The Story Behind This Recipe
The origins of bisquick sausage balls can be traced back to the mid-20th century, a time when convenience in cooking began to rise in popularity. The introduction of Bisquick, a pre-mixed baking mix, revolutionized how families approached cooking. It allowed home cooks to whip up delicious dishes with minimal effort, and thus, the sausage balls were born. This dish is a fantastic representation of how traditional recipes can adapt to modern needs, making them accessible to busy families.
As I delved deeper into the recipe’s history, I discovered that variations of sausage balls have been around for ages, often made with different types of flour or seasonings depending on regional tastes. However, the use of Bisquick has made these sausage balls particularly beloved for their ease and consistent results. The fact that you can create a delicious appetizer or snack in under 30 minutes is a game-changer for busy families. When life gets hectic, bisquick sausage balls provide a quick, satisfying solution without sacrificing flavor.
Why You’ll Love This Dish
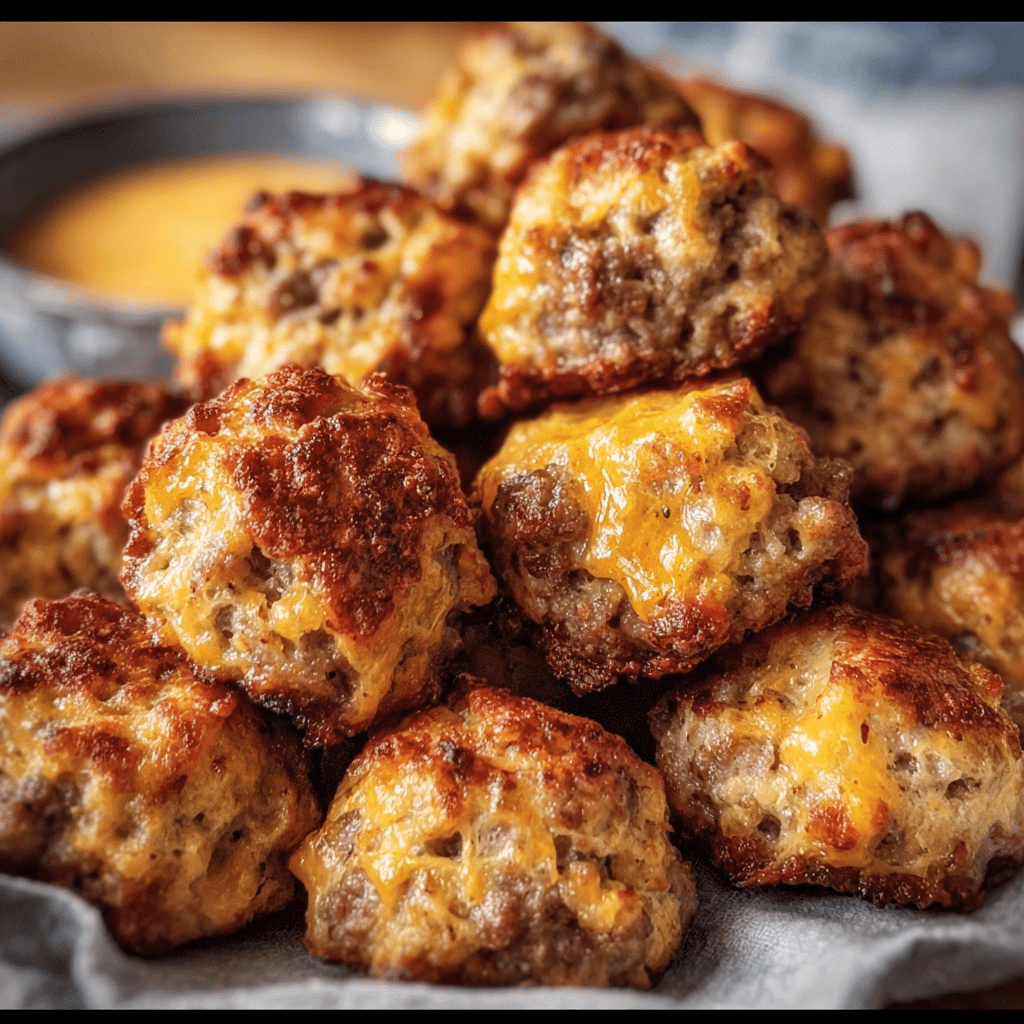
What makes bisquick sausage balls truly special is their versatility. You can serve them as a savory breakfast treat, a hearty snack during game day, or even as finger food at parties. They pair wonderfully with a variety of dips, from spicy mustard to creamy ranch, making them an absolute crowd-pleaser. My family often enjoys them with a side of homemade honey mustard sauce, which adds a delightful contrast to the savory sausage.
These sausage balls also have a seasonal relevance that makes them even more appealing. While they are perfect for any occasion, I find that they shine brightest during the holidays. Whether it’s a Thanksgiving gathering, a Christmas brunch, or a New Year’s Eve party, bisquick sausage balls are always a hit, bringing warmth and flavor to the table. They are so easy to make that I often prepare a double batch, knowing that they will disappear quickly!
Emotionally, this dish connects me to my roots, reminding me of the love and care that goes into cooking for family. Each bite evokes memories of my grandmother’s kitchen and the way she poured her heart into every meal. I hope that as you embark on your journey to make bisquick sausage balls, you too feel that connection, creating not just a meal, but a memory.
In this guide, you will learn everything you need to know about bisquick sausage balls, from the ingredients to the step-by-step process of making them. We will explore variations, tips for perfecting the recipe, and even ideas for serving. By the end of this journey, I promise you’ll have the confidence to whip up these delightful bites for any occasion!
The Rich History and Cultural Significance of bisquick sausage balls
The rich history and cultural significance of bisquick sausage balls is a fascinating journey that reflects the evolution of American cooking. While these savory morsels may seem like a modern invention, their roots extend deep into the culinary traditions of the South and beyond. To understand their place in our kitchens today, we must look back at their origins and the various ways they’ve been adapted over the years.
Origins and History
Initially, the concept of combining ground meat with a binding agent, like flour, is not new. Traditional Southern cooking has long embraced sausage as a staple ingredient, often incorporating it into various dishes. The introduction of Bisquick in the 1930s represented a significant shift in cooking practices, as it provided a convenient way to create baked goods without the need for measuring multiple dry ingredients. This innovation paved the way for the development of bisquick sausage balls.
In the early days, sausage balls were likely made from scratch, with cooks utilizing whatever spices and herbs were available to them. As time progressed and convenience food gained traction, the Bisquick sausage ball recipe became a beloved quick-fix solution for busy households. This dish quickly spread through social gatherings, potlucks, and family celebrations, becoming a quintessential appetizer enjoyed by many.
Cultural Significance
Bisquick sausage balls hold a unique place in American culture, particularly in the Southern states where sausage is a culinary cornerstone. They are often served at celebrations, family reunions, and holiday gatherings, bringing people together over shared flavors and fond memories. In many ways, these sausage balls are more than just food; they are a symbol of hospitality and warmth, reflecting the Southern tradition of cooking with love.
Additionally, in the age of social media, these sausage balls have taken on a new life. Home cooks share their own variations and adaptations across platforms, showcasing everything from spicy jalapeño-infused versions to cheesy delights packed with cheddar. The beauty of bisquick sausage balls lies in their adaptability, allowing families to personalize the dish to suit their tastes and preferences.
Nutritional Benefits
While bisquick sausage balls are often considered a comfort food, they can also provide some nutritional benefits. The primary ingredient, sausage, is a good source of protein, which is essential for muscle repair and growth. When combined with Bisquick, you get a balanced bite that includes carbohydrates, making them a satisfying snack or meal option.
For those concerned about nutrition, there are also healthier alternatives available. Many people are now experimenting with turkey or chicken sausage instead of traditional pork sausage, which can significantly reduce the fat content while still delivering great flavor. Additionally, incorporating whole grain Bisquick or adding vegetables like spinach or bell peppers can enhance the nutritional profile of these sausage balls without compromising on taste.
In conclusion, bisquick sausage balls have a rich history rooted in convenience, cultural significance, and adaptability. They serve as a delightful reminder of the joy of cooking and sharing meals with loved ones. As you explore this dish, you’ll not only discover a fantastic recipe but also a piece of culinary history that connects generations through the love of food.
Essential Ingredients for Perfect bisquick sausage balls
To create the perfect bisquick sausage balls, understanding the essential ingredients is key. Each component not only contributes to the flavor profile but also plays a vital role in the texture and overall success of the dish. Let’s dive into each ingredient that makes up this delightful appetizer.
Essential Ingredients
- 2 cups Bisquick: This is a pre-mixed baking product containing flour, leavening agents, and salt. It’s the backbone of your bisquick sausage balls, providing the necessary structure and a light texture. When choosing Bisquick, look for a consistent, fine texture without clumps, as this ensures even mixing and baking.
- 1 pound pork sausage: The type of sausage you select will greatly affect the flavor. For these sausage balls, a savory breakfast sausage works best. Look for high-quality pork sausage that is fresh and has a good balance of fat and meat. Opt for sausage without fillers or artificial flavors. If you’re feeling adventurous, consider using flavored sausages, like spicy or herb-infused varieties, to give your bisquick sausage balls a unique twist.
- 16 ounces sharp cheddar cheese (grated): Cheese adds richness and flavor to your sausage balls. Sharp cheddar is preferred for its robust taste, which complements the savory sausage perfectly. When selecting cheese, go for block cheese and grate it yourself for the best texture and flavor. Freshly grated cheese melts better and binds the ingredients more effectively than pre-shredded options, which often contain anti-caking agents.
- 1/2 cup milk: Milk adds moisture to the mixture, ensuring your bisquick sausage balls remain tender and delicious. Use whole milk for the richest flavor, or substitute with a plant-based milk if you’re looking for a dairy-free option. Just remember to check for any added sugars in non-dairy alternatives that might alter the taste.
- 1 1/2 teaspoons Italian seasoning: This seasoning blend introduces a depth of flavor that enhances the overall dish. Italian seasoning typically includes a mix of herbs like oregano, basil, and thyme. If you’re feeling creative, you can make your own blend or experiment with other dried herbs that complement the sausage, such as rosemary or sage.

Bisquick Sausage Balls
Ingredients
- 2 cups Bisquick
- 1 pound pork sausage
- 16 ounces sharp cheddar cheese, grated
- 1/2 cup milk
- 1 1/2 teaspoons Italian seasoning
Instructions
- Preheat oven to 350ºF (177ºC). Spray a rimmed baking dish with nonstick cooking spray.
- In a mixing bowl, combine all ingredients. Using a cookie scoop, shape it into 1-inch balls, squeezing sausage balls so it will hold their forms. Place on the baking sheet.
- Bake until brown, about 20 to 25 minutes. Best served warm.
Shopping Tips
When shopping for these ingredients, consider visiting local farmers’ markets or specialty shops for the freshest options. Freshly made sausage from a butcher can elevate your bisquick sausage balls significantly. Additionally, local cheese shops often carry artisan cheeses that can provide a distinct flavor profile. If you’re purchasing from a supermarket, always check the expiration dates on dairy products and choose the freshest options available.
Substitutions and Alternatives
Dietary restrictions should never stand in the way of enjoying bisquick sausage balls. Here are some substitution options:
- Gluten-free Bisquick: If you are gluten intolerant, there are several gluten-free baking mixes available that can replace traditional Bisquick without compromising texture.
- Turkey or chicken sausage: For a lighter option, you can swap pork sausage for turkey or chicken sausage. Just ensure that it’s seasoned well, as these lean meats can be less flavorful.
- Vegan cheese: For a dairy-free version, opt for a good-quality vegan cheese that melts well. Just be aware that flavor may vary, so choose one that complements the sausage.
- Non-dairy milk: Almond, oat, or soy milk can easily replace cow’s milk. Just make sure they are unsweetened to avoid unwanted sweetness in your dish.
Storing these ingredients properly is crucial to maintaining their quality. Keep Bisquick in a cool, dry place, and it should last for several months. Sausage should be refrigerated and used by the date on the package, while cheese can be stored in the fridge, ideally wrapped in parchment paper for breathability. Milk should always be refrigerated and used before its expiration date.
In the world of cooking, understanding the ingredients is just as important as knowing how to prepare them. Each element of your bisquick sausage balls contributes to the final outcome, making it essential to choose wisely.

Detailed Step-by-Step bisquick sausage balls Cooking Instructions
Creating the perfect bisquick sausage balls is not just about having the right ingredients; it’s also about mastering the cooking process. Below, I’ll guide you through a detailed step-by-step method to ensure your sausage balls turn out perfectly every time.
Preparation Steps
- Gather Your Ingredients: Start by organizing your workspace. Gather all the ingredients: Bisquick, sausage, cheddar cheese, milk, and Italian seasoning. Having everything at hand will make the cooking process smoother and more enjoyable.
- Preheat the Oven: Preheat your oven to 350°F (175°C). This is an important step because a properly heated oven ensures even cooking and helps achieve that golden-brown crust.
- Prepare Your Baking Sheet: Line a baking sheet with parchment paper or a silicone baking mat to prevent sticking. This also makes cleanup much easier.
- Grate Your Cheese: If you haven’t done so already, grate your sharp cheddar cheese. As mentioned earlier, freshly grated cheese melts better and offers superior flavor. Measure out 16 ounces and set it aside.
Cooking Process
- Mix the Ingredients: In a large mixing bowl, combine the 2 cups of Bisquick, pound of pork sausage, 16 ounces of grated sharp cheddar cheese, 1/2 cup of milk, and 1 1/2 teaspoons of Italian seasoning. Using your hands or a spatula, blend the mixture thoroughly until all ingredients are well incorporated. It’s a tactile process, and getting your hands in there can be the most effective way to mix, but be careful not to overwork the dough.
- Visual and Sensory Cues: The mixture should be cohesive but not overly sticky. If it feels too wet, add a little extra Bisquick; if it’s too dry, a splash of milk can help. This is where you can adjust based on your ingredients’ moisture content.
- Form the Balls: Using your hands, scoop out portions of the mixture and roll them into balls about 1 inch in diameter. You can use a cookie scoop for uniform sizes. This step is key for even cooking and presentation.
- Arrange on Baking Sheet: Place the sausage balls about an inch apart on your prepared baking sheet. This spacing allows for proper air circulation, helping them cook evenly.
- Bake: Place the baking sheet in the preheated oven and bake for about 20-25 minutes. Keep an eye on them during the last few minutes; they should turn a lovely golden brown and be firm to the touch when done. Using a meat thermometer, ensure the internal temperature reaches 160°F (71°C) to guarantee safety.
Final Assembly
- Remove from Oven: Once baked, take the sausage balls out of the oven and let them cool for a few minutes on the baking sheet. This resting period allows the flavors to meld and makes them easier to handle.
- Serve: Transfer them to a serving platter. They can be served warm or at room temperature. Consider offering a dipping sauce on the side, such as honey mustard or a spicy aioli, to enhance the flavor experience.
- Enjoy! Take a moment to admire your creation. These bisquick sausage balls are perfect for parties, game days, or just a cozy family dinner. Enjoy the fruits of your labor with friends and family, and don’t forget to savor every bite!
Throughout this cooking process, remember that practice makes perfect. The more you make bisquick sausage balls, the more comfortable you will become with the techniques and timing. Don’t hesitate to experiment with different flavors and ingredients to make the recipe your own. Happy cooking!
Professional Tips and Techniques for bisquick sausage balls
When it comes to creating the perfect bisquick sausage balls, a few professional tips and techniques can elevate your game from simple snacks to mouthwatering bites that everyone will love. As a passionate home cook, I’ve spent countless hours experimenting with different methods and ingredients, and I’m excited to share my insights with you. Whether you’re a kitchen novice or a seasoned chef, these tips will help you perfect your bisquick sausage balls, troubleshoot common issues, and impress your friends and family.
Professional Techniques
The foundation of any great bisquick sausage balls lies in the quality of your ingredients and the techniques used to bring them together. First, let’s talk about the sausage. While you can use any breakfast sausage, opting for fresh sausage from your local butcher can make a significant difference in flavor. Always choose a sausage that’s well-seasoned, as this will directly impact the taste of your final product.
Mixing the ingredients properly is crucial. When combining the bisquick mix, sausage, cheese, and any additional spices, use your hands to ensure an even distribution. This technique allows for better incorporation of flavors and helps prevent overmixing, which can lead to tough sausage balls. Remember, the goal is to mix until just combined; you want a soft dough, not a dense one.
For those looking to take their bisquick sausage balls to the next level, consider incorporating fresh herbs such as chives or parsley. Not only do they add a pop of color, but they also enhance the flavor profile. Additionally, you might want to experiment with different types of cheese—sharp cheddar, pepper jack, or even a creamy mozzarella can provide a delightful twist.
Troubleshooting Guide
Even the most seasoned cooks encounter hiccups in the kitchen. One common issue with bisquick sausage balls is dryness. If your sausage balls are coming out dry, it could be due to overbaking. Make sure to monitor the cooking time closely; they should be golden brown and firm to the touch but not hard. Another issue could stem from the type of sausage used. Lean sausages tend to yield drier results, so choosing a fattier sausage will help keep them moist.
On the flip side, if your bisquick sausage balls are too greasy, it might be due to the sausage itself. Opt for a brand that’s not overly fatty, and consider draining some of the excess fat after cooking. Additionally, adding too much cheese can lead to greasiness, so be mindful of the proportions you’re using.
Presentation Tips
If you want to kick it up a notch, serve your bisquick sausage balls with a selection of dipping sauces. A spicy mustard or a tangy ranch dressing can provide a nice contrast to the richness of the sausage balls. You could even whip up a quick honey mustard dipping sauce by mixing equal parts honey and mustard for a sweet and tangy treat.
For beverage pairings, consider serving your bisquick sausage balls with a light-bodied white wine like Sauvignon Blanc or a refreshing beer such as a pale ale. These drinks can cut through the richness of the sausage, making for a balanced eating experience. For those who prefer non-alcoholic options, a sparkling water infused with lemon or lime can be a wonderful palate cleanser.
Lastly, if you’re planning ahead, bisquick sausage balls can be made in advance and stored in the refrigerator for a couple of days or frozen for longer storage. Just reheat them in the oven before serving to maintain their crispiness. This make-ahead strategy is perfect for parties or busy weeknights, allowing you to enjoy delicious bites without the last-minute rush.
Creative Variations and Adaptations of bisquick sausage balls
One of the joys of cooking is the ability to adapt and innovate, and bisquick sausage balls are a perfect canvas for creative variations and adaptations. As someone who loves to experiment in the kitchen, I’ve discovered numerous ways to customize this classic recipe, and I’m thrilled to share these ideas with you. From seasonal twists to dietary modifications, the possibilities are endless!
Seasonal Variations
Seasonal ingredients can add a delightful twist to your bisquick sausage balls. In the fall, consider adding finely chopped apples or pumpkin puree for a sweet and savory blend that screams autumn. The sweetness of the apple or the warm spices in the pumpkin can transform your sausage balls into the perfect party appetizer for Thanksgiving gatherings.
During the summer months, fresh herbs like basil and sun-dried tomatoes can infuse your sausage balls with bright, vibrant flavors. You might even consider adding a bit of crumbled feta or goat cheese for a Mediterranean flair. These seasonal ingredients will not only enhance the flavor but also make your dish visually appealing and fresh.
Dietary Adaptations
In today’s world, accommodating various dietary preferences is essential, and bisquick sausage balls can easily be modified to fit those needs. For instance, if you’re looking for a keto-friendly version, swap the bisquick mix for almond flour or coconut flour. This adjustment allows you to enjoy the same delicious flavor without the carbs. Additionally, using a sausage that is low in carbohydrates will ensure that your dish remains keto-compliant.
For those following a vegan diet, you can replace the sausage with a plant-based alternative. There are many great vegan sausage options available that mimic the flavor and texture of traditional sausage. Combine this with a vegan cheese substitute and your favorite plant-based flour to create a delicious vegan version of bisquick sausage balls that everyone can enjoy.
Creative Twists
Don’t be afraid to get adventurous with your bisquick sausage balls! Adding spices is a fantastic way to change the flavor profile. For a kick of heat, incorporate some cayenne pepper or crushed red pepper flakes into your mixture. Alternatively, for an international flair, consider adding curry powder for a delightful Indian-inspired twist. You can also explore different cooking methods: try air frying or using a slow cooker for unique textures and flavors.
If you find yourself with leftover bisquick sausage balls—though I doubt they’ll last long—consider transforming them into a breakfast casserole. Simply crumble the sausage balls into a baking dish, top with beaten eggs and cheese, and bake until set for a hearty breakfast that will please the whole family. The versatility of bisquick sausage balls makes them an excellent candidate for creative leftovers!
As you explore these variations, remember that the beauty of cooking lies in experimentation. Don’t hesitate to mix and match ingredients to create a version of bisquick sausage balls that speaks to your taste preferences and dietary needs. With these creative ideas and adaptations, you’ll keep your family and friends excited about this beloved snack, no matter the occasion!
Storage, Reheating, and Meal Prep for bisquick sausage balls
When it comes to preparing delicious bisquick sausage balls, understanding how to store, reheat, and meal prep these little bites of joy is essential. After all, whether you’re whipping them up for a family gathering, a holiday party, or just for a quick snack at home, you want to ensure that they maintain their flavor and texture over time. In this section, we’ll explore various storage methods, reheating techniques, and meal prep strategies that will help you enjoy your bisquick sausage balls at their best, even days or weeks after making them.
Short-term Storage
Once your bisquick sausage balls have cooled to room temperature, the first thing you should consider is how to store them for short-term use. If you’re planning to eat them within a few days, the refrigerator is your best bet. To store them, place the sausage balls in an airtight container. This could be a glass Tupperware or a plastic container with a tight-fitting lid. The goal is to minimize air exposure, which can lead to drying out or spoilage.
For optimal freshness, you can also use parchment paper or wax paper to separate layers of sausage balls, preventing them from sticking together. This is especially useful if you’ve made a big batch and plan to consume them over the week. It’s also a good idea to label your container with the date you made the bisquick sausage balls; they can typically last in the fridge for about 3-4 days.
Freezing and Long-term Storage
If you know you won’t be able to finish your bisquick sausage balls within the week, consider freezing them for longer storage. Freezing is a great way to extend the shelf life of your sausage balls, allowing you to enjoy them at a later date without sacrificing quality. To freeze, arrange the cooled sausage balls in a single layer on a baking sheet lined with parchment paper. This step prevents them from sticking together when frozen.
Once they’re frozen solid (usually after a few hours), transfer the sausage balls into a heavy-duty freezer bag or an airtight container. Be sure to remove as much air as possible from the bag before sealing; this helps prevent freezer burn. You can also label the bags with the date and contents. Bisquick sausage balls can be stored in the freezer for up to 2-3 months without significant loss of quality. Just keep in mind that the sooner you consume them, the better they will taste!
Reheating Best Practices
When it’s time to enjoy your stored bisquick sausage balls, reheating them properly is key to preserving their moisture and flavor. The best method for reheating is in the oven. Preheat your oven to 350°F (175°C) and arrange the sausage balls on a baking sheet. Cover them loosely with aluminum foil to prevent drying out, and heat for about 10-15 minutes or until warmed through. If you’re in a hurry, you can also use the microwave, but be aware that this method can lead to a chewy texture. If microwaving, place the sausage balls on a microwave-safe plate and cover them with a damp paper towel to help retain moisture. Heat in 30-second intervals until warmed through.
Alternatively, you can reheat them in an air fryer at 300°F (150°C) for about 5-7 minutes. This method gives them a crispy exterior while ensuring the inside remains moist, making it a favorite for many.
As you incorporate bisquick sausage balls into your meal prep routine, it’s also important to consider food safety. Always ensure that the sausage balls are stored in the refrigerator or freezer promptly after cooking. Avoid leaving them out at room temperature for longer than two hours to reduce the risk of foodborne illness. Always check for signs of spoilage, such as an off smell or unusual texture, prior to consuming.
In conclusion, mastering the storage, reheating, and meal prep of your bisquick sausage balls opens up a world of delicious possibilities. Whether you’re making them for a party or just for yourself, knowing how to properly store and reheat ensures that every bite is just as delightful as the first. Happy cooking!
Nutritional Benefits and Health Information
As we dive into the nutritional benefits and health information related to bisquick sausage balls, it’s essential to understand not only the ingredients involved but also how these delicious bites can fit into various dietary lifestyles. With the right balance, these savory snacks can be both satisfying and nourishing. Let’s explore the nutritional profile, health benefits, and some dietary considerations that come into play.
Nutritional Profile
The basic ingredients of bisquick sausage balls typically include Bisquick mix, breakfast sausage, shredded cheese, and sometimes milk or eggs. A standard serving size (around 2-3 balls) can yield approximately 200-300 calories, depending on the specific brands and quantities used. Here’s a breakdown of the main components:
- Calories: On average, each sausage ball contains about 70-100 calories.
- Protein: Thanks to the sausage and cheese, you can expect roughly 5-7 grams of protein per ball, making them a good source of this essential nutrient.
- Fat: The fat content can range from 4-7 grams, primarily from the sausage and cheese, which contributes to the rich flavor.
- Carbohydrates: With the use of Bisquick, you’ll find around 8-10 grams of carbs per ball, offering a quick source of energy.
Additionally, bisquick sausage balls are a good source of calcium due to the cheese content, which is vital for bone health. The sausage also contributes some iron, which is important for oxygen transport in the body.
Health Benefits
The health benefits of bisquick sausage balls largely come from their ingredients. The combination of protein and fats from the sausage and cheese provides a satiating snack that can help curb hunger between meals. This is particularly important if you’re looking for a quick source of energy during busy days.
Moreover, the use of Bisquick mix allows for a quick and easy preparation method, making it accessible for those who may not have much time to cook. This convenience factor means you can whip up a batch of bisquick sausage balls in under 30 minutes, allowing for healthier homemade snacks instead of reaching for processed options.
Dietary Considerations
While bisquick sausage balls can be a delightful addition to your menu, it’s important to be mindful of dietary restrictions and allergen information. The traditional recipe contains gluten due to the Bisquick mix, which may not be suitable for those with celiac disease or gluten intolerance. However, there are gluten-free alternatives available on the market, allowing everyone to enjoy these tasty treats.
Additionally, the sausage used can vary widely in terms of fat content and seasoning, which is something to consider for those monitoring their fat intake or sodium levels. Opting for lean turkey or chicken sausage can reduce the overall fat content while still delivering flavor. For those looking to cut down on calories, you can also consider using reduced-fat cheese or even omitting it altogether without sacrificing too much taste.
In conclusion, bisquick sausage balls can be a versatile addition to your culinary repertoire, offering a delicious balance of flavors and nutrients. With thoughtful preparation and ingredient choices, you can enjoy these savory snacks in a way that aligns with your dietary preferences and health goals. Whether you’re preparing them for a gathering or just a cozy evening at home, they’re sure to bring satisfaction with every bite!
Frequently Asked Questions About Bisquick Sausage Balls
Pioneer Woman sausage balls with Bisquick
The Pioneer Woman’s sausage balls recipe typically utilizes Bisquick for its ease and convenience, making it a popular choice for home cooks. To make these sausage balls, you would combine Bisquick with ground sausage and shredded cheese, often cheddar, for a delicious savory treat. A tip to enhance the flavor is to add spices like garlic powder, onion powder, or even a dash of cayenne pepper for a kick. Bake them at 350°F (175°C) for about 20-25 minutes until they are golden brown. These sausage balls are perfect for parties or as a snack, and they freeze well for later use.
Bisquick sausage balls 3 ingredients
The classic Bisquick sausage balls recipe can be made with just three ingredients: Bisquick, ground sausage, and shredded cheese, typically cheddar. This simple combination makes preparation quick and hassle-free, perfect for busy cooks or impromptu gatherings. To ensure the best texture, mix the ingredients thoroughly until just combined; overmixing can lead to tough sausage balls. Shape the mixture into small balls and bake at 350°F (175°C) for 20-25 minutes, or until they are nicely browned. This recipe is not only easy but also versatile; feel free to experiment with different types of cheese or add spices to personalize the flavor!
Pioneer Woman sausage balls
The Pioneer Woman’s sausage balls are a beloved recipe that showcases the delicious blend of sausage and cheese, often enhanced with Bisquick for the perfect consistency. Her recipe usually features cheddar cheese, which melts beautifully and adds richness to the dish. An insider tip is to use breakfast sausage for a more flavorful kick; the herbs and spices in the sausage can elevate the overall taste. Bake the balls until they’re golden brown, and serve them warm for the best texture and flavor. These savory treats are great for brunch, parties, or as a snack, and they are sure to impress your guests!
Sausage balls without Bisquick recipe
If you’re looking to make sausage balls without Bisquick, you can create a delicious alternative using ground sausage, shredded cheese, and a binding agent like almond flour or breadcrumbs. Combine the sausage and cheese with your chosen binder, and season with spices such as garlic powder, paprika, or black pepper for added flavor. Form the mixture into balls and bake them at 350°F (175°C) for about 20-25 minutes until cooked through and golden. This gluten-free option is perfect for those with dietary restrictions while still delivering on taste. Adjust the amount of binder based on the moisture content of the sausage for the best results.
Moist sausage ball recipe
To ensure your sausage balls stay moist and flavorful, consider incorporating cream cheese or sour cream into the mixture. This addition not only adds moisture but also gives the sausage balls a delightful creaminess that complements the savory flavors. Additionally, using fresh sausage instead of precooked varieties can help retain moisture during baking. Bake the sausage balls at 350°F (175°C) for 20-25 minutes, keeping an eye on them to avoid overcooking. Allow them to rest for a few minutes after baking, as this can help maintain their juiciness when served.
How to reheat Bisquick sausage balls
Reheating Bisquick sausage balls can be done effectively in both the oven and microwave. For the oven, preheat it to 350°F (175°C) and place the sausage balls on a baking sheet, covering them with foil to prevent drying out. Heat them for about 10-15 minutes, or until warmed through. If using the microwave, place the sausage balls on a microwave-safe plate and cover them with a damp paper towel to retain moisture, heating for 30-second intervals until hot. This method ensures that the sausage balls maintain their texture and flavor, making them just as enjoyable as when they were freshly baked.
3 ingredient sausage balls
Three-ingredient sausage balls are a quick and simple snack that requires ground sausage, shredded cheese, and a binder like Bisquick or almond flour. To prepare, simply mix the ingredients together until just combined, ensuring you don’t overwork the mixture for the best texture. Form the mixture into small balls and place them on a baking sheet lined with parchment paper. Bake them at 350°F (175°C) for about 20-25 minutes, or until they are golden brown and cooked through. These balls are not only easy to make but can also be customized with spices or different cheese types for added flavor!
Sausage balls with cream cheese
Sausage balls with cream cheese take the traditional recipe to the next level by adding a rich and creamy texture to the mix. To make this variation, combine ground sausage, cream cheese, and shredded cheese (like cheddar), along with your favorite seasonings, until well mixed. The cream cheese not only keeps the sausage balls moist but also adds a delightful richness that pairs well with the savory sausage. Bake these at 350°F (175°C) for 20-25 minutes, ensuring they are golden brown and cooked through. This variation is perfect for parties or gatherings, offering a unique twist on the classic sausage ball recipe.


