Chocolate peppermint blossoms are a delightful treat that bring warmth and joy to any gathering. I first discovered this incredible recipe during a particularly cold winter when I was searching for a way to brighten up my family’s holiday season. As I rummaged through my grandmother’s old recipe box, I stumbled upon a handwritten note that simply read, “Chocolate Peppermint Blossoms.” Intrigued, I decided to give them a try. Little did I know that making these sweet, chewy cookies would become a cherished family tradition, bringing smiles and laughter to our kitchen every year.
The enchanting combination of rich chocolate and refreshing peppermint captured my heart and taste buds. As I mixed the ingredients, I could feel the spirit of my grandmother guiding me, and the scent of chocolate wafted through the air, filling my home with warmth and nostalgia. Each time I take a bite of these cookies, I’m transported back to those cozy afternoons spent baking with her, sharing stories and laughter. This recipe isn’t just about the cookies; it’s about the memories and love that come with them.
The Story Behind This Recipe
The origins of chocolate peppermint blossoms can be traced back to the classic chocolate blossom cookies, where a chocolate cookie base is complemented by a piece of candy placed on top. Over the years, the addition of peppermint has evolved this traditional recipe into a festive favorite, especially during the holiday season. The bright and fresh flavors of peppermint make chocolate peppermint blossoms not only delicious but also a seasonal staple that can elevate any dessert table.
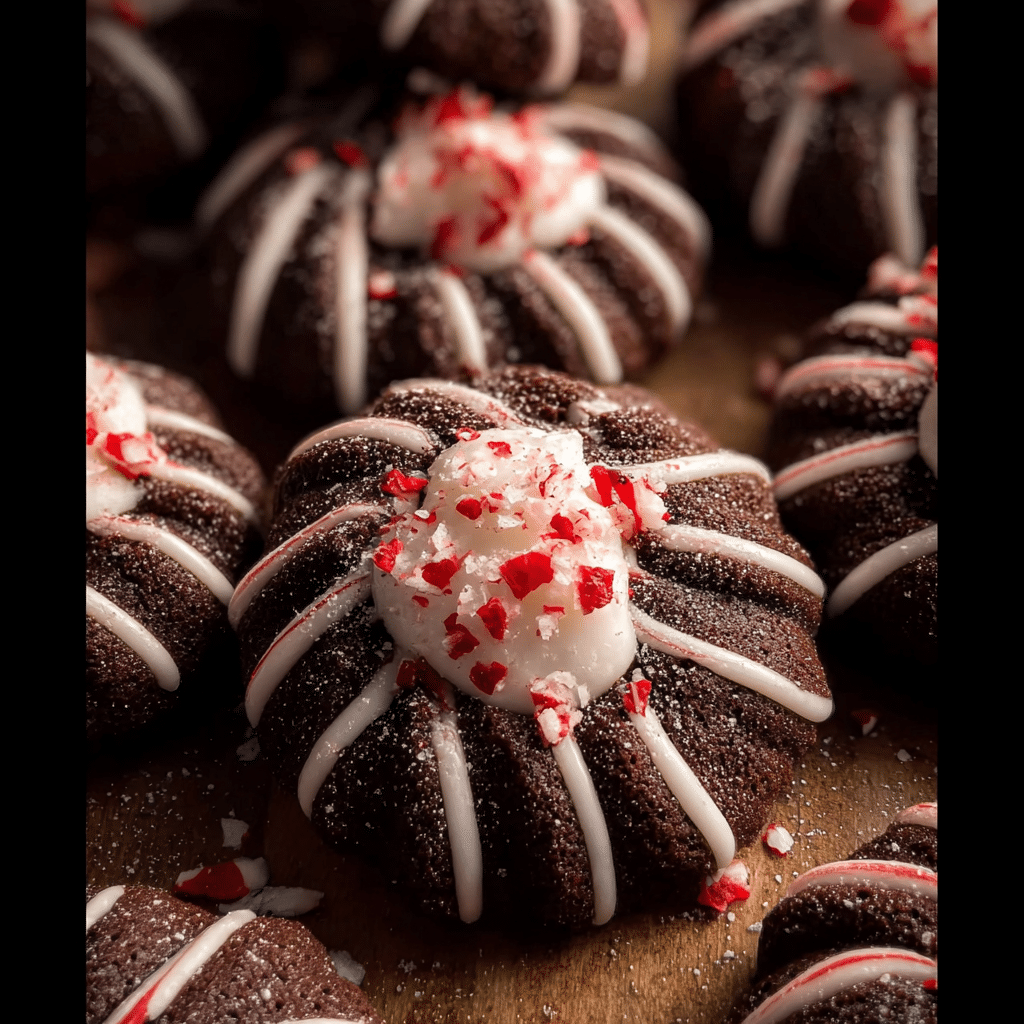
This recipe is special because it marries simplicity with flavor. It’s easy enough for busy families to whip up during the hectic holiday rush, yet it impresses guests with its aesthetic appeal and delightful taste. The cookies are soft, chewy, and topped with a peppermint candy or chocolate kiss, making them visually stunning and delicious. They are perfect for holiday parties, cookie swaps, or just a cozy night in with family. I often find myself making a double batch, knowing they will disappear before I even get the chance to store them away.
Why You’ll Love This Dish
Chocolate peppermint blossoms are the perfect recipe for families looking for quick dinner solutions during the holiday season. Whether you’re baking for a school event or simply indulging in a sweet treat after dinner, these cookies come together quickly without sacrificing flavor. The joy of baking these cookies is not just in the eating but in the experience of creating them together as a family. Imagine gathering around the kitchen, flour dusting the counters, and laughter filling the air as everyone pitches in to create something magical.
As winter approaches and the holidays draw near, the seasonal relevance of chocolate peppermint blossoms becomes even more pronounced. The vibrant colors of the candy paired with the rich chocolate create a festive feel that brings joy to the cold, dreary days. From Thanksgiving to Christmas and New Year’s, these cookies are a delightful way to celebrate the season. The emotional connection to this dish runs deep, as it represents family togetherness, love, and the spirit of giving. It’s a recipe that transcends generations, and I hope to pass it down to my children, just as my grandmother did for me.
In this article, we’ll dive deep into the world of chocolate peppermint blossoms, exploring their rich history, cultural significance, and how they’ve evolved over time. You’ll learn tips and tricks for perfecting your baking skills, variations to try, and ideas for serving these delightful cookies. So, grab your mixing bowls, and let’s embark on this sweet journey together!
The Rich History and Cultural Significance of chocolate peppermint blossoms
The rich history and cultural significance of chocolate peppermint blossoms are as layered as the cookies themselves. To truly appreciate this delightful treat, we must explore its origins, the evolution of the recipe, and the cultural traditions surrounding it. Chocolate and peppermint have long been paired together in various confections, but it is in the form of chocolate peppermint blossoms that this combination shines brightly during the festive season.
Origins and History
The roots of chocolate peppermint blossoms can be traced back to the classic chocolate cookie recipes that emerged in the United States in the early 20th century. As chocolate became more accessible due to advancements in manufacturing and transportation, recipes began to evolve. The introduction of peppermint, particularly during the winter months, added a refreshing twist to these rich chocolates. The idea of placing a peppermint candy or chocolate kiss on top of a warm cookie is a beautiful representation of the creativity found in home baking.
Cultural Significance
Chocolate peppermint blossoms hold a special place in holiday traditions across the globe. In the United States, they are often associated with Christmas, where the flavors of chocolate and peppermint evoke feelings of warmth and festivity. The act of baking together as a family during the holidays is a cherished tradition, with chocolate peppermint blossoms serving as a sweet centerpiece for gatherings. They are often exchanged as gifts, shared at cookie swaps, or left out for Santa, making them an integral part of holiday celebrations.
In addition to their festive significance, these cookies also represent a sense of community and togetherness. Many families have their own unique stories tied to the baking of chocolate peppermint blossoms, with each batch bringing back memories of laughter and love. It’s a simple yet profound way to connect with loved ones, creating a sense of belonging and shared joy.
Nutritional Benefits
While chocolate peppermint blossoms are undoubtedly a treat, they also offer some nutritional benefits when enjoyed in moderation. Dark chocolate, often used in these cookies, contains antioxidants and can provide some heart-healthy benefits. Peppermint, on the other hand, is known for its soothing properties and can aid digestion, making these cookies not just delicious but also a comforting option after a meal.
Of course, it’s important to remember that these cookies are still a dessert, and moderation is key. However, knowing that there are some nutritional advantages can make indulging in chocolate peppermint blossoms feel a little less guilty. Moreover, when made with love and shared with family, the emotional nourishment gained from these cookies is as important as the physical.
As we continue to explore the world of chocolate peppermint blossoms, it becomes clear that these delightful cookies are more than just a sweet treat. They are a representation of culture, tradition, and the power of family bonding through cooking and baking. With every bite, we savor not just the flavors but the stories and memories that come with them. Join me as we delve deeper into the art of making chocolate peppermint blossoms and discover how to create your own delicious memories.
Essential Ingredients for Perfect chocolate peppermint blossoms
When it comes to baking, having the right ingredients is key to achieving that delectable flavor and texture that makes your treats unforgettable. This is especially true for chocolate peppermint blossoms, a festive favorite that combines rich chocolate with the refreshing essence of peppermint. Each ingredient plays a pivotal role in creating the perfect cookie, so let’s dive into the essential components you’ll need to whip up a batch of these delightful treats.
Essential Ingredients
- 1 1/2 cups (188 g) all-purpose flour, spooned and leveled: Flour is the backbone of any baking recipe. For our chocolate peppermint blossoms, it provides the structure necessary for the cookie. Spoon and level the flour to avoid packing it down, which could lead to dry cookies.
- 1/2 cup (40 g) cocoa powder, Dutch process: Cocoa powder adds a rich chocolate flavor and color to the cookies. Dutch process cocoa has a smoother taste and darker color due to the alkali treatment, which neutralizes its acidity. This makes it perfect for our chocolate peppermint blossoms, as it pairs beautifully with the sweetness of the cookies.
- 1/2 tsp baking powder: This leavening agent helps the cookies rise slightly, giving them a tender texture. It’s essential for achieving that perfect balance between chewy and cakey.
- 1/2 tsp baking soda: Alongside baking powder, baking soda helps the cookies spread and rise. It also enhances the browning process, giving them that lovely golden hue.
- 1/2 tsp salt: Salt is crucial in baking as it enhances flavors. Even in sweet treats like chocolate peppermint blossoms, a pinch of salt can bring out the chocolate’s richness.
- 3/4 cup (168 g) unsalted butter, softened: Butter adds moisture and flavor. Make sure it’s at room temperature for easy creaming with the sugars, which will lead to a lighter texture in the final cookie.
- 3/4 cup (165 g) light brown sugar, packed: Brown sugar not only sweetens the cookies but also adds moisture due to its molasses content, leading to a chewy texture.
- 1/4 cup (50 g) granulated sugar: This sugar will help create a beautiful exterior on the cookies when rolled in it before baking. It also contributes to the overall sweetness.
- 2 egg yolks, at room temperature: Yolks add richness and help bind the ingredients together. Room temperature yolks will emulsify better, leading to a smoother dough.
- 1 tsp vanilla: Vanilla extract enhances the flavor profile of the cookies. It complements the chocolate and peppermint beautifully, creating a well-rounded taste.
- 34 Candy Cane Hershey Kisses, frozen: These delightful candies are the stars of our chocolate peppermint blossoms. The minty flavor paired with chocolate creates a festive touch that is impossible to resist.
- 1/4 cup (50 g) granulated sugar for rolling the dough: This sugar not only adds sweetness but provides a delightful crunch to the exterior of the cookies, enhancing their visual appeal.

CHOCOLATE PEPPERMINT BLOSSOMS
Ingredients
- 1 1/2 cups (188 g) all-purpose flour spooned and leveled, see notes
- 1/2 cup (40 g) cocoa powder, Dutch process
- 1/2 tsp baking powder
- 1/2 tsp baking soda
- 1/2 tsp salt
- 3/4 cup (168 g) unsalted butter, softened
- 3/4 cup (165 g) light brown sugar, packed
- 1/4 cup (50 g) granulated sugar
- 2 egg yolks, at room temperature
- 1 tsp vanilla
- 34 Candy Cane Hershey Kisses, frozen
- 1/4 cup (50 g) granulated sugar for rolling the dough
Instructions
- Unwrap 34 Candy Cane Hershey Kisses and place them in the freezer for 30 minutes.
- 34 Candy Cane Hershey Kisses, frozen
- Preheat oven to 350 degrees and line three baking sheets with parchment paper. Set aside.
- To a medium sized bowl add the flour, cocoa powder, baking powder, baking soda and salt. Whisk to combine. Set aside.
- 1 1/2 cups (188 g) all-purpose flour,1/2 cup (40 g) cocoa powder, Dutch process,1/2 tsp baking powder,1/2 tsp baking soda,1/2 tsp salt
-
To a large bowl add the butter, brown sugar and granualted white sugar. Cream together with an electric mixer for 1-2 minutes.3/4 cup (168 g) unsalted butter, softened,3/4 cup (165 g) light brown sugar, packed,1/4 cup (50 g) granulated sugar
-
Add in the egg yolks and vanilla and mix until pale in color and fluffy, 1-2 minutes.2 egg yolks, at room temperature,1 tsp vanilla
- Add in the dry ingredients and mix until combined.
- Scoop the dough into 34 portions, using a 1 tbsp scoop, and roll into balls.
-
Roll each dough ball in granulated sugar and then arrange on the baking sheets about 2 inches apart. (I did 12 cookies on the first two baking sheets and 10 on the third.)1/4 cup (50 g) granulated sugar
- Bake the cookies for 7-8 minutes. (7 for chewier cookies.)
- As soon as the cookies are done baking, press a frozen Candy Cane Kiss into the center of each cookie.
- Let the cookies cool completely on the baking sheets until the Kiss is set. I found that this was the best way to keep the Kiss from losing its shape.
- Once cooled, serve the cookies!
- Store left overs in an airtight container for up to three days.
Shopping Tips
For the best results, always opt for high-quality ingredients. When shopping for chocolate, look for brands that use real cocoa butter and have minimal additives. For flour, consider choosing a reputable brand known for consistency. Organic options are available, but conventional flour works just as well for most home bakers. When selecting cocoa powder, make sure to check the label for Dutch process to achieve that rich chocolate flavor.
As for butter, unsalted is preferred for better control over the saltiness of the cookies. When it comes to sugars, consider purchasing organic varieties if you’re mindful of additives. Lastly, for the Candy Cane Hershey Kisses, check local stores during the holiday season, as they may carry special editions that are not available year-round.
Substitutions and Alternatives
If you have dietary restrictions or preferences, there are substitutions you can make without sacrificing taste. For a gluten-free version, you can substitute the all-purpose flour with a 1:1 gluten-free baking blend. Just ensure the blend contains xanthan gum for the best texture.
If you need to avoid dairy, use a plant-based butter substitute that whips well, and ensure that the chocolate kisses are dairy-free, as some brands offer vegan options. For the sugars, coconut sugar can be a great alternative, imparting a caramel-like flavor to the cookies.
For those avoiding eggs, you can substitute each yolk with 1/4 cup of unsweetened applesauce or even 1/4 cup of silken tofu, both of which will help bind the ingredients without altering the flavor significantly. Just remember, these substitutes may slightly affect the texture of your cookies.
Lastly, store your ingredients properly to maintain their freshness. Keep flour in an airtight container away from moisture and light. Cocoa powder should also be stored in a cool, dry place. Butter can be kept in the refrigerator and should be brought to room temperature before use. Roll any leftover cookies in sugar before freezing them to ensure they maintain their delightful crunch when baked later.
Detailed Step-by-Step chocolate peppermint blossoms Cooking Instructions
Ready to bring the magic of chocolate peppermint blossoms into your kitchen? Baking is as much about the process as it is about the end result, so let’s walk through the steps together. With careful attention to detail and a sprinkle of love, you’ll be on your way to crafting cookies that not only look stunning but taste divine!
Preparation Steps
- Gather Your Ingredients: Start by assembling all your ingredients on the counter. This will help you ensure you have everything you need at your fingertips. Remember, organization is key in baking!
- Preheat Your Oven: Preheat your oven to 350°F (175°C). This is crucial as it allows your cookies to bake evenly. While the oven is heating, you can prepare your baking sheets.
- Line Baking Sheets: Line two baking sheets with parchment paper. This not only prevents the cookies from sticking but also makes for an easier clean-up!
- Measure and Prepare Dry Ingredients: In a medium bowl, whisk together the all-purpose flour, cocoa powder, baking powder, baking soda, and salt. This helps to evenly distribute the leavening agents and ensures a uniform texture in your cookies.
- Cream Butter and Sugars: In a large mixing bowl, beat the softened unsalted butter with the light brown sugar and granulated sugar until the mixture is light and fluffy. This process typically takes about 2-3 minutes with an electric mixer. The air incorporated during this step is what gives your cookies that delightful lift!
- Add Egg Yolks and Vanilla: Mix in the egg yolks and vanilla extract. Beat until well combined. The mixture should be smooth and creamy, with a pale yellow color.
- Incorporate Dry Ingredients: Gradually add the dry ingredient mixture to the wet ingredients, mixing until just combined. Be careful not to overmix, as this can lead to tough cookies.
- Chill the Dough: Cover the bowl with plastic wrap and refrigerate the dough for about 15-30 minutes. This step helps the flavors meld and makes the dough easier to handle.
Cooking Process
- Prepare the Topping: While the dough is chilling, take your frozen Candy Cane Hershey Kisses and unwrap them. It’s essential to keep them frozen until you’re ready to use them, as this prevents them from melting too quickly in the oven.
- Roll the Dough: Once the dough is chilled, scoop tablespoon-sized portions and roll them into balls. Roll each ball in the reserved granulated sugar until well coated. This will create a sparkly, sweet crust on your cookies.
- Place on Baking Sheet: Arrange the dough balls on your prepared baking sheets, spacing them about 2 inches apart to allow for spreading.
- Bake: Bake in the preheated oven for 9-11 minutes. The cookies should look set around the edges but slightly soft in the center. Keep an eye on them, as baking times may vary based on your oven.
- Add the Hershey Kisses: Immediately after removing the cookies from the oven, gently press a frozen Candy Cane Hershey Kiss into the center of each cookie. This will make a lovely indentation, creating that signature blossom look.
- Cool on Baking Sheet: Allow the cookies to cool on the baking sheet for about 5 minutes before transferring them to a wire rack to cool completely. This resting time helps them firm up and makes them easier to handle.
Final Assembly
- Store Properly: Once your chocolate peppermint blossoms are completely cool, store them in an airtight container at room temperature for up to a week. If you want to keep them longer, freeze them in a single layer, then transfer to a freezer-safe bag, where they can last for up to three months.
- Enjoy! Finally, take a moment to savor your creation. The combination of rich chocolate and refreshing peppermint will surely evoke the spirit of the holidays, making every bite a nostalgic delight.
Common Mistakes to Avoid: One common mistake is overbaking the cookies, which can lead to a dry texture. Trust your instincts and take them out of the oven when they still look slightly soft in the center. Another tip is to make sure your butter is at the right temperature; too cold or too warm can affect the creaming process and ultimately the texture of the cookies.
Chef Secrets: For an extra touch, consider adding crushed peppermint candies to the dough for an added crunch and flavor. You can also drizzle melted chocolate over the cooled cookies for a beautiful presentation that will impress your guests!
With these detailed instructions, you are well on your way to mastering the art of baking chocolate peppermint blossoms. So roll up your sleeves, put on your favorite apron, and get ready to enjoy a holiday tradition that will surely become a favorite in your home!
Professional Tips and Techniques for chocolate peppermint blossoms
When it comes to baking, especially with festive treats like chocolate peppermint blossoms, there’s a certain magic that unfolds in the kitchen. This delightful combination of rich chocolate and refreshing peppermint creates a flavor profile that is simply irresistible. But to truly master the art of baking these little gems, it’s essential to dive into some professional tips and techniques that can elevate your baking game. So, let’s roll up our sleeves and explore the ins and outs of creating the perfect chocolate peppermint blossoms!
Professional Techniques
First off, let’s talk about the fundamental components of chocolate peppermint blossoms. At their core, these cookies are a chocolate base topped with a delightful peppermint kiss. The key is to achieve the perfect balance of texture and flavor. Start by using high-quality cocoa powder and chocolate. The richness of the chocolate will shine through, making your cookies taste gourmet.
When mixing your dough, be mindful of the temperature of your ingredients. Room temperature butter and eggs mix more evenly, leading to a smoother dough. This is crucial for chocolate peppermint blossoms because a uniform dough means consistent baking. If you want to take it a step further, consider sifting your flour and cocoa powder together. This aerates the dry ingredients and helps prevent clumping, ultimately giving you a lighter cookie.
Another professional tip is to chill your dough before baking. This isn’t just a suggestion; it’s a game changer. Chilling the dough for at least 30 minutes allows the flavors to meld and also helps the cookies maintain their shape during baking. No one wants a flat cookie, right?
Troubleshooting Guide
Even the best bakers encounter hiccups from time to time. If your chocolate peppermint blossoms aren’t coming out as expected, don’t fret; troubleshooting is part of the learning process. One common issue is cookies spreading too much in the oven. This can happen if the dough is too warm or if there’s too much butter. Ensure that your butter is softened, not melted, and always chill the dough before baking.
If your cookies are too dry, it might be that you’ve over-measured your flour. Always spoon flour into your measuring cup and level it off with a knife for accuracy. On the flip side, if your cookies are too wet and sticky, a dash more flour can help rectify that situation.
Lastly, if your peppermint kisses are melting too much, you may want to add them later in the baking process. Bake your cookies for about 5-7 minutes, then gently press the kisses into the center before returning them to the oven for another 2-3 minutes. This technique ensures that the kisses stay beautifully shaped and don’t lose their form.
Presentation Tips
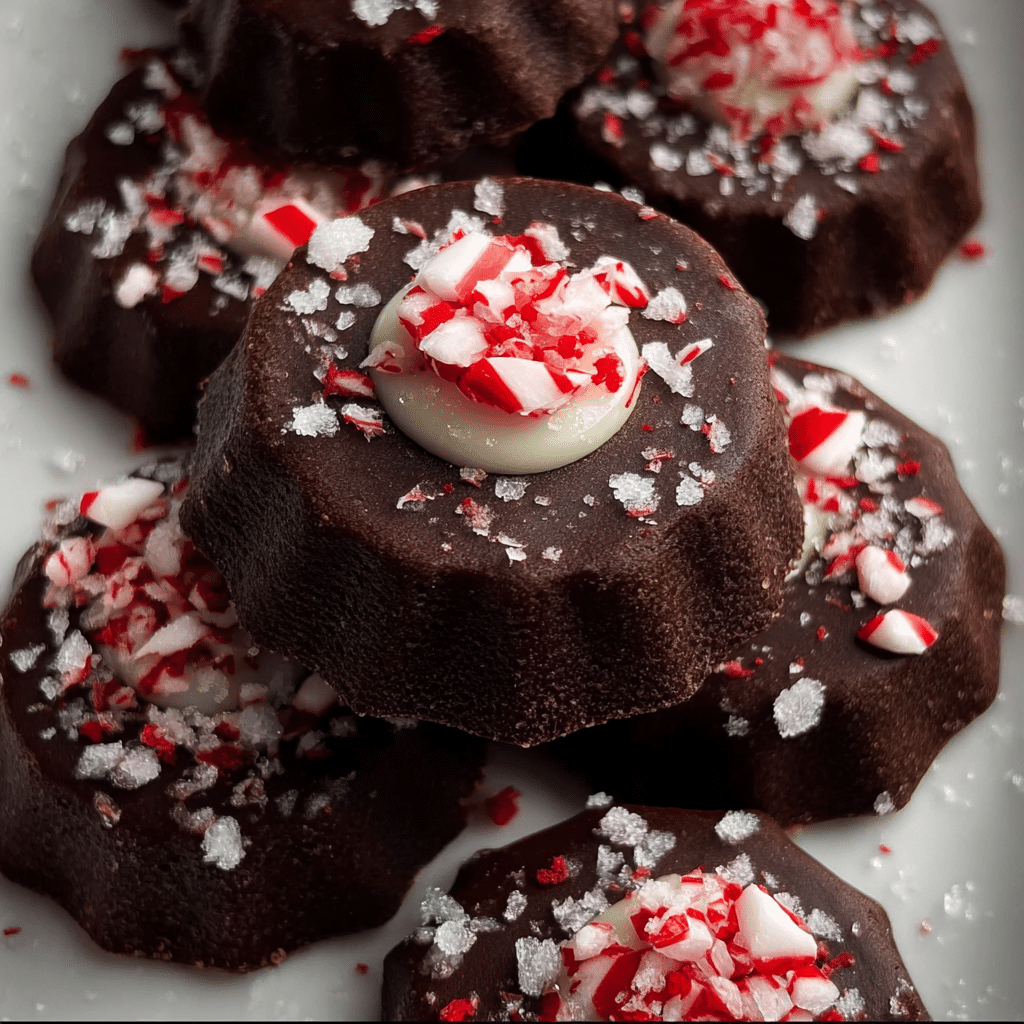
Once your chocolate peppermint blossoms are perfectly baked, it’s time to think about presentation. A beautiful cookie deserves to be showcased! Consider placing them on a festive platter or in a decorative cookie box if you’re gifting them. Adding a sprinkle of crushed peppermint candy on top of the kisses right after they come out of the oven can add a pop of color and a little extra crunch.
For a more elegant display, you can dust the cookies with a light sprinkle of powdered sugar before serving. This not only adds a touch of sophistication but also enhances the visual appeal, making them look like they belong in a bakery window. Pair your cookies with a warm cup of hot chocolate or a festive peppermint tea for a delightful experience.
Lastly, don’t underestimate the power of aroma. Baking is as much about the senses as it is about the taste. The sweet, chocolatey scent mixed with peppermint wafting through your home is bound to bring everyone to the kitchen, eager to have a taste. Consider serving your chocolate peppermint blossoms warm for the ultimate indulgence!
In conclusion, mastering chocolate peppermint blossoms involves a mix of professional techniques, troubleshooting skills, and beautiful presentation. With these tips in your back pocket, you’ll be well on your way to impressing family and friends with your baking prowess. So, get baking, and enjoy the delightful journey of creating these festive treats!
Creative Variations and Adaptations of chocolate peppermint blossoms
While the classic chocolate peppermint blossoms are a holiday favorite, there’s no reason to stop there! The beauty of baking lies in its versatility, and there are countless ways to adapt and customize this delicious treat to suit your taste or to try something new. Let’s explore some creative variations and adaptations to keep your cookie game strong all year round!
Seasonal Variations
One of the simplest ways to shake things up is by incorporating seasonal flavors into your chocolate peppermint blossoms. During the fall, why not try pumpkin spice? By adding a bit of pumpkin puree and some autumnal spices like cinnamon and nutmeg to your dough, you can create a warm, spiced cookie that’s perfect for sweater weather. Top these with a cinnamon candy instead of a peppermint kiss for a festive twist!
As for spring and summer, consider using fresh mint instead of peppermint extract. You can infuse your dough with finely chopped fresh mint leaves, creating a more subtle, natural flavor. For a zesty touch, add a hint of orange or lemon zest for a refreshing contrast to the chocolate. Top these cookies with a white chocolate kiss for a lovely presentation that echoes the fresh flavors.
Dietary Adaptations
In today’s world, dietary restrictions are more common than ever, but that shouldn’t stop anyone from enjoying delicious chocolate peppermint blossoms. For those on a keto diet, try substituting regular sugar with a low-carb alternative like erythritol or stevia. You can also use almond flour in place of all-purpose flour to create a gluten-free version. This not only accommodates dietary needs but also adds a lovely nutty flavor to the cookies.
If you’re looking to make these treats vegan, swap out the eggs for flax eggs (1 tablespoon of ground flaxseed mixed with 2.5 tablespoons of water, let it sit for a few minutes until it thickens) and use a dairy-free chocolate for the kisses. There are many great vegan chocolate brands available that still deliver rich, decadent flavors, ensuring that everyone can indulge in these festive cookies.
Creative Twists
If you’re feeling adventurous, consider some international fusion variations. For a Mexican twist, add a pinch of cayenne pepper or cinnamon to the cookie dough for a spicy kick. The heat from the cayenne pairs beautifully with the sweetness of the chocolate and the coolness of the peppermint, creating a delightful contrast that will surprise and delight your taste buds.
Leftover chocolate peppermint blossoms? You can transform these cookies into a decadent trifle by layering crumbled cookies with whipped cream and chocolate pudding. This not only minimizes waste but also creates a stunning dessert that’s perfect for gatherings.
Lastly, don’t shy away from experimenting with different cooking methods. If you want a chewier texture, consider baking them in a cast iron skillet for a cookie-pie hybrid. Just adjust your baking time accordingly, and serve it warm with a scoop of vanilla ice cream on top for an indulgent treat!
In summary, the possibilities for variations of chocolate peppermint blossoms are endless! By incorporating seasonal flavors, accommodating dietary needs, or even experimenting with global influences, you can keep this beloved cookie fresh and exciting. So, don your apron, gather your ingredients, and let your creativity run wild in the kitchen!
Storage, Reheating, and Meal Prep for chocolate peppermint blossoms
When it comes to baking, one of the most delightful treats to have on hand during the festive season is a batch of chocolate peppermint blossoms. These beautiful cookies, with their rich chocolate flavor and a refreshing hint of peppermint, are perfect for holiday gatherings, gifting, or simply enjoying at home. But what happens when you have leftovers? Proper storage is essential to keep these cookies fresh for as long as possible, and I’m here to share my insights on how to do just that.
Short-term Storage
If you find yourself with a batch of freshly baked chocolate peppermint blossoms and want to enjoy them over the next few days, short-term storage is quite simple. First, allow the cookies to cool completely on a wire rack; this prevents moisture from building up in the container. Once cooled, you can transfer them to an airtight container. I prefer using a plastic container with a tight-fitting lid, but glass jars also work wonderfully. Just make sure there’s no excess air trapped inside.
For optimal freshness, you can place a piece of parchment paper between layers of cookies. This technique prevents them from sticking together, preserving their shape and texture. Stored this way, your chocolate peppermint blossoms will stay fresh for about 5 to 7 days at room temperature. If you live in a humid area, I recommend keeping them in the refrigerator to prevent them from becoming too soft or losing their delightful crunch.
Freezing and Long-term Storage
For those who want to enjoy their chocolate peppermint blossoms even later, freezing is the way to go! Freezing can extend the shelf life of these cookies for up to three months without compromising their taste or texture. Start by placing the cooled cookies in a single layer on a baking sheet. This step is crucial as it prevents them from sticking together during the freezing process. Once frozen solid, transfer them to a freezer-safe bag or container, making sure to remove as much air as possible to prevent freezer burn.
Label the container with the date and type of cookie, so you remember what you have on hand. When you’re ready to indulge in those frozen delights, there’s no need to thaw them; simply pop them in the oven at a low temperature for a few minutes. This reheating method not only defrosts them but also revives their freshly baked aroma and texture, making them taste just like they came out of the oven!

Reheating Best Practices
Reheating your chocolate peppermint blossoms can be a delightful experience if done correctly. Whether they were stored in the fridge or frozen, the goal is to warm them gently without overcooking. If your cookies were stored in the refrigerator, you can place them on a baking sheet and warm them at 300°F (150°C) for about 5-7 minutes. For frozen cookies, extend that to about 10-12 minutes. This gentle heat allows the chocolate to melt slightly and the peppermint aroma to waft through your kitchen, creating a nostalgic atmosphere.
Another option is to use the microwave. Place a cookie on a microwave-safe plate and heat it for about 10-15 seconds. Be cautious not to overdo it, as microwaving can quickly turn a soft cookie into a chewy one. I always recommend using the oven for the best results, but if you’re in a pinch, the microwave is a handy alternative.
As for meal prep and batch cooking, I often whip up a double batch of chocolate peppermint blossoms during the holiday season. I store half in the freezer and keep half in the fridge, allowing me to have a ready supply of cookies for unexpected guests or when a sweet craving strikes. Portioning is key; I like to wrap individual cookies in plastic wrap or place them in small bags before freezing. This way, I can easily grab just one or two cookies at a time without defrosting the entire batch.
Food safety is an essential aspect of storage as well. Always check for any signs of spoilage, such as an off smell or change in texture. While chocolate peppermint blossoms can last a while, it’s better to err on the side of caution. Additionally, remember that ingredients such as butter and eggs have their own shelf life, which can impact the longevity of your cookies. If you’re ever in doubt, it’s wise to trust your instincts and discard anything that seems off.
In conclusion, mastering the art of storage for your chocolate peppermint blossoms ensures you can enjoy them far beyond the initial bake-off. With proper techniques for short-term storage, freezing, and reheating, these delightful cookies can bring joy to your table throughout the season. So go ahead, bake a batch, share them with loved ones, and savor the magic of chocolate and peppermint!
Nutritional Benefits and Health Information
As a passionate home baker, I often find myself pondering the nutritional aspects of my favorite dessert recipes. Among them, chocolate peppermint blossoms stand out not only for their delightful taste but also for the interesting health components they offer. Let’s dive deep into the nutritional benefits and health information surrounding these festive treats!
Nutritional Profile
A standard serving size of chocolate peppermint blossoms typically contains around 100-150 calories, depending on the specific recipe and size of the cookie. These cookies are primarily made with flour, sugar, cocoa powder, butter, eggs, and peppermint extract, which contribute to their rich flavor and texture. On average, each cookie contains approximately:
- Calories: 120
- Carbohydrates: 15 grams
- Protein: 2 grams
- Fat: 7 grams
- Sugar: 8 grams
- Fiber: 1 gram
This nutritional breakdown shows that while chocolate peppermint blossoms are a treat, they can be enjoyed in moderation as part of a balanced diet. The presence of cocoa, however, offers some unexpected benefits, making these cookies a little more than just a guilty pleasure.
Health Benefits
One of the key ingredients, cocoa powder, is known for its numerous health benefits. Rich in antioxidants, cocoa can help improve heart health, lower blood pressure, and even elevate mood thanks to its flavonoid content. These compounds may also enhance cognitive function and provide anti-inflammatory effects. So, indulging in a chocolate peppermint blossom is not just a sweet escape; it can also be a boost for your well-being!
Peppermint, the other star ingredient, also boasts health benefits. It can aid digestion, relieve headaches, and provide respiratory relief due to its menthol content. While we may not consume a large quantity of peppermint in one cookie, every bit counts! Plus, the invigorating aroma of peppermint can enhance your mood, making these cookies a delightful treat for both your taste buds and your spirit.
Dietary Considerations
When it comes to dietary considerations, chocolate peppermint blossoms may not be suitable for everyone. Those with gluten intolerance or celiac disease can easily modify the recipe by swapping out regular flour for a gluten-free alternative. Almond flour or a store-bought gluten-free flour blend can work beautifully, preserving the cookie’s structure while ensuring that everyone can enjoy them.
For those who are dairy-free, consider using plant-based butter or coconut oil as a substitute for traditional butter. Additionally, dark chocolate chips can be used to replace milk chocolate for a dairy-free option that still delivers that rich chocolate flavor we all love. This versatility allows the cookies to fit into various dietary plans without compromising on taste.
Moreover, if you’re looking to reduce sugar intake, you can experiment with sugar alternatives. Natural sweeteners like honey or maple syrup can be used, although they may slightly alter the texture. Just remember that baking is a science, so adjustments may require some experimentation.
In comparison to similar treats, chocolate peppermint blossoms can hold their own health-wise. For example, a traditional chocolate chip cookie may contain higher sugar and fat content, whereas the addition of peppermint can make these cookies feel lighter and more refreshing. Moreover, the richness of chocolate and peppermint often satisfies cravings with fewer cookies consumed, making them a more mindful indulgence.
In conclusion, while chocolate peppermint blossoms are undeniably a delightful treat, they also offer some surprising health benefits. By understanding their nutritional profile and being aware of dietary considerations, you can enjoy these cookies as part of a balanced diet. Whether you’re baking for the holidays or just craving something sweet, these cookies can provide both joy and satisfaction, all while keeping your health in mind. So go ahead, bake up a batch, and relish in the flavorful goodness of chocolate and peppermint!
Frequently Asked Questions About Chocolate Peppermint Blossoms
Hershey’s chocolate peppermint blossoms
Hershey’s chocolate peppermint blossoms are a delightful holiday treat that combines rich chocolate flavors with a refreshing hint of peppermint. These cookies are typically made by incorporating crushed peppermint candies or peppermint extract into a classic chocolate cookie base. Once baked, they are topped with a Hershey’s Kiss, which melts slightly to create a deliciously gooey center. For the best results, use high-quality cocoa powder and ensure your cookies are cooled completely before adding the kisses to prevent them from melting too much.
Chocolate peppermint blossoms recipe
A basic chocolate peppermint blossoms recipe includes essential ingredients like all-purpose flour, unsweetened cocoa powder, sugar, butter, eggs, and peppermint extract. To make the cookies, cream the butter and sugar, then gradually add the eggs and the dry ingredients mixed with the cocoa and peppermint. After forming the dough into balls and baking, press a Hershey’s Kiss into the center of each cookie while they’re still warm. For an extra touch, consider rolling the dough balls in crushed peppermint candies before baking to enhance the peppermint flavor and add a festive crunch.
Hershey kisses chocolate peppermint blossoms
Hershey Kisses chocolate peppermint blossoms are a signature ingredient in this beloved cookie recipe. These chocolate confections provide a rich, creamy finish that perfectly complements the peppermint flavor of the cookie. To achieve the best presentation, press the kisses into the center of the cookies right after they come out of the oven, allowing them to slightly melt and adhere to the cookie. For added visual appeal, you can sprinkle crushed peppermint candies over the warm cookies before the kisses set.
Best chocolate peppermint blossoms
The best chocolate peppermint blossoms are characterized by their soft, chewy texture and a perfect balance of chocolate and peppermint flavors. To achieve this, make sure to not overbake the cookies; they should still be soft in the center when you take them out of the oven. Using fresh peppermint extract or finely crushed candy canes can also elevate the flavor profile significantly. Lastly, refrigerating the dough for about 30 minutes before baking can help the cookies maintain their shape and prevent spreading.
White chocolate peppermint blossoms
White chocolate peppermint blossoms offer a delicious twist on the traditional recipe, substituting white chocolate for the classic Hershey’s Kiss. To make these cookies, you can either use white chocolate chips or melt white chocolate and drizzle it over the cookies after baking. Incorporating peppermint extract into the dough remains essential to maintain that refreshing mint flavor. These cookies are especially festive when topped with crushed peppermint candies to enhance both the flavor and appearance.
Hershey’s peppermint blossoms
Hershey’s peppermint blossoms are essentially the same as the chocolate peppermint blossoms but often feature a more pronounced peppermint flavor. The recipe typically involves adding more crushed peppermint candies or using peppermint-flavored Kisses. To make them, simply follow the standard chocolate cookie recipe, ensuring that you fold in the peppermint pieces before baking. For optimal flavor, let the cookies cool slightly before adding the Kisses, allowing them to melt just enough to create a gooey center.
Pillsbury chocolate peppermint blossoms
Pillsbury offers a convenient option for chocolate peppermint blossoms in the form of ready-to-bake dough or mixes. These pre-prepared products make it easy to whip up a batch without the hassle of measuring out ingredients. For the best results, follow the package instructions closely, and consider adding an extra sprinkle of crushed peppermint on top before baking for an added festive touch. You can also pair them with a drizzle of melted chocolate for a delicious finishing touch.
Peppermint blossoms tree
The term “peppermint blossoms tree” typically refers to a decorative holiday tree made of peppermint candies or cookie versions of peppermint blossoms arranged creatively. You can create a stunning centerpiece by stacking cookies in a tree formation and securing them with frosting or melted chocolate. For added flair, consider decorating the tree with edible glitter or candy canes. This fun project not only serves as a visual treat but also as a delicious dessert for holiday gatherings.


