Chocolate turtle apple. The very mention of it conjures up a delightful mix of flavors and textures that dance on the palate, a sweet temptation that’s hard to resist. My journey with this unique dessert began on a crisp autumn day, where the air was filled with the scent of falling leaves and the promise of holiday gatherings. I was visiting a local farmers’ market, my heart set on finding fresh produce for a dinner party. As I wandered through the stalls, I stumbled upon a vendor selling caramel apples. But these weren’t just any caramel apples; they were drizzled with rich chocolate and topped with chopped nuts, resembling the beloved turtle candies. Intrigued, I purchased one and took a bite. The explosion of flavors ignited my imagination, and right then, I knew I had to recreate this heavenly treat at home.
As I began to experiment in my kitchen, I found that the chocolate turtle apple was not just a dessert; it was a canvas for creativity. I could add different toppings, experiment with various types of chocolate, and even play with spices. Each attempt brought me closer to the perfect balance of sweet, salty, and crunchy. The beauty of this recipe lies not only in its taste but in its simplicity. With just a few ingredients—fresh apples, caramel, chocolate, and nuts—you can create something truly special. It’s a recipe that can be whipped up in a matter of minutes, making it perfect for busy families looking for quick and delicious dessert options.
The Story Behind This Recipe
As I delved deeper into the chocolate turtle apple, I learned about its cultural roots. The dessert draws inspiration from the classic chocolate turtle candy, which has been a favorite in American confectionery for decades. The turtles, known for their rich caramel and chocolate coating, are often associated with nostalgic childhood memories and holiday traditions. In many ways, the chocolate turtle apple serves as a bridge between the sweetness of childhood treats and the wholesome goodness of fresh fruit.
This recipe has a special place in my heart, as it brings together family and friends. I remember hosting a gathering where I set up a chocolate turtle apple bar, complete with bowls of caramel, various chocolates, and an array of toppings. Watching everyone customize their apples brought laughter and joy, and it became a cherished memory. There’s something about sharing food that creates connections and fosters love, and the chocolate turtle apple does just that.
Seasonally, this dish shines during the fall, especially around Halloween and Thanksgiving. As apples come into season, their crispness complements the rich sweetness of the caramel and chocolate. However, the beauty of the chocolate turtle apple is that it can be enjoyed year-round, making it a versatile dessert for any occasion. Whether it’s a summer barbecue or a winter holiday party, this treat will always be a crowd-pleaser.
What makes the chocolate turtle apple stand out is its ability to evoke emotions. It’s more than just a dessert; it’s a symbol of comfort and togetherness. Each bite takes me back to those autumn days, filled with laughter and the warmth of loved ones. It’s a reminder that simple ingredients can create lasting memories.
In this article, you will learn how to make your own chocolate turtle apples, discover tips for customizing them to your taste, and gain insights into their cultural significance. By the end, you’ll be inspired to bring this delightful treat into your home, creating your own cherished memories around the dining table.
The Rich History and Cultural Significance of chocolate turtle apple
The chocolate turtle apple has a rich history that reflects the evolution of American dessert culture. It draws its inspiration from the classic chocolate turtle candy, which has been enjoyed since at least the early 20th century. The original turtles are made with pecans, caramel, and chocolate, often served as bite-sized confections. The idea of pairing this beloved candy with fresh apples is a relatively modern twist that combines the indulgence of candy with the wholesome nature of fruit.
Origins and History
As the dessert gained popularity, variations began to sprout up across the country. Different regions put their own spin on the chocolate turtle apple, experimenting with various types of chocolate, caramel, and nut toppings. In some areas, you might find chocolate turtle apples drizzled with white chocolate or adorned with crushed pretzels for an added salty crunch, showcasing regional preferences and culinary creativity.
Cultural Significance
The chocolate turtle apple represents more than just a delicious dessert; it embodies the spirit of community and shared experiences. This dessert is often served at fairs, festivals, and family gatherings, making it a staple at celebrations throughout the year. It evokes nostalgia for many, reminding them of their childhood and the simple joys of indulging in sweet treats.
During autumn, chocolate turtle apples become a popular attraction at apple orchards and pumpkin patches, where families gather to pick their own apples and enjoy seasonal festivities. The act of creating and sharing these treats reinforces bonds, making them a beloved part of many family traditions.
Nutritional Benefits
In addition to their delightful taste, chocolate turtle apples offer some nutritional benefits. Apples are rich in fiber, vitamins, and antioxidants, making them a healthy choice when enjoyed in moderation. The addition of nuts provides healthy fats and protein, while dark chocolate can offer heart-healthy benefits when used in moderation. This combination allows the chocolate turtle apple to be a treat that satisfies sweet cravings while providing some nutritional value.
As we explore the chocolate turtle apple in further detail, you’ll discover not only how to make this delicious dessert but also how to customize it to fit your family’s preferences and dietary needs. Whether you’re a seasoned cook or a beginner in the kitchen, this recipe will inspire you to create your own chocolate turtle apples, allowing you to share your love for this delightful treat with friends and family.
Essential Ingredients for Perfect chocolate turtle apple
Creating the perfect chocolate turtle apple starts with selecting the right ingredients. Each component plays a crucial role in the overall flavor and texture of this delightful treat that combines the tartness of apples with the sweetness of chocolate and caramel, topped off with a satisfying crunch from nuts. Let’s dive into the essential ingredients that will make your chocolate turtle apple slices truly stand out.
Essential Ingredients
- 2 green Granny Smith Apples cut into 1/2 inch slices – The tartness of Granny Smith apples provides a perfect contrast to the sweet chocolate and caramel. When choosing apples, look for ones that are firm with no bruises or soft spots. The green skin indicates a higher acidity, which enhances the overall flavor profile.
- 3 cups chocolate chips or melts (milk or dark) – Whether you choose milk chocolate for a creamy sweetness or dark chocolate for a rich, bittersweet flavor, quality is key. Look for high cocoa content and avoid chips with added wax, which can affect melting. Brands like Ghirardelli or Guittard offer excellent options.
- 1 tbsp coconut oil – Coconut oil not only helps to achieve a smooth, glossy finish on your chocolate but also adds a hint of tropical flavor. When selecting coconut oil, opt for virgin or extra virgin for the best taste and health benefits.
- 1 cup caramel candies (unwrapped) – Caramel adds that classic sweetness to your chocolate turtle apple slices. Choose high-quality caramels, preferably those made with real butter and cream. If you want to save time, look for caramel sauces as an alternative.
- 1 tbsp heavy cream – Heavy cream adds richness to your caramel, making it easier to drizzle over the apples. Always pick fresh cream with a high-fat content for the best results.
- 1 cup walnuts (chopped, or nuts of choice) – Walnuts provide a delightful crunch and a slightly bitter flavor that balances the sweetness of chocolate and caramel. If you have nut allergies, consider using toasted pumpkin seeds or sunflower seeds instead.
- 12 popsicle sticks – These are essential for serving your chocolate turtle apple slices. Make sure they are food-safe and sturdy enough to hold the weight of the coated apple slices.
- Coarse sea salt (to garnish) – A sprinkle of coarse sea salt elevates the flavors of chocolate and caramel, creating a delightful sweet-salty contrast. Look for high-quality sea salt like Maldon or fleur de sel for the best taste.

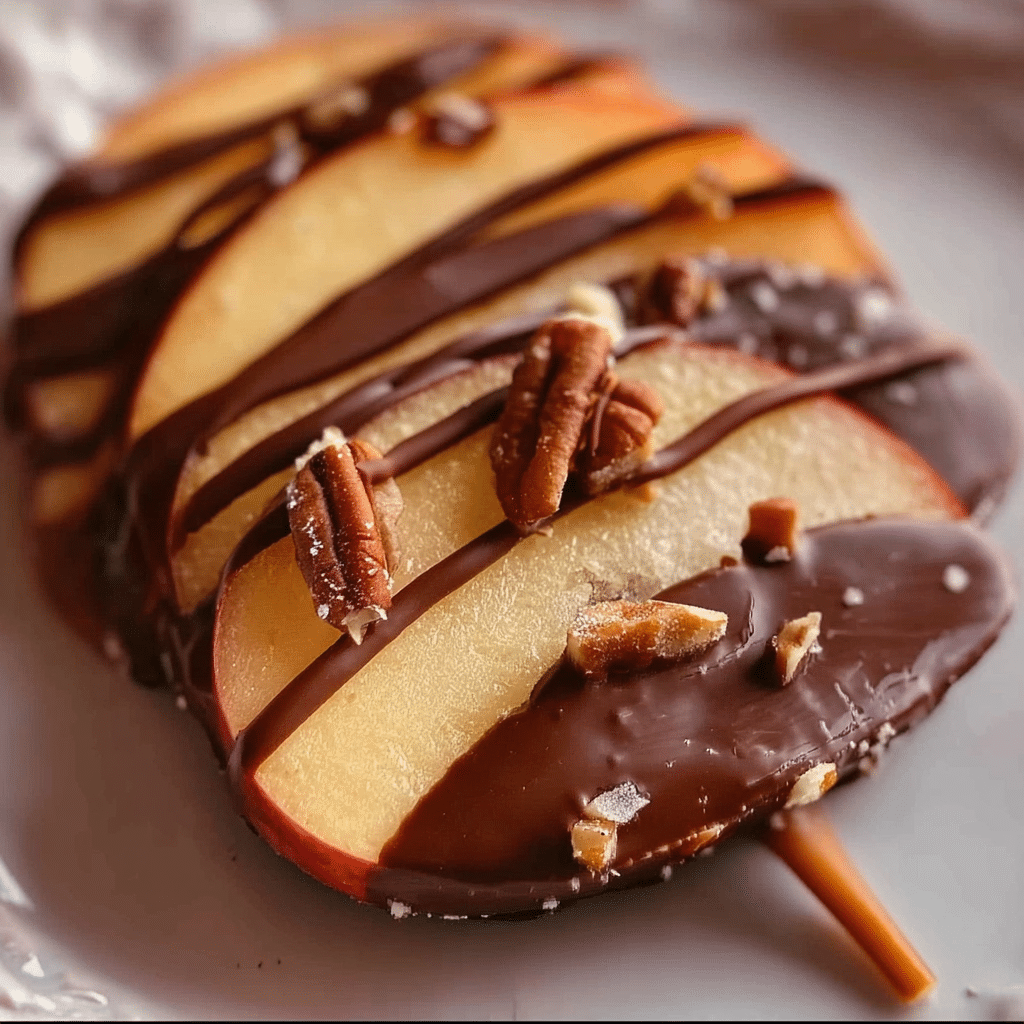
Chocolate Turtle Apple Slices
Ingredients
- 2 green Granny Smith Apples cut into 1/2 inch slices
- 3 cups chocolate chips or melts milk or dark
- 1 tbsp coconut oil
- 1 cup caramel candies unwrapped
- 1 tbsp heavy cream
- 1 cup walnuts chopped, or nuts of choice
- 12 popsicle sticks
- coarse sea salt to garnish
Instructions
- Prepare the Apples: Wash and dry the apples thoroughly. Slice each apple into thick wedges, about 1/2 to 3/4 inch wide. Insert wooden sticks into one end of each apple slice, making sure they hold firmly.
- Melt the Chocolate: In a microwave-safe bowl, combine the chocolate chips or chocolate melts and coconut oil. Microwave the chocolate in 30-second intervals, stirring each time until the chocolate is smooth and fully melted. OR fill the bottom of a double boiler with water and place on low heat. Place chocolate in the top of a double boiler over hot (not boiling) water and allow it to melt. Do not cover. When most of the chocolate is shiny, stir until smooth, and add in the coconut oil to make it even smoother.
- Dip in Chocolate: Holding the wooden stick, dip each apple slice into the melted chocolate, coating it evenly. Allow any excess chocolate to drip back into the bowl. While the chocolate is still warm and melty, add the nuts to the chocolate. Make sure to do this before the chocolate sets so they will stick. Place the sheet pan in the refrigerator for about 10-15 minutes to let the chocolate firm up.
- Melt the Caramel: Unwrap the caramel candies and place them in a microwave-safe bowl. Add the cream and microwave the caramel mixture in 30-second intervals, stirring each time until the caramel is completely melted and smooth. Be cautious not to overheat. Feel free to also use the double broiler method from above.
- Toppings: Remove the apples from the fridge, drizzle with the melted caramel, and finish with a little touch of coarse sea salt. Enjoy!
Shopping Tips
When shopping for ingredients, always prioritize freshness and quality. Seasonal availability can affect your options, especially with apples. Late summer to early fall is the best time to find fresh Granny Smith apples at local farmers’ markets. For chocolate, caramel, and nuts, consider checking specialty stores for gourmet options that might offer better flavors than standard supermarket brands.
Substitutions and Alternatives
Dietary restrictions can often make it challenging to find suitable substitutions. For instance, if you’re looking for a dairy-free version of chocolate turtle apple, opt for dairy-free chocolate chips and coconut cream instead of heavy cream. If you’re avoiding nuts, pumpkin seeds or a sprinkle of crushed pretzels can give you that desired crunch without the allergens. Additionally, if you’re short on time, pre-packaged caramel sauce can work as a quick substitute for homemade caramel.
Being mindful of your ingredient choices not only enhances the flavor of your chocolate turtle apple but also ensures that your treat meets any dietary needs you may have. And with a little creativity, you can make this delightful dessert accessible to everyone!
Detailed Step-by-Step chocolate turtle apple Cooking Instructions
Now that you have all your ingredients ready, let’s dive into the detailed step-by-step instructions for making your chocolate turtle apple slices. This process is not only straightforward but also a fun activity to do with family or friends. Gather your equipment and let’s get started!
Preparation Steps
- Wash and slice the apples: Start by thoroughly washing your Granny Smith apples under cool water to remove any wax or pesticides. Once clean, slice them into 1/2 inch thick rounds. Make sure to remove the seeds as you go, as they can be unpleasant to bite into.
- Prepare the workspace: Lay out all your ingredients and tools on a clean, flat surface. You’ll need a microwave-safe bowl for melting chocolate and caramel, a baking sheet lined with parchment paper for cooling, and a small saucepan for any heating tasks.
- Chop the nuts: If you’re using walnuts, chop them into small pieces. This will help them stick better to the caramel and chocolate coatings. You want pieces that are small enough to sprinkle but not so small that they lose their crunch.
Cooking Process
- Melting the chocolate: In a microwave-safe bowl, combine the chocolate chips and 1 tbsp of coconut oil. Microwave in 30-second intervals, stirring in between, until completely melted and smooth. This should take about 1-2 minutes. Be careful not to overheat, as chocolate can seize up if it gets too hot.
- Melting the caramel: In a separate saucepan, combine the unwrapped caramel candies and 1 tbsp of heavy cream. Heat over low-medium heat, stirring until melted and smooth. If the caramel is too thick, you can add a little more cream to achieve your desired consistency.
- Coating the apple slices: Dip each apple slice into the melted chocolate, ensuring it’s fully coated. Allow any excess chocolate to drip off before placing it on the parchment-lined baking sheet. Repeat this process until all apple slices are coated.
- Drizzling with caramel: Once the chocolate has set slightly (it doesn’t need to be completely hardened), take your melted caramel and drizzle it over the chocolate-covered apple slices. You can use a spoon or a piping bag for more control.
- Sprinkling nuts: Immediately after drizzling the caramel, sprinkle the chopped walnuts over the apple slices, pressing gently to ensure they stick. This will create that signature turtle topping.
- Add sea salt: Before the chocolate and caramel set completely, finish with a light sprinkle of coarse sea salt. This will enhance the flavors and provide that sweet-salty balance that makes chocolate turtle apples so irresistible.
Final Assembly
- Insert popsicle sticks: While the chocolate and caramel are still slightly warm, insert a popsicle stick into the bottom of each apple slice. This will make it easy to hold and eat.
- Let them cool: Allow the assembled chocolate turtle apples to cool completely at room temperature. You can also place them in the fridge for about 15-20 minutes to help set the chocolate and caramel faster.
- Store or serve: Once cooled, you can serve them immediately or store them in an airtight container in the refrigerator. They should stay fresh for up to three days, although the texture may change slightly over time.
Creating chocolate turtle apples is not just about following a recipe; it’s about enjoying the process and sharing these delightful treats with loved ones. Whether for a special occasion or just a sweet snack, your homemade chocolate turtle apples will surely impress!
Professional Tips and Techniques for chocolate turtle apple
When it comes to creating the perfect chocolate turtle apple, the key lies in mastering a few professional techniques that can elevate your dessert from ordinary to extraordinary. As someone who has spent countless hours in the kitchen experimenting with chocolates, apples, and nuts, I’ve gathered a treasure trove of tips that will help you create a stunning and delicious treat.

Professional Techniques
First and foremost, let’s talk about the apples. Choosing the right variety is crucial. I recommend using tart apples like Granny Smith, as their crispness and acidity provide a perfect contrast to the rich sweetness of the chocolate and caramel. Once you’ve selected your apples, it’s important to wash and dry them thoroughly. Any residue or moisture can prevent the chocolate from adhering properly.
Next, let’s dive into the chocolate. For the best flavor and texture, opt for high-quality chocolate. I’ve experimented with both dark and milk chocolate, and while each brings its unique flavor profile, dark chocolate tends to balance the sweetness of the caramel beautifully. When melting chocolate, it’s essential to do so gently. Use a double boiler or microwave in short bursts, stirring frequently to avoid seizing. This technique ensures a smooth, glossy finish that will make your chocolate turtle apple irresistible.
Now, let’s discuss the caramel. Homemade caramel adds a richness that store-bought versions simply can’t match. A classic technique for achieving that perfect caramel is to use a candy thermometer. Aim for a temperature of about 240°F (soft ball stage). This helps prevent the caramel from becoming too hard or too soft. If you’re new to making caramel, don’t be discouraged; it takes some practice, but the results are well worth it!
Troubleshooting Guide
Even the most experienced cooks encounter hiccups along the way. If your chocolate isn’t sticking to the apple, it may be due to moisture. Make sure the apples are completely dry before dipping. If your caramel seems too runny, it may not have been cooked long enough. Try returning it to the heat for a few more minutes.
Another common issue is chocolate that’s too thick for dipping. If you find your chocolate has solidified too much, gently reheat it using the double boiler method. If it’s too thin, a quick stir in some cocoa powder or melted chocolate can thicken it up. Remember, patience is key; rushing through these steps can lead to frustration.
Presentation Tips
Presentation is everything when it comes to desserts, and your chocolate turtle apple should be a feast for the eyes as well as the taste buds. After dipping your apples in chocolate and caramel, consider rolling them in chopped nuts for added texture and flavor. Pecans are a classic choice, but walnuts or hazelnuts can also work beautifully. Arrange them on a decorative plate, and don’t forget to drizzle extra melted chocolate over the top for a professional touch.
When it comes to serving, consider pairing your chocolate turtle apple with a nice dessert wine. A rich port or a sweet Riesling complements the dessert’s flavors perfectly, enhancing the overall experience. If you’re not a wine drinker, a cup of spiced hot cider can also be a delightful choice, especially during the fall months.
For make-ahead and meal prep strategies, you can prepare the caramel and chocolate in advance. Just be sure to store them properly to maintain their texture. The apples can be dipped a few hours before serving, and they’ll still maintain their crunch. If you’re scaling the recipe for a larger gathering, simply multiply the ingredients accordingly; just keep in mind that you may need a larger workspace for the dipping process.
In summary, the creation of chocolate turtle apples is as much an art as it is a science. By utilizing high-quality ingredients, mastering techniques, and paying attention to presentation, you can create a dessert that not only tastes fantastic but also looks stunning. I hope these tips inspire you to make your own chocolate turtle apple masterpiece!
Creative Variations and Adaptations of chocolate turtle apple
When it comes to chocolate turtle apples, the classic recipe is merely a canvas for creativity. There are endless ways to adapt and personalize this delightful treat, and I’ve discovered several variations that can cater to different tastes, dietary needs, and seasonal inspirations. Let’s explore some creative approaches to the beloved chocolate turtle apple.
Seasonal Variations
One of the most fun aspects of making chocolate turtle apples is the opportunity to play with seasonal ingredients. In the fall, consider infusing your chocolate with pumpkin spice for a festive twist. Simply add a pinch of cinnamon, nutmeg, and clove to your melted chocolate for a flavor that screams autumn.
As winter approaches, think about incorporating peppermint. Crush some candy canes and sprinkle them over the chocolate before it sets to create a refreshing holiday treat. In the spring, you could enhance your chocolate with floral notes, like lavender or rose, offering a delicate yet sophisticated flavor that pairs beautifully with fresh apples.
During summer, I love using tropical fruits like mango or pineapple slices instead of apples. Dip them in chocolate and drizzle with caramel for a refreshing take that’s perfect for hot days. These variations not only keep things exciting but also allow you to celebrate the flavors of each season.
Dietary Adaptations
With the growing awareness of dietary restrictions, it’s essential to offer adaptations for chocolate turtle apples. For those following a keto lifestyle, you can use sugar-free chocolate and a homemade low-carb caramel sauce made with erythritol or stevia. The sweetness remains, but the carbs are significantly reduced, allowing everyone to enjoy this treat without guilt.
If you’re catering to vegans, opt for dairy-free chocolate and create a coconut-based caramel. Coconut milk can mimic the creamy texture of traditional caramel while adding a delightful tropical flavor. Additionally, using nut butters like almond or cashew can provide a rich, creamy texture that enhances the overall experience.
For gluten-free variations, ensure any toppings you choose are certified gluten-free. Many nuts and chocolates are naturally gluten-free, but it’s always best to check labels. This way, your chocolate turtle apples can be enjoyed by everyone, regardless of dietary restrictions.
Creative Twists
Why stop at just chocolate and caramel? Experimenting with spices can elevate your chocolate turtle apple experience to new heights. A sprinkle of sea salt can enhance the sweetness, while adding a hint of cayenne can introduce a surprising kick. The contrast of sweet and spicy is something that will leave your guests talking about your dessert long after they’ve finished eating.
If you have leftover chocolate or caramel, don’t let it go to waste! Use it to create chocolate-covered pretzels or caramel popcorn. These leftover transformations can make for delightful snacks or gifts, showcasing your culinary prowess. You can even create a chocolate turtle apple charcuterie board, combining various fruits, nuts, and sweet treats for a visually stunning centerpiece.
In conclusion, the possibilities for chocolate turtle apples are as vast as your imagination. By embracing seasonal ingredients, dietary adaptations, and creative twists, you can craft a dessert that is not only delicious but also uniquely yours. Whether you’re hosting a party or simply indulging yourself, these variations will ensure that every bite of your chocolate turtle apple is a delightful experience!
Storage, Reheating, and Meal Prep for chocolate turtle apple
When it comes to enjoying the delightful treat of chocolate turtle apple slices, knowing how to store them properly can make all the difference in maintaining their deliciousness and freshness. Whether you’re prepping for a party, making them as a special treat for your family, or just want to keep some on hand for yourself, understanding the ins and outs of storage, reheating, and meal prep is essential. Let’s dive deep into the world of chocolate turtle apples and explore how to keep them in tip-top shape!
Short-term Storage
First things first, let’s talk about short-term storage. If you’ve freshly made your chocolate turtle apple slices, they can be stored at room temperature for a short period. Ideally, they should be consumed within a day or two for the best flavor and texture. However, if you find yourself with leftovers, it’s best to refrigerate them. To do this, place the apple slices in an airtight container lined with parchment paper. This will help absorb any moisture and keep the chocolate from becoming sticky.
When stacking the slices, be sure to separate them with more parchment paper. This prevents the chocolate from sticking together and losing its beautiful presentation. You might be tempted to skip the parchment, but trust me – your future self will thank you for those extra steps. Once in the refrigerator, the chocolate turtle apple slices can typically last about five to seven days. Just be aware that the longer they sit, the softer the apple may become, which could affect the overall crunch you crave.
Freezing and Long-term Storage
If you know you won’t be able to finish your chocolate turtle apple slices within a week, consider freezing them. Freezing is a fantastic way to extend the shelf life of your treats without compromising their flavor. To freeze, first, allow the chocolate turtle apple slices to cool completely. Then, place them on a baking sheet lined with parchment paper, ensuring they are not touching each other. Place the baking sheet in the freezer for about an hour, or until the slices are frozen solid.
Once frozen, transfer the slices to a freezer-safe airtight container or a heavy-duty freezer bag. Be sure to label the container with the date so you can keep track of how long they’ve been stored. When done correctly, chocolate turtle apples can last in the freezer for up to three months. When you’re ready to enjoy them, simply remove the desired amount from the freezer and let them thaw in the refrigerator for a few hours. This method helps maintain their texture and flavor, ensuring a delightful experience when you indulge again.
Reheating Best Practices
Reheating chocolate turtle apple slices is a bit of a misnomer, as these treats are best enjoyed at room temperature or chilled. However, if you find that the chocolate has hardened too much after refrigeration or freezing, you may want to slightly warm them up. To do this, avoid using the microwave as it can cause the chocolate to seize or become overly melty. Instead, opt for the double boiler method. Place a heat-safe bowl over a pot of simmering water, and gently warm the chocolate until it’s just melted. Drizzle a bit of this warm chocolate over your cold slices for a fresh touch.
For meal prep enthusiasts, chocolate turtle apple slices can also be incorporated into a variety of snack boxes or dessert platters. If you’re batch cooking, consider preparing the chocolate turtle apples ahead of time and storing them in the refrigerator as mentioned. They make for an excellent addition to kids’ lunches or as a sweet treat for gatherings. Just remember to portion them out to prevent overindulgence, though I must admit, it can be hard to stop at just one slice!
Food safety is always a priority, so be mindful of how long the chocolate turtle apple slices have been stored. If they’ve been left out at room temperature for more than a couple of hours, it’s best to err on the side of caution and discard them. When it comes to apples, the fresher they are, the better your chocolate turtle apple slices will taste. So, if you’re planning to store them, choose firm apples that can withstand the test of time.
In summary, chocolate turtle apple slices can be easily stored for both short-term and long-term enjoyment. By following proper storage methods, you can ensure that your treats remain fresh and delightful, ready for you to indulge whenever the craving strikes. Remember, whether you’re enjoying them fresh or frozen, the key is to keep them safe and tasty!

Nutritional Benefits and Health Information
When indulging in chocolate turtle apple slices, it’s not just about satisfying your sweet tooth; it’s also important to consider the nutritional benefits of this delicious treat. The combination of apples, chocolate, and caramel brings together a unique blend of flavors and nutrients that can contribute positively to your diet. Let’s dive into the nutritional breakdown and health benefits of the key ingredients in chocolate turtle apples!
Nutritional Profile
A standard serving of chocolate turtle apple slices (typically one slice) contains a variety of nutrients that can enhance your overall wellness. Here’s a rough breakdown of what you can expect:
- Calories: Approximately 150-200 calories per slice, depending on the amount of chocolate and caramel used.
- Carbohydrates: Around 25-30 grams, primarily from the apple and added sugars.
- Fat: About 7-10 grams, mostly from the chocolate and nuts (if included).
- Protein: Roughly 1-3 grams, depending on the ingredients.
- Fiber: 2-3 grams, primarily from the apple.
This nutritional profile can vary based on the specific recipe and the size of the apple slices, but it provides a general idea of what you’re consuming when you enjoy a chocolate turtle apple slice.
Health Benefits
One of the standout ingredients in chocolate turtle apple slices is, of course, the apple itself. Apples are packed with vitamins and minerals, including Vitamin C, potassium, and various antioxidants. Eating apples is linked to numerous health benefits, such as improved heart health, better digestion, and even weight management due to their high fiber content. The act of eating fiber-rich foods like apples can help you feel full longer, which is a fantastic bonus for those watching their calorie intake!
When it comes to chocolate, particularly dark chocolate, there are also notable health benefits. Dark chocolate is rich in flavonoids, which are compounds that have been shown to improve heart health by lowering blood pressure and improving blood flow. Additionally, dark chocolate can enhance mood and cognitive function, making it a delightful treat for the mind as well as the body. Pairing these health benefits with the natural sweetness of apples creates a guilt-free indulgence that can be enjoyed in moderation.
Dietary Considerations
For those with dietary restrictions, chocolate turtle apple slices offer some flexibility. If you’re gluten-free, you can easily make this treat using gluten-free chocolate and caramel options. For vegans, substitute traditional chocolate with dairy-free chocolate and opt for a plant-based caramel. Additionally, those with nut allergies can replace nuts with seeds or leave them out altogether without sacrificing flavor.
When it comes to calorie content and macronutrient distribution, moderation is key. While chocolate turtle apple slices can be a delightful treat, it’s crucial to be mindful of portion sizes. Enjoying one or two slices can fit comfortably into most diets, but be cautious of overindulging, as the calorie count can add up quickly. Consider pairing your slice with a source of protein, like a handful of nuts or a yogurt, to create a more balanced snack.
In terms of vitamins and minerals, chocolate turtle apple slices provide a mix that can contribute to your daily requirements. The Vitamin C from the apples can support your immune system, while the antioxidants in dark chocolate can help combat oxidative stress in the body. By enjoying chocolate turtle apples, you’re not just indulging – you’re also providing your body with valuable nutrients!
In conclusion, chocolate turtle apple slices are more than just a sweet treat; they offer a range of nutritional benefits that can enhance your overall diet. By understanding the nutritional profile, health benefits, and dietary considerations, you can feel good about indulging in this delightful dessert. Remember, balance and moderation are essential, and with the right approach, chocolate turtle apple slices can be a part of a healthy lifestyle!
Frequently Asked Questions About Chocolate Turtle Apple
Chocolate turtle apple slices recipe
To make delicious chocolate turtle apple slices, start by slicing a firm apple, like a Granny Smith or Honeycrisp, into even slices about 1/2 inch thick. Melt some caramel and chocolate in separate bowls; you can use store-bought caramel or make it from scratch. Dip each apple slice in the melted caramel, letting the excess drip off, and then place it on a parchment-lined tray. Next, drizzle the melted chocolate over the caramel-covered apple slices and sprinkle with chopped pecans or sea salt for added flavor. Allow the chocolate to set in the refrigerator for about 30 minutes before serving, ensuring a delightful treat that balances sweetness and tartness.
Chocolate turtle apple slices healthy
While chocolate turtle apple slices can be a delicious treat, they can also be considered healthier than many other desserts if made with moderation. Apples provide dietary fiber, vitamins, and antioxidants, making them a nutritious base for this dessert. To make them healthier, consider using dark chocolate, which contains less sugar and more antioxidants compared to milk chocolate. Additionally, you can use homemade caramel made with natural sweeteners or coconut sugar to reduce the overall sugar content. Remember to enjoy them in moderation, as the added sugars from chocolate and caramel can add up quickly.
Chocolate covered apple slices recipe
To create chocolate covered apple slices, first, slice your favorite apples into even wedges or rounds. Melt your choice of chocolate—milk, dark, or white—in a microwave-safe bowl, stirring every 30 seconds until smooth. Dip each apple slice into the melted chocolate, ensuring it’s fully coated, and then let the excess drip off. For added texture and flavor, sprinkle toppings like crushed nuts, sprinkles, or coconut flakes before placing them on a parchment-lined baking sheet. Chill the coated slices in the refrigerator for about 15-20 minutes until the chocolate sets, and enjoy your tasty and visually appealing treat!
How to keep chocolate covered apple slices from browning
To prevent chocolate covered apple slices from browning, it’s essential to treat the apple slices with a little lemon juice or an ascorbic acid solution before dipping them in chocolate. This helps to reduce oxidation, which causes browning. After applying the lemon juice, rinse them lightly with water and dry them before dipping. Additionally, ensure that the chocolate coating is thick enough to seal the apple’s surface and minimize exposure to air. Storing the chocolate-covered apple slices in an airtight container in the refrigerator can also help keep them fresh longer.
Chocolate covered apple slices on a stick
Creating chocolate covered apple slices on a stick is a fun and easy way to enjoy this treat! Start by slicing the apple into thick wedges and inserting a popsicle stick into each slice. Prepare your chocolate by melting it until smooth, then dip each apple slice into the chocolate, allowing any excess to drip off. If desired, you can roll the chocolate-covered slices in crushed nuts, sprinkles, or mini chocolate chips for added texture. After coating, place the slices on a parchment-lined tray and refrigerate until the chocolate hardens, making them perfect for parties or a fun snack on the go!
Chocolate Apple fruit
The term “chocolate apple” can refer to either chocolate-covered apples or a variety of apples that have been infused or flavored with chocolate. When making chocolate-covered apples, select firm and crisp apples, as their texture complements the rich chocolate coating. For a unique twist, you might also consider using flavored chocolate or adding spices like cinnamon to enhance the overall taste. Chocolate apples can be a delightful treat for special occasions and can be customized with various toppings to suit different palates. Always remember that while they are delicious, moderation is key to enjoying the indulgence without overdoing it.
Chocolate covered apple slices calories
The calorie count for chocolate covered apple slices can vary based on the size of the apple, the type of chocolate used, and any additional toppings. On average, a slice of chocolate-covered apple can contain about 100-150 calories, especially if made with dark chocolate and minimal toppings. To lower the calorie content, opt for smaller apple slices and use less chocolate or a lower-calorie chocolate alternative. Keep in mind that adding toppings, such as nuts or sprinkles, will also contribute to the overall calorie count. If you’re tracking your intake, it’s helpful to calculate based on the specific ingredients used.
Apple turtles
Apple turtles are a delightful and creative treat made by transforming apple slices into turtle shapes, often using chocolate and caramel. Start by cutting a whole apple into quarters and removing the core; then, slice each quarter into thinner wedges. Dip each wedge in melted caramel and arrange them to resemble the turtle’s shell. For the head and legs, use smaller pieces of apple, and you can use chocolate chips or candy eyes for decoration. This fun presentation not only makes for a great dessert but also serves as an engaging activity for kids during parties or family gatherings!


