Classic apple crisp has a way of wrapping you in the warm embrace of nostalgia, conjuring memories of family gatherings, autumn afternoons, and the sweet aroma of baked apples wafting through the air. I remember the first time I made this delightful dessert. It was a chilly October afternoon, and the leaves outside were a riot of color. My grandmother had recently gifted me her cherished recipe, a simple handwritten note tucked between the pages of a worn-out cookbook. As I gathered the ingredients, I felt a connection to generations past, who had baked this dish in their own kitchens. The buzz of anticipation filled the room as I chopped apples, mixed the crisp topping, and slid the dish into the oven, knowing that soon my home would be filled with the comforting scent of cinnamon and baked goodness.
The Story Behind This Recipe
The recipe for classic apple crisp is more than just a collection of ingredients; it’s a narrative woven into the fabric of many families’ traditions. This dish finds its roots in the early 19th century when apple desserts began to flourish in American kitchens, particularly in New England. The simplicity of the recipe reflects the ingenuity of home cooks who made the most of seasonal fruits and pantry staples. As apples became a staple in American orchards, the crisp emerged as a popular way to celebrate the harvest. Its easy preparation and delightful taste made it a go-to dessert for busy families, especially during the fall when apples are at their peak.
What makes classic apple crisp particularly special is its versatility. While many recipes exist, the core elements—fresh apples, a crumbly topping of oats, butter, and sugar—remain consistent. This dish isn’t just another dessert; it’s a canvas for creativity. You can mix in nuts, spices, or even dried fruits. Each variation tells a different story, influenced by personal tastes and regional ingredients. In my own family, we often add a handful of pecans to the topping, a nod to my Southern roots. This personal touch transforms the classic apple crisp into something uniquely ours, making it a dish that resonates on a deeper level.
Why You’ll Love This Dish
Classic apple crisp is the epitome of comfort food, making it the perfect solution for busy families seeking quick dinner ideas. It’s a one-dish wonder that can be prepared in under an hour, allowing you to spend more time with your loved ones and less time in the kitchen. The recipe is forgiving; you can use any type of apple you have on hand, whether it’s Granny Smith for a tart kick or Honeycrisp for a sweeter bite. The topping is equally adaptable, accommodating various dietary needs with gluten-free oats or alternative sweeteners if necessary.
Seasonally, classic apple crisp shines brightest in the fall, a time when apple orchards are bursting with ripe fruit. It’s the quintessential dessert for Thanksgiving, potlucks, or simply a cozy night in. However, its appeal spans the entire year, as it can be enjoyed warm with a scoop of vanilla ice cream during the summer months when apples are at their best. The emotional connection to this dish is profound; it evokes feelings of comfort, warmth, and shared moments around the dinner table. Each bite transports you back to those cherished family gatherings, where laughter is shared, and memories are made.
In this guide, you will learn everything you need to know about making the perfect classic apple crisp. From selecting the best apples to tips for achieving that perfect crumbly topping, I’ll walk you through the process step by step. You’ll discover variations that can elevate this beloved dish, ensuring it becomes a staple in your kitchen as it has in mine. So, grab your apron, and let’s dive into the delicious world of classic apple crisp, where tradition meets modern convenience!
The Rich History and Cultural Significance of classic apple crisp
The rich history and cultural significance of classic apple crisp are as layered as the dish itself. Its origins can be traced back to the early 1800s in America, where settlers embraced the abundance of apples that flourished in their orchards. This simple dessert emerged as a practical solution for using up excess fruit, a hallmark of resourceful cooking that defines American culinary traditions. As apple orchards spread across the country, so too did the popularity of apple crisp, evolving from humble beginnings into a beloved comfort food.
Origins and History
Classic apple crisp is often associated with the New England region, where the apple harvest was a significant event. Early recipes were straightforward, relying on tart apples and a basic mixture of flour, sugar, and butter for the topping. The dish’s name likely derives from the “crisp” texture of the topping, which contrasts beautifully with the soft, sweet apples underneath. Over time, as apple varieties became more diverse and accessible, the crisp evolved into a dish that embraced various flavors and textures.
As families began to share their own takes on the classic apple crisp, regional variations emerged. In some areas, cooks would add spices like nutmeg or allspice to the apples, while others would incorporate nuts or oats into the topping. This adaptability has allowed classic apple crisp to transcend regional boundaries and become a staple across the United States. Different cultures have also left their mark on the recipe. For instance, in some Southern states, pecans are a common addition, adding a rich, nutty flavor that complements the sweetness of the apples.
Cultural Significance
Classic apple crisp has woven itself into the fabric of American culture, often making an appearance at family gatherings, holiday feasts, and community potlucks. It symbolizes togetherness and the joy of sharing food with loved ones. The act of baking an apple crisp often becomes a family affair, with children helping to peel apples and mix the topping, creating lasting memories in the kitchen. This tradition of cooking together not only strengthens family bonds but also passes down culinary knowledge from one generation to the next.
In recent years, chefs and food enthusiasts have also embraced the classic apple crisp, elevating it to gourmet status in restaurants and bakeries. You can find variations that incorporate unique ingredients or sophisticated presentations, showcasing the versatility of this beloved dish. However, even as it adapts to modern tastes, the essence of classic apple crisp remains untouched—a celebration of simple, wholesome ingredients that connect us to our roots.
Nutritional Benefits
Beyond its delicious taste and cultural significance, classic apple crisp also offers several nutritional benefits. Apples are a powerhouse of vitamins, particularly Vitamin C, which boosts the immune system and promotes overall health. They are also high in fiber, which aids digestion and can help regulate blood sugar levels. When made with wholesome ingredients like oats and nuts, the topping can provide additional nutrients such as protein and healthy fats, making this dessert not only satisfying but also nourishing.
While classic apple crisp is often viewed as a treat, it can be a guilt-free indulgence when made with mindful ingredients. Substituting refined sugars with natural sweeteners or limiting added sugars can create a healthier version that still delivers on flavor. With the right choices, you can enjoy the comforting essence of classic apple crisp while nourishing your body and satisfying your sweet tooth.
In summary, classic apple crisp is more than just a dessert; it’s a reflection of our shared history, cultural values, and familial connections. From its humble origins to its place on modern menus, this dish continues to hold a special place in our hearts and our kitchens. So, whether you’re baking it for the first time or perfecting your family’s beloved recipe, you are participating in a tradition that spans generations, creating memories that will last a lifetime.
Essential Ingredients for Perfect classic apple crisp
When it comes to creating a delightful classic apple crisp, the foundation lies in your ingredients. Each component plays a vital role in not only enhancing flavor but also contributing to the overall texture and appeal of the dish. Let’s take a deep dive into the essential ingredients that will make your classic apple crisp a standout dessert.
Essential Ingredients
- Apples (6-8 medium-sized): The star of the show! Opt for a mix of tart and sweet apples; Granny Smith and Honeycrisp are perfect companions. The tartness of Granny Smith balances the sweetness of Honeycrisp, delivering a flavor profile that sings. Choose firm apples that are free from bruises or blemishes. For the best results, look for apples grown locally in season, as they tend to be fresher and more flavorful.
- Sugar (3/4 cup granulated): This ingredient enhances the natural sweetness of the apples. You can adjust the amount based on the tartness of your apple selection. Granulated sugar dissolves well and gives a nice caramelization during baking.
- Brown Sugar (1/2 cup packed): The molasses in brown sugar adds depth and richness to your classic apple crisp. It also provides a delightful chewy texture to the topping. Look for light brown sugar for a milder flavor or dark brown sugar for a more intense taste.
- All-Purpose Flour (1 cup): This is essential for the crisp topping. It helps bind the ingredients together, giving it structure. If you prefer a gluten-free option, consider using almond flour or oat flour, which both work beautifully in this recipe.
- Oats (1 cup rolled oats): Rolled oats lend a hearty texture to the topping and soak up the juices from the apples, creating a delightful contrast. Old-fashioned oats work best as they maintain their shape during baking.
- Butter (1/2 cup, unsalted): Butter adds richness and flavor to the topping while helping to create a crispy texture. For a dairy-free alternative, you can use coconut oil or a vegan butter substitute.
- Cinnamon (1 teaspoon): This spice is a classic pairing with apples, providing warmth and depth to your classic apple crisp. You can also experiment with nutmeg or allspice for a unique twist.
- Salt (1/4 teaspoon): A pinch of salt heightens the flavors in your dish, balancing sweetness and enhancing the overall taste.
- Vanilla Extract (1 teaspoon): Adding vanilla brings a lovely aroma and additional sweetness, making your apple crisp even more inviting.

Classic Apple Crisp Recipe
Ingredients
Filling
- 8 medium peeled apples, cut into 1-inch chunks that are 1/4 – 1/2 inch thick (about 10 cups, or 1200g, chunks)
- 1/2 cup (100g) packed light or dark brown sugar
- 1/4 cup (31g) all-purpose flour (spooned & leveled)
- 1 teaspoon pure vanilla extract
- 1 teaspoon ground cinnamon
- 1/2 teaspoon ground nutmeg
- 1/4 teaspoon salt
Topping
- 3/4 cup (94g) all-purpose flour (spooned & leveled)
- 3/4 cup (150g) packed light or dark brown sugar
- 1 teaspoon ground cinnamon
- 1/2 cup (8 Tbsp; 113g) unsalted butter, cold and cubed
- 1 cup (85g) old-fashioned whole rolled oats
- optional: salted caramel and vanilla ice cream for serving
Instructions
- Preheat oven to 350°F (177°C). Lightly grease a 9×13-inch baking pan. Any 3.5-4-quart baking dish works.
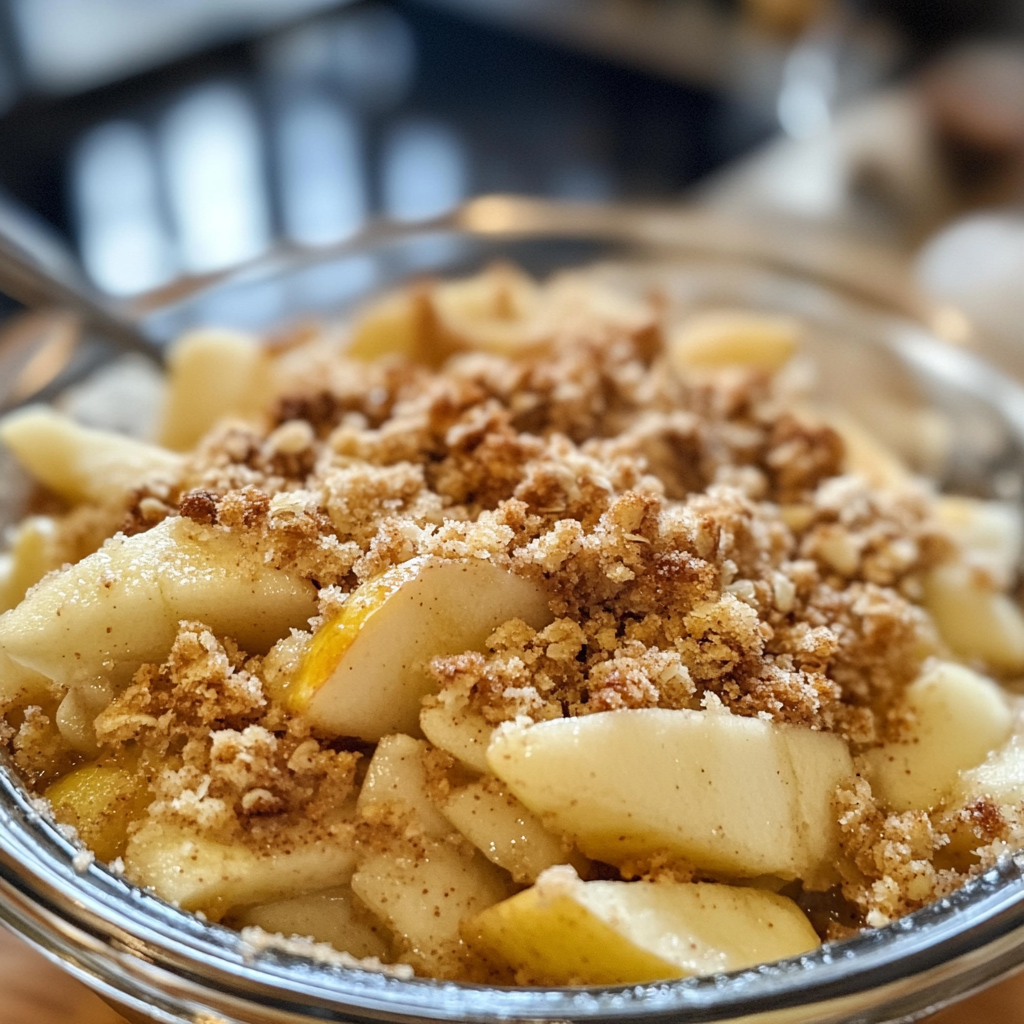
- Mix all of the filling ingredients together in a large bowl, then spread into the baking pan.
- Make the topping: Whisk the flour, brown sugar, and cinnamon together in a medium bowl. Cut in the butter using a pastry cutter or fork until the mixture becomes super crumbly. Stir in the oats. Sprinkle over filling.
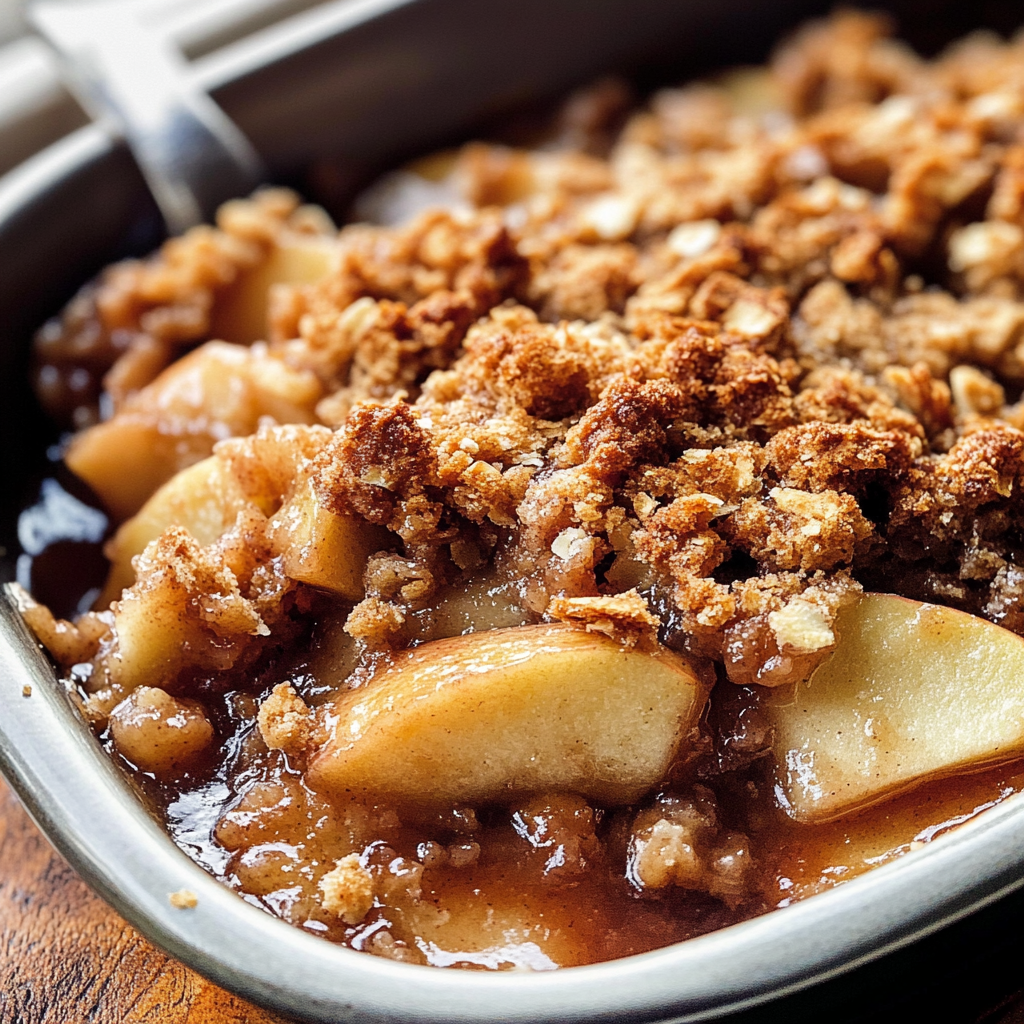
- Bake for 45 minutes or until the topping is golden brown and the fruit juices are bubbling around the edges. Remove from the oven, place on a wire rack, and allow to cool for at least 5 minutes before serving. Serve warm, room temperature, or cold; plain or with salted caramel and/or vanilla ice cream.
- Cover leftovers and store in the refrigerator for up to 5 days.
Shopping Tips
When shopping for your ingredients, freshness is key, especially when it comes to apples. Visit local farmers’ markets or orchards if possible, as they often have the freshest selections. Check for seasonal varieties and ask vendors for their recommendations on the best apples for baking. If you’re in a grocery store, look for apples that feel heavy for their size and have a firm texture, as these will yield the best results.
For other ingredients like oats and flour, consider purchasing in bulk. Not only does this save money, but it also allows you to have a steady supply for future baking endeavors. When selecting sugars, opt for organic versions when possible. Organic sugar is minimally processed and often has a more robust flavor.
Substitutions and Alternatives
Dietary restrictions shouldn’t keep anyone from enjoying a delicious classic apple crisp. There are numerous substitutions available to ensure everyone can indulge:
- Apples: If you’re allergic to apples, try using pears or a combination of pears and berries for a different take on this dessert.
- Sugars: For those watching their sugar intake, consider using a sugar substitute like monk fruit sweetener or erythritol. Keep in mind that these alternatives may alter the flavor slightly.
- Butter: For vegan options, there are several non-dairy butters available that can mimic the richness of traditional unsalted butter.
- Flour: For a gluten-free crisp, almond flour or a gluten-free all-purpose blend can replace regular flour. Be sure to adjust the quantities slightly as needed.
Storing your ingredients properly can enhance their shelf-life. Keep flour in a cool, dry place, and ensure that your oats are sealed tightly to avoid moisture. Apples should be stored in a cool, dark place or in the refrigerator to prolong their freshness. With these tips and insights, you’re well on your way to gathering all the components needed to create a mouthwatering classic apple crisp!
Detailed Step-by-Step classic apple crisp Cooking Instructions
Now that we have gathered all the essential ingredients for our classic apple crisp, it’s time to dive into the cooking process. This section will guide you through each step, ensuring that your dessert turns out perfectly every time.
Preparation Steps
- Preheat the Oven: Start by preheating your oven to 350°F (175°C). This ensures that your classic apple crisp bakes evenly and rises properly.
- Prepare the Apples: Wash and peel your chosen apples. I love using a mix of Granny Smith and Honeycrisp for a balanced flavor. Cut the apples into thin slices or small cubes, roughly 1/4-inch thick. This size will help them cook evenly. As you slice, toss the apples in a bowl with 3/4 cup of granulated sugar, 1 teaspoon of cinnamon, and a splash of vanilla extract. Allow them to sit for about 10 minutes; this will help draw out the juices while also infusing the apples with flavor.
- Make the Topping: In a separate bowl, combine 1 cup of rolled oats, 1 cup of all-purpose flour, 1/2 cup of packed brown sugar, and 1/4 teaspoon of salt. Mix them together until well combined. Melt 1/2 cup of unsalted butter and pour it over the dry mixture. Stir until everything is evenly coated, creating a crumbly texture. This is my favorite part; the buttery aroma is simply heavenly!
Cooking Process
- Combine the Mixtures: In a large greased baking dish (around 9×13 inches works well), spread the apple mixture evenly across the bottom. Then, sprinkle the oat topping generously over the apples. Make sure to cover them completely, as this will create a deliciously crispy layer.
- Bake: Place the baking dish in the preheated oven. Bake for approximately 30 minutes or until the topping is golden brown and the apples are bubbling. You’ll know it’s ready when you can smell the warm, inviting scents wafting through your home. The visual cue of a golden top is an excellent indicator that your classic apple crisp is nearly done.
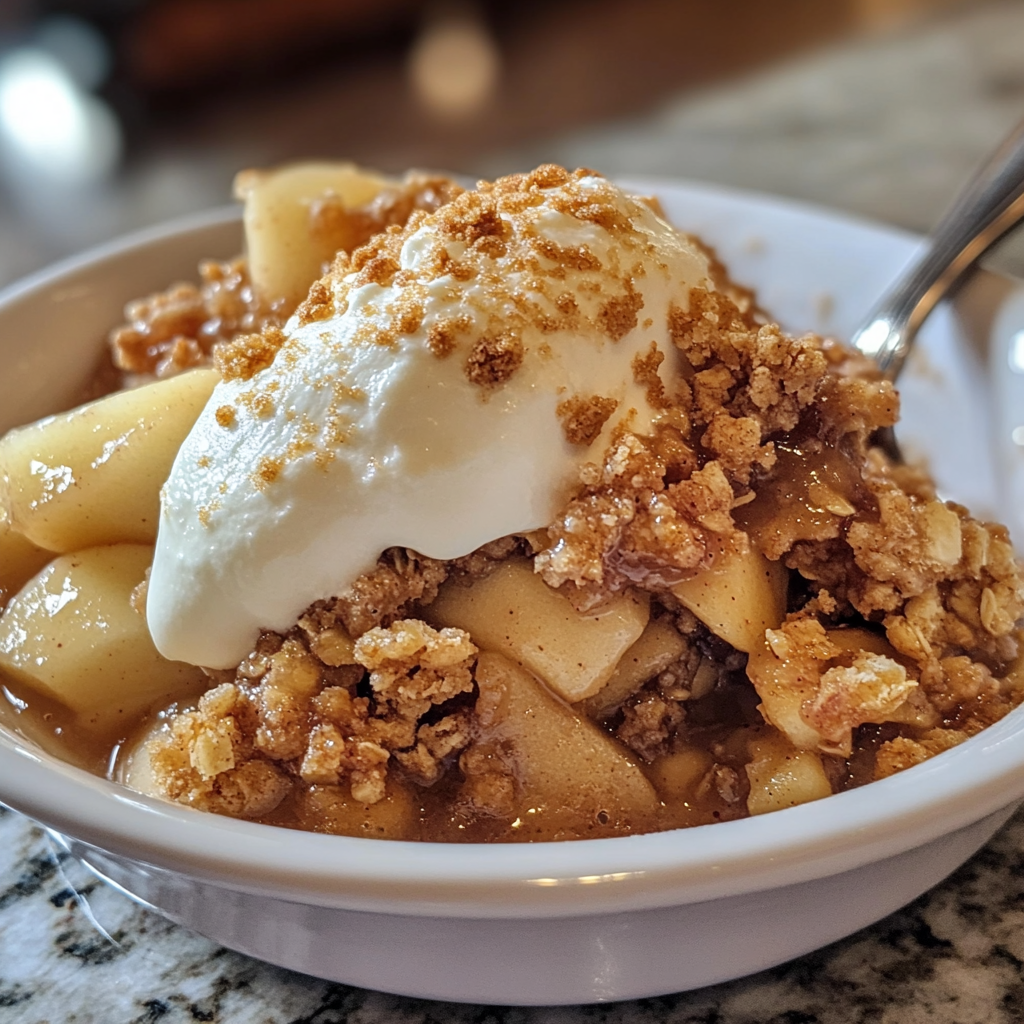
- Cool and Serve: Once baked, remove the dish from the oven and allow it to cool for about 10-15 minutes. This cooling time helps the juices to settle, making it easier to serve. I often like to enjoy my apple crisp warm, topped with a scoop of vanilla ice cream or a dollop of whipped cream. The contrast of hot and cold is simply divine!
Final Assembly
Serve your classic apple crisp in individual bowls, making sure to scoop out a generous portion of both apples and crisp topping. For an added touch, a sprinkle of cinnamon or a drizzle of caramel sauce can elevate the presentation. If you have leftovers, store them in an airtight container in the refrigerator for up to three days. Reheat in the oven or microwave before serving to bring back the delightful warmth.
Common mistakes often happen during the preparation of a classic apple crisp. For instance, not allowing the apples to sit with sugar can result in a less flavorful filling. Also, be cautious not to overbake it; burnt topping can ruin the entire dish! Remember, the key to perfecting this recipe lies in your attention to detail and your willingness to adapt based on what you have available.
With these comprehensive instructions, you’re equipped to create a classic apple crisp that will impress both family and friends. Enjoy the process of baking, and savor every delicious bite of this timeless dessert!
Professional Tips and Techniques for classic apple crisp
When it comes to creating the perfect classic apple crisp, a few professional tips and techniques can elevate your dish from good to spectacular. Whether you’re a novice in the kitchen or a seasoned chef, these insider secrets will help you master this timeless dessert that has been a beloved favorite for generations.
Professional Techniques
One of the key elements to a delightful classic apple crisp is the quality of the apples you choose. Opt for a mix of sweet and tart apples, such as Granny Smith and Honeycrisp, to achieve a balanced flavor profile. The tartness of the Granny Smith complements the sweetness of the Honeycrisp, resulting in a depth of flavor that’s nothing short of sublime.
Another crucial technique is the method of preparing your apples. Peel and core the apples, then slice them into even pieces to ensure uniform cooking. If you have the time, consider soaking the apple slices in a mixture of lemon juice and a bit of sugar for about 15 minutes. This not only enhances the flavor but also helps prevent browning.
As for the crumble topping, the texture is paramount. For a crunchy topping, use cold butter and cut it into the dry ingredients until you achieve a mixture that resembles coarse crumbs. Some professionals recommend using a food processor for this step, as it can save time and ensure an even consistency. Don’t shy away from adding oats or nuts like pecans or walnuts to the topping for added texture and flavor.
Troubleshooting Guide
Even the most experienced cooks can encounter issues when making a classic apple crisp. One common problem is a runny filling. This often happens if the apples release too much juice during baking. To combat this, sprinkle a tablespoon of cornstarch over the apple slices before baking. This will help thicken the juices and create a luscious filling.
If your topping is browning too quickly while the apples are still cooking, cover the dish loosely with aluminum foil for the first half of baking. This technique allows the apples to cook properly without burning the topping. Conversely, if the topping is not browning enough, consider broiling it for a minute or two at the end of baking, keeping a close eye to prevent burning.
Presentation Tips
To really impress your guests, consider how you present your classic apple crisp. Serve it in individual ramekins for a charming touch, or use a rustic cast-iron skillet for a more homey feel. A scoop of vanilla ice cream melting over the warm crisp is a must for that classic dessert experience. Drizzle some caramel sauce or a sprinkle of cinnamon on top for an inviting presentation. Remember, we eat with our eyes first!
For those looking to pair their classic apple crisp with beverages, consider serving it with a glass of sweet dessert wine, like a late harvest Riesling or a sparkling cider. The sweetness of the wine complements the apples beautifully, enhancing the overall flavor experience.
Lastly, if you’re preparing this dish for a gathering, make-ahead strategies can save you time. You can prepare the apple filling a day in advance and store it in the refrigerator. Assemble the crisp topping just before baking to maintain its crunchiness. This way, you can enjoy the company of your guests without being stuck in the kitchen for hours.
Creative Variations and Adaptations of classic apple crisp
The classic apple crisp is a delicious canvas for creativity. While the traditional recipe is beloved, there are countless ways to adapt and enhance this dessert to suit different tastes and dietary needs.
Seasonal Variations
One of the joys of making a classic apple crisp is that it can be adapted to highlight seasonal fruits. In the fall, you can incorporate pears or cranberries for a delightful twist. Pears add a softer texture that contrasts beautifully with the firmer apples, while cranberries introduce a tartness that balances the sweetness perfectly. In the summer, try using peaches or berries for a lighter, more refreshing dessert. The sweetness of ripe peaches or the tang of fresh blueberries can breathe new life into your crisp.
Dietary Adaptations
With the growing demand for diverse dietary options, adapting the classic apple crisp for various diets is easier than you might think. For a gluten-free version, simply substitute regular flour with almond flour or a gluten-free all-purpose blend. If you’re looking to reduce sugar, consider using natural sweeteners like maple syrup or honey, which can add a unique flavor while keeping it healthier.
For those following a vegan lifestyle, you can easily replace butter with coconut oil or vegan margarine. In lieu of traditional ice cream, serve the crisp with coconut milk ice cream or a scoop of cashew cream for a deliciously creamy finish without dairy.
Creative Twists
As you become more comfortable with the basic recipe, feel free to experiment with spices and flavorings. Add a pinch of nutmeg or a splash of vanilla extract to the apple filling for an aromatic touch. For those who enjoy a bit of heat, a sprinkle of cayenne pepper can give your classic apple crisp an unexpected kick that contrasts nicely with the sweetness of the apples.
If you have leftover apple crisp, don’t let it go to waste! Transform it into a breakfast treat by mixing it into oatmeal or yogurt. You can also make apple crisp bars by pressing the mixture into a baking dish, baking it, and cutting it into squares for a portable snack.
Lastly, don’t forget about different cooking methods! While the oven is the traditional way to bake a classic apple crisp, you can also prepare it on the stovetop for a quicker version. Simply sauté the apple filling in a skillet, top it with the crumble, and cover it to steam the topping until golden brown. Alternatively, use a slow cooker for a set-it-and-forget-it approach that results in a warm and comforting dessert.
Storage, Reheating, and Meal Prep for classic apple crisp
When it comes to enjoying a delightful dish like a classic apple crisp, knowing how to properly store, reheat, and prep this scrumptious dessert can enhance your culinary experience while ensuring the crisp remains as delicious as the day it was made. After all, a classic apple crisp is not just a treat for the moment; it’s a dish that brings comfort, nostalgia, and warmth. Let’s explore the ins and outs of storage, reheating, and meal prep for your classic apple crisp.
Short-term Storage
After you’ve baked your classic apple crisp, you might be wondering about the best way to store leftovers. If you plan to enjoy the dessert within a few days, your best bet is to store it in the refrigerator. First, ensure the crisp is completely cooled to room temperature—this prevents condensation from forming, which can lead to a soggy topping.
Transfer the apple crisp to an airtight container. If you’re using the original baking dish, consider covering it tightly with plastic wrap or aluminum foil. The goal here is to minimize air exposure, which can dry out the topping and affect the apples’ texture. When stored properly in the fridge, your classic apple crisp will last for about 3 to 5 days.
Freezing and Long-term Storage
If you have made a large batch of classic apple crisp or just want to save some for a rainy day, freezing is a fantastic option. To freeze your apple crisp, let it cool completely, then cut it into serving-sized portions. This makes it easier to thaw only what you need in the future. Wrap each portion tightly in plastic wrap, and then place them into a freezer-safe container or a heavy-duty freezer bag. Be sure to label each package with the date and contents for easy retrieval later on.
For long-term storage, classic apple crisp can be frozen for up to 3 months without losing much quality. However, for the best flavor and texture, try to consume it within a month. When you’re ready to indulge in your frozen classic apple crisp, simply remove it from the freezer and let it thaw in the refrigerator overnight. This gradual thawing will help maintain the integrity of the apples and the crisp topping.
Reheating Best Practices
Reheating your classic apple crisp can be an art in itself. If you want to keep that topping wonderfully crisp, the oven is the best option. Preheat your oven to 350°F (175°C), and place the apple crisp in an oven-safe dish if it isn’t already. Cover it with aluminum foil to prevent over-browning and heat it for about 20 to 30 minutes or until warmed through. For that extra crispiness, remove the foil during the last 5 to 10 minutes of reheating.
If you’re in a hurry, the microwave is an alternative, but it can make the topping a bit soft. Place a serving in a microwave-safe dish and cover it with a damp paper towel to help retain moisture. Heat it in short bursts of 15-20 seconds until warmed through. Just be aware that the texture will not be as ideal as when reheated in the oven.
Meal Prep and Batch Cooking Strategies
Meal prepping classic apple crisp can save you time and ensure you always have a delicious dessert on hand. Consider making a double or triple batch during apple season when the fruit is at its peak. Slice and prepare the apples, mix in the spices, and prepare your oat topping. You can store the apple mixture in the refrigerator for up to 3 days before baking, or you can freeze it for future use. Just remember, if you freeze the apple mixture, add the topping just before baking to keep it crunchy.
Batch cooking is another great strategy. You can bake multiple apple crisps at once in different sizes. This allows you to serve a small one for a weeknight treat while having a larger one ready for gatherings or special occasions. Plus, the aroma of baking classic apple crisp is sure to draw everyone to the kitchen!
Food Safety Considerations and Guidelines
Food safety is paramount when it comes to storing any dish, including your beloved classic apple crisp. Always store your apple crisp in the refrigerator within two hours of baking. If you plan to freeze it, do so promptly to maintain its quality. When reheating, ensure that the internal temperature reaches at least 165°F (74°C) to ensure it’s safe to eat.
Also, remember to observe the “two-hour rule” when food is left out at room temperature. If your classic apple crisp has been sitting out for longer than that, it’s best to err on the side of caution and discard it.
Shelf Life Expectations
In terms of shelf life, your classic apple crisp will be at its best within the first few days after baking. While it can last in the refrigerator for up to 5 days, the quality may start to diminish after the first couple of days. If frozen, aim to enjoy it within three months for optimal taste and texture. Keeping a close eye on how long it’s been stored will help you savor every last crumb of this timeless dessert.
Portioning and Packaging Tips
When it comes to portioning your classic apple crisp for storage, consider using individual ramekins or small containers for single servings. This method is not only practical for reheating but also makes it easy to share with family and friends. Additionally, smaller portions can help with portion control if you’re mindful of serving sizes. Remember to label each container with the date to keep track of freshness.
In summary, mastering the storage, reheating, and meal prep techniques for classic apple crisp can ensure that you always have a slice of this heartwarming dessert ready to go. Whether enjoying it fresh from the oven or savoring leftovers, these tips will help you maintain its signature flavors and textures, allowing you to indulge in this classic dish any time you desire.
Nutritional Benefits and Health Information
When you bite into a warm serving of classic apple crisp, the buttery aroma and sweet-tart flavor of baked apples topped with a crunchy oat mixture is undeniably delightful. But beyond its deliciousness, have you ever considered the nutritional value and health benefits that come with this beloved dessert? Let’s dig into the nutritional profile of classic apple crisp and explore how this dish can fit into a balanced diet.
Nutritional Profile
The nutritional breakdown of classic apple crisp can vary depending on the specific ingredients used and portion sizes. Typically, a serving of classic apple crisp contains around 200-300 calories, primarily from the apples, oats, flour, butter, and sugar. Here’s a closer look at its key components:
- Apples: The star of the show! Apples are low in calories and high in fiber, making them a healthful choice. A medium apple contains about 95 calories and provides a good source of vitamin C and potassium.
- Oats: Used in the crisp topping, oats are a great source of whole grains and fiber. They can help promote heart health and maintain digestive function.
- Butter: While butter adds richness and flavor, it’s also a source of saturated fat. Moderation is key here, and using alternatives like coconut oil or applesauce can reduce fat content.
- Sugar: Most classic recipes call for sugar to sweeten the apples and create that delectable topping. You can experiment with natural sweeteners like honey or maple syrup for a healthier twist.
Health Benefits
While classic apple crisp is undoubtedly a dessert, it does offer some health benefits thanks to its wholesome ingredients. Apples, for example, are rich in antioxidants, particularly quercetin, which has been linked to reducing inflammation and lowering the risk of chronic diseases. The fiber content in apples and oats supports digestive health and can help regulate blood sugar levels.
Moreover, oats provide beta-glucans, a type of soluble fiber that can help lower cholesterol levels. This means that enjoying a warm bowl of classic apple crisp can also contribute to heart health, especially when made with whole oats and less added sugar. The comforting nature of this dish, combined with its healthful components, makes it a satisfying option for dessert lovers.
Dietary Considerations
When it comes to dietary considerations, classic apple crisp can be easily modified to cater to various dietary needs. For those with gluten sensitivities, gluten-free oats and flour can be used in the topping. Vegan substitutes, like coconut oil instead of butter and flaxseed meal to replace eggs, can also be incorporated for a plant-based version.
For those watching their sugar intake, consider reducing the amount of sugar in the recipe or using natural sweeteners. Additionally, you can add in more spices like cinnamon or nutmeg to enhance sweetness without the extra calories. This way, you can create a delicious classic apple crisp that aligns with your dietary preferences.
Calorie Content and Macronutrient Distribution
The calorie content of classic apple crisp can vary significantly based on portion size and ingredients. On average, a serving might contain approximately 200-300 calories, with macronutrient distribution roughly comprising 30-40% carbohydrates, 10-20% protein, and 20-30% fat. The carbohydrate content primarily comes from the apples and oats, while the fats are largely derived from butter or any oil used in the recipe.
For those tracking macronutrient intake, it’s important to keep portion sizes in mind. A single serving can be satisfying, but larger servings can quickly elevate the calorie count and disrupt your dietary goals. Consider enjoying your classic apple crisp with a dollop of Greek yogurt or a scoop of low-fat ice cream to add protein and calcium while still indulging in the sweet treat.
Vitamin and Mineral Content
Classic apple crisp also boasts a variety of vitamins and minerals. Apples provide vitamin C, potassium, and small amounts of vitamin K. Oats are a good source of iron, magnesium, and B vitamins, contributing to overall well-being. The inclusion of spices such as cinnamon can add additional health benefits, including anti-inflammatory properties and improved insulin sensitivity. This means that while you enjoy this dessert, you’re also nourishing your body in a meaningful way.
Healthy Modification Suggestions
If you’re looking to make your classic apple crisp even healthier, there are plenty of modifications you can consider. Here are a few ideas:
- Replace some of the sugar with unsweetened applesauce to cut down on added sugars and enhance the apple flavor.
- Use almond flour or oat flour as alternatives to all-purpose flour for a nutty flavor and added nutrients.
- Incorporate nuts or seeds into the topping for added crunch and healthy fats.
- Add a dash of lemon juice to the apple mixture to enhance flavor and provide a refreshing twist.
Comparison with Similar Dishes
When comparing classic apple crisp to similar desserts like apple pie or cobbler, the crisp often comes out on top in terms of healthfulness. Apple pie typically has a heavier crust made from refined flour, leading to a higher calorie and fat content. On the other hand, the oats in a classic apple crisp provide more fiber and whole grains, making it a more filling option. Cobbler can vary widely in healthfulness depending on the topping used, but classic apple crisp maintains a balance between being indulgent and relatively nutritious.
In conclusion, classic apple crisp is more than just a delicious dessert—it holds a wealth of nutritional benefits and can fit into many dietary lifestyles. By understanding its healthful components and exploring modification options, you can enjoy this comforting dish while reaping its many benefits. So go ahead, bake up a batch, and savor the sweet and wholesome goodness of classic apple crisp!
Frequently Asked Questions About Classic Apple Crisp
Apple crisp recipe Pioneer Woman
The Pioneer Woman’s apple crisp recipe is a delightful take on this classic dessert, featuring a perfect blend of sweet and tart apples. Start by selecting a mix of Granny Smith and Honeycrisp apples for a balanced flavor profile. Peel and slice the apples, then toss them with sugar, cinnamon, and lemon juice to enhance their natural sweetness and prevent browning. For the topping, combine flour, brown sugar, oats, and cold butter, mixing until crumbly—this creates a deliciously crunchy layer. Bake until the apples are tender and the topping is golden brown, and serve warm with a scoop of vanilla ice cream for an exquisite finish.
Apple crisp recipe with oats and melted butter
To make a delicious apple crisp using oats and melted butter, start by preparing your apple filling with a mixture of tart apples, sugar, and spices like cinnamon and nutmeg. For the topping, combine rolled oats with flour, brown sugar, and a pinch of salt, then drizzle in melted butter and mix until crumbly. The melted butter not only enhances flavor but also helps the topping crisp up nicely during baking. Spread the oat mixture evenly over the apples and bake until bubbly and golden. For a twist, consider adding chopped nuts or shredded coconut to the topping for extra texture and flavor.
Apple crisp topping
The topping for apple crisp is crucial for achieving that signature crunchy texture, and it typically consists of flour, sugar, oats, and butter. For a classic topping, use equal parts of all-purpose flour and rolled oats, mixed with brown sugar for richness. Cold, cubed butter is essential; use your fingers or a pastry cutter to work it into the dry ingredients until you achieve a crumbly consistency. To elevate your topping, consider incorporating spices like cinnamon or nutmeg, or even add chopped nuts for added crunch. Remember to sprinkle the topping generously over the apples before baking to ensure every bite is flavorful and satisfying.
Apple crisp without oats
If you prefer an apple crisp without oats, you can still achieve a delightful topping using just flour, sugar, and butter. Start by mixing all-purpose flour with granulated or brown sugar, and a pinch of salt to balance the sweetness. Cut in cold butter until the mixture resembles coarse crumbs. For added flavor and texture, consider incorporating crushed nuts or coconut flakes into the topping. Bake the apple crisp until the apples are soft and the topping is golden brown, and enjoy it warm with whipped cream or ice cream for a comforting dessert.


