Classic peanut butter cookies are more than just a delightful treat; they are a symbol of comfort, nostalgia, and family bonding. I remember the first time I helped my grandmother bake these cookies in her sunlit kitchen. The scent of roasted peanuts wafted through the air, mingling with the sweetness of sugar, and creating an aroma that felt like home. It was during one of those chilly autumn afternoons, and the world outside was painted with hues of orange and gold. As we rolled the dough into balls and pressed them with a fork, I felt a sense of connection—not only to my grandmother but also to generations of bakers who had passed down this simple yet delicious recipe.
The classic peanut butter blossom cookie, characterized by its signature peanut butter dough topped with a chocolate kiss, has a rich history that dates back to the mid-20th century. This cookie became popular during the post-war era when families sought comfort in home-baked goods. It quickly made its way into American households, becoming a staple at celebrations, holiday gatherings, and bake sales. The joy of biting into a warm, chewy cookie, only to be met with the sweet surprise of a chocolate center, creates an experience that resonates deeply with many of us.
What makes this recipe special is its unique combination of flavors and textures. The creamy, nutty goodness of peanut butter pairs beautifully with the rich chocolate, creating a perfect harmony that dances on your taste buds. Unlike other cookies that may often feel overly indulgent, classic peanut butter blossom cookies strike a balance between sweetness and richness, making them perfect for any occasion. They’re not just a treat; they are an experience, a moment of joy that takes you back to simpler times.
For busy families looking for quick dinner solutions, these cookies are a dream come true. They require minimal ingredients and can be whipped up in under an hour, making them an ideal choice for unexpected guests or a last-minute dessert. The simplicity of the recipe also allows for kids to get involved in the kitchen, turning baking into a fun family activity that can spark creativity and joy. Imagine gathering around the kitchen counter, laughter filling the air as everyone takes turns rolling dough and placing chocolate kisses on warm cookies. It’s a memory that lasts far longer than the cookies themselves.
Seasonal relevance is another appealing aspect of classic peanut butter blossom cookies. While they are enjoyed year-round, they take on a special significance during the holiday season. The festive spirit often calls for sharing sweet treats with friends and family, and these cookies are perfect for cookie exchanges or festive gatherings. Their charming appearance and delightful flavors make them an instant hit, and they are sure to bring smiles to everyone who tries them.
On a more emotional level, these cookies remind us of the love and care that goes into home-baked goods. They evoke memories of family traditions, celebrations, and even quiet moments of solace. Each bite is a reminder that the simplest ingredients can create profound experiences, bridging generations and creating bonds that last a lifetime.
In this guide, you will learn everything you need to know about making the perfect classic peanut butter blossom cookies. From the right ingredients to tips and tricks for achieving the ideal texture, we will explore each step in detail. Whether you’re a seasoned baker or a novice in the kitchen, this recipe is accessible to everyone. Get ready to embark on a culinary adventure that blends tradition with creativity, and experience the joy of baking these timeless cookies!
The Story Behind This Recipe
As I reflect on my journey into baking, I can’t help but smile when I think about my grandmother’s kitchen. She was a master at making even the simplest recipes feel special. The way she measured out the peanut butter with such precision, or how she would remind me to be gentle when pressing the chocolate kisses into the warm cookies, always felt like a lesson in love and care. This recipe transcended mere ingredients; it became a vessel for sharing stories, laughter, and the occasional mishap in the kitchen.
Every time I bake these cookies now, I find myself transported back to those moments. The act of baking has become a cherished ritual, and the classic peanut butter blossom cookie remains a favorite not only for its taste but for the memories it holds. It’s a reminder that food is not just about nourishment; it’s about connection, tradition, and the warmth of shared experiences.
Why You’ll Love This Dish
So why should you add classic peanut butter blossom cookies to your baking repertoire? For starters, they are incredibly versatile. While the traditional recipe calls for creamy peanut butter and chocolate kisses, you can easily customize them with your favorite nut butters or add in ingredients like chopped nuts, butterscotch chips, or even a sprinkle of sea salt on top for a gourmet twist. The possibilities are endless!
Moreover, these cookies are perfect for any occasion. Whether you’re celebrating a birthday, a holiday, or simply enjoying a cozy evening at home, they are sure to impress. Their delightful combination of flavors and textures makes them appealing to kids and adults alike, ensuring that everyone at your gathering will want to indulge.
Ultimately, the classic peanut butter blossom cookie is a timeless treat that brings people together. It represents the heart of home baking—a sweet, comforting reminder of the love and joy that can be found in even the simplest of recipes. So grab your apron, gather your loved ones, and let’s create some delicious memories together!
The Rich History and Cultural Significance of classic peanut butter
The classic peanut butter cookie has a history that is deeply intertwined with American culture. It is believed that the first peanut butter cookies were created in the United States around the 1910s, coinciding with the rise of peanut butter’s popularity. Peanut butter itself was introduced to the masses at the 1904 World’s Fair in St. Louis, where it was showcased as a nutritious and affordable food source. As it gained traction, home bakers began experimenting with it, leading to the creation of various cookie recipes.
One of the earliest known peanut butter cookie recipes appeared in a 1933 edition of a cookbook published by the American Peanut Council. This cookbook aimed to promote the nutritional benefits of peanuts and peanut butter, highlighting their role in American cuisine. The classic peanut butter blossom cookie, as we know it today, gained popularity in the 1950s and 1960s, becoming a staple at family gatherings and holiday celebrations. It was during this time that bakers began topping their peanut butter cookies with chocolate kisses, creating the beloved treat that has stood the test of time.
Origins and History
The origins of the classic peanut butter cookie are rooted in the agricultural history of peanuts in the United States. Peanuts were first cultivated by Native Americans and later became a significant crop in the South, thanks to the introduction of crop rotation methods by farmers. These methods helped restore soil nutrients and allowed peanuts to thrive. With the rise of industrialization and the development of commercially produced peanut butter in the early 20th century, the ingredient became accessible to households across America, paving the way for its incorporation into sweet treats.
As the popularity of peanut butter grew, so did the variations of peanut butter cookies. Regions across the United States began to put their unique spin on the traditional recipe. For instance, in the South, bakers often added a pinch of salt or used crunchy peanut butter for added texture, while in the Northeast, variations sometimes included maple syrup or honey for sweetness. Over time, the classic peanut butter blossom cookie emerged as a beloved version, combining the creamy texture of peanut butter with the rich flavor of chocolate, creating a delightful contrast that has become synonymous with American baking.
Cultural Significance
The classic peanut butter blossom cookie holds a special place in American culture. It is often associated with childhood memories, family gatherings, and festive celebrations. Whether it’s a birthday party, a school bake sale, or a holiday cookie exchange, these cookies have become a symbol of joy and togetherness. They represent the comfort of home-cooked meals and the love that is poured into each batch. In many families, baking these cookies is a cherished tradition passed down through generations, with each new baker adding their unique touch.
Beyond familial ties, these cookies have also made their way into popular culture. They have been featured in cookbooks, baking competitions, and social media platforms, where food enthusiasts share their variations and experiences. The classic peanut butter blossom cookie has become a canvas for creativity, inspiring bakers to experiment with different flavors and presentations, ensuring its relevance in modern kitchens.
Nutritional Benefits
In addition to their delightful taste and cultural significance, classic peanut butter blossom cookies also offer some nutritional benefits that make them a guilt-free indulgence. Peanut butter is rich in healthy fats, protein, and essential vitamins and minerals, making it a nutritious ingredient to include in your baking. The protein content in peanut butter can help keep you feeling fuller for longer, making these cookies a more satisfying treat compared to others made with empty calories.
Moreover, peanut butter is a good source of vitamin E, magnesium, and potassium, all of which contribute to overall health. While it’s important to enjoy these cookies in moderation, knowing that they contain wholesome ingredients can make them a more appealing choice for families looking to balance sweetness with nutrition. By using natural peanut butter with minimal added sugars and oils, you can further enhance the health aspect of this classic treat.
In conclusion, the classic peanut butter cookie is a delicious fusion of history, culture, and nutrition. Its journey from humble beginnings to a beloved dessert showcases the power of food to bring people together and create lasting memories. As you embark on your own baking adventures, remember the rich history behind each cookie and the joy it can bring to your table.
Essential Ingredients for Perfect classic peanut butter
When it comes to baking the perfect classic peanut butter blossom cookies, the foundation lies in selecting the right ingredients. Each component plays a crucial role in achieving that delightful balance of flavors and textures that make these cookies a timeless favorite. Here’s a comprehensive look at the essential ingredients you’ll need to create these scrumptious treats, along with tips on how to choose the best options and substitute where necessary.
Essential Ingredients
The classic peanut butter blossom cookie recipe is simple yet rich in flavor, and it includes the following ingredients:
- 1 1/4 cups (156g) all-purpose flour (spooned and leveled)
- 1/2 teaspoon baking soda
- 1/4 teaspoon salt
- 1/2 cup (8 Tbsp; 113g) unsalted butter, softened to room temperature
- 1/2 cup (100g) packed light or dark brown sugar
- 1/4 cup (50g) granulated sugar
- 1 large egg, at room temperature
- 3/4 cup (about 185g) creamy peanut butter
- 1 teaspoon pure vanilla extract
- 24 chocolate kiss candies, unwrapped
- 1/2 cup (100g) granulated sugar (for coating)
- 1/4 cup (50g) green sanding sugar
- 1/4 cup (50g) red sanding sugar
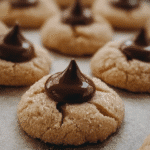
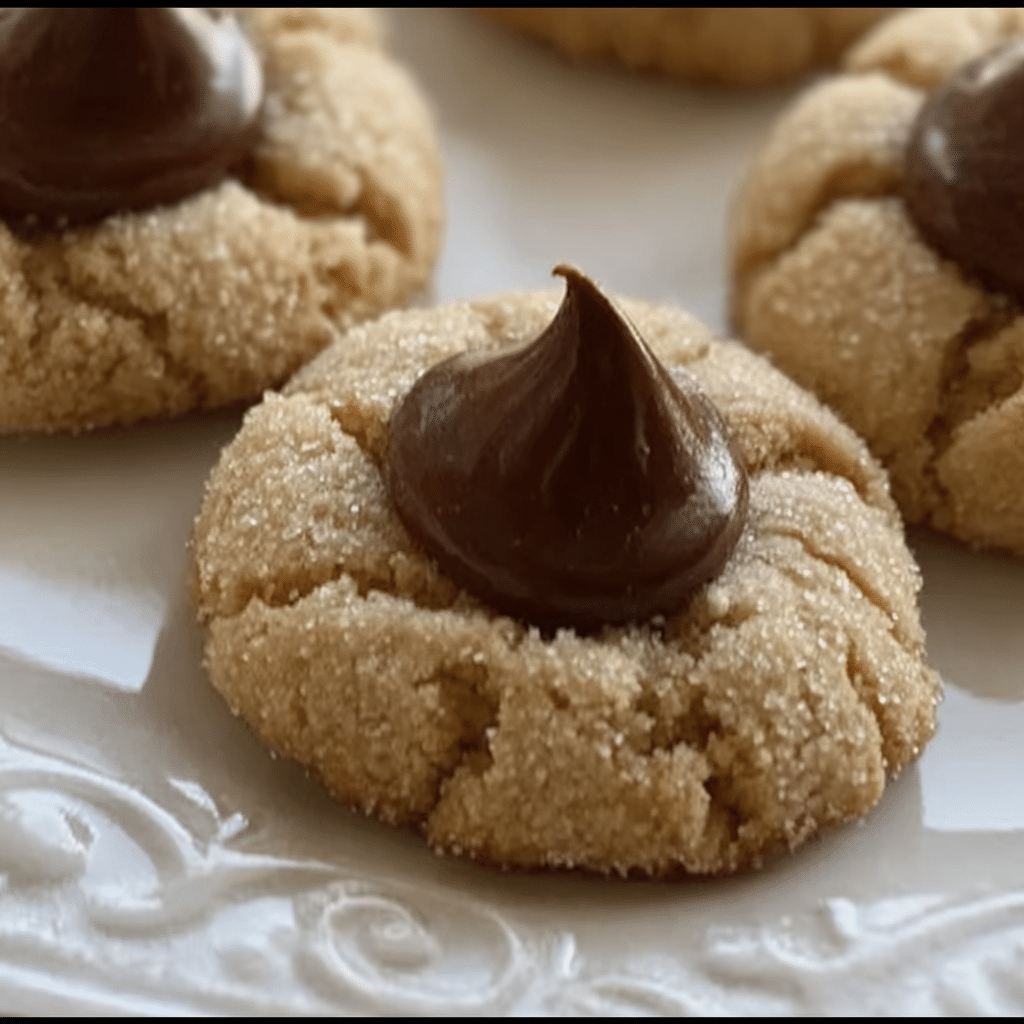
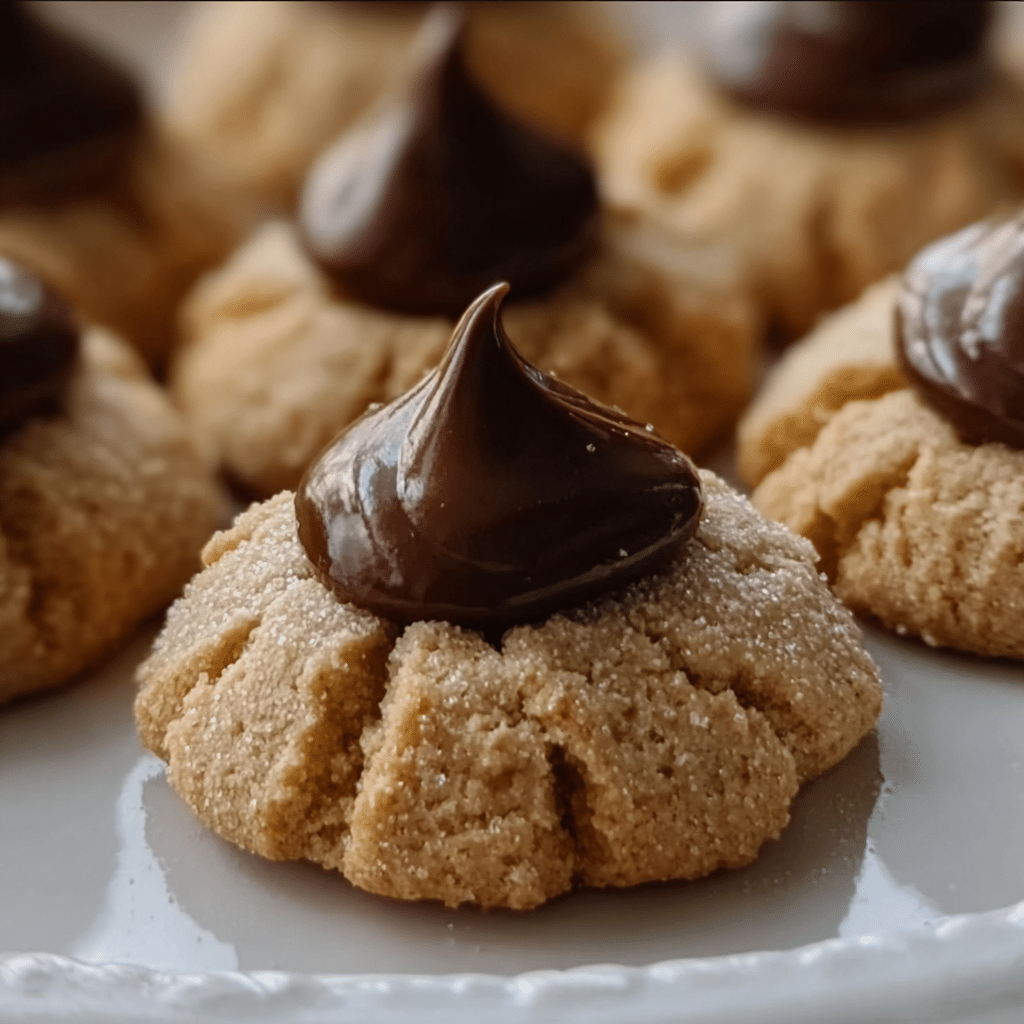
Classic Peanut Butter Blossom Cookies
Ingredients
- 1 and 1/4 cups (156g) all-purpose flour (spooned & leveled)
- 1/2 teaspoon baking soda
- 1/4 teaspoon salt
- 1/2 cup (8 Tbsp; 113g) unsalted butter, softened to room temperature
- 1/2 cup (100g) packed light or dark brown sugar
- 1/4 cup (50g) granulated sugar
- 1 large egg, at room temperature
- 3/4 cup (about 185g) creamy peanut butter
- 1 teaspoon pure vanilla extract
- 24 chocolate kiss candies, unwrapped
Coating
- 1/2 cup (100g) granulated sugar
- OR: 1/4 cup (50g) green sanding sugar and 1/4 cup (50g) red sanding sugar
Instructions
- Whisk the flour, baking soda, and salt together in a medium bowl. Set aside.
- In a large bowl using a hand mixer or a stand mixer fitted with paddle attachment, beat the butter for 1 minute on high speed until creamy. Switch to medium-high speed and beat in the brown sugar and 1/4 cup (50g) granulated sugar until completely creamed and smooth, about 2 minutes. Add the egg and beat until combined, about 1 minute. Scrape down the sides and bottom of the bowl with a silicone spatula as needed. Add the peanut butter and vanilla extract and beat until combined.
- Add the flour mixture to the wet ingredients and beat on low speed until combined. The dough will be very creamy and soft. Cover and chill the cookie dough in the refrigerator for at least 1 hour, and up to 3 days.
- Preheat oven to 350°F (177°C). Line two large baking sheets with parchment paper or silicone baking mats. Also, make sure there’s room in your freezer because the cookies will need to be placed inside to prevent the chocolates from melting.
- Roll & Bake: Scoop and roll cookie dough, about 1 heaping Tablespoon of dough each. Roll each ball in the 1/2 cup of sugar (or sanding sugar) and arrange on the baking sheet about 3 inches apart. Bake for 11–13 minutes or until the tops begin to slightly crack. Remove cookies from the oven and allow to cool on the baking sheets for 5 minutes.
- Set the chocolate: Press a chocolate kiss candy into the center of each, then, using a thin spatula, immediately transfer the cookies to a large plate or a few smaller plates (gently—they’re soft). Place the plate(s) of cookies in the freezer for 10 minutes to quickly set the chocolate in the cookie.
- Remove from the freezer and serve.
- Cookies stay fresh covered at room temperature for up to 1 week.
Let’s delve deeper into the significance of each ingredient:
- All-purpose flour: The backbone of your cookie dough, all-purpose flour provides structure. When measuring, make sure to spoon the flour into the measuring cup and level it off to avoid packing it down, which can make your cookies dense.
- Baking soda: This leavening agent helps the cookies rise and achieve a nice texture, creating that soft, chewy bite we all crave. Be sure to use fresh baking soda for optimal results.
- Salt: A small amount of salt enhances the flavors of the other ingredients. It balances out the sweetness and accentuates the peanut butter’s nutty flavor.
- Unsalted butter: Butter brings richness and moisture to the cookies. Ensure it’s softened to room temperature for easy creaming with the sugars, which will help incorporate air for a light texture.
- Brown sugar: The molasses in brown sugar adds moisture and a slight chewiness to the cookies. You can use light or dark brown sugar based on your preference; dark brown will yield a deeper flavor.
- Granulated sugar: This sugar contributes to the cookie’s crispness around the edges while keeping the center soft. It also assists in creating that signature crinkle on top.
- Large egg: The egg acts as a binder and adds moisture. Using a room temperature egg will help it mix more evenly into the batter.
- Creamy peanut butter: Naturally, this is the star of the show! Peanut butter adds flavor, richness, and a lovely nuttiness that pairs perfectly with chocolate. Choose a high-quality brand that doesn’t contain added sugar or hydrogenated oils for the best flavor.
- Pure vanilla extract: Vanilla adds a depth of flavor that enhances the overall cookie experience. Always opt for pure vanilla extract over imitation for the best results.
- Chocolate kiss candies: These are the iconic topping of the classic peanut butter blossom cookies. Their creamy chocolate centers provide a wonderful contrast to the salty peanut butter base.
- Sanding sugar: This decorative sugar adds a festive touch and a slight crunch to the cookies. You can use colored sanding sugars to align with holiday themes or personal preferences.
Shopping Tips
When shopping for ingredients, quality is key. Look for organic or local options when possible, especially for the peanut butter and eggs, which can significantly impact the flavor of your cookies. When purchasing flour, check for freshness, and ensure that your baking soda is not expired for optimal leavening. It’s also wise to inspect the butter for freshness; it should have a clean, creamy smell without any off-putting odors.
Substitutions and Alternatives
If you have dietary restrictions or simply want to experiment, there are several substitutions you can consider:
- Gluten-free option: Substitute all-purpose flour with a gluten-free flour blend. Just ensure it includes xanthan gum to mimic the binding properties of gluten.
- Vegan alternative: Use a plant-based butter and flaxseed egg (1 tablespoon ground flaxseed mixed with 2.5 tablespoons water, let sit for a few minutes to thicken) instead of egg.
- Nut allergies: You can replace peanut butter with sun butter or soy nut butter, which offers a similar texture and flavor profile.
Each ingredient plays a vital role in the success of your classic peanut butter blossom cookies. By carefully selecting and understanding the function of each component, you can create a batch that not only looks beautiful but tastes divine. Remember, your kitchen is a space for creativity, so don’t hesitate to make these cookies your own!
Detailed Step-by-Step classic peanut butter Cooking Instructions
Now that you’ve gathered all the essential ingredients for your classic peanut butter blossom cookies, it’s time to roll up your sleeves and dive into the baking process. Follow this detailed step-by-step guide to ensure your cookies turn out perfectly every time.
Preparation Steps
- Preheat your oven: Start by preheating your oven to 350°F (177°C). This step is crucial as it ensures your cookies bake evenly and turn out just right.
- Gather your tools: You’ll need a mixing bowl, a baking sheet lined with parchment paper, measuring cups and spoons, and an electric mixer or whisk. Having everything ready to go will make your baking experience smoother.
- Measure and sift dry ingredients: In a medium bowl, whisk together the all-purpose flour, baking soda, and salt. Sifting these ingredients can help aerate the flour, ensuring a lighter cookie texture.
- Cream butter and sugars: In a large mixing bowl, combine the softened unsalted butter, brown sugar, and granulated sugar. Using an electric mixer, beat them together on medium speed until the mixture is light and fluffy. This process usually takes about 3-5 minutes and is essential for creating a nice texture in your cookies.
- Add the egg and vanilla: Crack the large egg into the butter and sugar mixture, and add the pure vanilla extract. Beat until well combined. The egg helps bind the ingredients together, while the vanilla adds depth to the flavor.
- Incorporate peanut butter: Add the creamy peanut butter and mix until fully integrated into the wet ingredients. This is where the classic peanut butter flavor starts to shine!
- Combine wet and dry ingredients: Gradually add the flour mixture to the wet ingredients, mixing on low speed until just combined. Be careful not to overmix; you want to mix until the flour is incorporated without developing too much gluten.
Cooking Process
- Scoop the cookie dough: Using a cookie scoop or tablespoon, portion out the dough and roll it into balls about 1 inch in diameter. This is where the fun begins! You can let your kids help with this part for some quality family time.
- Coat in sugar: Roll each dough ball in a mixture of granulated sugar and sanding sugar until they’re fully coated. This adds a delightful crunch and a festive touch to your cookies.
- Place on baking sheet: Arrange the coated dough balls on the prepared baking sheet, spacing them about 2 inches apart. They will spread slightly while baking, so give them enough room!
- Bake the cookies: Pop the baking sheet into the preheated oven and bake for approximately 10-12 minutes. Keep an eye on them; you want the edges to be lightly golden while the centers remain soft. They will continue to cook slightly after being removed from the oven.
- Add the chocolate kisses: As soon as you take the cookies out of the oven, press an unwrapped chocolate kiss into the center of each cookie. This step is essential to get that iconic look and flavor combination!
- Cool the cookies: Let the cookies cool on the baking sheet for about 5 minutes, then transfer them to a wire rack to cool completely. This cooling time allows the chocolate to set slightly, making them easier to handle.
Final Assembly
- Decorate if desired: If you want to take your cookies to the next level, consider drizzling some melted chocolate over the top once they’ve cooled. It adds a little extra flair and flavor!
- Store your cookies: Once cooled completely, store your classic peanut butter blossom cookies in an airtight container at room temperature. They’ll stay fresh for about a week, but let’s be honest—these cookies rarely last that long!
- Enjoy and share: Share the love with friends and family or keep them all to yourself—no judgment here! These cookies are perfect for any occasion, especially during the holidays.
With these detailed cooking instructions, you are now equipped to create a batch of classic peanut butter blossom cookies that will surely impress. Remember, baking is as much about joy and experience as it is about the final product. Enjoy every moment of the process, and happy baking!
Professional Tips and Techniques for classic peanut butter
When it comes to baking classic peanut butter blossom cookies, mastering the art requires more than simply following a recipe; it involves understanding the nuances of the ingredients, techniques, and processes involved. As someone who has spent countless afternoons baking these delightful treats, I’ve gathered a wealth of tips that can help you create the perfect batch of cookies, whether you’re a novice baker or an experienced cook. Let’s dive into the essentials to ensure your classic peanut butter cookies turn out beautifully every time.
Professional Techniques
One of the most critical aspects of baking classic peanut butter cookies is the technique. First and foremost, always start with room temperature ingredients. Softened butter is key to achieving the right texture; it should be just soft enough to make an indentation when pressed but not melted. This allows for proper creaming with sugar, which contributes to the cookies’ fluffiness. I often find that letting my butter sit out for about 30 minutes before I start my baking session works wonders.
Another professional tip is to use a combination of granulated sugar and brown sugar. The brown sugar not only adds moisture but also gives the cookies a deeper flavor, which complements the classic peanut butter taste perfectly. When measuring these sugars, remember to pack the brown sugar into your measuring cup for accuracy.
When it comes to the mixing process, be careful not to overmix your dough. Once you combine the wet and dry ingredients, mix just until you see no flour streaks. Overmixing can lead to tough cookies, which we definitely want to avoid. Instead, aim for a soft and slightly sticky dough. If the mixture feels too dry, add a teaspoon of milk to help bring it together without losing that classic peanut butter essence.

Troubleshooting Guide
Even with the best intentions, sometimes things go awry in the kitchen. If your cookies spread too much during baking, this could be due to using melted butter or too much sugar. For the next batch, refrigerate your dough for at least 30 minutes before baking; this will help the cookies maintain their shape. Conversely, if your cookies come out too dry or crumbly, consider using a bit more peanut butter or adding an extra egg yolk to enhance moisture.
Another common issue is the cookies not being soft and chewy in the center. To solve this, bake them for a shorter time. Cookies will continue to cook a bit after they come out of the oven due to residual heat, so removing them when they are lightly golden around the edges but still soft in the center is ideal. If you want to ensure they stay soft longer, store them with a slice of bread in the container; the bread will help maintain moisture.
Presentation Tips
Presentation can elevate your classic peanut butter blossom cookies from ordinary to extraordinary. Once your cookies are cool, consider dusting them lightly with powdered sugar for a beautiful finish. Additionally, you can arrange them on a decorative platter, perhaps with a few chocolate kisses nestled among them to create an inviting display. If you’re serving them at a gathering, consider pairing them with a glass of milk or even a scoop of vanilla ice cream for an indulgent treat.
For more festive occasions, try incorporating seasonal decorations. For example, during the holidays, you can use red and green sprinkles, or even dip the edges of the cookies in chocolate and then sprinkle with crushed peppermint for a festive touch.
Make-Ahead and Meal Prep Strategies
Baking classic peanut butter blossom cookies can be a fantastic way to spend a weekend, but sometimes we need to plan ahead. A great strategy is to make the dough in advance. You can wrap it tightly in plastic wrap and store it in the refrigerator for up to a week, or even freeze it for up to three months. When you’re ready to bake, simply let the dough sit at room temperature for about 15 minutes before scooping and baking.
If you’re making cookies for a crowd, consider scaling up your recipe. Doubling or tripling the classic peanut butter cookie recipe is straightforward, but be mindful of your mixing bowl size and oven capacity. Bake in batches, so you don’t overcrowd the oven, which can lead to uneven baking.
As for beverage pairings, classic peanut butter cookies pair wonderfully with milk, of course, but they also complement a rich cup of coffee or a sweet dessert wine. The nutty flavor of the peanut butter shines through when balanced with these beverages, creating a delightful experience for your palate.
In conclusion, baking classic peanut butter blossom cookies is an art that can be perfected with the right tips and techniques. From understanding the importance of ingredient temperatures to mastering the presentation, these insights will help you create cookies that are not only delicious but also visually appealing. Happy baking!
Creative Variations and Adaptations of classic peanut butter
While classic peanut butter blossom cookies hold a special place in many hearts, there’s always room for creativity in the kitchen. Over the years, I have experimented with various adaptations of this beloved recipe, leading to some delightful surprises. Let’s explore some exciting variations that can breathe new life into your classic peanut butter cookie experience!
Seasonal Variations
One of the most enjoyable aspects of baking is the ability to incorporate seasonal ingredients into your classic peanut butter cookies. During the fall, consider adding pumpkin spice to the dough for a warm, cozy flavor. Simply blend in a teaspoon of pumpkin pie spice into your dry ingredients, and you’ll have a delightful twist that is perfect for autumn gatherings.
In the winter months, you might want to experiment with peppermint extract instead of vanilla to create a refreshing minty flavor. Pair this with crushed candy canes sprinkled on top of each cookie right after baking for a festive touch that will impress your holiday guests.
In the spring, try adding lemon zest to your classic peanut butter cookie dough for a bright, citrusy flavor that’s perfect for warmer weather. The zest adds a refreshing contrast to the rich peanut butter, making for a delightful treat.
Dietary Adaptations
As our understanding of dietary needs evolves, so too does our ability to adapt classic recipes like peanut butter blossom cookies. For those following a keto diet, you can swap out traditional flour for almond flour and use a sugar substitute like erythritol. This version will still provide that beloved peanut butter flavor while keeping the carbs low.
If you’re baking for vegans or those with egg allergies, try using a flaxseed egg instead. Mix one tablespoon of ground flaxseed with three tablespoons of water, and let it sit for about 15 minutes until it becomes gelatinous. This acts as a great binder in your classic peanut butter cookies without compromising texture or taste.
For gluten-free baking, simply replace all-purpose flour with a high-quality gluten-free flour blend. Many of these blends are designed to mimic the texture of all-purpose flour closely, making them perfect for achieving that soft and chewy classic peanut butter cookie.
Creative Twists
Now, let’s dive into some truly creative twists on the classic peanut butter cookie. One of my favorites is the addition of chocolate chips. Instead of placing a chocolate kiss on top, try folding in a cup of semi-sweet or dark chocolate chips into the dough before baking. This adds a delightful melty chocolate experience that complements the classic peanut butter flavor beautifully.
For a burst of flavor, consider adding chopped nuts such as pecans or walnuts into the dough. This not only provides a pleasing crunch but also enhances the nutty profile of the classic peanut butter cookie. If you’re feeling adventurous, you could even use different types of nut butters like almond or cashew butter for a unique twist.
Another fun idea is to create a sandwich cookie by taking two classic peanut butter cookies and filling them with your favorite frosting or a homemade peanut butter cream. This transforms your classic cookies into an indulgent treat that’s perfect for parties or special occasions.
In conclusion, the classic peanut butter blossom cookie is a versatile base that allows for endless creativity. Whether you’re incorporating seasonal ingredients, accommodating dietary needs, or adding exciting twists, the possibilities are truly limitless. So gather your ingredients and let your imagination run wild in the kitchen. Happy baking!
Storage, Reheating, and Meal Prep for classic peanut butter
When it comes to classic peanut butter blossom cookies, one of the most delightful aspects is their versatility in storage. These cookies are not only delicious when fresh out of the oven but can also be stored and enjoyed later. Whether you’re preparing for a special occasion or simply want to indulge in a sweet treat throughout the week, understanding how to store these cookies properly is essential. In this section, we’ll explore everything from short-term storage solutions to long-term freezing guidelines, as well as reheating methods that ensure your classic peanut butter cookies remain as delicious as the day they were baked.
Short-term Storage
After baking a batch of classic peanut butter cookies, it’s tempting to devour them all in one sitting. However, if you find yourself with extra cookies, proper short-term storage is key. The best way to store your cookies for a few days is to place them in an airtight container. This will keep them soft and chewy, allowing the flavors to meld beautifully.
For optimal freshness, consider layering your cookies with parchment paper between them. This prevents them from sticking together and makes it easier to grab just one (or two) when the craving strikes. If you’re storing different types of cookies together, make sure to keep the classic peanut butter cookies separate from those with strong flavors, as they can absorb odors and tastes from one another.
Another great tip is to store your cookies at room temperature in a cool, dry place. Avoid exposing them to sunlight or heat sources, as this can lead to a stale texture. If you live in a particularly humid area, it might be worth placing a slice of bread in the container with the cookies. This will help absorb excess moisture and keep your cookies soft longer!
Freezing and Long-term Storage
If you want to prolong the life of your classic peanut butter blossom cookies, freezing is a fantastic option. Freezing cookies not only maintains their quality but also allows you to enjoy them weeks or even months later. To freeze your cookies effectively, start by allowing them to cool completely after baking. Once cooled, place them in a single layer on a baking sheet and put them in the freezer for about an hour. This initial freeze will prevent them from sticking together.
After the cookies are frozen, transfer them to a freezer-safe bag or container. Be sure to label the container with the date so you can keep track of how long they’ve been stored. Classic peanut butter cookies can be frozen for up to three months without losing their flavor or texture. If you’re planning to freeze unbaked dough, shape the cookies and freeze them in the same manner. Once frozen, you can place the dough balls in a container and bake them directly from the freezer when you want a fresh cookie fix.
When it comes to thawing frozen cookies, the best method is to remove them from the freezer and let them sit at room temperature for about 30 minutes. This gentle thawing will help retain their chewy consistency. If you prefer a warm cookie, consider popping them in the microwave for a few seconds or reheating them in the oven. There’s nothing quite like the smell of freshly baked classic peanut butter cookies wafting through your home!
Reheating Best Practices
Reheating your classic peanut butter blossom cookies can be done in a few different ways, depending on your preference and the tools available to you. The microwave is the quickest method; simply place the cookie on a microwave-safe plate and heat it for about 10-15 seconds. Be careful not to overheat, as this can lead to a rubbery texture instead of the soft, chewy goodness we all love.
Alternatively, for those who enjoy a crispy exterior, reheating in the oven is a great option. Preheat your oven to 350°F (175°C) and place the cookies on a baking sheet. Heat them for about 5-7 minutes until warmed through. This method not only revives the cookie’s original texture but also enhances the aromatic qualities of the classic peanut butter flavor.
For meal prep enthusiasts, consider setting aside a few hours to bake a large batch of classic peanut butter blossom cookies. You can portion them out in small containers or bags, making them easy to grab for lunchboxes or snacks throughout the week. This strategy not only saves time but also ensures you have a sweet treat on hand for those moments when only a cookie will do.
Lastly, it’s vital to consider food safety when storing cookies. Always ensure that your containers are clean and dry before adding cookies to them. If you’re working with different types of cookies, be mindful of allergens and cross-contamination. Classic peanut butter cookies contain peanut butter, which can be a significant allergen for some people. Always label your containers if you’re storing cookies made with allergenic ingredients.
With these storage tips, your classic peanut butter blossom cookies will be ready to enjoy at a moment’s notice, whether fresh out of the oven or warmed up after a few weeks in the freezer!
Nutritional Benefits and Health Information
When indulging in classic peanut butter blossom cookies, many of us forget to consider the nutritional benefits that come from the key ingredients. This delightful treat not only satisfies your sweet tooth but also offers a range of health benefits, making them an interesting contender in the world of baked goods. In this section, we’ll delve into the nutritional profile of classic peanut butter cookies, exploring their health benefits, dietary considerations, and ways to make them fit into various diet plans.
Nutritional Profile
The primary ingredients in classic peanut butter blossom cookies include peanut butter, sugar, flour, butter, and eggs. To provide a clearer picture, let’s break down the nutritional content per cookie, assuming one batch yields approximately 24 cookies:
- Calories: About 100-120 per cookie
- Carbohydrates: 12-15 grams
- Protein: 2-3 grams
- Fat: 5-7 grams
- Sugar: 8-10 grams
- Fiber: 0.5-1 gram
Peanut butter, the star ingredient in classic peanut butter cookies, provides a wealth of nutrients. A two-tablespoon serving of peanut butter contains about 7 grams of protein, 2 grams of fiber, and a host of vitamins and minerals, including vitamin E, magnesium, and potassium. These nutrients contribute to heart health, muscle recovery, and overall well-being.
Health Benefits
One of the standout features of classic peanut butter cookies is their protein content. The protein from peanut butter can help keep you full and satisfied, making it less likely that you’ll reach for unhealthy snacks later. Additionally, the healthy fats found in peanut butter are primarily monounsaturated and polyunsaturated fats, which are beneficial for heart health.
Moreover, the fiber content in peanut butter can aid in digestion and promote a feeling of fullness. While these cookies are certainly a treat, they do carry some nutritional benefits that can make indulgence feel a bit better about your choices. The key is moderation; enjoying a classic peanut butter cookie as part of a balanced diet can be both satisfying and nourishing.
Dietary Considerations
For those with dietary restrictions, classic peanut butter blossom cookies can still be enjoyed with a few modifications. For gluten-free diets, consider substituting regular flour with a gluten-free blend. If you’re watching your sugar intake, there are plenty of sugar alternatives available that can be used to maintain the sweet flavor without the added calories. Natural sweeteners like honey, maple syrup, or agave nectar can be great substitutes, although they may slightly alter the texture of the cookies.
Additionally, for those with nut allergies, a seed butter like sunflower seed butter can be used in place of peanut butter to achieve a similar flavor profile without the allergens. It’s important to note that while these modifications can make classic peanut butter blossom cookies more accessible, they may also change the texture and flavor slightly, so some experimentation might be necessary.
When comparing classic peanut butter cookies to similar treats, such as chocolate chip cookies or oatmeal cookies, it’s clear that each type has its own unique benefits. Classic peanut butter cookies tend to be higher in protein due to the peanut butter content, whereas chocolate chip cookies are often higher in sugar and fat. Oatmeal cookies, while also delicious, may not provide the same level of protein but do offer more fiber, especially if made with whole oats.
In conclusion, while classic peanut butter blossom cookies are certainly a delightful treat, they also come packed with nutritional benefits that can be appreciated within a balanced diet. Whether enjoyed during the holidays, at family gatherings, or simply as a sweet snack, these cookies can be a wholesome indulgence when made with care and consideration. So go ahead, bake a batch, and savor the rich flavors and delightful textures of these classic treats!
Frequently Asked Questions About Classic Peanut Butter
Classic peanut butter blossom cookies recipe
The classic peanut butter blossom cookies recipe combines creamy peanut butter, sugar, and flour to create a soft, chewy base, topped with a chocolate Hershey’s Kiss. Start by preheating your oven to 350°F (175°C) and mix together 1 cup of peanut butter, 1 cup of sugar, and 1 egg until the dough is smooth. Roll the dough into balls and place them on a baking sheet lined with parchment paper. Bake for about 10-12 minutes, and once they come out of the oven, gently press a Hershey’s Kiss into the center of each cookie while they are still warm. Let them cool completely on a wire rack for the best texture and flavor.
3 ingredient peanut butter blossoms
For a simplified version of peanut butter blossoms, you can make a 3-ingredient recipe using just peanut butter, sugar, and an egg. Combine 1 cup of peanut butter with 1 cup of sugar and 1 egg in a mixing bowl, and stir until well mixed. Roll the dough into small balls and place them on a baking sheet lined with parchment paper. Bake them at 350°F (175°C) for about 10 minutes, then immediately press a chocolate kiss into the center of each cookie as they come out of the oven. This quick method is perfect for those who want to enjoy delicious cookies without the hassle of extra ingredients!
Hershey Kiss cookies without peanut butter
If you’re looking to make Hershey Kiss cookies without peanut butter, you can substitute the peanut butter with an equal amount of softened butter or coconut oil for a similar texture. Use a basic sugar cookie dough as your base, combining 1 cup of butter, 1 cup of sugar, 1 egg, and 2 cups of flour. After rolling the dough into balls, bake at 350°F (175°C) for about 10 minutes, and then press a Hershey’s Kiss into each cookie while they’re still warm. This creates a delightful cookie that still features the iconic chocolate center without the nutty flavor of peanut butter.
Easy peanut butter blossom cookies
Easy peanut butter blossom cookies can be whipped up in no time by using a straightforward recipe that requires minimal ingredients. Combine 1 cup of creamy peanut butter, 1 cup of brown sugar, and 1 egg in a mixing bowl, and stir until smooth. Roll the mixture into balls and place them on a baking sheet lined with parchment paper. Bake at 350°F (175°C) for 8-10 minutes, and don’t forget to press a Hershey’s Kiss into the center as soon as they come out of the oven. This simple approach ensures you get delicious cookies with a delightful balance of flavors!
Peanut butter blossoms recipe
A traditional peanut butter blossoms recipe includes key ingredients such as creamy peanut butter, granulated sugar, brown sugar, and flour. Start by creaming together 1 cup of peanut butter, 1/2 cup of granulated sugar, and 1/2 cup of brown sugar in a bowl until fluffy. Add 1 egg and 1 teaspoon of vanilla extract, mixing until well combined. Gradually stir in 1 cup of all-purpose flour and 1/2 teaspoon of baking soda. Roll the dough into balls, bake at 350°F (175°C) for 10-12 minutes, and press a Hershey’s Kiss into each cookie right after removing them from the oven for a delectable treat!
Best peanut butter blossoms
The best peanut butter blossoms are those that strike the perfect balance between a chewy texture and a rich peanut butter flavor. For optimum results, use fresh, high-quality peanut butter and mix it with softened butter, sugar, and a hint of vanilla extract. Bake the cookies until they are just set but still slightly underbaked, allowing them to firm up as they cool. Press in the Hershey’s Kiss while they are warm to ensure it melts slightly, creating a perfect chocolatey complement to the cookie. For added decadence, consider drizzling melted chocolate over the top of the cookies once they have cooled.
4 ingredient peanut butter blossoms
To create 4-ingredient peanut butter blossoms, you can simply combine peanut butter, sugar, an egg, and vanilla extract for a quick and delicious treat. Mix together 1 cup of peanut butter, 1 cup of sugar, and 1 egg until you have a smooth consistency, then add in 1 teaspoon of vanilla extract for extra flavor. Roll the dough into balls and place them on a parchment-lined baking sheet. Bake at 350°F (175°C) for approximately 10 minutes, and after removing them from the oven, immediately press a Hershey’s Kiss into each cookie for the classic finish. This recipe is perfect for anyone wanting to whip up a sweet treat with minimal fuss!
Betty Crocker Peanut Butter Blossoms
Betty Crocker’s Peanut Butter Blossoms recipe is a beloved classic that emphasizes simplicity and flavor. To make these cookies, you start with 1 cup of peanut butter, 1 cup of sugar, and 1 egg, then mix until creamy. After rolling the dough into balls, you can roll them in additional granulated sugar for an extra sweet crust. Bake at 350°F (175°C) for about 10 minutes, and while the cookies are still warm, press a Hershey’s Kiss into the center to create that iconic look and taste. Following this recipe will ensure you get soft, delicious cookies that are sure to impress!


