Garlic bread rolls have a way of making any meal feel like a celebration. The moment you take that first bite, your senses are enveloped in a warm, buttery embrace, punctuated by the unmistakable aroma of garlic. The golden, crusty exterior gives way to a soft, pillowy interior that’s just waiting to be slathered with more butter or dipped into a rich marinara sauce. My journey with garlic bread rolls began during my college years, when I stumbled upon a recipe in a tattered old cookbook that had belonged to my grandmother.

As a busy student juggling classes, part-time work, and my social life, I was always on the lookout for quick, satisfying meals. One rainy afternoon, while rifling through her recipes, I found myself captivated by the simplicity of garlic bread rolls. With only a handful of ingredients—flour, yeast, butter, garlic, and herbs—I realized I could create something that not only nourished my body but also brought a piece of my grandmother’s love into my cramped little kitchen. That day marked the beginning of a culinary adventure that would see me experimenting with different flavors and techniques, paving the way for my lifelong love for baking.
The Story Behind This Recipe
Garlic bread rolls, as it turns out, have roots that stretch back centuries. The concept of infusing bread with garlic and herbs is not unique to any single culture; rather, it is a delicious amalgamation of various traditions. Italy is often credited with popularizing garlic bread, particularly in the form of bruschetta, which features toasted bread topped with garlic, olive oil, and herbs. However, garlic and bread have been combined in numerous ways across the Mediterranean and beyond, each region boasting its own twist on this timeless pairing.
What makes my garlic bread rolls special is the way they bring together the rustic charm of traditional Italian recipes with the ease and comfort of modern home cooking. Unlike conventional garlic bread that’s usually baked in larger loaves, these rolls are perfectly portioned for any gathering, making them ideal for family dinners, casual get-togethers, or even a cozy night in with a good book. Their versatility is what sets them apart; they can be served as a side to pasta, a delightful appetizer, or even as a snack on their own.
Why You’ll Love This Dish
For busy families, garlic bread rolls are an absolute lifesaver. They can be prepared in advance, frozen, and simply popped into the oven to bake whenever you need a quick dinner solution. Imagine coming home after a long day, and instead of scrambling to put together a meal, you have a batch of garlic bread rolls ready to go. The smell that fills your kitchen as they bake is enough to make anyone’s mouth water, and the kids—trust me—will come running at the first whiff.
Seasonal relevance is another factor that makes garlic bread rolls a fantastic choice. While they can be enjoyed year-round, they shine particularly bright during the cooler months. Think cozy family dinners during the fall or winter holidays, where the warmth of freshly baked rolls pairs perfectly with soups and stews. They can also be the star of your summer barbecues as a delightful accompaniment to grilled meats or salads.
What truly resonates with me about garlic bread rolls is the emotional connection they foster. Every time I make them, I am transported back to my grandmother’s kitchen, where the air was thick with the aroma of garlic and butter, and laughter filled every corner. Sharing this dish with my family has become a cherished tradition, one that I hope to pass down to future generations. It’s not just about the food; it’s about the memories created around the dinner table, the stories shared, and the love that is kneaded into every roll.
In this ultimate guide to garlic bread rolls, you will learn everything you need to know to make your own at home. From the basic recipe to creative variations and tips for perfecting your technique, I promise you’ll find inspiration to make these delightful rolls a staple in your kitchen. So, roll up your sleeves and get ready to dive into the wonderful world of garlic bread rolls!
The Rich History and Cultural Significance of garlic bread rolls
The rich history and cultural significance of garlic bread rolls can be traced back through generations, reflecting the culinary traditions of various cultures and regions. While the exact origin of garlic bread is somewhat nebulous, it is widely believed that the practice of infusing bread with garlic and herbs has existed since the antiquity of Mediterranean civilizations. The combination of garlic and bread is a testament to the resourcefulness of home cooks who have sought to elevate simple ingredients into something extraordinary.
Origins and History
Garlic itself has been celebrated for thousands of years, not just for its flavor but also for its health benefits. Ancient Egyptians revered garlic, believing it to be a powerful food for strength and vitality, and it was even used as a form of currency in some instances. As bread became a staple food across Europe, the integration of garlic into bread recipes was a natural evolution. In Italy, the tradition of bruschetta—grilled bread rubbed with garlic and drizzled with olive oil—became widespread, and this concept of garlic-infused bread laid the groundwork for what we now know as garlic bread rolls.
During the 20th century, garlic bread gained significant popularity in the United States, particularly as Italian-American cuisine flourished. Restaurant menus began to feature garlic bread as a staple side dish, often served with pasta and marinara sauce. The roll form emerged as a convenient and shareable variant, making it easier for families to enjoy garlic bread without the hassle of slicing a larger loaf.
Cultural Significance
Garlic bread rolls have transcended their humble beginnings to become a beloved dish across various cultures. In Italian households, they are often served during family gatherings, holidays, and special occasions, symbolizing warmth and hospitality. In the United States, these rolls have become synonymous with the Italian-American dining experience, frequently appearing on tables during Sunday dinners and festive celebrations.
In addition to their role in family meals, garlic bread rolls also serve as a culinary bridge between cultures. They are enjoyed not only in Italian cuisine but also adapted into various forms across different regions. For instance, in France, you may come across “pain à l’ail,” which features a baguette topped with garlic butter, while in Spain, “pan de ajo” is often served as a tapas dish, showcasing the versatility of garlic bread in global cuisines.
Nutritional Benefits
Beyond their cultural significance and delightful taste, garlic bread rolls provide a range of nutritional benefits that can be enjoyed in moderation. Garlic itself is known for its numerous health properties, including its potential to boost the immune system, lower blood pressure, and improve cardiovascular health. The use of whole-grain flour in your garlic bread rolls can add fiber, which is essential for digestive health.
Additionally, the use of herbs like parsley or oregano not only enhances the flavor but also contributes vitamins and antioxidants to the dish. While garlic bread rolls are often associated with indulgence due to their buttery nature, they can easily be modified to fit healthier dietary preferences by using alternatives like olive oil or plant-based butter, making them a delicious and health-conscious choice for any meal.
As you can see, garlic bread rolls are more than just a simple side dish; they carry with them a rich history and cultural significance that connects generations of families. Whether you’re enjoying them at a festive gathering or as a comforting weeknight meal, these rolls offer a taste of tradition and a reminder of the joys of sharing food with loved ones. In the following sections, we’ll delve into the best recipes and tips for creating your own perfect garlic bread rolls at home.
Essential Ingredients for Perfect garlic bread rolls
When it comes to baking garlic bread rolls, the magic truly lies in the ingredients. Each component plays a vital role in achieving the perfect balance of flavor, texture, and aroma. Let’s delve into the essential ingredients that will transform simple dough into the most delightful garlic bread rolls you’ve ever tasted.
Essential Ingredients
- 4 1/2 tablespoons unsalted butter
- 2 tablespoons minced garlic
- 3 1/2 cups + 1 tablespoon all-purpose flour, see notes below for measuring
- 3 tablespoons chopped fresh parsley
- 1 tablespoon granulated sugar
- 2 1/4 teaspoons instant yeast
- 1 teaspoon fine sea salt
- 1 cup whole or 2% milk, warmed to 110°F
- 1 large egg, room temperature
- 1 beaten egg, for brushing the tops
- 2 tablespoons unsalted butter
- 1 tablespoon minced garlic
- 1 tablespoon chopped fresh parsley
- Flaky sea salt, for finishing
Now, let’s explore the significance of each ingredient:
Unsalted Butter: This is the cornerstone of rich flavor in your garlic bread rolls. Unsalted butter allows you to control the sodium content in your dish, enhancing the overall taste without overpowering it. Look for high-quality butter, preferably from grass-fed cows for a richer flavor profile. When possible, use fresh butter, as it carries a more vibrant taste.
Minced Garlic: Garlic is the star of the show in garlic bread rolls. It adds depth and a punch of flavor. Fresh garlic cloves are your best bet, as they offer a pungent aroma and a robust flavor compared to pre-minced varieties. When selecting garlic, opt for firm bulbs with no soft spots or green shoots, which can indicate age.
All-Purpose Flour: This versatile flour gives your rolls structure. The gluten content in all-purpose flour helps the dough rise and maintain its shape. For the best results, sift the flour before measuring to ensure accuracy. If the texture of your rolls isn’t what you expected, it might be due to improper flour measurement.
Fresh Parsley: Fresh herbs like parsley not only provide a burst of color, but they also add a fresh, earthy flavor to your rolls. Choose bright green parsley that is not wilted. If unavailable, you can use dried parsley, but fresh is preferable for that aromatic punch.
Granulated Sugar: A small amount of sugar is crucial for activating the yeast, helping your garlic bread rolls rise beautifully. It also contributes to the browning of the crust, giving it that appetizing golden hue. Use regular granulated sugar, but if you’re looking for alternatives, honey or maple syrup can also work, just adjust the liquid content accordingly.
Instant Yeast: This is what gives your rolls their fluffy texture. Unlike active dry yeast, instant yeast doesn’t need to be dissolved in water before using, which simplifies the process. Always check the expiration date on the packet to ensure maximum effectiveness.
Fine Sea Salt: Salt enhances the flavor of your rolls and helps control yeast fermentation. Use fine sea salt for an even distribution throughout the dough. Avoid table salt, as it can sometimes contain additives that affect the taste.
Milk: Warm milk enriches the dough and activates the yeast, promoting a tender crumb. For the best results, use whole or 2% milk warmed to around 110°F. If you’re lactose intolerant, almond milk or soy milk can serve as substitutes, but keep an eye on the consistency of your dough.
Egg: The egg adds moisture and richness to your rolls. It also helps with binding the ingredients together. Using a room temperature egg ensures it blends more easily into the dough. For a vegan alternative, a flaxseed meal mixed with water can mimic the binding properties of an egg.
Flaky Sea Salt: This is for finishing your garlic bread rolls. A sprinkle on top just before baking provides a delightful crunch and bursts of flavor. Look for high-quality flaky sea salt for the best effect.
Print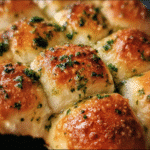
Garlic Bread Rolls
Ingredients
- 4 1/2 tablespoons unsalted butter
- 2 tablespoons minced garlic
- 3 1/2 cups + 1 tablespoon all-purpose flour
- 3 tablespoons chopped fresh parsley
- 1 tablespoon granulated sugar
- 2 1/4 teaspoons instant yeast
- 1 teaspoon fine sea salt
- 1 cup whole or 2% milk, warmed to 110°F
- 1 large egg, room temperature
- 1 beaten egg, for brushing the tops
For the Garlic Butter
- 2 tablespoons unsalted butter
- 1 tablespoon minced garlic
- 1 tablespoon chopped fresh parsley
- flaky sea salt, for finishing
Instructions
- Lightly butter the bottom and sides of a 9×13 pan and set it aside.
- In a small pot, melt the butter and add the minced garlic. Cook for 1-2 minutes or until the garlic is fragrant. Take off the heat and cool while you measure the other ingredients.
- 4 1/2 tablespoons (60 g) unsalted butter,2 tablespoons minced garlic
- In a stand mixing bowl, combine the flour, parsley, sugar, yeast, and salt. Then add the warmed milk, egg, and garlic butter from above. Knead on low speed with the dough hook until the dough looks smooth and feels soft and tacky, about 10-12 minutes. *If the dough is too sticky, add one tablespoon of flour at a time until you have a workable dough.
- 3 1/2 cups + 1 tablespoon (434 g) all-purpose flour,3 tablespoons chopped fresh parsley,1 tablespoon (15 g) granulated sugar,2 1/4 teaspoons instant yeast,1 teaspoon fine sea salt,1 cup (225 g) whole or 2% milk,1 (55 g) large egg
- Cut the kneaded dough into 12 equal portions (use a scale for accuracy- 67 grams each). Shape each piece of dough into a smooth ball with your hand. Pinch the bottom of the roll where the seam comes together to keep it tight. Then place the shaped dough balls into the prepared baking pan. Cover the top with plastic wrap or a clean kitchen towel and set them in a warm place to rise until doubled in size, about 1-2 hours. *Watch the video below for visual aid!
- Preheat the oven to 350 F/180 C.
- Brush the tops of the rolls with the beaten egg wash. Then bake the dinner rolls for 20-30 minutes, or until the tops are golden brown.
- 1 beaten egg, for brushing the tops
- While the rolls are baking, make the garlic butter. Melt the butter in a pot and add the minced garlic. Cook for 1-2 minutes until the garlic is fragrant. Then remove it from the heat and stir in the parsley. When the rolls come out of the oven, immediately brush them with the garlic butter. Sprinkle with flaky sea salt if desired, and serve warm!
- 2 tablespoons (28 g) unsalted butter,1 tablespoon minced garlic,1 tablespoon chopped fresh parsley,flaky sea salt
Shopping Tips
When shopping for these ingredients, consider visiting your local farmers’ market for fresh herbs and garlic. This not only supports your community but also guarantees fresher produce. For pantry staples like flour and yeast, bulk bins can save you money and reduce packaging waste.
Substitutions and Alternatives
If you have dietary restrictions or preferences, there are several substitutions you can make. For gluten-free options, consider using a 1:1 gluten-free flour blend, but be aware that the texture may differ. Dairy-free butter and plant-based milk work well for those avoiding animal products. And if you want to experiment with flavors, try adding different herbs like rosemary or oregano.
In conclusion, understanding the role of each ingredient is crucial in preparing the best garlic bread rolls. By making informed choices at the grocery store and being aware of substitutions, you can create a delicious batch of rolls that will impress family and friends alike!
Detailed Step-by-Step garlic bread rolls Cooking Instructions
Creating the perfect batch of garlic bread rolls is not just a cooking task; it’s an experience filled with delightful aromas, warm textures, and mouthwatering flavors. Whether you’re preparing these rolls for a family gathering, a cozy dinner, or just because you crave that garlic goodness, following the right steps will ensure success. Let’s dive into the detailed step-by-step cooking instructions that will guide you through this culinary journey.
Preparation Steps
- Gather Your Ingredients: Before you embark on your baking adventure, gather all your ingredients on the counter. Having everything in one place makes the process smoother and more enjoyable. I still remember the first time I tried making garlic bread rolls; I forgot to take the butter out of the fridge, and it was a race against time to get it softened!
- Measure Your Ingredients: Accurate measurements are crucial in baking. Use a kitchen scale for the flour, as it provides the most precise measurement. For the other ingredients, a set of measuring spoons and cups will do the trick. Remember to level off the flour with a knife for the best results.
- Prepare Your Workspace: Clean your work surface and prepare any equipment you’ll need, such as a mixing bowl, a clean kitchen towel, and a baking sheet lined with parchment paper. This mise en place approach helps in organizing your thoughts and tasks.
- Warm the Milk: Heat the milk gently in a small saucepan or microwave until it reaches about 110°F. This temperature is warm to the touch but not hot. Testing with a kitchen thermometer can help avoid overheating, which can kill the yeast.
Cooking Process
- Activate the Yeast: In a large mixing bowl, combine the warm milk, 1 tablespoon of granulated sugar, and instant yeast. Stir gently and let it sit for about 5-10 minutes until it becomes frothy. This is a sign that the yeast is active and ready to work its magic.
- Mix Dry Ingredients: In a separate bowl, whisk together the all-purpose flour, fine sea salt, and chopped parsley. This ensures an even distribution of the salt and herbs throughout the dough.
- Add Wet Ingredients: Once the yeast mixture is frothy, add the room-temperature egg and the 4 1/2 tablespoons of melted unsalted butter. Mix well until combined.
- Combine Wet and Dry Ingredients: Gradually add the dry ingredient mixture to the yeast mixture. Use a wooden spoon or a spatula to combine until a shaggy dough forms. At this point, the dough will look quite messy, and that’s perfectly okay!
- Knead the Dough: Transfer the dough onto a floured surface. Knead the dough for about 8-10 minutes until it’s smooth and elastic. You’re looking for a dough that springs back when poked. If the dough gets too sticky, sprinkle a bit more flour, but be cautious not to over-flour.
- First Rise: Place the kneaded dough in a lightly greased bowl, cover it with a clean kitchen towel, and set it in a warm place. Allow it to rise for about 1 hour or until it has doubled in size. This is a great time to clean up your workspace and prepare for the next steps.
Final Assembly
- Prepare the Garlic Butter: While the dough is rising, melt the 2 tablespoons of unsalted butter in a small saucepan. Add the minced garlic and sauté for about a minute until fragrant. Remove from heat and stir in the remaining chopped parsley. This garlic butter will be brushed on the rolls before baking to add that incredible flavor.
- Shape the Rolls: Once the dough has risen, punch it down to release the air. Turn it out onto a lightly floured surface and divide it into 12 equal pieces. Shape each piece into a ball by tucking the edges under. Place the rolls on the prepared baking sheet, ensuring they are spaced evenly apart.
- Second Rise: Cover the rolls with a kitchen towel and let them rise again for about 30 minutes. This second rise is crucial for achieving light and fluffy garlic bread rolls.
- Preheat the Oven: While the rolls are rising, preheat your oven to 375°F. A properly preheated oven is essential for achieving that golden crust.
- Brush with Garlic Butter: Before baking, gently brush the tops of the rolls with the garlic butter mixture you prepared earlier. Use a light hand to avoid flattening the rolls.
- Bake: Bake the rolls in the preheated oven for about 20-25 minutes, or until they are golden brown on top. Keep an eye on them, as oven temperatures can vary. You want that perfect, inviting golden hue.
- Finishing Touches: Once baked, remove the rolls from the oven and sprinkle flaky sea salt on top while they are still warm. This adds a delightful crunch and burst of flavor.
- Cool and Serve: Allow the rolls to cool slightly before serving. They are best enjoyed warm, fresh out of the oven. Serve them alongside your favorite pasta dish or enjoy them on their own with a bit of extra garlic butter. I promise, once you start, you won’t stop at just one!
In conclusion, making garlic bread rolls can be a simple yet rewarding experience. From the initial gathering of ingredients to the final golden rolls emerging from the oven, each step is filled with anticipation and joy. With a few tips and techniques under your belt, you’re well on your way to impressing your loved ones with these delectable treats!
Professional Tips and Techniques for garlic bread rolls
When it comes to creating the perfect garlic bread rolls, having the right techniques and insider knowledge can elevate your culinary experience to new heights. Whether you’re a novice cook or an experienced chef, these professional tips will guide you in crafting delectable, homemade garlic bread rolls that will impress your family and friends.
Professional Techniques
To start, let’s talk about the essential ingredients. The foundation of any great garlic bread rolls lies in the dough. A basic recipe includes flour, yeast, water, sugar, salt, and butter. However, the secret to achieving that soft, fluffy texture is all in the kneading. When kneading the dough, ensure that you develop the gluten sufficiently. This could take anywhere from 8 to 10 minutes of vigorous kneading. If you’re using a stand mixer, opt for the dough hook attachment, which allows for less manual effort while still providing the same results.
Another professional technique is to let your dough rise until it has doubled in size. This is often overlooked but is crucial for achieving light and airy garlic bread rolls. The first rise can take about 1 to 2 hours, depending on the temperature of your kitchen. If you’re in a hurry, consider placing the dough in a warm area, such as near your oven while it’s preheating.
Once your dough is ready, the shaping process is where your garlic bread rolls begin to take their final form. Divide the dough into equal portions and roll each piece into a tight ball. This helps create surface tension, which will lead to a beautifully rounded roll. Allow the rolls to rest for about 15 minutes before baking; this will ensure they are tender and fluffy.
Troubleshooting Guide
Even the most seasoned bakers encounter issues. One common problem is overly dense rolls, often caused by too much flour or inadequate kneading. If your rolls turn out heavy, try adjusting your flour measurements next time or ensure you’re kneading long enough. On the other hand, if your garlic bread rolls are too dry, this could be due to overbaking. Keep an eye on your rolls as they near the end of the baking time. They should be golden brown and sound hollow when tapped on the bottom.
Another common issue is not achieving that delicious garlicky flavor throughout the roll. A great way to infuse the garlic flavor is to prepare a garlic butter mixture. Combine softened butter with minced garlic, parsley, and a dash of salt. Brush this mixture on the rolls right before baking and again right after they come out of the oven. This not only enhances the flavor but also gives your rolls a beautiful gloss.
Presentation Tips
First impressions count, and your garlic bread rolls deserve a stunning presentation. One simple yet effective way to serve them is on a rustic wooden board. Arrange the rolls in a circular pattern, with a small bowl of marinara sauce or garlic butter in the center for dipping. This not only looks appealing but also invites your guests to dig in.
To add a touch of elegance, consider garnishing your rolls with fresh herbs, such as parsley or chives. A sprinkle of Parmesan cheese just before serving can also elevate the flavor and aesthetics. Remember, the goal is to make your garlic bread rolls not just delicious but also visually appealing.
Make-Ahead Strategies
If you’re planning a gathering, making garlic bread rolls ahead of time can save you valuable moments before your guests arrive. You can prepare the dough a day in advance and let it rise in the fridge overnight. When you’re ready to bake, simply shape the rolls and let them come to room temperature while your oven preheats. This strategy allows for maximum freshness with minimal stress.
Additionally, you can freeze the shaped rolls before the second rise. Place them on a baking sheet until they freeze completely, then transfer them to a freezer-safe bag. When you’re ready to bake, let them thaw in the fridge overnight, then proceed with the second rise and baking. This technique ensures you always have fresh garlic bread rolls at your fingertips!
Wine and Beverage Pairings
Now that you have your garlic bread rolls perfected, let’s talk about what to serve alongside them. A crisp white wine, such as Sauvignon Blanc, perfectly complements the rich buttery flavor of the rolls. The acidity in the wine balances the richness of the garlic, creating a harmonious dining experience. Alternatively, for a non-alcoholic option, consider serving sparkling water with a slice of lemon. This adds a refreshing zing that pairs beautifully with the savory rolls.
In conclusion, these professional tips and techniques will not only improve your garlic bread rolls but also enhance your overall baking skills. Whether you’re troubleshooting issues or experimenting with make-ahead strategies, remember that practice makes perfect. So roll up your sleeves and get ready to impress with your homemade garlic bread rolls!
Creative Variations and Adaptations of garlic bread rolls
Garlic bread rolls are a beloved staple in many households, but the beauty of this dish lies in its versatility. With a few creative variations and adaptations, you can transform the classic garlic bread rolls into something extraordinary, catering to diverse tastes, dietary needs, and seasonal inspirations.
Seasonal Variations
As the seasons change, so can your garlic bread rolls. In the spring, consider infusing your rolls with fresh herbs like basil and dill. A garlic and herb butter spread can elevate your rolls to new heights, bringing the freshness of the season into every bite. During summer, you might want to incorporate ingredients such as sun-dried tomatoes or roasted red peppers into your garlic butter for a Mediterranean twist that sings of sun-soaked days.
Fall brings a wonderful opportunity to experiment with flavors like pumpkin or sage. A pumpkin puree can be added to the dough, providing a subtle sweetness and beautiful color – perfect for those cozy autumn dinners. In the winter, you can go for a heartier approach by adding grated cheese directly into the dough, such as mozzarella or cheddar, creating irresistibly gooey rolls that are perfect for holiday gatherings.
Dietary Adaptations
As we become more health-conscious, dietary modifications are essential in today’s cooking landscape. For those following a keto diet, creating garlic bread rolls with almond flour instead of traditional wheat flour can maintain the flavor while keeping carb counts low. Simply use a blend of almond flour, cheese, and eggs to create a dough that’s both satisfying and guilt-free.
Vegan adaptations are equally simple. Instead of using butter, substitute with plant-based margarine or olive oil. The key is to ensure that your garlic is fresh and pungent, allowing it to shine through even without traditional dairy. For gluten-free options, there are many flour alternatives available on the market that can easily replace wheat flour without compromising the texture of your garlic bread rolls.
Creative Twists
Don’t shy away from experimenting with spices and flavors! For a spicy kick, mix some red pepper flakes or chopped jalapeños into your garlic butter. This adds an unexpected heat that can elevate your rolls to a whole new level. Additionally, consider incorporating cheese into your rolls – think cheddar, feta, or even a spicy pepper jack. The ooey-gooey melted cheese will create an irresistible pull that everyone will love.
For those who love sweet and savory combinations, try adding a touch of honey or brown sugar to your garlic butter spread. The sweetness beautifully balances the savory garlic and can be a delightful surprise for your taste buds. You can even fashion a sweet version of garlic bread rolls by incorporating cinnamon and sugar into the dough, making an indulgent dessert roll.
Different Cooking Methods
While baking garlic bread rolls in the oven is traditional, exploring different cooking methods can yield delicious results. If you have a slow cooker, consider preparing your rolls there. Simply shape them and place them in the slow cooker with a bit of garlic butter. Cook on low for 2 to 3 hours for soft, fluffy rolls that are perfect for gatherings. The slow cooker method allows the flavors to meld beautifully, creating an incredibly moist roll.
Alternatively, try pan-frying your rolls in a skillet. This method gives them a delightful crust on the outside while keeping them soft inside. Just heat some oil or butter in your skillet, place the rolls cut-side down, and cook until golden brown. Finish them off with a sprinkle of garlic and parsley for an extra flavor boost.
Leftover Transformation Ideas
If you find yourself with leftover garlic bread rolls, don’t let them go to waste! They can be transformed into a variety of delicious dishes. One popular idea is to create garlic bread croutons. Cut the rolls into small cubes, toss them with olive oil, and bake until crispy. These croutons can add a delightful crunch to salads or soups.
Another fantastic use for leftover garlic bread rolls is to make a savory bread pudding. Simply tear the rolls into pieces, mix them with eggs, milk, and your choice of vegetables or cheese, and bake until set. This dish can be a comforting meal on its own or serve as an impressive brunch item.
In conclusion, the creative variations and adaptations of garlic bread rolls are limited only by your imagination. By exploring different seasonal ingredients, accommodating dietary preferences, and experimenting with cooking methods, you can personalize this classic dish to suit any occasion. So whether you’re hosting a dinner party or just enjoying a quiet night in, these garlic bread rolls will always be a delightful addition to your table!
Storage, Reheating, and Meal Prep for garlic bread rolls
Garlic bread rolls are not only a delicious accompaniment to many meals, but they also offer a fantastic opportunity for meal planning and storage. As someone who loves to prepare food in advance, I’ve learned a thing or two about how to store these mouthwatering rolls effectively to ensure they remain fresh and flavorful. In this section, we’ll dive deep into the world of garlic bread rolls storage, covering everything from short-term solutions to long-term freezing methods, as well as reheating strategies that will have you enjoying them just as much as the day they were made.
Short-term Storage
After you’ve baked a batch of garlic bread rolls, you might be tempted to devour them all in one sitting. Trust me, I’ve been there! But if you find yourself with leftovers, proper short-term storage is essential. Ideally, if you plan to consume the rolls within a few days, storing them in the refrigerator is your best option. Use a container that is airtight to keep the rolls from drying out. I usually opt for a glass container with a tight-sealing lid. Alternatively, you can wrap the rolls tightly in plastic wrap or aluminum foil.
When storing garlic bread rolls in the fridge, it’s important to let them cool completely before sealing them in your container. This step helps prevent condensation from forming, which can lead to soggy rolls. If you’re using plastic wrap, try to wrap each roll individually; this way, you can grab just what you need without exposing the others to air and moisture.
As for shelf life, garlic bread rolls stored in the refrigerator should ideally be consumed within three to four days. After this period, you may notice a decline in texture and flavor. If you find that your rolls are beginning to dry out, consider reheating them slightly in the oven with a bit of butter brushed on top to bring back some of that original moisture and flavor.
Freezing and Long-term Storage
If you want to keep your garlic bread rolls for longer, freezing them is a fantastic option. I often make a double batch of rolls on the weekends and freeze half for later use. To freeze garlic bread rolls, first, allow them to cool completely. Then, wrap each roll tightly in plastic wrap, ensuring that there is no air trapped inside. For added protection against freezer burn, place the wrapped rolls in a freezer-safe zip-top bag or an airtight container.
You can freeze garlic bread rolls for up to three months without significant loss of quality. When you’re ready to enjoy them, there’s no need to thaw them in advance. Simply preheat your oven to 350°F (175°C), unwrap the rolls, and place them on a baking sheet. Bake for about 15-20 minutes, or until heated through. If you prefer a crispy exterior, you can brush them with a little extra garlic butter before baking.
One tip I’ve found helpful is to label the containers or bags with the date and contents. This simple step helps me keep track of what I have in my freezer and ensures I use older items first. Additionally, portioning the rolls into smaller quantities can be beneficial, allowing you to defrost only what you need for a meal rather than the entire batch.
Reheating Best Practices
Reheating garlic bread rolls properly is key to maintaining their deliciousness. The microwave is the quickest option, but it often results in a chewy texture. If you must use the microwave, heat the rolls for only 10-15 seconds at a time to avoid overcooking them. Ideally, I recommend reheating garlic bread rolls in the oven. Preheat your oven to 350°F (175°C), place the rolls on a baking sheet, and cover them loosely with aluminum foil to retain moisture. Bake for about 10-15 minutes, or until they are warmed through.
Another method I enjoy for reheating is using a skillet. Heat a non-stick skillet over medium heat, add a little butter, and place the garlic bread rolls cut-side down in the skillet. This method gives them a delightful crispy texture while warming them up. Just keep an eye on them to prevent burning!
When it comes to food safety, always ensure that you store your garlic bread rolls in clean containers and avoid leaving them out at room temperature for more than two hours to prevent bacterial growth. If the rolls have been left out longer than that, it’s best to err on the side of caution and discard them.
In conclusion, garlic bread rolls are a versatile and delicious addition to any meal, and with a little knowledge about storage and reheating, you can enjoy them fresh and flavorful long after they’ve come out of the oven. Whether you’re preparing for a busy week or just want to savor the flavors of these delightful rolls at your convenience, proper storage techniques will ensure that they remain a staple in your kitchen for many meals to come.
Nutritional Benefits and Health Information
Garlic bread rolls are not just a tasty treat; they also carry a variety of nutritional benefits that can contribute to a balanced diet. While they might be known primarily as comfort food, understanding their health aspects can help you appreciate them even more. In this section, we will explore the nutritional profile of garlic bread rolls, delve into their health benefits, and consider dietary implications, ensuring you can enjoy them guilt-free.
Nutritional Profile
First, let’s break down the nutritional components of garlic bread rolls. While the exact values can vary depending on the recipe and ingredients used, a typical garlic bread roll made with basic ingredients such as flour, garlic, butter, and yeast generally contains the following per roll:
- Calories: Approximately 150-200 calories
- Carbohydrates: 25-30 grams
- Protein: 4-6 grams
- Fat: 5-10 grams
- Sodium: 200-400 mg
These rolls are primarily made up of carbohydrates, which provide energy, while the garlic adds flavor and health benefits, and the butter contributes to the overall taste and texture. The protein content may be relatively low, but it can be complemented by pairing the rolls with protein-rich dishes.
Health Benefits
Garlic, the star ingredient in garlic bread rolls, is renowned for its numerous health benefits. It contains allicin, a compound that has been linked to various health properties, including anti-inflammatory and antioxidant effects. Consuming garlic regularly may help lower blood pressure, improve cholesterol levels, and enhance immune function. Personally, I love adding extra garlic to my rolls because not only does it elevate the flavor, but it also makes me feel like I’m doing something good for my health!
Additionally, the carbohydrates in garlic bread rolls can be a quick source of energy, making them a great pre- or post-workout snack. However, it’s important to balance them with other nutrient-dense foods, such as vegetables and lean proteins, to create a wholesome meal.
Dietary Considerations
When it comes to dietary considerations, garlic bread rolls can be easily modified to accommodate various dietary needs. For those following a gluten-free diet, simply substitute traditional wheat flour with a gluten-free blend. For a vegan option, you can replace butter with olive oil or a plant-based butter alternative, and use dairy-free cheese if you want to take the flavor up a notch.
In terms of allergens, garlic bread rolls can contain gluten, dairy, and sometimes even egg, depending on the recipe. Always check ingredient labels if you’re purchasing pre-made rolls or be sure to inform guests of any allergens if you’re serving homemade rolls.
In terms of calorie content, while garlic bread rolls are not the lowest-calorie option, they can fit into various diet plans when consumed in moderation. The key is to enjoy them as part of a balanced meal, ideally paired with a salad, grilled vegetables, or a protein source.
If you’re looking to make healthier modifications, consider reducing the amount of butter used or incorporating whole grain flour for added fiber. You can also experiment with adding herbs or spices to enhance the flavor without adding extra calories.
When comparing garlic bread rolls to similar dishes, such as traditional breadsticks or other types of bread, they may have a higher fat content due to the butter. However, the unique flavor profile of garlic bread rolls can make them a more appealing option for many, particularly when served alongside pasta or salad.
In conclusion, garlic bread rolls are a delightful addition to any meal, and with their nutritional benefits and versatility, they can be enjoyed in a variety of ways. Whether you’re making them as a side dish or a snack, understanding their nutritional aspects will help you appreciate these rolls even more. So next time you indulge in a warm, buttery garlic bread roll, remember that you’re not just treating your taste buds; you’re also nourishing your body!
Frequently Asked Questions About Garlic Bread Rolls
Vegan garlic bread rolls
To make vegan garlic bread rolls, substitute traditional butter with a plant-based alternative such as coconut oil or vegan margarine. Use minced garlic and a blend of fresh herbs like parsley to create a flavorful spread. Additionally, consider adding nutritional yeast for a cheesy flavor without dairy. Ensure that any bread you choose is vegan-friendly; many artisan breads are made without dairy or eggs, but it’s always good to check the ingredients list. Bake the rolls until golden, and for an extra touch, brush them with olive oil before serving.
Garlic bread rolls recipe
A classic garlic bread rolls recipe typically includes ingredients like bread rolls, butter, garlic, parsley, and seasonings. Start by preheating your oven to 375°F (190°C) and mixing softened butter with minced garlic, chopped parsley, and a pinch of salt. Spread this mixture generously inside each roll or on top if using whole rolls, and wrap them in foil for a soft texture. Bake for about 15-20 minutes until heated through and the tops are slightly crispy. For added flavor, experiment with different herbs such as basil or oregano.
Garlic rolls with store-bought rolls
Using store-bought rolls for garlic rolls is a quick and easy solution for a delicious side dish. Choose rolls that have a good texture, like soft dinner rolls or baguette-style bread. Simply melt butter and mix it with minced garlic and your preferred herbs, then brush the mixture over the tops of the rolls. Place them on a baking sheet and bake at 350°F (175°C) for about 10-15 minutes until they’re warm and fragrant. This method saves time while still delivering a homemade taste.
Cheesy garlic bread rolls
To create cheesy garlic bread rolls, start with a basic garlic butter mixture, adding shredded cheese like mozzarella or cheddar for that gooey texture. After preparing your rolls, create a pocket in each one and fill it with cheese before slathering on the garlic butter. Bake them in a preheated oven at 375°F (190°C) for about 15-20 minutes, or until the cheese is melted and bubbly. For an extra flavor boost, sprinkle some Italian seasoning or crushed red pepper flakes on top before serving.
Garlic bread rolls with yeast
Making garlic bread rolls with yeast provides a light and fluffy texture that is hard to resist. Start by preparing a simple dough using flour, yeast, warm water, sugar, and salt, allowing it to rise for about an hour. Once the dough has doubled in size, punch it down and shape it into rolls. Brush the rolls with a mixture of melted butter, minced garlic, and herbs before baking them in a preheated oven at 375°F (190°C) for 20-25 minutes. This method results in soft, fluffy rolls infused with garlic flavor.
Mini garlic bread rolls
Mini garlic bread rolls are perfect for appetizers or side dishes and are easy to make. Use small dinner rolls or create your own by dividing a standard dough into smaller portions. Prepare a garlic butter mixture by combining softened butter with minced garlic and herbs, then brush it generously over each mini roll. Bake at 375°F (190°C) for about 10-15 minutes until they are golden and aromatic. For an attractive presentation, consider serving them in a basket lined with a cloth.
Italian garlic rolls
Italian garlic rolls are a delightful twist on traditional garlic bread, often featuring herbs and Italian seasonings. Start with a basic dough recipe enriched with olive oil and Italian herbs such as oregano and basil. After the dough has risen, shape it into rolls and brush them with a mixture of garlic, parsley, and more herbs before baking. Bake in a preheated oven at 375°F (190°C) for 20-25 minutes, allowing the flavors to meld beautifully. Serve warm with marinara sauce for dipping to enhance the Italian experience.
Garlic bread cinnamon rolls
Garlic bread cinnamon rolls are an unexpected fusion that can tantalize your taste buds. Start by preparing a standard cinnamon roll dough, then roll it out and spread a mixture of softened butter, minced garlic, and a hint of sugar for sweetness. Roll it up and slice it into individual rolls, placing them in a baking dish. Bake at 375°F (190°C) for about 20-25 minutes until golden brown. The result is a unique blend of savory and sweet that can be served as a fun appetizer or a side dish with dinner.


