Garlic butter bread is a culinary delight that tantalizes the taste buds and warms the heart. I vividly remember the first time I stumbled upon a recipe for garlic butter bread. It was a chilly autumn evening, and I found myself rifling through an old recipe box that belonged to my grandmother. As I flipped through the yellowed index cards, one particular recipe caught my eye—a simple yet enticing note scribbled in her elegant handwriting: “Garlic Butter Bread.” My curiosity piqued, I decided to give it a try.
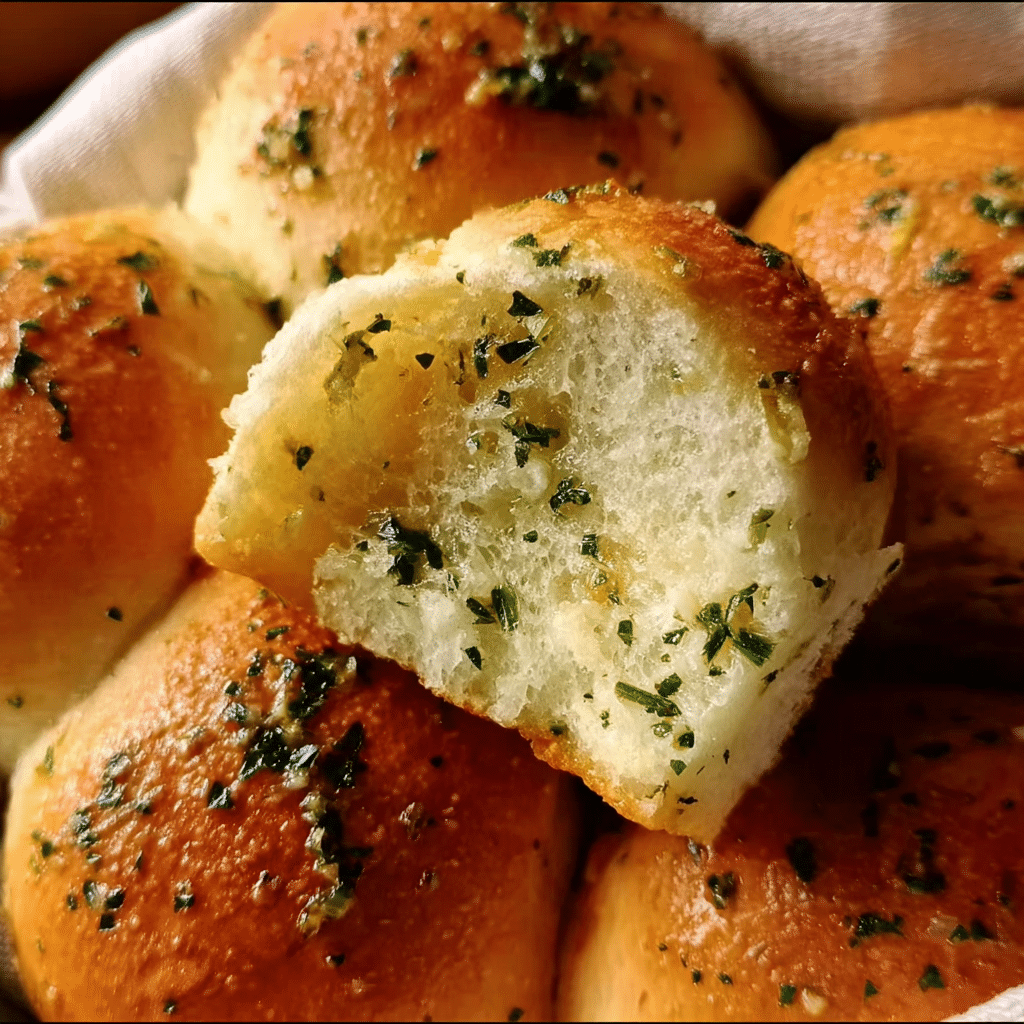
As I melted the butter and mixed in the garlic, a fragrant aroma filled my kitchen, instantly transporting me back to my grandmother’s home, where she would often whip up this comforting dish for family gatherings. The warmth of the garlic butter bread was more than just a flavor; it represented love, tradition, and togetherness. Each bite was a reminder of those cherished moments spent around the dinner table, sharing stories and laughter. This recipe is more than just a way to put bread on the table; it’s an experience, a connection to my roots.
The Story Behind This Recipe
Garlic butter bread has its origins deeply rooted in various cultures, particularly Mediterranean and European cuisines. Bread has been a staple in these regions for centuries, often served alongside meals as a way to soak up sauces and enhance flavors. The combination of garlic and butter has a fascinating history; garlic, known for its robust flavor and numerous health benefits, has been used since ancient times, while butter adds richness and creaminess to dishes. Together, they create a perfect harmony that elevates the humble bread into a culinary masterpiece.
This recipe stands out because it is incredibly versatile and easy to prepare. Unlike other garlic bread recipes that may require elaborate preparations or exotic ingredients, garlic butter bread can be made with just a few pantry staples: bread, butter, garlic, and herbs. It’s a dish that busy families can whip up in no time, making it an excellent choice for weeknight dinners or quick gatherings. Whether you’re serving it alongside a hearty soup, a fresh salad, or as an appetizer, garlic butter bread fits seamlessly into any meal.
Additionally, this dish shines during various seasons. In the spring, it pairs wonderfully with light salads and grilled vegetables; in the summer, it complements barbecues and outdoor dining; during the fall and winter months, it serves as a comforting side to hearty stews and roasts. The adaptability of garlic butter bread makes it a year-round favorite in our household.
For me, garlic butter bread evokes feelings of nostalgia and joy. It’s a simple dish that carries profound emotional significance. Every time I prepare it, I’m reminded of my grandmother’s warm kitchen and the love that went into feeding her family. This sense of connection is what I hope to share with you through this recipe. By making garlic butter bread, you too can create lasting memories with your loved ones around the dinner table.
In this guide, you will learn everything you need to know about making the perfect garlic butter bread, from selecting the right bread to mastering the garlic butter blend. I’ll share tips and tricks that I’ve picked up over the years, ensuring that your garlic butter bread comes out beautifully every time. Let’s embark on this delicious journey together!
The Rich History and Cultural Significance of garlic butter bread
The rich history and cultural significance of garlic butter bread are as layered as its flavors. This beloved dish has evolved over centuries, drawing from various culinary traditions and regional variations. Its roots can be traced back to ancient civilizations, where bread served as a fundamental part of the diet. Garlic, with its strong flavor and medicinal properties, has been utilized in cooking and healing since ancient Egyptian times. The fusion of these two ingredients—bread and garlic—has created a timeless dish that resonates across cultures.
Origins and History
Garlic butter bread likely has its origins in the Mediterranean region, where both bread and garlic are staples. Countries such as Italy, France, and Spain have their own interpretations of garlic bread, each showcasing local bread types and flavor profiles. In Italy, for example, bruschetta is a popular dish made with toasted bread, garlic, and olive oil, often topped with tomatoes or other ingredients. Similarly, in France, the classic “pain à l’ail” features a baguette slathered in garlic butter and often garnished with parsley.
As garlic butter bread made its way to other parts of the world, regional variations began to emerge. In the United States, for instance, the dish gained popularity in the 1980s and 1990s, often served as a side at Italian restaurants. The American version typically involves spreading a generous layer of garlic butter on sliced French or Italian bread, which is then baked until golden and crisp. This version has become synonymous with comfort food, often accompanying pasta dishes and family dinners.
Cultural Significance
Garlic butter bread is more than just a side dish; it carries cultural significance in many communities. In Italian households, for example, garlic bread is often served during family gatherings and holiday celebrations, symbolizing hospitality and abundance. It’s a way to bring people together, sharing stories and laughter over a warm meal. Similarly, in French culture, the act of breaking bread is a sacred tradition, representing unity and love among family and friends.
Throughout its history, garlic butter bread has also been associated with various occasions. From festive gatherings to casual weeknight dinners, this dish adapts beautifully to the context in which it is served. It’s a staple at picnics, barbecues, and potlucks, where its simplicity and flavor appeal to a wide range of palates. The emotional connection people have with garlic butter bread often transcends generations, as families pass down recipes and traditions, ensuring that the love for this dish continues.
Nutritional Benefits
In addition to its cultural significance, garlic butter bread also offers nutritional benefits. Garlic is known for its numerous health properties, including its ability to boost the immune system, lower blood pressure, and improve heart health. It contains antioxidants and anti-inflammatory compounds that can contribute to overall well-being. While butter is often viewed with caution due to its saturated fat content, it also provides essential vitamins and can be enjoyed in moderation as part of a balanced diet.
When prepared with whole-grain bread, garlic butter bread can become an even healthier option. Whole grains offer additional fiber, vitamins, and minerals, making this dish not just a flavorful treat but also a nourishing addition to your meal. By choosing high-quality ingredients, such as fresh garlic and organic butter, you can create a dish that not only satisfies your taste buds but also supports your health.
In conclusion, garlic butter bread is a dish that embodies history, culture, and love. Its journey through time and across cultures has transformed it into a beloved comfort food that brings families together. Whether you’re preparing it for a special occasion or a simple weeknight dinner, garlic butter bread is sure to create lasting memories and evoke feelings of warmth and connection.
Essential Ingredients for Perfect garlic butter bread
When it comes to baking, having the right ingredients is the cornerstone of success. In the realm of garlic butter bread, each ingredient plays a pivotal role in creating those heavenly, pillowy rolls that everyone craves. Let’s delve into the essential components that make this recipe not just good, but absolutely unforgettable.
Essential Ingredients
- 4 1/2 tablespoons unsalted butter: This is the fat that forms the base of our rolls, contributing to their richness and flavor. Unsalted butter is preferred as it allows you to control the salt content in your bread. Look for butter that’s creamier, with a fresh smell and a pale-yellow color.
- 2 tablespoons minced garlic: Garlic is the star of the show in garlic butter bread. Freshly minced garlic brings a pungent, aromatic quality that elevates the flavor. Choose firm, dry bulbs that feel heavy for their size with no green shoots or soft spots.
- 3 1/2 cups + 1 tablespoon all-purpose flour: Flour is the backbone of any bread recipe. For this recipe, all-purpose flour strikes the perfect balance of protein and starch, yielding a soft yet structured roll. When measuring, fluff the flour first, then spoon it into your measuring cup for accuracy.
- 3 tablespoons chopped fresh parsley: This adds a fresh, herbal note that complements the garlic beautifully. Look for bright green parsley with no yellowing leaves. Fresh herbs are best used immediately; however, if you need to store them, keep them in a damp paper towel in the fridge.
- 1 tablespoon granulated sugar: Sugar is not just for sweetness; it also helps activate the yeast, contributing to the rise of the dough. Opt for pure granulated sugar, avoiding any that have additives.
- 2 1/4 teaspoons instant yeast: Yeast is the leavening agent that makes our rolls fluffy. Instant yeast is preferred as it can be mixed directly with dry ingredients. When buying yeast, check the expiration date; fresh yeast will yield better results.
- 1 teaspoon fine sea salt: Salt enhances flavor and strengthens the dough structure. Fine sea salt dissolves easily and distributes uniformly in the dough. Always taste before adding more, as saltiness can vary.
- 1 cup whole or 2% milk, warmed to 110°F: Milk adds moisture and richness to the dough. Warm milk is essential as it activates the yeast. Use a kitchen thermometer to ensure accuracy; too hot can kill the yeast, while too cold will not activate it.
- 1 large egg, room temperature: The egg adds richness and helps bind the ingredients together. For best results, let your egg sit in warm water for a few minutes if it’s straight from the fridge.
- 1 beaten egg, for brushing the tops: This gives the rolls a beautiful golden finish. Use a fork to beat the egg until homogeneous.
For the garlic butter, we have:
- 2 tablespoons unsalted butter: This will be melted and mixed with garlic to create a flavorful topping.
- 1 tablespoon minced garlic: Fresh garlic here makes the bread truly shine.
- 1 tablespoon chopped fresh parsley: This adds color and freshness to the garlic butter.
- Flaky sea salt, for finishing: A sprinkle of flaky salt right before serving enhances the flavors and adds a delightful crunch.
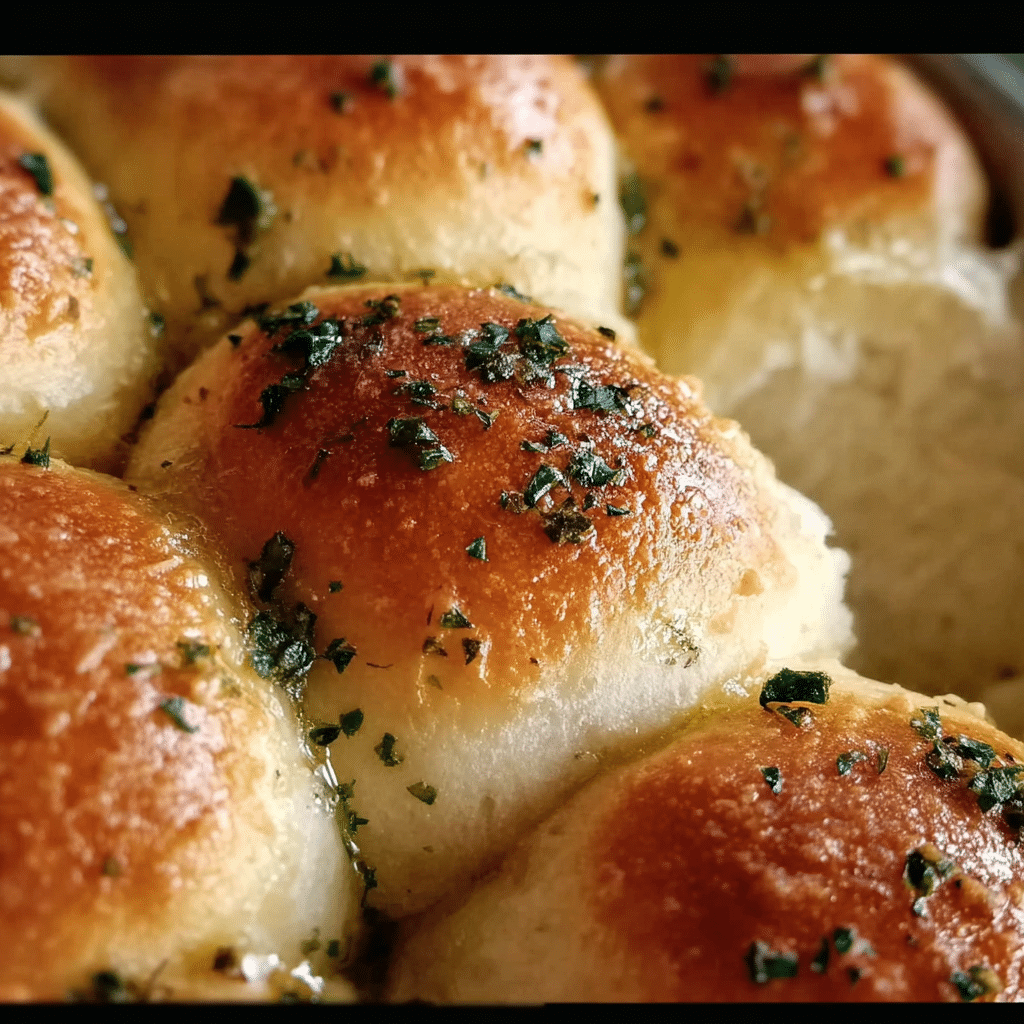
Garlic Butter Bread Rolls
- Total Time: 1h 15mins
Ingredients
- 4 1/2 tablespoons unsalted butter
- 2 tablespoons minced garlic
- 3 1/2 cups + 1 tablespoon all-purpose flour
- 3 tablespoons chopped fresh parsley
- 1 tablespoon granulated sugar
- 2 1/4 teaspoons instant yeast
- 1 teaspoon fine sea salt
- 1 cup whole or 2% milk, warmed to 110°F
- 1 large egg, room temperature
- 1 beaten egg, for brushing the tops
For the Garlic Butter
- 2 tablespoons unsalted butter
- 1 tablespoon minced garlic
- 1 tablespoon chopped fresh parsley
- flaky sea salt, for finishing
Instructions
-
- Lightly butter the bottom and sides of a 9×13 pan and set it aside.
-
-
In a small pot, melt the butter and add the minced garlic. Cook for 1-2 minutes or until the garlic is fragrant. Take off the heat and cool while you measure the other ingredients.4 1/2 tablespoons (60 g) unsalted butter,2 tablespoons minced garlic
-
In a stand mixing bowl, combine the flour, parsley, sugar, yeast, and salt. Then add the warmed milk, egg, and garlic butter from above. Knead on low speed with the dough hook until the dough looks smooth and feels soft and tacky, about 10-12 minutes. *If the dough is too sticky, add one tablespoon of flour at a time until you have a workable dough.3 1/2 cups + 1 tablespoon (434 g) all-purpose flour,3 tablespoons chopped fresh parsley,1 tablespoon (15 g) granulated sugar,2 1/4 teaspoons instant yeast,1 teaspoon fine sea salt,1 cup (225 g) whole or 2% milk,1 (55 g) large egg
- Cut the kneaded dough into 12 equal portions (use a scale for accuracy- 67 grams each). Shape each piece of dough into a smooth ball with your hand. Pinch the bottom of the roll where the seam comes together to keep it tight. Then place the shaped dough balls into the prepared baking pan. Cover the top with plastic wrap or a clean kitchen towel and set them in a warm place to rise until doubled in size, about 1-2 hours.
-
- Preheat the oven to 350 F/180 C.
-
Brush the tops of the rolls with the beaten egg wash. Then bake the dinner rolls for 20-30 minutes, or until the tops are golden brown.1 beaten egg, for brushing the tops
-
While the rolls are baking, make the garlic butter. Melt the butter in a pot and add the minced garlic. Cook for 1-2 minutes until the garlic is fragrant. Then remove it from the heat and stir in the parsley. When the rolls come out of the oven, immediately brush them with the garlic butter. Sprinkle with flaky sea salt if desired, and serve warm!2 tablespoons (28 g) unsalted butter,1 tablespoon minced garlic,1 tablespoon chopped fresh parsley,flaky sea salt
- Prep Time: 1 hr 30minutes
- Cook Time: 20minutes
Shopping Tips
When shopping for these ingredients, consider visiting local farmers’ markets for fresh herbs and quality dairy products. Local dairies often offer higher quality milk and butter than mass-produced options. For garlic, look for bulbs that feel heavy and firm; avoid any that are sprouting or have soft spots. Flour can usually be bought in bulk, which can save you money in the long run. And don’t forget to check the expiration dates on your yeast!
Substitutions and Alternatives
If you have dietary restrictions, there are several substitutions you can make without sacrificing flavor. For a dairy-free version, you can replace the butter with a plant-based alternative and use almond or oat milk instead. For gluten-free options, a 1:1 gluten-free baking flour can be used, although the texture will differ slightly. If you’re avoiding eggs, a flax egg (1 tablespoon ground flaxseed mixed with 2.5 tablespoons water) can work in its place, although the texture may be more dense.
In terms of cost-saving tips, purchasing ingredients in bulk can be a great way to save money, especially for flour and sugar. Always check for store-brand options, which are often more affordable than name brands but still high in quality.
Lastly, when it comes to organic versus conventional ingredients, it’s often a matter of personal preference and budget. Organic butter and dairy products can be richer and creamier, while conventional options are still delicious and can be more cost-effective.
Detailed Step-by-Step garlic butter bread Cooking Instructions
Now that we have all our ingredients prepped and ready, it’s time to dive into the exciting process of making garlic butter bread rolls. This recipe is not just about following steps; it’s about enjoying the journey of baking, filled with delicious aromas and the satisfaction of creating something wonderful from scratch. Let’s break it down into manageable steps.
Preparation Steps
- Gather Your Ingredients: Start by assembling all the ingredients listed. This is known as mise en place, a French culinary term that means “everything in its place.” It helps streamline the cooking process. Make sure to measure the flour accurately by fluffing it up and spooning it into your measuring cup, leveling it off with a knife.
- Warm the Milk: Gently warm your milk to 110°F. You can do this on the stovetop or in the microwave. If using the microwave, heat it in ten-second intervals to avoid overheating. This temperature is important for activating the yeast without killing it.
- Activate the Yeast: In a large mixing bowl, combine the warm milk with the granulated sugar and instant yeast. Stir gently and let it sit for about 5-10 minutes. You’ll know it’s ready when it becomes frothy and bubbly, indicating that the yeast is alive and kicking!
- Mixing the Ingredients: Once the yeast has activated, add the melted unsalted butter, egg, and salt to the mixture. Use a whisk to combine well. Gradually add the flour, starting with 3 1/2 cups, mixing until a sticky dough begins to form.
Cooking Process
- Kneading the Dough: Flour your work surface lightly and turn the dough out onto it. Knead the dough for about 8-10 minutes until it becomes smooth and elastic. If the dough is too sticky, sprinkle a little more flour as needed. Kneading is crucial as it develops the gluten, giving the bread its structure.
- First Rise: Form the dough into a ball and place it in a lightly greased bowl, covering it with a damp cloth. Let it rise in a warm, draft-free area for about 1 hour, or until it has doubled in size. This can also be done in a slightly warm oven.
- Prepare Your Garlic Butter: While the dough is rising, prepare the garlic butter by melting the unsalted butter and mixing it with minced garlic and chopped parsley. Set aside to cool slightly.
- Shaping the Rolls: Once the dough has risen, punch it down gently to release the air. Turn it out onto a floured surface and divide it into 12 equal pieces. Shape each piece into a ball and place them in a greased baking dish or on a parchment-lined baking sheet.
- Second Rise: Cover the shaped rolls with a clean kitchen towel and let them rise again for about 30 minutes. This second rise is essential for achieving that light and fluffy texture.
- Preheat the Oven: Preheat your oven to 375°F (190°C). This ensures a hot environment for baking, helping the rolls to rise further in the oven.
Final Assembly
- Brushing with Egg Wash: Before baking, brush the tops of the rolls with the beaten egg. This will give them a lovely golden color when baked.
- Baking the Rolls: Place the rolls in the preheated oven and bake for 20-25 minutes, or until they are golden brown and sound hollow when tapped. Keep an eye on them to avoid over-baking.
- Applying the Garlic Butter: As soon as they come out of the oven, brush the tops generously with your prepared garlic butter. The heat from the rolls will help infuse the garlic flavor throughout.
- Finishing Touches: Sprinkle with flaky sea salt before serving for that perfect finishing touch. These rolls are best enjoyed warm, straight from the oven, but they can also be stored in an airtight container for a couple of days.
Remember, baking is as much about the experience as it is about the finished product. Take your time, enjoy the process, and soon you’ll be rewarded with the most delightful garlic butter bread rolls that will make your kitchen smell heavenly and your taste buds dance with joy!
Professional Tips and Techniques for garlic butter bread
When it comes to making the perfect garlic butter bread, a few professional tips and techniques can elevate your baking game from ordinary to extraordinary. Whether you are a novice baker or an experienced culinary enthusiast, these insights will ensure that your garlic butter bread is a showstopper at any gathering.

Professional Techniques
To start, let’s talk about the dough. The key to achieving light and fluffy garlic butter bread lies in the dough preparation. Always ensure your yeast is fresh. If you’re using dry yeast, activate it by mixing it with warm water (around 110°F) and a pinch of sugar. Let it sit for about 5-10 minutes until it becomes frothy. This step is critical because it ensures that your yeast is alive and will give your bread that perfect rise.
Another tip is to knead your dough properly. Kneading develops gluten, which gives the bread its structure and chewiness. You should knead the dough for about 8-10 minutes until it becomes smooth and elastic. If you’re short on time, consider using a stand mixer equipped with a dough hook; this can save your arms and provide excellent results.
Don’t underestimate the power of resting your dough. After kneading, let it rise in a warm place until it doubles in size. This can take about an hour, but it’s absolutely essential. The longer the dough ferments, the more flavor it develops. If you have the luxury of time, consider a cold fermentation by placing the dough in the fridge overnight. This will enhance the flavor profile significantly.
Troubleshooting Guide
Even the best bakers encounter issues from time to time. One common problem is bread that is too dense. This could be due to insufficient kneading or not allowing the dough enough time to rise. If you find that your dough isn’t rising, check the temperature. If your kitchen is too cold, the yeast may be sluggish. Try placing the dough in a warm environment, like an oven with just the light on.
Another issue is the garlic butter not infusing properly into the bread. To solve this, ensure that the butter is softened but not melted. You want it to mix well with the minced garlic and herbs. Additionally, consider brushing the garlic butter onto the bread just after it comes out of the oven for an intense flavor boost.
Presentation Tips
Presentation can be just as important as taste! When it comes to serving your garlic butter bread, consider cutting the rolls into a pull-apart style. This not only looks inviting but also makes it easy for guests to help themselves. To create an eye-catching platter, serve the rolls on a rustic wooden board or a decorative dish, garnished with fresh herbs such as parsley or chives. A sprinkle of sea salt on top can add a delightful finishing touch.
For drinks, nothing pairs quite like a full-bodied red wine or a crisp white wine with your garlic butter bread. A nice Chianti complements the garlic beautifully, while a Sauvignon Blanc can enhance the buttery flavor. If you’re opting for non-alcoholic beverages, consider serving a refreshing sparkling water with a slice of lemon or a herbed lemonade to balance the richness of the garlic butter.
As a final tip, if you’re preparing garlic butter bread for a gathering, consider making a double batch. These rolls can freeze well, and you can reheat them in the oven for a few minutes when you need them. This way, you have a quick and delicious side ready to go at any time!
Creative Variations and Adaptations of garlic butter bread
Garlic butter bread is a universally loved dish, but why stop at the classic version? Let’s explore some creative variations and adaptations that can cater to different tastes, seasons, and dietary preferences. You’ll find that the beauty of garlic butter bread lies in its versatility, allowing you to experiment and personalize it to your liking.
Seasonal Variations
Seasonal ingredients can add a delightful twist to your garlic butter bread. In the spring, consider incorporating fresh herbs like basil, thyme, or chives into your garlic butter mixture. This not only enhances the flavor but also adds a pop of color. In summer, you can fold in sun-dried tomatoes or even some grated zucchini for a refreshing variation.
As the leaves turn in autumn, think about adding a sprinkle of grated cheese, such as Parmesan or Gruyère, to your dough for a rich, nutty flavor. Finally, in winter, you can infuse the butter with roasted garlic instead of raw garlic for a sweeter, mellower taste. Roasting garlic brings out its natural sugars and creates a buttery, caramelized flavor that pairs beautifully with warm bread.
Dietary Adaptations
Garlic butter bread can easily be adapted for various dietary needs. For those following a keto diet, consider using almond flour or coconut flour instead of all-purpose flour to create a low-carb version. Additionally, you can substitute the butter with a plant-based alternative to make it vegan-friendly. Nutritional yeast can add a cheesy flavor without the dairy, making it a fantastic option.
If gluten is a concern, gluten-free flours such as a blend of rice flour, tapioca flour, and xanthan gum can work wonders in creating a soft and fluffy texture. Moreover, there are excellent gluten-free bread mixes available that can simplify the process. Just make sure to adjust the liquid ratios as gluten-free flours often absorb more moisture.
Creative Twists
Now, let’s dive into some creative twists on the traditional garlic butter bread. One fun idea is to turn it into garlic butter breadsticks. Roll the dough into long strips before baking, then brush them with garlic butter and sprinkle them with Italian seasoning for an extra flavor kick. Another exciting option is to create a garlic butter pull-apart bread. Layer the dough pieces in a bundt pan, drizzling each layer with garlic butter and herbs before baking. This creates a stunning presentation and makes for easy serving.
If you’re feeling adventurous, try a fusion approach. A garlic butter naan can be a delightful twist, marrying the flavors of Indian cuisine with the classic garlic bread. Simply prepare your naan dough, and incorporate garlic and butter while cooking on a hot skillet or tandoor. The result is a soft, pillowy bread that pairs perfectly with curries.
Finally, let’s not forget about leftovers! If you have any garlic butter bread left over, consider transforming it into garlic croutons. Simply cube the bread, toss it with olive oil and seasoning, and bake until crispy. These can add an amazing crunch to salads or soups.
In conclusion, the possibilities for garlic butter bread are virtually limitless. With seasonal variations, dietary adaptations, and creative twists, you can ensure that this beloved bread remains a staple in your kitchen, capable of catering to every occasion and palate!
Storage, Reheating, and Meal Prep for garlic butter bread
When it comes to garlic butter bread, the way you store it can significantly impact its taste and texture. I have often found myself with leftover rolls after a family gathering or a dinner party, and knowing how to properly store them has been a game-changer. In this section, we will explore the best practices for storing garlic butter bread, as well as how to reheat it to maintain its deliciousness, and some meal prep strategies that can save you time in the kitchen.
Short-term Storage
If you find yourself with leftover garlic butter bread, the first thing to consider is short-term storage. Ideally, you want to keep the rolls fresh for a couple of days without losing their delightful flavor and texture. The best way to do this is by using an airtight container. I personally love using glass containers with tight-fitting lids. Not only do they keep the rolls fresh, but they also look great on my counter.
Place the garlic butter bread rolls in the container and line them with a paper towel. This helps to absorb any excess moisture and prevents the rolls from becoming soggy. Seal the container tightly and store it in the refrigerator. They should stay fresh for about 3 to 4 days. However, I recommend consuming them sooner rather than later for the best flavor.
If you’re planning to serve the garlic butter bread again soon, you can also wrap the rolls in aluminum foil or plastic wrap before placing them in the fridge. Just remember, it’s essential to ensure that they are tightly wrapped to avoid them drying out or absorbing any odors from the fridge.
Freezing and Long-term Storage
For longer storage, freezing is your best bet. Freezing garlic butter bread is straightforward and allows you to enjoy these delightful rolls weeks later, just as fresh. First, let the rolls cool completely after baking—this helps to prevent freezer burn. Once cooled, you can wrap each roll individually in plastic wrap. This extra layer of protection helps preserve their moisture and flavor.
Once wrapped, place the rolls in a resealable freezer bag or a freezer-safe container. Make sure to label the bag with the date so you can keep track of how long they’ve been in the freezer. Garlic butter bread can be stored in the freezer for up to 3 months, but I typically try to use them within one month for the best quality.
When you’re ready to enjoy your frozen garlic butter bread, simply remove the desired number of rolls from the freezer and let them thaw in the refrigerator overnight. Alternatively, you can reheat them directly from frozen, which we’ll cover in the next section.
Reheating Best Practices
Reheating garlic butter bread properly is crucial to retaining its original flavor and texture. There are several methods you can use, depending on what you have on hand and how much time you have available.
The first method is the oven. Preheat your oven to 350°F (175°C). Wrap the garlic butter bread in aluminum foil to keep it from drying out. Place the wrapped rolls directly on the oven rack or on a baking sheet. Heat for about 10-15 minutes, or until warmed through. This method ensures that the rolls are evenly heated and maintain their soft, fluffy texture.
If you’re in a hurry, a microwave is a great option, although it can sometimes make the bread a bit chewy. To avoid this, place a damp paper towel over the rolls before microwaving them on a microwave-safe plate. Heat them in 10-15 second intervals until warmed through.
Another method that I love is using a skillet. Simply place the rolls in a heated skillet over low heat, cover them with a lid, and let them warm up for about 5-7 minutes. This method gives the rolls a nice, slightly crispy exterior while keeping the inside soft.
Lastly, if you’re meal prepping, consider making a larger batch of garlic butter bread. You can freeze them as described above and then simply reheat them when you’re ready to serve. This not only saves time but also ensures you always have a delicious side dish on hand for any meal.
In terms of food safety, always remember to practice good hygiene. When storing or reheating food, keep in mind the general rule of keeping food at room temperature for no longer than two hours to prevent bacterial growth. Additionally, always store your garlic butter bread as soon as it has cooled to ensure it remains fresh and safe to eat.
In conclusion, knowing how to store and reheat garlic butter bread can significantly enhance your enjoyment of this delicious treat. With the right techniques, you can savor the delightful combination of garlic and butter any day of the week, whether it’s fresh out of the oven or reheated from the freezer.
Nutritional Benefits and Health Information
Garlic butter bread is not just a delightful addition to your meals; it also brings with it various nutritional benefits that often go unnoticed. Understanding the nutritional profile of garlic butter bread can help you appreciate this delicious dish even more. In this section, we’ll delve into the nutritional breakdown, health benefits, and dietary considerations surrounding garlic butter bread, while also exploring ways to make it a healthier choice.
Nutritional Profile
The primary ingredients in garlic butter bread typically include flour, butter, garlic, and yeast. Each of these components contributes to the overall nutritional profile. A typical serving of garlic butter bread (approximately one roll) can contain around 150-200 calories, depending on the size and the amount of garlic butter used.
The macronutrient distribution generally comprises carbohydrates, fats, and a small amount of protein. You can expect around 20-25 grams of carbohydrates, 7-10 grams of fat, and about 2-4 grams of protein per serving. While these rolls are primarily carbohydrate-based, the inclusion of butter provides healthy fats, which can enhance the flavor while also contributing to a satiating effect.
In terms of vitamins and minerals, garlic is a powerhouse of nutrients. It contains significant amounts of manganese, vitamin B6, vitamin C, and selenium. Garlic is also known for its antioxidant properties, which can help combat oxidative stress and inflammation in the body.
Health Benefits
One of the most notable health benefits of garlic butter bread lies in its key ingredient: garlic. Garlic has been linked to numerous health benefits, including improved cardiovascular health. Studies suggest that garlic can help lower blood pressure and cholesterol levels, ultimately reducing the risk of heart disease. Additionally, garlic’s anti-inflammatory properties may offer protective effects against certain types of cancer.
Moreover, the butter used in garlic butter bread, when consumed in moderation, can provide essential fatty acids that are beneficial for brain health and hormone production. It’s essential to remember, however, that moderation is key, especially in a world where dietary fats are often misunderstood. When making garlic butter bread, consider using high-quality butter for maximum health benefits.
Dietary Considerations
When it comes to dietary considerations, garlic butter bread can be enjoyed by many, but it’s important to be aware of allergens and dietary restrictions. For individuals with gluten intolerance or celiac disease, traditional garlic butter bread made with all-purpose flour is not suitable. However, gluten-free flour alternatives, such as almond flour or gluten-free all-purpose flour, can be used to create a version that is safe and delicious.
Additionally, those following a low-carb or ketogenic diet may want to limit their intake of garlic butter bread due to its carbohydrate content. However, there are many creative ways to enjoy the flavors of garlic and butter without the bread. Zucchini boats or cauliflower bread are excellent substitutes that can still provide that garlicky goodness without the added carbs.
For those who are watching their calorie intake, it’s also possible to modify the recipe to make it lighter. You can reduce the amount of butter or use a healthier fat alternative, such as olive oil. Incorporating herbs and spices can enhance the flavor without adding extra calories, making it a win-win situation.
In comparison to similar dishes, garlic butter bread holds its own. For example, garlic knots typically have a similar flavor profile but can pack in more calories and carbohydrates due to the way they are prepared. Garlic bread made from a French baguette may also have a higher calorie count than a homemade version where you control the ingredients.
In conclusion, garlic butter bread is not only a delectable addition to any meal but also offers a variety of health benefits when consumed mindfully. By understanding its nutritional profile and exploring ways to make it fit into various dietary needs, you can enjoy this beloved dish without guilt. Whether you stick to the classic recipe or branch out into healthier alternatives, garlic butter bread remains a cherished staple in many households.
Frequently Asked Questions About Garlic Butter Bread
Garlic butter bread rolls recipe
To make garlic butter bread rolls, start by preparing your dough using all-purpose flour, yeast, warm water, and a pinch of sugar. Once the dough rises, roll it into small balls and place them in a greased baking dish. For the garlic butter, melt unsalted butter and mix in minced garlic, parsley, and a bit of salt. Brush this mixture generously over the rolls before baking them at 375°F (190°C) for about 20-25 minutes, or until golden brown. For an extra touch, sprinkle some grated Parmesan cheese on top before baking for added flavor!
Garlic rolls with store bought rolls
Using store-bought rolls for garlic rolls is a time-saving option that still delivers delicious results. Start by melting butter and mixing in minced garlic, parsley, and a pinch of salt. Brush this garlic butter mixture over the rolls, then place them on a baking sheet. Bake at 350°F (175°C) for about 10-15 minutes, or until they’re warmed through and slightly crispy. For a fun twist, you can also add shredded cheese on top before baking for cheesy garlic rolls!
Garlic butter bread rolls with yeast
To create garlic butter bread rolls with yeast, you’ll need to activate the yeast by mixing it with warm water and a little sugar until it becomes frothy. Combine this mixture with all-purpose flour, salt, and melted butter to form a dough. After kneading, let it rise until it doubles in size, which typically takes about 1 hour. Once risen, shape the dough into rolls, place them in a greased pan, and let them rise again for about 30 minutes. Brush with a mixture of melted garlic butter before baking at 375°F (190°C) for 20-25 minutes, achieving a fluffy and flavorful result.
Quick garlic rolls recipe
If you’re short on time, a quick garlic rolls recipe can be made using pre-made biscuit dough. Simply cut the biscuit dough into smaller pieces, roll them into balls, and dip them in a mixture of melted butter, minced garlic, and Italian herbs. Place the balls in a greased baking dish and bake according to the biscuit package instructions, usually around 10-12 minutes at 375°F (190°C). For an extra burst of flavor, consider adding shredded cheese to the butter mixture before dipping the dough balls!
Cheesy garlic rolls recipe
For cheesy garlic rolls, start with your favorite garlic roll recipe, whether it’s homemade or store-bought. After preparing the dough or using pre-made rolls, incorporate shredded cheese into the center of each roll before sealing them. Prepare a garlic butter mixture with melted butter, minced garlic, and herbs, then brush it on top of the rolls before baking. Bake them at 375°F (190°C) for about 20-25 minutes, until they’re golden and the cheese is bubbling. This will result in a gooey, cheesy interior paired with a crispy exterior!
Garlic bread rolls recipe
A classic garlic bread rolls recipe starts with making a dough from flour, yeast, and warm water. After the dough rises, shape it into small rolls and allow them to rise again. For the garlic butter, mix melted butter with minced garlic, parsley, and a pinch of salt. Brush the garlic butter over the rolls, and bake them at 375°F (190°C) for 20-25 minutes. For added flavor, consider sprinkling some crushed red pepper flakes or oregano on top before baking!
Italian garlic rolls
Italian garlic rolls can be made by infusing your dough with traditional Italian flavors. Use a basic bread dough recipe, but enhance it with Italian herbs like basil, oregano, and rosemary. Shape the dough into rolls, and prepare a garlic butter mixture with minced garlic and Italian seasoning. Brush this mixture over the rolls before baking at 375°F (190°C) for 20-25 minutes. For an authentic touch, serve them warm with marinara sauce for dipping!
Mini garlic bread rolls
Mini garlic bread rolls are perfect for parties or gatherings. To make them, you can use a standard garlic bread recipe but shape the dough into smaller rolls. After allowing them to rise, brush the rolls with a garlic butter mixture made from melted butter, minced garlic, and fresh parsley. Bake them in a preheated oven at 375°F (190°C) for about 15-20 minutes. These bite-sized treats are great for serving alongside soups or salads, or simply as an appetizer!


