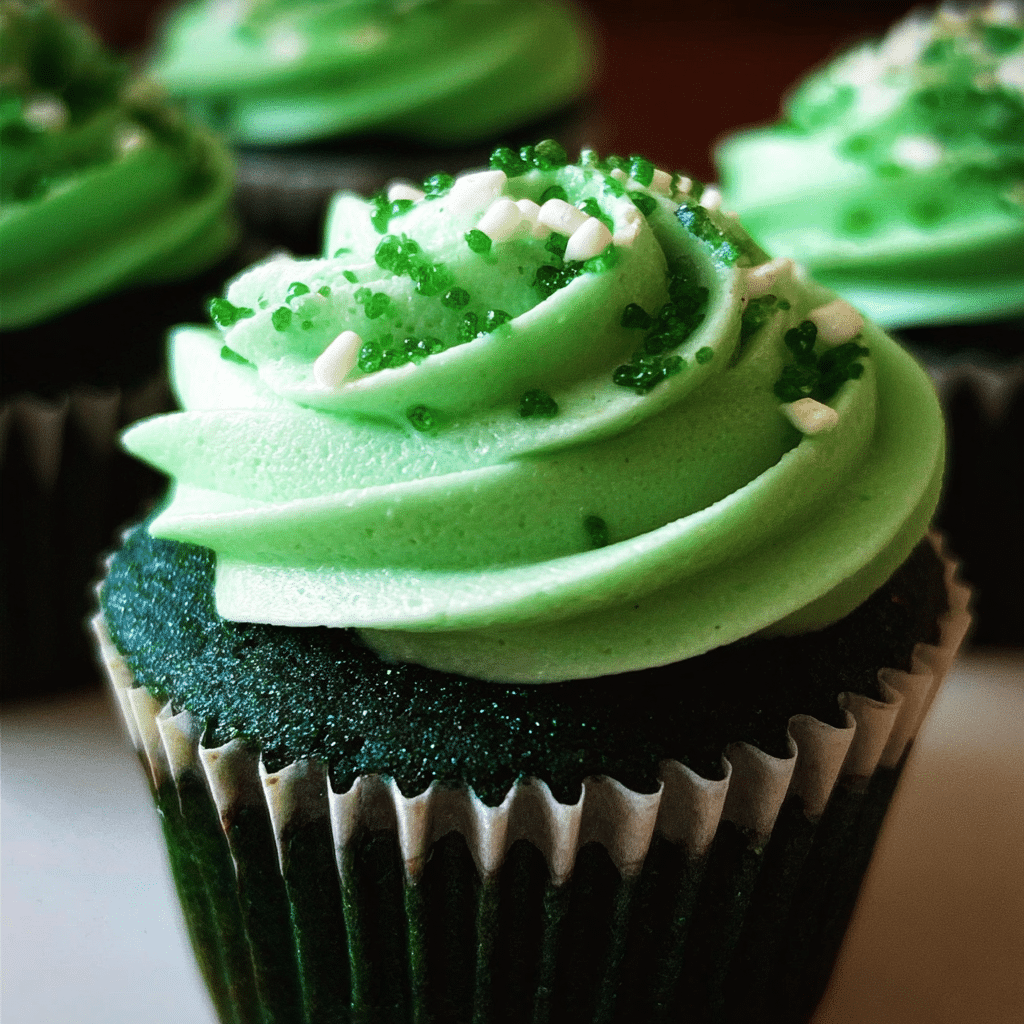
Green velvet cupcakes are a delightful treat that not only tantalize the taste buds but also bring a pop of color to any dessert table. My first encounter with these vibrant cupcakes occurred during a family gathering where my aunt surprised us all with her culinary prowess. As she pulled the tray out of the oven, the rich green hue of the cupcakes caught my eye, sparking curiosity and excitement. The first bite was nothing short of magical; the moist texture combined with the subtle flavor of cocoa created an unforgettable experience. From that moment on, I was hooked, and green velvet cupcakes have since become a staple in my baking repertoire.
The Story Behind This Recipe
As a child, I always found joy in the kitchen, watching my family whip up delicious desserts. The kitchen was a place of warmth, laughter, and the occasional culinary disaster, but it was here that I learned the importance of creativity and experimentation in baking. When I discovered green velvet cupcakes, I was intrigued by their unique twist on the traditional red velvet cake. It was a simple recipe that allowed for both creativity and deliciousness, making it perfect for any occasion.
There’s something special about the vibrant green color of these cupcakes that brings a sense of celebration. I remember making them for a friend’s birthday party, and everyone was captivated not only by their appearance but also by the delightful flavor. This recipe became a conversation starter, sparking joy and laughter as we shared stories while indulging in these treats. Green velvet cupcakes are not just a dessert; they represent a connection to family and friends, creating lasting memories with each bite.
What makes this recipe unique is its ability to blend the classic flavors of a velvet cake with the creativity of color. While red velvet has long been a favorite among cake lovers, green velvet offers a fresh and unexpected twist. This culinary innovation allows bakers to express their creativity while still delivering the rich, moist texture that everyone loves. For busy families looking for quick dinner solutions, green velvet cupcakes are ideal because they can be whipped up in under an hour, providing a delicious dessert without the fuss.
When it comes to seasonal relevance, green velvet cupcakes shine particularly bright during spring and St. Patrick’s Day celebrations. The vibrant green color embodies the spirit of renewal and festivity, making them a perfect choice for Easter gatherings or any springtime celebration. However, their appeal transcends seasons; they can brighten up a gloomy winter day or add a splash of color to summer picnics. Regardless of the occasion, these cupcakes are sure to evoke feelings of joy and nostalgia.
When I bake green velvet cupcakes, I often reminisce about those family gatherings, the laughter, and the love that filled the air. Each cupcake becomes a vessel of cherished memories, connecting me to my past while creating new ones with each batch I make. I hope to share this emotional connection with my readers, guiding them through the process of creating their own green velvet cupcake memories.
In this guide, you will learn everything you need to know about making the perfect green velvet cupcakes, from the ingredients that create that unique flavor to decorating tips that will make your cupcakes stand out. Whether you’re a seasoned baker or a novice in the kitchen, this recipe is accessible and enjoyable. Get ready to embark on a culinary adventure that will not only satisfy your sweet tooth but also bring your loved ones together around the table.
The Rich History and Cultural Significance of green velvet cupcakes
The rich history and cultural significance of green velvet cupcakes are as layered as the cupcakes themselves. Originating from the classic red velvet cake, these green delights have evolved over time to become a cherished dessert in their own right. The roots of red velvet cake can be traced back to the Victorian era, where the use of cocoa powder and buttermilk created a velvety texture that was both unique and delicious. As culinary creativity blossomed, bakers began experimenting with colors, leading to the creation of green velvet cupcakes, which have become a modern favorite.
Origins and History
The history of green velvet cupcakes is intertwined with the story of red velvet cake. The original red velvet cake gained popularity in the United States during the 1920s, particularly in the South. The cake’s vibrant red color was initially achieved through the reaction of cocoa powder with acidic ingredients like buttermilk and vinegar. However, the introduction of food coloring transformed this classic dessert into the red-hued cake we know today.
As baking trends evolved, so did the desire for novelty in flavors and colors. Enter green velvet cupcakes, which emerged as a playful adaptation of the classic recipe. The vibrant green color can be attributed to the addition of green food coloring, which not only makes the cupcakes visually appealing but also adds an element of fun to any gathering. In many ways, green velvet cupcakes symbolize the spirit of creativity that exists in baking, encouraging those in the kitchen to push boundaries and explore new flavors.
Cultural Significance
Green velvet cupcakes have also found a special place in various cultural celebrations. They are particularly popular during St. Patrick’s Day, where their emerald hue aligns perfectly with the holiday’s theme. Many families have adopted the tradition of serving these cupcakes as part of their festivities, creating a shared experience that fosters connection and joy. Beyond St. Patrick’s Day, these cupcakes are versatile enough to be served at birthdays, weddings, and other celebrations, making them a go-to dessert for any occasion.
In recent years, the popularity of green velvet cupcakes has surged, thanks in part to social media. Platforms like Instagram and Pinterest have allowed bakers to showcase their colorful creations, inspiring others to try their hand at this delightful treat. As more people share their experiences and variations, the recipe continues to evolve, incorporating new flavors and techniques that reflect regional influences and personal tastes.
Nutritional Benefits
While green velvet cupcakes are undoubtedly a treat, they can also offer some nutritional benefits, especially when made with wholesome ingredients. By incorporating whole wheat flour, natural sweeteners, and even adding vegetables like spinach or avocado for color and moisture, bakers can create a more nutritious version of this beloved dessert. Additionally, the use of quality cocoa powder can provide antioxidants, adding a healthful touch to your indulgence.
Moreover, the emotional and psychological benefits of baking should not be overlooked. Engaging in the process of creating something delicious can be a great stress reliever, bringing joy and fulfillment. Green velvet cupcakes can become a bonding experience for families, encouraging togetherness in the kitchen as they mix, bake, and decorate together.
In conclusion, green velvet cupcakes are not just a beautiful dessert; they represent a rich history of culinary creativity and cultural significance. As you embark on your journey to make these delightful treats, remember that you are not only creating a delicious dessert but also continuing a tradition that connects generations. With each cupcake you bake, you are contributing to the ongoing story of green velvet cupcakes, one delicious bite at a time.
Essential Ingredients for Perfect green velvet cupcakes
When it comes to baking, the foundation of any great recipe lies in its ingredients. For green velvet cupcakes, a delightful twist on the classic red velvet, it’s essential to select high-quality components that not only enhance flavor but also create the perfect texture and appearance. Below, I’ll walk you through the essential ingredients needed to make your green velvet cupcakes stand out.
Essential Ingredients
- 2 1/2 cups all-purpose flour: This is the backbone of your cupcakes, providing structure and stability. Ensure you sift it before measuring to avoid any lumps and to aerate it, which helps create a light texture.
- 2 cups sugar: Granulated sugar sweetens the cupcakes and contributes to their moistness. Consider using organic sugar for a more natural sweetness and a slight caramel taste.
- 1 Tablespoon cocoa powder: This ingredient is crucial for that hint of chocolate flavor that balances the sweetness. Use high-quality unsweetened cocoa for the best results.
- 1 teaspoon salt: Salt enhances the flavors in your cupcakes. A pinch of salt can elevate the sweetness, making each bite more flavorful.
- 1 teaspoon baking soda: This is your leavening agent, helping the cupcakes rise. Make sure it’s fresh, as expired baking soda won’t activate properly.
- 2 eggs: Eggs provide moisture, richness, and stability to your batter. Room temperature eggs blend more easily and create a smoother batter.
- 1 cup oil: Using vegetable or canola oil adds moisture to the cupcakes without weighing them down. It also helps keep them soft and tender.
- 1 cup buttermilk: Buttermilk adds acidity, which reacts with the baking soda, giving your cupcakes a nice rise and a tender crumb. If you don’t have buttermilk, you can make a substitute with milk and vinegar.
- 1 Tablespoon vinegar: This is another acid that helps with the leavening process, contributing to the light texture of the cupcakes.
- 1 teaspoon vanilla: Vanilla extract is essential for flavoring, providing a warm, inviting aroma to your baked goods.
- 1 oz green food coloring: The star of the show! This gives green velvet cupcakes their signature hue. Gel food coloring is recommended for its vibrant color and lack of added water.
- 1 package of softened cream cheese: Essential for the frosting, cream cheese adds a tangy flavor that contrasts beautifully with the sweetness of the cupcakes.
- 1/4 cup softened butter: Butter adds richness and flavor to the frosting, creating a creamy texture.
- 1 teaspoon vanilla extract (for frosting): Just like in the batter, a touch of vanilla enhances the flavor of your frosting.
- 1 bag powdered sugar (2 lb bag): This sugar creates the perfect texture for your frosting. Ensure you sift it before using to avoid lumps.
- Milk as needed: Use milk to adjust the consistency of your frosting, making it as creamy or stiff as you desire.

Green Velvet Cupcakes
Ingredients
CAKE
- 2 1/2 cups all purpose flour
- 2 cups sugar
- 1 Tablespoon cocoa
- 1 teaspoon salt
- 1 teaspoon baking soda
- 2 eggs
- 1 cup oil
- 1 cup buttermilk
- 1 Tablespoon vinegar
- 1 teaspoon vanilla
- 1 oz green food coloring
CREAM CHEESE FROSTING
- 1 package of softened cream cheese
- 1/4 cup softened butter
- 1 teaspoon vanilla extract
- 1 bag powdered sugar 2 lb bag
- Milk as needed
Instructions
CAKE
- Preheat your oven to 350 degrees.
- Grease your cake pans, muffin tins, whoopie pie pans, whatever method you decide to go with.
- Lightly stir eggs in a medium bowl with whisk. Add in remaining liquid ingredients. Whisk until blended, the stir in food coloring and sit aside.
- Place all dry ingredients in your mixing bowl and stir together well.
- Pour your wet ingredients into your dry ingredients and mix on medium-high for about a minute or two until well combined.
- Pour the batter into cake pans or cupcake pans.
- Baking times will vary based on what you are using. For one 8″ cake pan, it was about 22 minutes. Regular size cupcakes were around 16 minutes, mini cupcakes and whoopie pie pans were both about 13 minutes.
FROSTING
- Cream together cream cheese, butter and vanilla in a bowl until smooth. Gradually add in powdered sugar and continue mixing. Add in milk as needed to reach the desired consistency. Store frosting and frosted cupcakes in refrigerator.
Each ingredient plays a crucial role in the final outcome of your green velvet cupcakes, making it imperative to understand their functions. When selecting these ingredients, opt for the best quality you can find. Organic ingredients, where feasible, can impart a more genuine flavor and are often more sustainable.
Shopping Tips
When shopping for your ingredients, consider visiting local farmers’ markets for the freshest eggs and dairy products. These often have superior flavor compared to grocery store items. For flour, check the expiration date; fresher flour will yield better results. If you’re opting for cocoa powder, choose Dutch-processed for a richer flavor profile.
Seasonal availability can affect your choices as well, particularly with dairy and eggs. Utilizing locally sourced products not only supports your community but can also provide unique flavors that enhance your baking.
Substitutions and Alternatives
Dietary restrictions don’t have to limit your ability to enjoy green velvet cupcakes. Here are some substitution options:
- Gluten-free: Substitute all-purpose flour with a gluten-free all-purpose blend. Look for one that contains xanthan gum for best results.
- Vegan: Replace eggs with flax eggs (1 tablespoon flaxseed meal + 2.5 tablespoons water per egg) and use a plant-based butter and dairy-free milk.
- Lower sugar: You can reduce the amount of sugar in the recipe or use a sugar substitute that measures like sugar.
When it comes to storing your ingredients, keep flour in a cool, dry place, ideally in an airtight container. Eggs and dairy products should be stored in the refrigerator, while sugar can be stored at room temperature. If you find yourself with excess cocoa powder, it can last for up to two years when stored in a cool, dark place.
By understanding these ingredients and their roles, as well as how to source and substitute them, you’re well on your way to baking the most delicious green velvet cupcakes. Let’s now turn our attention to the exciting part: the actual baking process!
Detailed Step-by-Step green velvet cupcakes Cooking Instructions
Now that you have your ingredients ready, it’s time to dive into the baking process of your green velvet cupcakes. Follow these detailed steps to ensure your cupcakes come out perfectly moist, flavorful, and visually appealing.
Preparation Steps
- Preheat your oven: Set your oven to 350°F (175°C). Preheating is crucial as it ensures your cupcakes rise properly. Make sure your oven is fully heated before placing your cupcakes inside.
- Prepare your baking pans: Line your cupcake pans with paper liners. This not only makes for easy removal but also helps in keeping the cupcakes moist. If you prefer a more rustic look, you can grease the pans directly.
- Mise en place: This French term means “everything in its place.” Measure out all your ingredients beforehand to streamline the baking process. This helps you avoid the last-minute scramble for ingredients.
- Combine dry ingredients: In a large bowl, sift together the flour, cocoa powder, baking soda, and salt. Sifting helps to aerate the mixture and ensures there are no lumps.
- Mix wet ingredients: In another bowl, whisk together the sugar and oil until well combined. Then add the eggs, buttermilk, vinegar, and vanilla extract. Mix until smooth. The color will start to develop as you add the green food coloring next.
Cooking Process
- Add food coloring: Carefully mix in your green food coloring. Start with half an ounce and add more if you want a more vibrant green. The mixing should be thorough to ensure an even color throughout the batter.
- Combine wet and dry: Gradually add the dry ingredients to the wet mixture, stirring gently until just combined. Avoid overmixing, as this can lead to dense cupcakes.
- Fill the cupcake liners: Use an ice cream scoop or a spoon to fill each liner about two-thirds full. This allows room for the cupcakes to rise without overflowing.
- Bake: Place the cupcake pans in the preheated oven and bake for about 20-25 minutes. They are done when a toothpick inserted into the center comes out clean. Pay attention to the aroma; your kitchen will fill with a delightful scent when they are almost ready!
- Cool: Once baked, remove the pans from the oven and let them cool in the pans for about 10 minutes. Then, transfer the cupcakes to a wire rack to cool completely. This is a crucial step; frosting warm cupcakes will cause the frosting to melt.
Final Assembly
- Prepare your frosting: In a bowl, beat the softened cream cheese and butter together until creamy. Add in your powdered sugar gradually, mixing until smooth. Incorporate vanilla extract and milk, adjusting for thickness as desired.
- Frost the cupcakes: Once the cupcakes have cooled completely, use a piping bag or a spatula to generously frost each cupcake. The frosting should be smooth and luscious, perfectly complementing the moist cupcake.
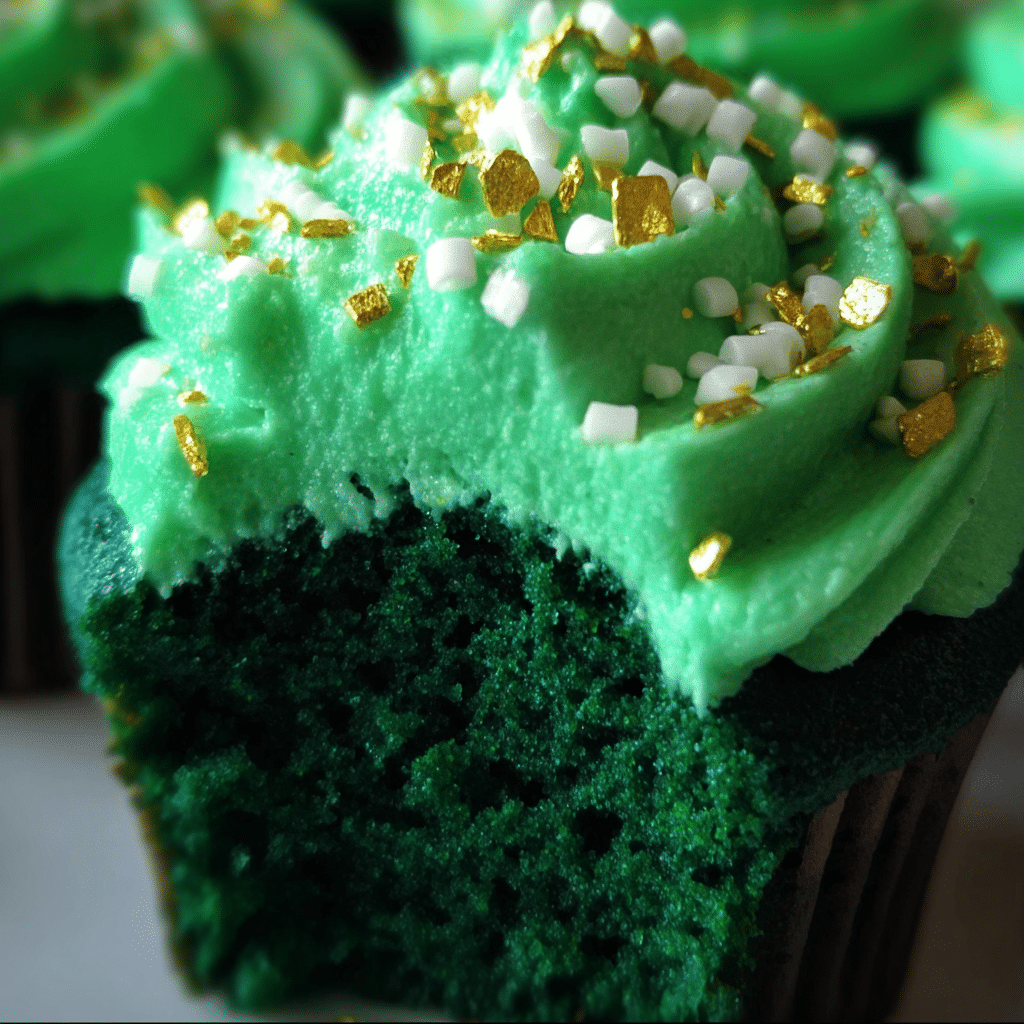
- Decorate: If you’d like, sprinkle some green sprinkles or edible glitter on top for an extra festive touch, especially if you’re serving these for a special occasion.
- Enjoy: Serve your green velvet cupcakes at room temperature. They are perfect for any celebration or as a delightful treat for yourself! Make sure to savor every bite, as the flavors are truly a celebration of culinary art.
Throughout this process, common mistakes can occur, such as overmixing the batter or not allowing the cupcakes to cool completely before frosting. Always remember that patience is key when baking. Additionally, ensure you’re using the right equipment; a good-quality stand mixer can save you time and effort.
In terms of timing, baking the cupcakes will take about 30 minutes, which includes preparation and baking time. Multitasking can be beneficial here; while your cupcakes are baking, you can prepare your frosting to save time.
With these detailed instructions, you’re now equipped to create the most delightful green velvet cupcakes. The combination of flavors and the stunning green color make them a showstopper for any event. Happy baking!
Professional Tips and Techniques for green velvet cupcakes
When it comes to baking, the small details can make a world of difference, especially for something as visually stunning and delicious as green velvet cupcakes. These vibrant treats, often compared to their more famous cousin, red velvet, have a unique charm and flavor profile all their own. In this section, I’ll share professional tips and techniques that will elevate your green velvet cupcake game, ensuring they turn out perfect every time.
Professional Techniques
First and foremost, let’s talk about the fundamental ingredients in green velvet cupcakes. The base of your batter is typically a mix of all-purpose flour, cocoa powder, baking soda, and buttermilk, with a dash of green food coloring that gives these cupcakes their signature hue. To achieve the best results, using high-quality ingredients is crucial. I recommend opting for pure cocoa powder rather than Dutch-processed, as it reacts better with the baking soda, giving your cupcakes a light, airy texture.
When mixing your batter, the method of incorporation can significantly affect the final product. Start by creaming the butter and sugar together until light and fluffy. This process incorporates air into the batter, helping your cupcakes rise beautifully. Add in the eggs one at a time, ensuring they are fully incorporated before moving to the next. This is an essential step; under-mixing or over-mixing can lead to dense or uneven cupcakes.
Another tip for achieving moist cupcakes is to avoid overbaking. Each oven has its quirks, so I recommend checking for doneness a few minutes before the recipe’s suggested baking time. Insert a toothpick into the center; it should come out clean or with a few moist crumbs clinging to it. Remember, cupcakes will continue to cook a bit after being removed from the oven, so it’s better to err on the side of caution.
Troubleshooting Guide
Even seasoned bakers encounter mishaps from time to time. If your green velvet cupcakes turn out too dry, consider checking your oven temperature with an oven thermometer. Sometimes, ovens can run hotter or cooler than they indicate. Additionally, measuring flour accurately is crucial; too much flour can lead to dry, crumbly cupcakes. Use the spoon-and-level method rather than scooping directly from the bag.
Another common issue is the cupcakes sinking in the middle. This can occur if the batter is overmixed or if too much leavening agent (like baking soda or baking powder) was used. For a fluffier texture, remember to fold in the dry ingredients gently, just until combined. If you find your cupcakes are cracking on top, try lowering the oven temperature slightly and adjusting the baking time. A slower bake can yield a more even rise.
Presentation Tips
Presentation is key when it comes to making your green velvet cupcakes pop! Once they are cooled, consider topping them with a cream cheese frosting for that classic pairing. To achieve a smooth finish, use a piping bag with a star tip for a professional look. You can also sprinkle some edible glitter or finely chopped nuts on top for added texture and visual appeal.
When it comes to serving, think about your plating. Arrange the cupcakes on a decorative cake stand for a gorgeous display. Alternatively, place them in colorful cupcake liners that contrast beautifully against the green color. For an extra touch, consider garnishing with fresh mint leaves or a slice of lime, which complements the green color and adds a refreshing twist.
Make-Ahead and Meal Prep Strategies
If you’re planning for a special occasion or simply want to bake in advance, green velvet cupcakes are a great option! You can prepare the cupcake batter a day ahead and store it in the refrigerator for up to 24 hours. When you’re ready to bake, just give it a good stir and pour it into your cupcake liners. Frosting can also be made ahead of time; just store it in an airtight container in the fridge. Simply re-whip before using to restore its fluffy texture.
Scaling the recipe is another handy tip. If you’re hosting a large gathering, you can easily double or even triple the recipe. Just be mindful of your mixing bowl size and baking time, as larger batches might require a bit more time to bake evenly. For smaller gatherings, try halving the recipe; this way, you can indulge without the temptation of leftovers.
Lastly, pairing your green velvet cupcakes with beverages can enhance the whole experience. A glass of sparkling wine or a refreshing mint lemonade works wonderfully, balancing the sweetness of the cupcakes. If you’re feeling adventurous, serve them with a matcha latte for a unique flavor combination that aligns beautifully with the green theme!
Creative Variations and Adaptations of green velvet cupcakes
Green velvet cupcakes are just as versatile as they are delicious. While the classic recipe is a hit on its own, there are countless creative variations that can take your baking to new heights. From seasonal ingredient swaps to dietary modifications, let’s dive into the many ways you can adapt this delightful treat to suit your needs and preferences.
Seasonal Variations
One of the best parts about baking is taking advantage of seasonal ingredients. In the spring, consider adding fresh mint or lime zest to the batter for a refreshing twist that complements the green color beautifully. For fall, you might swap in pumpkin puree instead of buttermilk for a richer, denser cupcake that still retains that lovely green hue.
During the summer months, think about incorporating fresh herbs like basil or rosemary into your frosting. This unexpected flavor combination not only adds an aromatic quality but also pairs wonderfully with the sweetness of the cupcake. You can also experiment with different food colorings or natural dyes from spinach or matcha to achieve different shades of green, making each batch unique.
Dietary Adaptations
As dietary preferences evolve, so do baking techniques! If you’re catering to gluten-free guests, you can easily substitute all-purpose flour with a gluten-free blend. Just remember to add a bit of xanthan gum to maintain that fluffy texture. For a vegan option, replace eggs with flaxseed meal mixed with water, and use a dairy-free milk alternative. The results can be just as satisfying and delicious!
If you’re looking to reduce sugar without sacrificing flavor, consider using mashed bananas or unsweetened applesauce as a natural sweetener. This can also add moisture to the cupcakes, making them even more delectable. Just be cautious with the amount of liquid you’re adding; you may need to adjust other wet ingredients accordingly.
Creative Twists
Why stop at just green velvet? Think about adding different flavor profiles to your batter. For a chocolate lover’s version, increase the cocoa powder slightly for a richer taste. You can also fold in chocolate chips or nuts for added texture and flavor. If you’re feeling adventurous, incorporate spices like cinnamon or nutmeg to create a unique twist on the classic recipe.
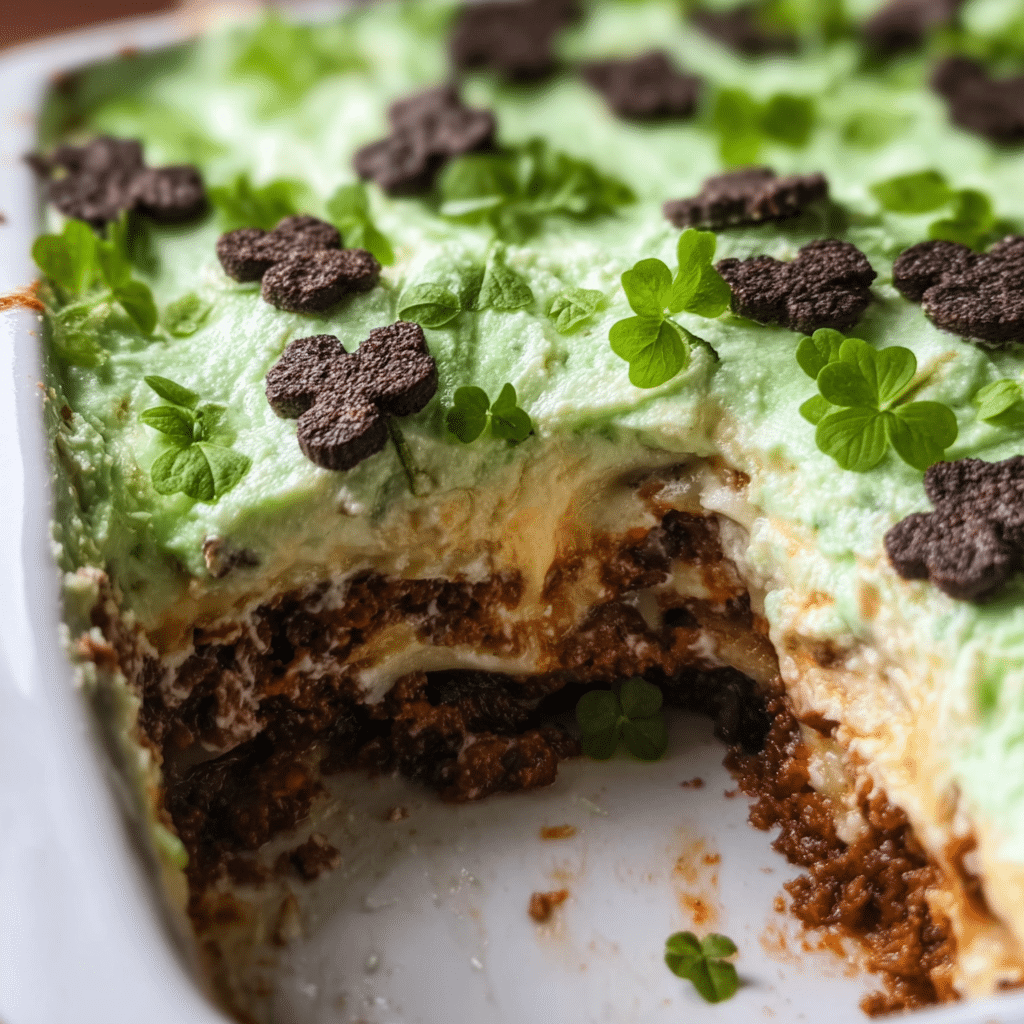
Another fun idea is to transform your green velvet cupcakes into a layered cake. Just bake the cupcakes as usual, then stack them with layers of cream cheese or buttercream frosting in between. This adds a dramatic flair while still retaining the fun of the cupcake format!
And let’s not forget about the cooking methods! While baking is traditional, you can also make green velvet cupcakes using an air fryer for a quicker option. Just adjust the cooking time and temperature according to your air fryer’s instructions. Alternatively, for a fun activity with kids, consider making green velvet pancake cupcakes on the stovetop, using a pancake batter infused with the same vibrant green hue and flavor.
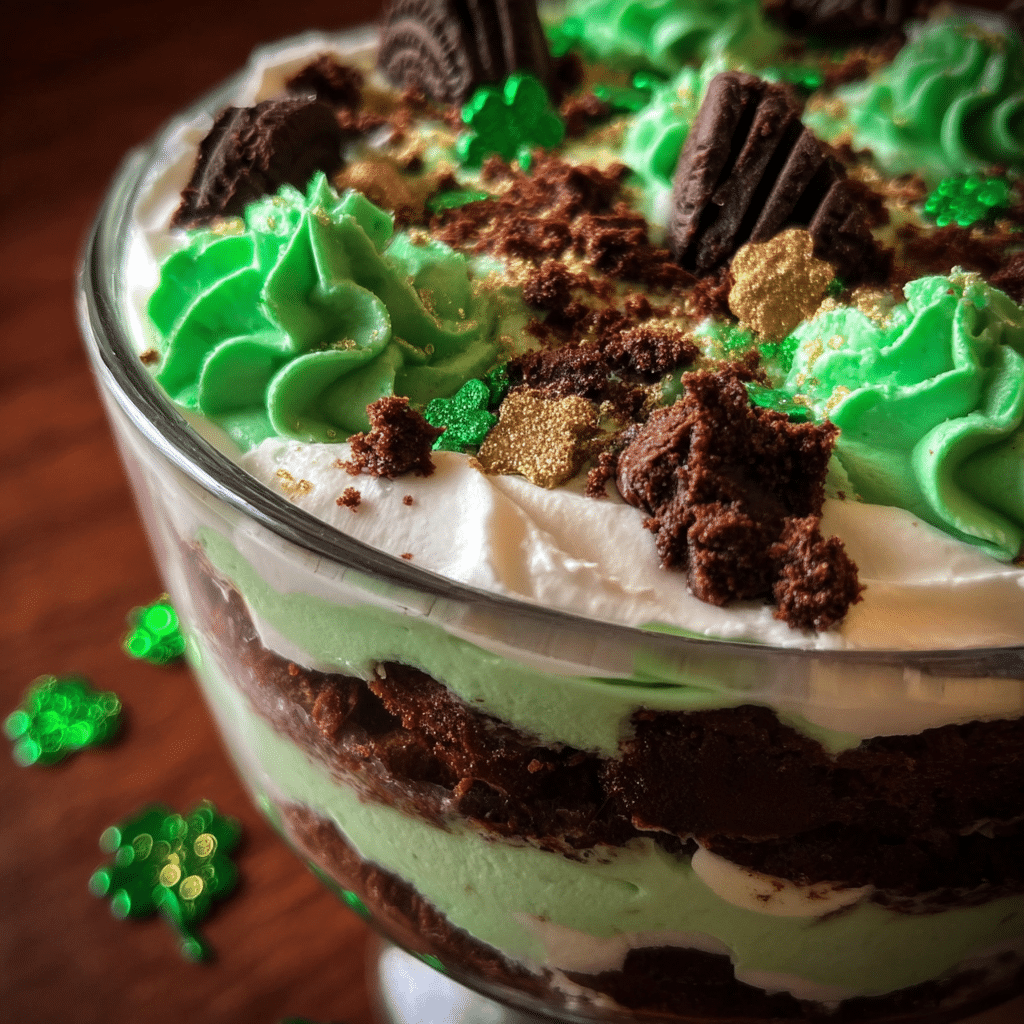
Finally, if you have any leftover cupcakes, don’t let them go to waste! Transform them into a trifle by crumbling the cupcakes and layering them with whipped cream and fresh berries. This not only turns a simple dessert into something extraordinary but also adds a refreshing twist that’s perfect for warm weather gatherings.
In conclusion, green velvet cupcakes are a versatile and exciting dessert that can be adapted to fit any occasion or dietary need. Whether you stick to the classic recipe or venture into creative variations, these cupcakes are sure to impress and satisfy any sweet tooth!
Storage, Reheating, and Meal Prep for green velvet cupcakes
When it comes to baking, particularly with something as whimsical and delightful as green velvet cupcakes, knowing how to properly store them is essential. After all, you want those vibrant green treats to maintain their moistness and flavor, whether you’re enjoying them right after baking or saving them for later. In this section, we’ll dive deep into the best methods for storing green velvet cupcakes, including short-term and long-term strategies, reheating tips, and meal prep ideas that will keep your cupcakes fresh and delicious.
Short-term Storage
After baking your green velvet cupcakes, it’s important to allow them to cool completely before you think about storing them. This is a crucial step that prevents condensation from forming, which can turn your lovely cupcakes into soggy disappointments. Once cooled, you have a few options for short-term storage. If you plan to eat them within a couple of days, simply place them in an airtight container at room temperature. This will keep them fresh and ready to enjoy!
If you live in a particularly warm or humid climate, it might be wise to store them in the refrigerator. Just be sure to wrap each cupcake individually in plastic wrap or place them in an airtight container to avoid any refrigerator odors affecting their flavor. The cool environment will help preserve their texture for a few more days.
Another fun idea is to layer your green velvet cupcakes in a container with parchment paper between the layers. This not only keeps them from sticking but also adds a lovely touch when you’re ready to serve them. And let’s not forget about presentation! You can decorate the container with a cute ribbon or a label, making it a perfect gift for friends or family.
Freezing and Long-term Storage
If you want to keep your green velvet cupcakes for longer, freezing them is an excellent option. To freeze, start by ensuring your cupcakes are completely cool. Then, individually wrap each cupcake in plastic wrap, followed by a layer of aluminum foil for extra protection against freezer burn. This two-layer technique is key to maintaining their flavor and moisture. Just imagine biting into a cupcake that’s as fresh as the day you baked it, even weeks later!
When you’re ready to enjoy a frozen cupcake, simply remove it from the freezer and let it thaw at room temperature for a few hours. If you’re in a hurry, you can microwave it for about 10-15 seconds, but be careful not to overdo it, as that can lead to a dry texture. If you’ve frozen cupcakes with frosting, it’s best to thaw them in the refrigerator to prevent the frosting from melting.
As for how long green velvet cupcakes can last in the freezer, they can typically be stored for up to three months. However, for the best quality, I recommend enjoying them within the first month. After that, they might lose some of their fabulous taste, and we wouldn’t want that!
Reheating Best Practices
When it comes to reheating your green velvet cupcakes, there are several methods you can use to ensure they remain moist and delicious. The microwave is the quickest option, as mentioned earlier; just be sure to keep an eye on the time. For a more even heating, consider using the oven. Preheat your oven to 350°F (175°C), and place your cupcakes on a baking sheet. Heat them for about 10-15 minutes, checking frequently to make sure they don’t dry out. To maintain moisture, you can place a small dish of water in the oven while they heat up.
Another great option is to enjoy your cupcakes cold. Sometimes, the flavor of a cupcake can be more pronounced when it’s cool, and the texture can be quite delightful as well. So, don’t hesitate to reach for a cold green velvet cupcake straight from the fridge!
In conclusion, storing green velvet cupcakes properly can extend their shelf life and maintain their taste and texture. Whether you opt for short-term storage on your kitchen counter, refrigerate them for a few extra days, or freeze them for future enjoyment, these tips will help you savor every last bite. Remember, the joy of baking is not just in the creation but also in the anticipation of enjoying those delightful treats later on!
Nutritional Benefits and Health Information
Green velvet cupcakes are not just a feast for the eyes; they can also be surprisingly nutritious when made with the right ingredients. In this section, we will delve into the nutritional benefits of green velvet cupcakes, examining their key ingredients, potential health benefits, and how they can fit into various dietary lifestyles. You might be surprised at how these whimsical treats can be both indulgent and wholesome!
Nutritional Profile
The primary ingredients in green velvet cupcakes typically include flour, sugar, cocoa powder, eggs, oil, buttermilk, and green food coloring. Each of these components contributes to the overall nutritional profile of the cupcakes. For a standard cupcake (without frosting), you can expect approximately 200-250 calories per serving, depending on the recipe and portion size.
In terms of macronutrients, a typical green velvet cupcake can contain around 5 grams of protein, 10 grams of fat, and 30-35 grams of carbohydrates. This distribution can vary based on the specific ingredients used, particularly if you opt for whole grain flour or alternative sweeteners. It’s important to remember that while these cupcakes can be part of a balanced diet, moderation is key—indulgence doesn’t have to mean excess!
Health Benefits
One of the key ingredients you might find in green velvet cupcakes is cocoa powder. This ingredient is not just for flavor; it also contains beneficial antioxidants known as flavonoids. These compounds can help reduce inflammation and improve heart health, making your treat a bit more guilt-free! Additionally, if you use buttermilk in your recipe, you’ll be adding some probiotics to your cupcakes, which can aid in digestion.
Another fun twist is to incorporate vegetable purees, like spinach or avocado, into your green velvet cupcakes. Not only will this amp up the green color, but it will also add vitamins and minerals such as Vitamin A, potassium, and folate. Plus, it can make your cupcakes even more moist and delicious!
Dietary Considerations
For those with dietary restrictions, green velvet cupcakes can be easily modified to fit various needs. For a gluten-free option, simply substitute regular flour with a gluten-free blend. There are also ways to reduce the sugar content by using natural sweeteners like honey or maple syrup, which can provide additional nutrients as well.
When it comes to allergens, it’s essential to be mindful of common ingredients like eggs and dairy. Vegan alternatives, such as flax eggs or almond milk, can easily replace eggs and buttermilk in your recipe without compromising too much on flavor or texture. This versatility allows everyone to enjoy green velvet cupcakes, regardless of their dietary preferences!
In conclusion, while green velvet cupcakes may seem like an indulgent treat, they can be crafted in a way that aligns with a healthy lifestyle. By making simple ingredient swaps and being mindful of portion sizes, you can enjoy these delightful desserts without the guilt. So, the next time you whip up a batch of green velvet cupcakes, consider the nutritional benefits and how they can fit into your overall wellness journey. After all, life is too short not to enjoy a cupcake now and then!