Homemade garlic knots have a way of bringing warmth and comfort into any kitchen. I can still remember the first time I discovered this delightful recipe. It was a rainy afternoon, and I was flipping through an old family cookbook that had seen better days. Each page was crinkled with age, adorned with food stains from years of use. As I turned the pages, my eyes landed on a simple recipe for garlic knots. The concept seemed so straightforward, yet the idea of transforming a basic dough into these irresistible little knots of joy sparked my curiosity. I decided then and there to give it a try, and that decision changed my perception of baking forever.
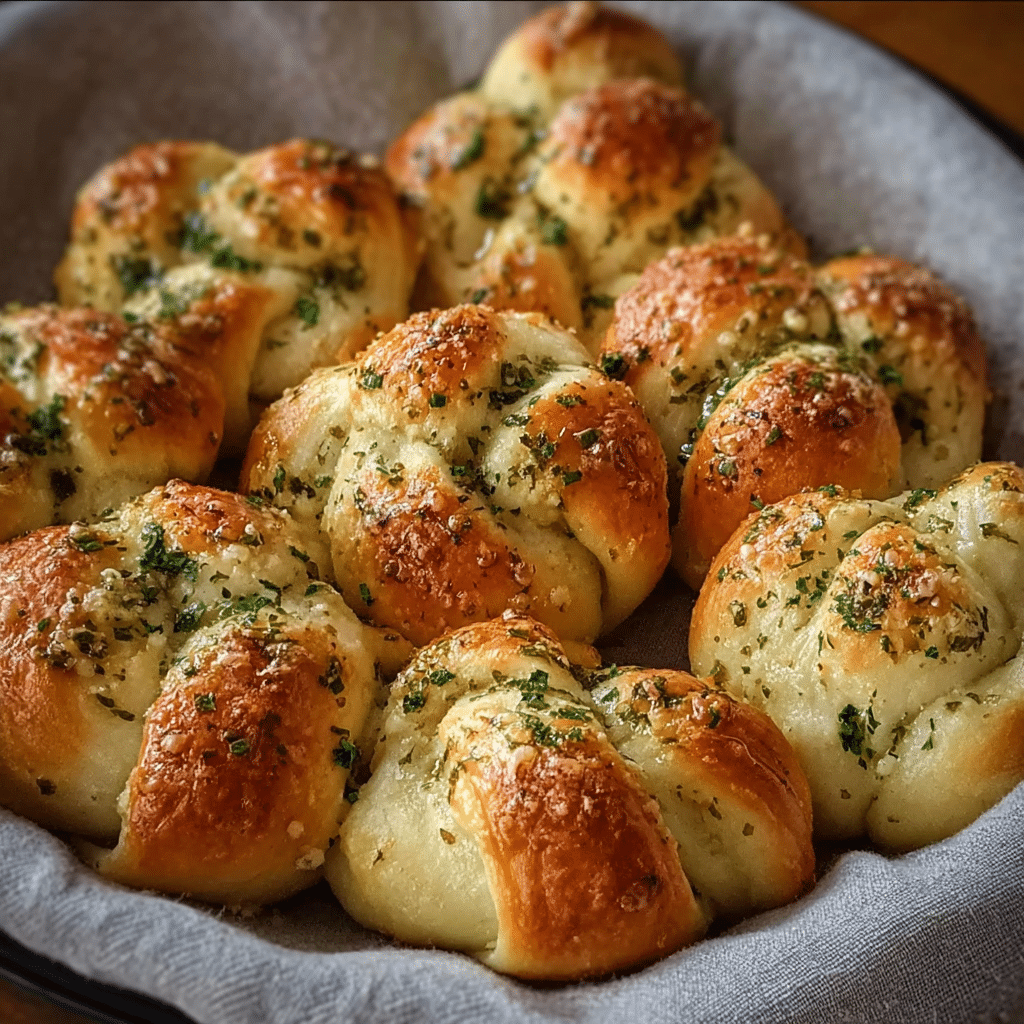
As I kneaded the dough, the scent of yeast and flour filled my kitchen, mingling with the earthy aroma of garlic and herbs that would soon follow. The process was meditative, each fold and twist a reminder of how simple ingredients can create something truly special. When I finally pulled those golden-brown knots from the oven, the entire house was enveloped in a heavenly fragrance that beckoned my family to gather around the table. The combination of crispy exterior and soft, fluffy interior, all brushed with a buttery garlic bath, was enough to make anyone a fan. From that day forward, homemade garlic knots became a staple in my household—an easy recipe that brings everyone together, no matter how busy life gets.
The Story Behind This Recipe
Garlic knots have roots in Italian-American cuisine, emerging from the pizza parlors and bakeries of New York City. They began as a way to utilize leftover pizza dough, transforming what could have been waste into a delicious appetizer or side dish. This clever use of ingredients reflects the Italian philosophy of “cucina povera,” or “poor kitchen,” which emphasizes making the most out of what you have. The knots were originally brushed with garlic-infused oil and sprinkled with parsley, giving them that distinct flavor we all love today.
What makes this recipe special is not just its delicious taste but the memories it creates. Each time I make homemade garlic knots, I’m reminded of the countless family gatherings and celebrations where they were served. They’re more than just food; they symbolize togetherness and joy. For busy families, this recipe is a lifesaver—quick to prepare and easy to customize. You can whip them up in no time, making them perfect for a weeknight dinner or a weekend gathering with friends.
Seasonally, homemade garlic knots shine during the colder months. There’s something undeniably comforting about warm, buttery knots when the weather turns chilly. However, they can be enjoyed year-round, making them a versatile addition to any meal. Whether served alongside a hearty pasta dish or enjoyed as a snack during movie night, they always hit the spot.
Why You’ll Love This Dish
Emotional connections often run deep in the kitchen, and homemade garlic knots hold a special place in my heart. They remind me of my grandmother, who would always have a batch ready when we came to visit. Her laughter and stories filled the air, just as the aroma of garlic filled her small kitchen. Making garlic knots is my way of honoring those cherished memories while creating new ones with my own family.
In this article, you will learn how to make your own homemade garlic knots from scratch, including tips and tricks to ensure perfect results every time. From the dough to the garlic-infused butter, we will cover each step in detail. You’ll discover the joy of kneading and shaping dough, and how to infuse flavors that will have your family begging for more. So roll up your sleeves, and let’s get started on this delicious journey of homemade garlic knots!
The Rich History and Cultural Significance of homemade garlic knots
The rich history and cultural significance of homemade garlic knots are just as flavorful as the dish itself. Often associated with Italian-American cuisine, garlic knots have a fascinating backstory that reflects the resourcefulness of immigrant families. These delightful bites originated in the bustling kitchens of New York City during the late 20th century, where Italian immigrants sought to create new meals from leftover pizza dough. Instead of discarding unused dough, they twisted it into knots, baked them to golden perfection, and brushed them with garlic and butter. The result? A delicious, savory snack that quickly became a favorite among locals.
Origins and History
Tracing the origins of homemade garlic knots takes us back to the heart of Italy, where fresh bread has been a staple for centuries. In Italian culture, bread is not just a side dish; it’s a fundamental part of every meal. The concept of repurposing bread products is deeply rooted in tradition, with various regions showcasing their own unique interpretations. In Southern Italy, for instance, you might find similar creations, such as “taralli,” which are often flavored with spices and herbs.
However, the garlic knot as we know it today undoubtedly gained popularity on the streets of New York, where Italian-American communities thrived. As pizza shops began to pop up in every neighborhood, so did the garlic knot. It became a signature side dish, often served with marinara sauce for dipping. Over the years, the recipe evolved, with chefs adding their own twists—some infusing the garlic butter with different herbs or cheeses, while others experimented with various shapes and sizes.
Cultural Significance
Garlic knots have transcended their humble beginnings to become a beloved dish across the United States. They’re often found at family gatherings, parties, and casual dinners, symbolizing warmth and community. In many Italian-American homes, you’ll find garlic knots served alongside pasta dishes, salads, or even as a standalone snack. Their versatility makes them a favorite for both adults and children alike.
Special occasions, such as holidays and celebrations, often feature homemade garlic knots. They are a staple during Thanksgiving feasts, Christmas dinners, and even Super Bowl parties. The act of gathering around a plate of warm garlic knots fosters connection and togetherness, an integral part of Italian dining culture.
Nutritional Benefits
While homemade garlic knots are undeniably indulgent, they can also offer nutritional benefits when prepared with care. The base of the knots, made from flour, provides carbohydrates that are essential for energy. When paired with garlic, known for its numerous health benefits, the dish takes on a whole new level of nutritional value. Garlic is celebrated for its anti-inflammatory properties, ability to boost the immune system, and potential heart health benefits.
Additionally, making homemade garlic knots allows you to control the ingredients, opting for whole wheat flour or adding herbs and spices for an extra nutritional punch. You can also experiment with different toppings, such as grated cheese or seeds, to enhance both flavor and texture.
As you dive deeper into the world of homemade garlic knots, you’ll not only appreciate their delightful taste but also their rich history and cultural significance. By making them from scratch, you’re not just creating a delicious dish—you’re also participating in a tradition that spans generations. So, gather your ingredients, roll up your sleeves, and let’s embark on this culinary journey together!
Essential Ingredients for Perfect homemade garlic knots
When it comes to creating the perfect homemade garlic knots, the ingredients you choose play a pivotal role in the overall flavor and texture. Each component contributes not just to the taste but also to the experience of making and enjoying these delightful treats. In this section, we will explore the essential ingredients needed for crafting mouthwatering homemade garlic knots, along with tips on selecting quality ingredients, storage, and substitutions.
Essential Ingredients
Here’s a comprehensive list of the ingredients you will need to prepare homemade garlic knots:
- Homemade Dough
- 1 and 1/3 cups (320ml) warm water (between 100–110°F, 38–43°C)
- 2 and 1/4 teaspoons (7g) Platinum Yeast from Red Star instant yeast (1 standard packet)*
- 1 Tablespoon (13g) granulated sugar
- 3 Tablespoons (45ml) olive oil or (43g) melted butter
- 1 teaspoon salt
- 1/2 teaspoon garlic powder*
- 3 and 1/2 cups (about 450g) all-purpose flour (spooned & leveled), plus more for hands and work surface
- Topping
- 5 Tablespoons (71g) unsalted butter, melted
- 3 garlic cloves, minced; or 1/2 teaspoon garlic powder
- 1 teaspoon Italian seasoning*
- 1/4 teaspoon salt
- optional after baking: 1/4 cup grated Parmesan cheese
- optional after baking: 2 Tablespoons chopped fresh parsley
Homemade Garlic Knots Recipe
Ingredients
Homemade Dough
- 1 and 1/3 cups (320ml) warm water (between 100–110°F, 38–43°C)
- 2 and 1/4 teaspoons (7g) Platinum Yeast from Red Star instant yeast (1 standard packet)*
- 1 Tablespoon (13g) granulated sugar
- 3 Tablespoons (45ml) olive oil or (43g) melted butter
- 1 teaspoon salt
- 1/2 teaspoon garlic powder
- 3 and 1/2 cups (about 450g) all-purpose flour (spooned & leveled), plus more for hands and work surface
Topping
- 5 Tablespoons (71g) unsalted butter, melted
- 3 garlic cloves, minced; or 1/2 teaspoon garlic powder
- 1 teaspoon Italian seasoning*
- 1/4 teaspoon salt
- optional after baking: 1/4 cup grated Parmesan cheese
- optional after baking: 2 Tablespoons chopped fresh parsley
Instructions
- Whisk the warm water, yeast, and granulated sugar together in the bowl of your stand mixer fitted with a dough hook or paddle attachment. Cover and allow to rest for 5 minutes. *If you don’t have a stand mixer, simply use a large mixing bowl and mix the dough with a wooden spoon or silicone spatula in the next step.
- Add the olive oil (or butter), salt, garlic powder, and half of the flour. Beat for 15 seconds, then add the remaining flour. Beat on low speed for 2 minutes.
- Knead the dough: Keep the dough in the mixer (and switch to the dough hook if using the paddle) and beat for an additional 5 full minutes, or knead by hand on a lightly floured surface for 5 full minutes. (If you’re new to bread-baking, my How to Knead Dough video tutorial can help here.) If the dough becomes too sticky during the kneading process, sprinkle 1 teaspoon of flour at a time on the dough or on the work surface/in the bowl to make a soft, slightly tacky dough. Do not add more flour than you need because you do not want a dry dough. After kneading, the dough should still feel a little soft. Poke it with your finger—if it slowly bounces back, your dough is ready to rise. You can also do a “windowpane test” to see if your dough has been kneaded long enough: tear off a small (roughly golfball-size) piece of dough and gently stretch it out until it’s thin enough for light to pass through it. Hold it up to a window or light. Does light pass through the stretched dough without the dough tearing first? If so, your dough has been kneaded long enough and is ready to rise. If not, keep kneading until it passes the windowpane test.
- Rise: Lightly grease a large bowl with oil or nonstick spray—just use the same bowl you used for the dough. Place the dough in the bowl, turning it to coat all sides in the oil. Cover the bowl with aluminum foil, plastic wrap, or a clean kitchen towel. Allow the dough to rise at room temperature for 1–2 hours or until double in size. (Tip: For a warm environment on a particularly cold day, heat your oven to 150°F (66°C). Turn the oven off, place the dough inside, and keep the door slightly ajar. This will be a warm environment for your dough to rise. After about 30 minutes, close the oven door to trap the air inside with the rising dough. When it’s doubled in size, remove from the oven.)
- Shape the dough: Use the video tutorial and step-by-step photos as your guide for this step. When the dough is ready, punch it down to release the air. Using floured hands on a lightly floured work surface, shape the dough into a 16×5-inch (13x41cm) log. (5-inch width really isn’t as important as the 16-inch length here—no need to be exact.) Using a very sharp knife, pizza cutter, or bench scraper, slice into 16 1-inch strips. Roll each strip into 8-inch ropes. Tie each into a knot. You can tuck the 2 ends of the knots underneath or leave them out—that’s up to you. Arrange the knots on 2 baking sheets lined with silicone baking mats or parchment paper.
- Lightly cover the shaped knots and let them rest for at least 30 minutes and up to 45 minutes. They will slightly puff up during this time, producing softer rolls.
- Towards the end of the rise time, preheat oven to 400°F (204°).
- Make the topping: Stir the melted butter, garlic, Italian seasoning, and salt together. Brush on the knots. Reserve some of the topping for when the knots come out of the oven.
- Bake for about 20–23 minutes or until golden brown on top. Remove from the oven and brush the warm knots with remaining garlic butter. Sprinkle with parmesan cheese and/or parsley, if using.
- Serve plain or with marinara sauce for dipping.
- Cover and store leftover knots at room temperature for up to 2 days or in the refrigerator for up to 1 week. Freeze baked and cooled knots for up to 3 months. Thaw on the counter, then reheat as desired. (I usually just microwave them for a few seconds.)
Ingredient Roles and Importance
Understanding the role each ingredient plays will help you appreciate the art of making homemade garlic knots. The warm water activates the yeast, which is crucial for rising and creating that fluffy texture we all love. Yeast is a living organism, and using the right temperature is vital; too hot and it can die, too cold and it won’t activate properly.
The granulated sugar serves as food for the yeast, promoting fermentation and enhancing the dough’s flavor. Meanwhile, olive oil or melted butter adds richness and moisture, making the knots tender and flavorful. Salt is essential for controlling fermentation and enhancing the overall taste of the knots.
All-purpose flour is the backbone of the dough. The gluten in the flour helps to form the structure of the knots, allowing them to rise beautifully. Garlic powder adds a hint of garlic flavor right into the dough, complementing the fresh garlic topping.
The topping ingredients, especially the melted butter and minced garlic, are what truly elevate these knots. They infuse each bite with rich, garlicky goodness, while the Italian seasoning rounds out the flavor profile.
Shopping Tips
When shopping for ingredients to make your homemade garlic knots, consider quality over quantity. For instance, look for fresh garlic that is firm and free of blemishes. Organic garlic is often more flavorful, and you might find local farmers’ markets offer the freshest options.
For flour, opt for unbleached all-purpose flour as it tends to have a better flavor and texture profile. If you’re concerned about gluten, you can find high-quality gluten-free all-purpose flour blends that work well in bread-making.
When it comes to yeast, Platinum Yeast from Red Star is a great choice because it offers superior performance with no need for proofing. Just ensure the yeast is stored in a cool, dry place, and check expiration dates to ensure freshness.
Substitutions and Alternatives
For those with dietary restrictions, substitutions can easily be made without sacrificing flavor. Instead of traditional flour, gluten-free alternatives such as almond flour or a gluten-free all-purpose blend can be used. Keep in mind that these alternatives may require additional binding agents.
If you’re looking for a dairy-free option, replace the butter with vegan butter or olive oil in the dough and topping. For a lower sodium option, you can reduce the amount of salt in the dough without compromising its structure.
Herbs are often interchangeable. If you don’t have Italian seasoning on hand, consider using a mix of dried oregano, basil, and thyme. Fresh herbs can also add a bright flavor to your knots.
Storage Tips
Proper storage of ingredients is crucial for making homemade garlic knots. Flour should be kept in an airtight container in a cool, dry place to prevent it from going stale or attracting pests. Yeast should also be stored in a cool, dry area, and once opened, it’s best to keep it in the refrigerator or freezer to prolong its shelf life.
Garlic should be stored in a dry, dark place to maintain its flavor and prevent sprouting. Fresh parsley can be kept in the refrigerator, wrapped in a damp paper towel, to extend its freshness.
By understanding the importance of each ingredient and how to select them, you can confidently embark on your journey to create the most delightful homemade garlic knots. Each step you take in choosing the right components brings you closer to achieving a dish that is not only delicious but also a testament to the love and care you put into making it.
Detailed Step-by-Step homemade garlic knots Cooking Instructions
Now that we have gathered all the essential ingredients for our homemade garlic knots, let’s dive into the detailed cooking instructions. This step-by-step guide will help you navigate the process with confidence, ensuring that your garlic knots turn out soft, fluffy, and packed with flavor.
Preparation Steps
- Activate the Yeast: Begin by warming your water to between 100–110°F (38–43°C). This temperature range is perfect for activating the yeast. In a medium bowl, combine the warm water, granulated sugar, and yeast. Stir gently and let it sit for about 5-10 minutes until it becomes frothy. This is a crucial step, as it proves your yeast is active and ready to help your dough rise.
- Mix the Dry Ingredients: In a large mixing bowl, combine the all-purpose flour, salt, and garlic powder. Whisk them together to ensure they are well mixed. This step is important because it helps to evenly distribute the salt and garlic powder throughout the flour.
- Combine Wet and Dry Ingredients: Once your yeast mixture is frothy, add the olive oil or melted butter to the bowl. Pour this mixture into the dry ingredients and stir until a shaggy dough forms. You can use a wooden spoon or your hands for this step.
- Knead the Dough: Turn the dough out onto a floured surface and knead it for about 8-10 minutes, or until it becomes smooth and elastic. This step is where the magic happens! Kneading develops the gluten in the flour, which gives your homemade garlic knots their chewiness. If the dough is too sticky, sprinkle a little more flour as needed.
- First Rise: Place the kneaded dough in a lightly greased bowl, cover it with a clean kitchen towel or plastic wrap, and let it rise in a warm place for about 1-2 hours, or until it has doubled in size. This is the dough’s first rise, and it’s essential for achieving that fluffy texture.
Cooking Process
- Punch Down the Dough: After the dough has risen, gently punch it down to release the air bubbles. This step helps to redistribute the yeast and gives your knots a better structure. Turn the dough out onto a floured surface again.
- Shape the Knots: Divide the dough into 12 equal pieces. Roll each piece into a long rope, about 8-10 inches long. Tie each rope into a knot, tucking the ends underneath. Place the knots on a baking sheet lined with parchment paper, leaving space between each knot for rising.
- Second Rise: Cover the shaped knots with a towel and let them rise again for about 30 minutes. During this time, preheat your oven to 375°F (190°C). This second rise is crucial as it allows the knots to puff up beautifully.
- Prepare the Topping: While the knots are rising, melt the unsalted butter in a small saucepan over low heat. Add the minced garlic, Italian seasoning, and salt, stirring until well combined. This fragrant mixture will become the delicious garlic topping for your knots.
- Bake the Knots: Once the knots have risen, place them in the preheated oven and bake for about 15-20 minutes, or until they are golden brown. Keep an eye on them towards the end of the baking time; you want that beautiful golden color to develop.
Final Assembly
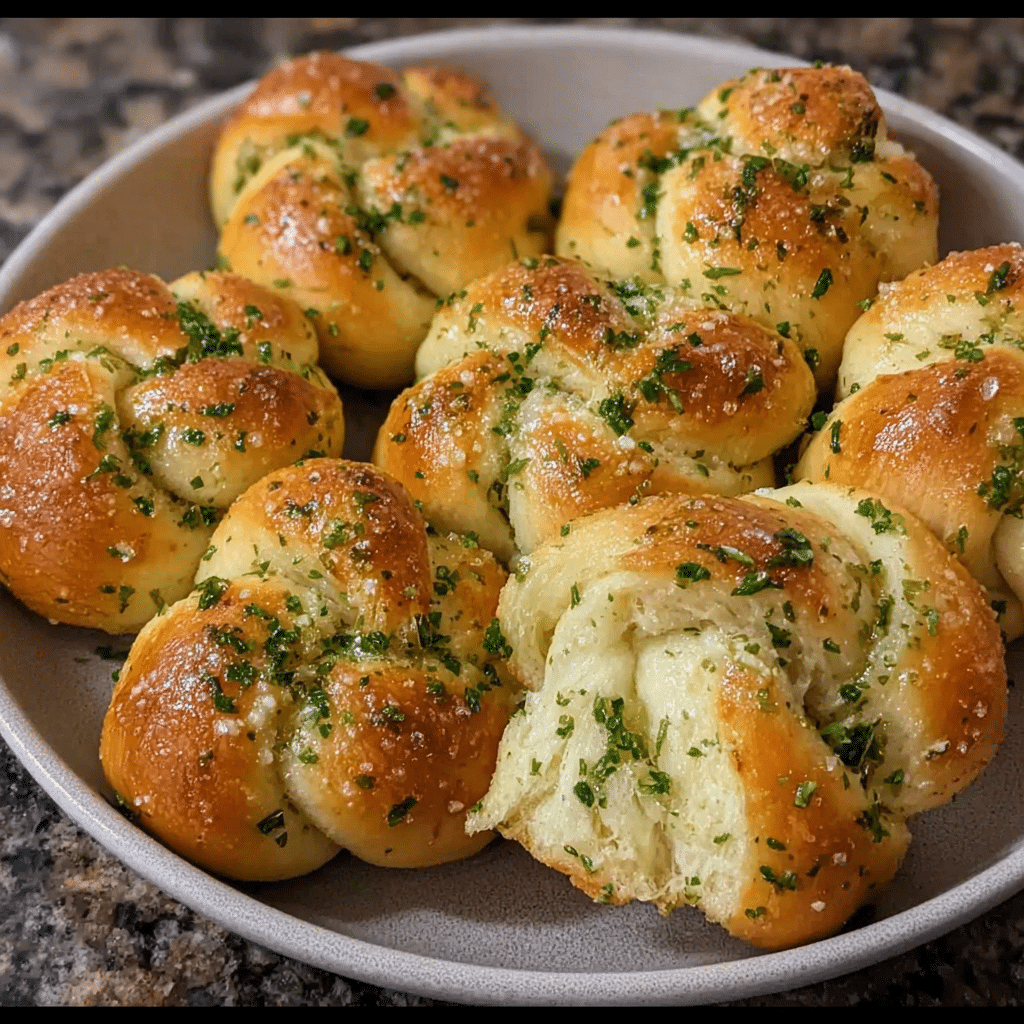
- Brush with Garlic Butter: As soon as the knots come out of the oven, brush them generously with the melted garlic butter mixture. This step is essential for infusing each knot with that incredible garlic flavor. If you choose to sprinkle grated Parmesan cheese and chopped parsley, do so while the knots are still warm so that they melt slightly into the knots.
- Serve Warm: Allow the knots to cool slightly before serving. These homemade garlic knots are best enjoyed warm, fresh out of the oven. They pair perfectly with marinara sauce for dipping or can be served as a side to your favorite pasta dish.
Throughout this process, be mindful of the sensory indicators. The smell of the rising dough, the texture as you knead it, and the golden color as they bake are all signs that you are on the right track. Remember, cooking is as much about feeling as it is about following instructions. Embrace the process, and soon you will have a batch of delightful homemade garlic knots to share with friends and family.
Professional Tips and Techniques for homemade garlic knots
When it comes to making homemade garlic knots, there are a wealth of professional tips and techniques that can elevate your baking game from simple to extraordinary. As someone who has spent years experimenting with dough, I can share some tried-and-true methods that will make your garlic knots not just good, but spectacular.
Professional Techniques
The foundation of any great garlic knot lies in the dough. While store-bought dough can save time, making your own from scratch allows for a more flavorful and texturally superior result. Start with high-quality ingredients. Use bread flour instead of all-purpose flour for its higher protein content, which gives the knots that delightful chewiness.
When mixing your dough, consider using the “autolyse” method. This involves mixing just the flour and water and allowing it to rest for about 30 minutes before adding the yeast and salt. This process hydrates the flour and helps develop gluten, resulting in a softer, more pliable dough.
After kneading, don’t rush the proofing process. Allow the dough to rise until it has doubled in size—this can take anywhere from 1 to 2 hours, depending on the temperature of your kitchen. For faster results, place the dough in a warm, draft-free area, or even in a slightly warmed oven that’s turned off.
Troubleshooting Guide
Even the most experienced bakers face challenges. If your garlic knots don’t rise properly, check your yeast. It should be fresh and active. To test if your yeast is alive, dissolve it in warm water (about 110°F) with a pinch of sugar; it should foam up within 5-10 minutes. If not, it’s time to get new yeast.
If your knots are too tough, they may have been over-kneaded or baked for too long. When kneading, stop as soon as the dough is smooth and elastic, and always keep an eye on your knots in the oven. They should just turn golden brown and not overly dark. Conversely, if they are too doughy inside, they may need more time in the oven, but check every few minutes to avoid overbaking.
Equipment Recommendations
For making homemade garlic knots, having the right equipment can make a world of difference. A good stand mixer with a dough hook is invaluable, especially for kneading. If you prefer a hands-on approach, a large wooden board and a rolling pin will do the trick. A silicone baking mat can help prevent sticking and make cleanup a breeze.
Invest in a good-quality baking sheet and parchment paper for easy removal. If you have a pizza stone, consider using it for a more even bake. Just preheat the stone in the oven to ensure that heat is evenly distributed, giving your knots a crispy exterior.
Make-Ahead and Meal Prep Strategies
One of the best parts about homemade garlic knots is their versatility when it comes to meal prep. You can make the dough ahead of time and store it in the refrigerator for up to 3 days. Just remember to let it come to room temperature before shaping. Alternatively, you can freeze the unbaked knots. Place them on a baking sheet, freeze until solid, then transfer to a freezer-safe bag. When ready to bake, just add a few extra minutes to the baking time.
Scaling the Recipe Up or Down
If you’re hosting a large gathering or simply want to make fewer knots for a snack, scaling your recipe is easy. The ratios of flour, water, yeast, and salt remain consistent. Just remember that larger quantities may require more time for proofing, as the dough needs room to expand. Conversely, if you’re making a smaller batch, you might want to consider dividing the dough into smaller pieces to help it rise faster.
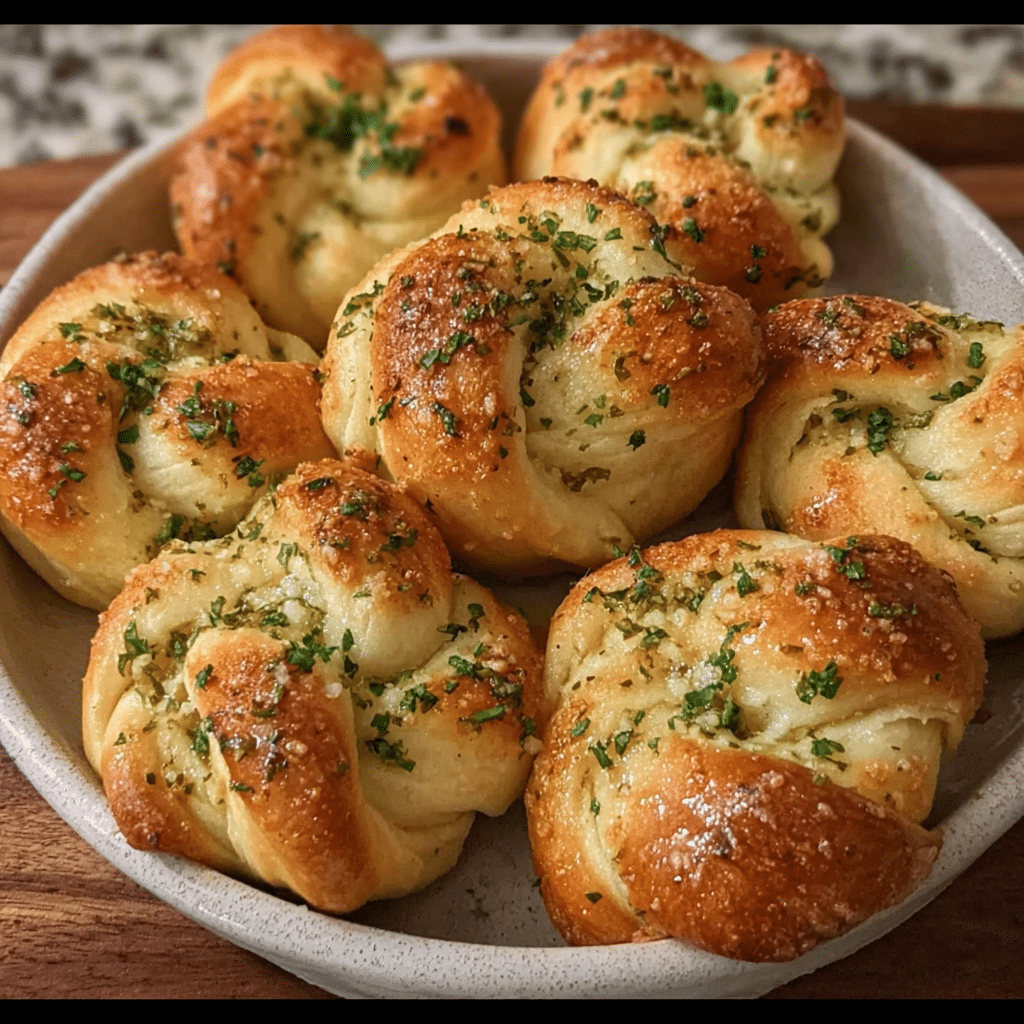
Presentation Tips
Presentation is key when serving homemade garlic knots. Brush them with garlic butter right after baking for that shiny, delicious finish. Serve them in a rustic basket lined with parchment paper for a homey touch or on a wooden board for a more casual feel. A sprinkle of fresh parsley or grated Parmesan on top just before serving adds color and enhances the flavor.
Wine and Beverage Pairings
Pairing beverages with your homemade garlic knots can elevate your dining experience. A light, crisp white wine like Pinot Grigio complements the garlic and butter beautifully. If you prefer beer, a pale ale or a light lager can balance the richness of the knots. For a non-alcoholic option, consider serving them with a refreshing sparkling water infused with lemon or lime for a zesty touch.
Creative Variations and Adaptations of homemade garlic knots
The beauty of homemade garlic knots lies in their adaptability; you can easily modify the basic recipe to suit your tastes or incorporate seasonal ingredients. Let’s explore some creative variations that can take your garlic knots from ordinary to extraordinary.
Seasonal Variations
As the seasons change, so do the ingredients available to us. In spring, consider adding fresh herbs like basil or chives into the dough or as a topping. You can also incorporate roasted garlic for a deeper flavor profile. In the summer, try mixing in sun-dried tomatoes or olives for a Mediterranean twist. For fall, consider adding pumpkin puree to the dough, which not only alters the color but also adds a subtle sweetness that pairs beautifully with the garlicky goodness. Finally, in winter, a sprinkle of crushed red pepper flakes or even some grated cheddar cheese can warm up your garlic knots and make them feel cozy.
Dietary Adaptations
For those following specific dietary restrictions, adapting your homemade garlic knots recipe is entirely possible. To create gluten-free knots, substitute regular flour with a gluten-free all-purpose blend, ensuring that it contains xanthan gum, which mimics the elasticity of gluten. For those on a keto diet, replace the flour with almond flour and add a binding agent like eggs. Vegan adaptations can be made by using flaxseed meal mixed with water as an egg substitute and opting for vegan butter or olive oil in the garlic topping.
Creative Twists
Take your garlic knots to new levels with creative twists. For a cheesy variation, stuff the knots with mozzarella cheese before baking. You can also experiment with different flavor profiles, such as adding a hint of lemon zest to the garlic butter or infusing your olive oil with herbs and spices before brushing it on the knots. If you’re feeling adventurous, try making a sweet version by replacing garlic with cinnamon and brown sugar, creating a delightful dessert that’s perfect for dipping in icing.
When it comes to cooking methods, don’t be afraid to think outside the box. While baking is the traditional method, consider cooking your knots in a cast-iron skillet on the stovetop. This method can create a crispy base that contrasts beautifully with the soft interior. Similarly, if you have a slow cooker, you can arrange the knots in it and let them steam for a unique texture that’s moist and flavorful.
Leftover Transformation Ideas
Leftover garlic knots can easily be transformed into something new. Turn them into garlic bread croutons by dicing them up and toasting them in the oven. These croutons make a fantastic addition to salads or soups. Alternatively, you can repurpose them into a savory bread pudding by cubing the knots and mixing them with eggs, milk, cheese, and your choice of vegetables. Bake until set, and you have a hearty breakfast or brunch dish that’s sure to impress.
Storage, Reheating, and Meal Prep for homemade garlic knots
When it comes to enjoying homemade garlic knots, knowing how to store and reheat them properly can make all the difference in maintaining their deliciousness. After all, no one wants to bite into a soggy or stale knot! Whether you’re preparing a batch for a party or just making a few for yourself, understanding the right storage techniques is crucial. Let’s dive into the ins and outs of storing, reheating, and meal prepping these delightful treats.
Short-term Storage
Once you’ve made your homemade garlic knots, you might be wondering how to keep them fresh for a few days. The best way to store them short-term is in an airtight container. Make sure they have cooled completely before placing them in the container to prevent moisture buildup, which can lead to sogginess. If you don’t have an airtight container, wrapping the knots in plastic wrap or aluminum foil can work, but be aware that they may lose a bit of their texture.
Typically, homemade garlic knots can be stored in the refrigerator for about 3 to 5 days. If you’re like me and love meal prepping, this is a great way to have a quick snack or side dish ready to go. When storing, consider portioning them out into smaller containers. This not only helps with grabbing them on-the-go but also keeps the remaining knots fresher for longer.
Freezing and Long-term Storage
If you want to keep your homemade garlic knots for a longer period, freezing them is an excellent option. To freeze, start by ensuring they’ve cooled completely after baking. Then, place them in a single layer on a baking sheet and pop them in the freezer for about an hour. This step prevents them from sticking together. Once they are frozen, transfer the knots into a freezer-safe bag or container. Be sure to remove as much air as possible to prevent freezer burn. In this state, they can last for about 2 to 3 months.
When you’re ready to enjoy your frozen garlic knots, you have a couple of options. You can let them thaw overnight in the refrigerator, or for a quicker method, you can bake them straight from the freezer. Just remember to add a few extra minutes to the baking time. I’ve found that this method not only saves time but also delivers a fresh-baked taste that is hard to resist.
Reheating Best Practices
Reheating homemade garlic knots is an art in itself. The goal is to revive their crispy exterior and soft, fluffy interior. While microwaving is quick and convenient, it often results in a chewy texture, which isn’t ideal for garlic knots. Instead, I recommend reheating them in the oven. Preheat your oven to 350°F (175°C) and place the knots on a baking sheet, ideally lined with parchment paper. Bake them for about 5 to 10 minutes, or until they’re heated through and the edges regain their crispness.
If you’re dealing with frozen garlic knots, you can reheat them directly from the freezer as mentioned earlier. Just remember to keep an eye on them to avoid overcooking. A sprinkle of fresh garlic butter or a light brush of olive oil before reheating can elevate their flavor even more! Serve them warm with marinara sauce or garlic dipping sauce for a delightful treat.
Aside from reheating, I also love the idea of meal prep with garlic knots. You can make a big batch over the weekend and store them for easy access during the week. Just imagine coming home after a long day and knowing there are delicious, warm garlic knots waiting for you!
Food safety is another important consideration. Always let the knots cool before storage, and ensure your storage containers are clean and dry. If you notice any unusual smells or textures, it’s best to err on the side of caution and discard them. In general, garlic knots can stay fresh in the refrigerator for several days, but keep an eye on how they look and smell to ensure they’re safe to eat.
In summary, knowing how to store, freeze, and reheat your homemade garlic knots can significantly extend their shelf life and maintain their deliciousness. With these tips and techniques, you can enjoy these mouthwatering treats anytime, whether they’re fresh from the oven or pulled from the freezer!
Nutritional Benefits and Health Information
When it comes to enjoying homemade garlic knots, it’s not just about the delicious flavors and satisfying textures; understanding the nutritional benefits can enhance your appreciation for this delightful treat. As someone who loves to indulge in food while also being mindful of health, I find it essential to explore what goes into these knots, how they fit into various diet plans, and modifications to make them even healthier.
Nutritional Profile
A standard serving of homemade garlic knots (about two knots) typically contains around 200 to 300 calories, depending on the ingredients and size. The main components include flour, yeast, garlic, butter, and seasonings. Here’s a breakdown of the macronutrients found in these knots:
- Carbohydrates: The primary source of energy, coming mainly from flour. A serving can contain about 30-40 grams of carbs.
- Proteins: While not a significant source, each serving offers around 5-7 grams of protein, primarily from the flour.
- Fats: The addition of butter or olive oil provides around 10-15 grams of fat, contributing to the flavor and texture.
In terms of vitamins and minerals, garlic knots offer small amounts of essential nutrients. Garlic itself is known for its health benefits, including boosting the immune system and having anti-inflammatory properties. It also contains vitamins B6 and C, manganese, and selenium, which are beneficial for overall health.
Health Benefits
The key ingredients in homemade garlic knots provide various health benefits. Garlic is renowned for its medicinal properties. Studies suggest that garlic can help lower cholesterol levels, improve heart health, and even have antimicrobial effects. Incorporating garlic into your diet can be a delicious way to boost your overall well-being.
Moreover, using whole grain flour instead of white flour can enhance the nutritional value of your garlic knots. Whole grains are rich in fiber, which aids digestion and helps maintain a healthy weight by keeping you fuller for longer. This simple swap not only improves the texture but also increases the knots’ health benefits.
Dietary Considerations
When it comes to dietary restrictions, homemade garlic knots can be quite versatile. For those following a vegan diet, substituting butter with plant-based margarine or olive oil can easily make these knots vegan-friendly. Additionally, gluten-free alternatives, such as almond or coconut flour, can be used for those with gluten intolerance, although adjustments will be needed to ensure the right texture.
If you’re watching your calorie intake, consider making smaller knots or limiting the amount of butter used in the recipe. You can also experiment with herbs and spices to enhance flavor without adding extra calories. A sprinkle of nutritional yeast can provide a cheesy flavor while adding extra nutrients.
In comparison to similar dishes, such as breadsticks or traditional garlic bread, homemade garlic knots often have a lighter texture. However, they can be richer in flavor due to the garlic and butter. Understanding these differences can help you make informed choices when planning meals or indulging in snacks.
In conclusion, homemade garlic knots can be a delightful addition to any meal or enjoyed as a snack. With a good understanding of their nutritional profile, health benefits, and dietary considerations, you can enjoy them guilt-free. Remember that moderation is key, and with some thoughtful modifications, you can savor these delicious knots while staying aligned with your health goals!
Frequently Asked Questions About Homemade Garlic Knots
Quick garlic knots recipe
For a quick garlic knots recipe, you can use pre-made pizza dough for a faster preparation. Simply roll out the dough, cut it into strips, and tie each strip into a knot. Bake at 400°F (200°C) for about 15-20 minutes until golden brown. While the knots are baking, melt some butter and mix in minced garlic and parsley for a delicious topping. Brush this mixture over the hot garlic knots right out of the oven for maximum flavor.
Homemade garlic knots no yeast
If you’re looking for a homemade garlic knots recipe without yeast, you can create a quick dough using baking powder instead. Combine flour, baking powder, salt, and yogurt or sour cream to form a soft dough. Shape the dough into knots and bake them at 400°F (200°C) for 15-20 minutes. To enhance the flavor, mix melted butter with minced garlic and fresh herbs to brush over the knots after baking. This method yields a soft, fluffy texture without the wait for dough to rise.
Soft garlic knots recipe
To achieve soft garlic knots, focus on using high-quality bread flour as it has more protein, which contributes to a chewy texture. Once you knead the dough, allow it to rise until doubled in size, which typically takes about 1 hour. After shaping the knots, consider letting them rest for an additional 30 minutes before baking to enhance their softness. Bake at 375°F (190°C) until golden brown, and immediately brush with a mixture of melted butter, minced garlic, and herbs for added moisture and flavor.
Garlic knots ingredients
The basic ingredients for garlic knots include all-purpose or bread flour, yeast, warm water, sugar, salt, and olive oil for the dough. For the garlic butter topping, you will need unsalted butter, fresh garlic (minced or crushed), and fresh parsley for garnish. Some recipes also suggest adding Italian seasoning or grated Parmesan cheese to the dough for an extra flavor boost. Ensure all ingredients are at room temperature to achieve the best texture and taste.
Garlic knots near me
To find garlic knots near you, consider using food delivery apps or restaurant locators like Yelp or Google Maps. Search for pizza places or Italian restaurants in your area, as they often serve garlic knots as an appetizer. Additionally, check for local bakeries that may offer them fresh. Reading reviews can also help you discover which establishments have the best garlic knots based on customer experiences.
Garlic knots Allrecipes
Allrecipes has a variety of garlic knots recipes, which are user-tested and often include helpful reviews and tips. To find a garlic knots recipe on Allrecipes, simply search for “garlic knots” in their recipe section. Pay attention to the ratings and comments, as they can provide insights into modifications and cooking times that work well. Consider trying a highly-rated recipe and don’t hesitate to experiment with additional toppings or herbs to suit your taste.
1 hour garlic knots
If you want to make garlic knots in just one hour, opt for a quick dough recipe that uses baking powder instead of yeast, as it eliminates the need for proofing. Prepare the dough, shape it into knots, and bake for about 15-20 minutes. While the knots are baking, melt butter and mix in minced garlic and herbs for a flavorful topping. This method allows you to enjoy soft and delicious garlic knots in under an hour, perfect for unexpected guests or last-minute cravings.
Garlic Knots Papa Johns
Garlic knots from Papa John’s are a popular side option that pairs beautifully with their pizzas. They offer a tasty twist on traditional garlic bread, featuring the same buttery, garlicky goodness. You can order them through the Papa John’s website or app for delivery or takeout. If you enjoy the flavor, consider trying to replicate them at home with your own garlic knots recipe, experimenting with similar seasonings and toppings to match that signature taste.


