Layered milk bar is not just a dessert; it’s an experience that encapsulates the essence of comfort and joy in every bite. My journey with this delightful recipe began on a crisp autumn afternoon when the air was filled with the faint scent of fallen leaves and pumpkin spice. I was browsing through an old family cookbook, and there it was: a handwritten note from my grandmother, “Hilly’s Pumpkin Caramel Pie.” The name alone evoked childhood memories of family gatherings, laughter, and the warmth of a home filled with the aromas of baking. This layered milk bar recipe became my go-to during the fall season, a tradition I eagerly pass down to my children, connecting us across generations.
The Story Behind This Recipe
When I first attempted to recreate Hilly’s Pumpkin Caramel Pie, I found myself enveloped in nostalgia. The process of layering the rich, creamy filling with the perfectly spiced pumpkin and the luxurious caramel brought back vivid memories of my grandmother bustling around the kitchen, her laughter echoing against the walls as she expertly crafted this layered masterpiece. Every step in the recipe felt like a tribute to her, each layer an homage to her culinary skills and the love she infused into her cooking. This layered milk bar not only satisfied our sweet cravings but also served as a bridge connecting me to my family’s history.
What makes this recipe unique in the realm of desserts is its versatility and the way it harmonizes flavors and textures. The creamy layers of sweetened milk and pumpkin, combined with the gooey richness of caramel, create a balance that is both indulgent and comforting. Unlike traditional pies, this layered milk bar can be assembled in advance, making it a perfect solution for busy families seeking quick dinner or dessert options. In a world where time often feels like a luxury, having a delightful dessert ready to serve at a moment’s notice is invaluable.
As fall approaches, this layered milk bar becomes not just a dessert but a seasonal staple. The vibrant colors of the pumpkin and the golden hues of caramel reflect the changing leaves outside, making it a visual treat as well. It’s a dish that begs to be shared, whether at Thanksgiving dinner, a cozy gathering with friends, or simply enjoyed on a quiet evening at home. The emotional connection to this layered milk bar runs deep for me; it reminds me of family, love, and the simple pleasures of life.
As you dive into this article, you’ll discover the secrets behind making the perfect layered milk bar, including tips for achieving the ideal texture and flavor balance. We’ll explore the cultural significance of this dish, its history, and how it has evolved over time. Whether you are a seasoned baker or a novice in the kitchen, this layered milk bar recipe will not only be your new favorite but will also bring warmth and joy to your dining table.
Why You’ll Love This Dish
The layered milk bar is not just about the ingredients; it’s about the love and tradition that goes into making it. From the first bite, the combination of pumpkin and caramel will transport you to a world of comfort and happiness. It’s the kind of dish that makes you feel good, both physically and emotionally. The best part? It’s incredibly easy to prepare, making it an excellent choice for families on the go. With a few simple ingredients and minimal prep time, you can create a show-stopping dessert that will impress your guests and delight your family.
So, prepare to embrace the charm and warmth of this layered milk bar. Let’s get baking, and soon enough, you’ll be creating your own memories around the table, just like I did with my grandmother. This recipe isn’t just about food; it’s about the stories we share, the connections we make, and the love we spread through the act of cooking. Join me on this delicious journey!
The Rich History and Cultural Significance of layered milk bar
The rich history and cultural significance of the layered milk bar are as intriguing as its flavor profile. This dessert has its roots in various culinary traditions, blending influences from both European and American kitchens. The layered milk bar, particularly in the form of Hilly’s Pumpkin Caramel Pie, embodies the essence of fall, celebrating the harvest season with its use of pumpkin, a staple ingredient in many autumnal dishes. But how did this delightful dessert come to be? Let’s take a closer look at its origins and the journey it has taken over the years.
Origins and History
The history of the layered milk bar can be traced back to the early 20th century, when the concept of layering desserts became popular. This technique allowed for a variety of flavors and textures to be combined, making each bite a new experience. The use of pumpkin in desserts, particularly around Thanksgiving, has long been a tradition in America, with recipes being passed down through generations. The layering of pumpkin, caramel, and milk in this particular recipe showcases the ingenuity of home cooks who wanted to create something visually appealing and delicious.
As time progressed, the layered milk bar began to evolve, with various regions adding their own twists to the recipe. For instance, some versions incorporate spices like nutmeg and ginger, while others might include different types of crusts or toppings. The beauty of this dessert lies in its adaptability; it can be tailored to suit individual tastes while still honoring its foundational elements. This evolution reflects the changing culinary landscape, where traditional recipes are often reimagined to include modern flavors and techniques.
Cultural Significance
The layered milk bar holds a special place in various cultural celebrations, particularly during the fall season. It often graces the tables of Thanksgiving feasts, family reunions, and harvest festivals. The act of sharing this dessert is a celebration of community and togetherness, as families gather to give thanks and enjoy each other’s company. Each layer of the milk bar tells a story, representing the hard work and dedication that goes into creating something special for loved ones. In many households, it has become a cherished tradition, with each family adding their own unique spin on the recipe, ensuring that it remains a living part of their culinary heritage.
Famous chefs and restaurants have also embraced the layered milk bar, elevating it to new heights in the culinary world. Some have experimented with gourmet ingredients, turning this humble dessert into a fine dining experience. However, the heart of the layered milk bar remains in its simplicity, reminding us that sometimes the best dishes are those made with love and care in our own kitchens.
Nutritional Benefits
Beyond its delicious taste and cultural significance, the layered milk bar also offers several nutritional benefits. Pumpkin, the star ingredient, is packed with vitamins and minerals, including vitamin A, which is crucial for eye health, and fiber, which aids in digestion. The addition of milk adds calcium and protein, making this dessert not just a treat but also a source of essential nutrients. While it’s important to enjoy desserts in moderation, incorporating wholesome ingredients like pumpkin and milk can make the layered milk bar a more balanced option for those looking to indulge without sacrificing their health.
In conclusion, the layered milk bar is more than just a dessert; it’s a celebration of culture, history, and the joy of cooking. Its evolution over time, coupled with its nutritional benefits, makes it a dish worth exploring. As you prepare to make your own layered milk bar, remember the stories and traditions that come with it. Embrace the flavors, the history, and the love that each layer represents, and make it a part of your culinary repertoire.
Essential Ingredients for Perfect layered milk bar
Creating a delightful layered milk bar like Hilly’s Pumpkin Caramel Pie begins with the right selection of ingredients. Each component is crucial not just for flavor but for texture and presentation as well. Let’s dive into the essential ingredients and their roles in crafting this decadent treat.
Essential Ingredients
- PUMPKIN GANACHE:
- 2 (15-ounce) cans Pumpkin Puree (NOT pumpkin pie filling or mix)
- 1 1/4 cups Heavy Cream
- 1/3 cup Corn Syrup (scant)
- 5 Tablespoons Unsalted Butter
- 12 to 16 ounces White Chocolate (2 to 2 1/2 cups high-quality white chocolate, see notes)
- 3 teaspoons Pumpkin Pie Spice
- 1/2 teaspoon Salt
- CHEWY SALTED CARAMEL:
- 1 cup White Sugar
- 1/3 cup Heavy Cream
- 6 Tablespoons Unsalted Butter
- 1/4 cup Water
- 2 Tablespoons Corn Syrup
- 1 teaspoon Salt (up to 2 teaspoons of salt to taste)
- 2 teaspoons Vanilla Extract
- PIE CRUST: (may use my pie crust recipe linked in the notes section)
- 1 1/2 cups Flour
- 12 Tablespoons Unsalted Butter
- 1/2 cup Fine Ground Cornmeal
- 1 Tablespoon White Sugar (heaping)
- 1/2 teaspoon Salt
- 1/4 to 1/3 cup Ice Cold Water
- 1 Tablespoon Apple Cider Vinegar
- STREUSEL TOPPING:
- 1/2 cup Flour
- 1/3 cup Light Brown Sugar
- 1/3 cup Rolled Oats
- 6 Tablespoons Unsalted Butter
- 1 teaspoon Cinnamon
- 1/2 teaspoon Cardamom
- pinch of salt
- FRESH WHIPPED CREAM:
- 2 cups Heavy Cream
- 3 Tablespoons Powdered Sugar

Layered Milk Bar Hilly’S Pumpkin Caramel Pie
Ingredients
PUMPKIN GANACHE:
- (2) 15-ounce cans Pumpkin Puree (NOT pumpkin pie filling or mix)
- 1 1/4 cups Heavy Cream
- 1/3 cup Corn Syrup (scant)
- 5 Tablespoons Unsalted Butter
- 12 to 16 ounces White Chocolate (2 to 2 1/2 cups high-quality white chocolate, see notes)
- 3 teaspoons Pumpkin Pie Spice
- 1/2 teaspoon Salt
CHEWY SALTED CARAMEL:
- 1 cup White Sugar
- 1/3 cup Heavy Cream
- 6 Tablespoons Unsalted Butter
- 1/4 cup Water
- 2 Tablespoons Corn Syrup
- 1 teaspoon Salt (up to 2 teaspoons of salt to taste)
- 2 teaspoons Vanilla Extract
PIE CRUST: (may use my pie crust recipe linked in the notes section)
- 1 1/2 cups Flour
- 12 Tablespoons Unsalted Butter
- 1/2 cup Fine Ground Cornmeal
- 1 Tablespoon White Sugar (heaping)
- 1/2 teaspoon Salt
- 1/4 to 1/3 cup Ice Cold Water
- 1 Tablespoon Apple Cider Vinegar
STREUSEL TOPPING:
- 1/2 cup Flour
- 1/3 cup Light Brown Sugar
- 1/3 cup Rolled Oats
- 6 Tablespoons Unsalted Butter
- 1 teaspoon Cinnamon
- 1/2 teaspoon Cardamom
- pinch of salt
FRESH WHIPPED CREAM:
- 2 cups Heavy Cream
- 3 Tablespoons Powdered Sugar
Instructions
PUMPKIN GANACHE:
- Spread both cans of pumpkin on a parchment lined baking sheet and roast at 325 for about 20 – 30 minutes. Color should darken by two shades and be well reduced. The puree should reduce to about 2 cups or 500g — if your puree is not at this amount, keep roasting! Let cool before use.
- Add white chocolate to a large heat safe bowl, set aside. Add cream, corn syrup, and butter to a small pot, and bring to boil. Once boiling, pour hot cream mixture over white chocolate, making sure all the chocolate is covered. Let sit for 1 minute.
- Add roasted pumpkin, spices, and salt to the white chocolate mixture, stir.
Using an immersion blender or place all ingredients in a blender, blend all ingredients until completely smooth and silky.
- Ganache can be made 1 – 2 days ahead, stored in the fridge. Reheat 20 seconds at a time in the microwave to achieve pourable consistency before filling your pie.
SALTED CARAMEL:
-
- Measure out the heavy cream and butter (cut into tablespoons). It is best to keep these cold before use. Measure the salt and vanilla into small vessels and keep close by. Keep a whisk nearby.
- Add the following to a medium saucepan: water, white sugar, and corn syrup. Mix well with heat proof spatula so all the sugar is hydrated, then set over medium heat.
You can stir this mixture until the sugar dissolves. Once it turns clear and is bubbling all over, only swirl the pan (this will help prevent crystallization of the sugar.) You can also begin brushing down the sides of the pan with a wet pastry brush to prevent crystallization along the edges, if you wish.
- Once the mixture begins to take on a golden color, make sure to gently swirl the pan often, so the sugar does not caramelize all in one place. At this point, bring your butter and cream out of the fridge and keep nearby.
Watch the caramel closely, keep cooking to bring it to a rich golden brown color. Be careful not to burn the caramel. It is better to pull it from the heat early then to pull it too late and risk burning it. Turn off the heat, and remove the pan from the heat.
- Carefully add the butter one tablespoon at a time, whisking well in between each Tbsp until fully incorporated — be careful as this will foam up and produce a lot of steam.
Slowly stream in your cream, whisking well and quickly. Add the vanilla, whisk. Add the salt, whisk.
Pour into a heat safe container and allow to come to room temperature, then place in the refrigerator to fully cool.
- Caramel can be made 1-2 days ahead, stored in the fridge. Reheat in 20 second increments in the microwave to achieve pourable consistency to fill the pie.
PIE CRUST:
- Measure out all dry ingredients into your largest bowl. Mix together until well incorporated.
Cut cold butter into tablespoons and add to your bowl. Toss with hands until all the butter is coated in flour mixture.
Smash, squeeze, and break cold butter chunks with your fingers until some of the mixture resembles a coarse meal but there are still plenty of pieces of butter about the size of blueberries in the mix. If butter has gone soft and melty, place the entire bowl into the fridge for 15 minutes to firm up, otherwise, proceed.
- Mix vinegar and ice water together, then add to the flour mixture one tablespoon at a time, tossing with hands in between additions. The amount of water you will need varies — so add water until the mixture holds together when pressed into a ball, but is still a little crumbly, and isn’t sticky to the touch.
- Form into a disc, wrap tightly in plastic wrap and refrigerate for at least 30 minutes. Once firmed up, proceed. If your dough is too hard to roll out, allow it to sit at room temp for 5 – 10 minutes.
- Dust the surface, rolling pin, and both sides of the pie crust lightly with flour. Roll out the dough into a long rectangle-ish shape — short side facing you. The sides of the dough may have cracked a little, and the dough might be a little crumbly, that is totally fine at this stage.
Fold the dough like a letter: fold the far side down towards you, then the side closest to you on top of that folded down side. Press it all back together, rotate the dough 90 degrees, then repeat the roll and fold, making sure to dust the surface and rolling pin with more flour as needed.
Once folded and dough has become cohesive and not shaggy, roll out dough into a circle that is at least two inches wider than the base of your pie tin. Carefully transfer your rolled out dough to your tin, draping, rather than stretching it into place. Fold excess dough underneath itself to create a lip, and crimp as desired.
- Return to the fridge to firm up. Preheat the oven to 350 degrees. To blind bake the pie crust: place the tin on a baking sheet and line the inside of the pie with foil or parchment. Fill with your chosen weights. I like to tent the edges of my crust with foil to prevent burning.
Place in the oven and allow to bake for about 30-35 minutes, checking occasionally to ensure the edges of your crust have not taken on too much color (tent with foil if needed.)
When the edges of your pie are lightly browned, remove weights from inside of the pie to properly cook the center — prick the bottom of the pie crust with a fork to prevent ballooning.
Continue to cook for an additional 15 – 20 minutes, until your pie is golden brown in color.
- Cool for at least 1 hour before filling. Pie crust can be made several days ahead of time, pre-baked, and stored in the fridge. Or, store unbaked pie crust in the freezer for up to a month.
STREUSEL:
- Add all ingredients to a medium bowl. Mash and mix with hands until a loose crumb forms, and there are no dry spots or chunks of butter.
- Spread on a parchment lined sheet pan. Bake at 325 for 15 minutes, agitating every five minutes or so until golden brown.
Streusel can be made up to a week ahead, stored at room temp in an airtight container.
FRESH WHIPPED CREAM:
- When ready to serve the pie, in a mixing bowl, whip heavy cream and powdered sugar until soft peaks form.
ASSEMBLING:
- Pour room temperature caramel into the base of the pre-baked pie crust so the base is fully covered and level. Place the filled shell into the fridge to firm up for 20 – 25 minutes.
Pour pumpkin ganache over caramel and quickly spread using offset spatula or spoon to make sure all caramel is covered with ganache.
- Place pie in the refrigerator as soon as possible, covered, and overnight (8 hours minimum). Ganache should feel firm to the touch, should not stick to your fingers, and feel solid all the way through.
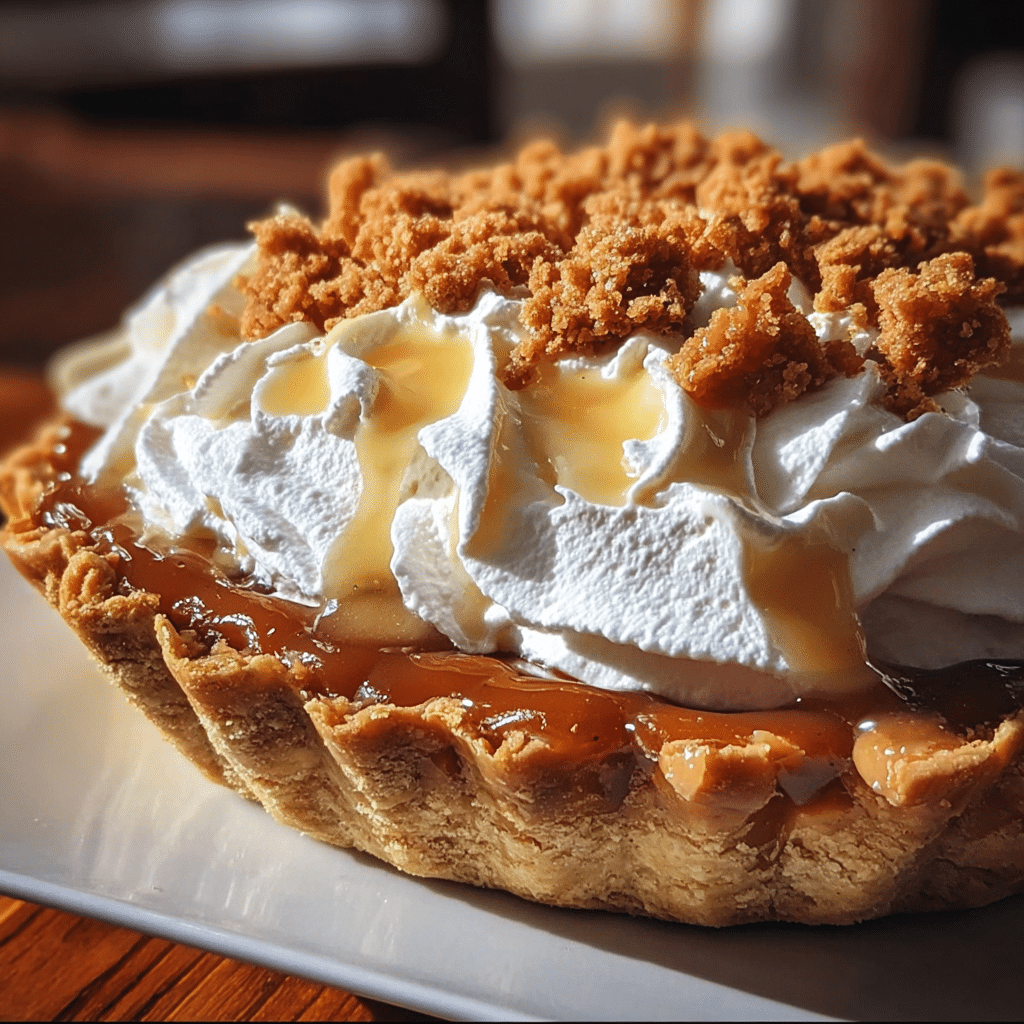
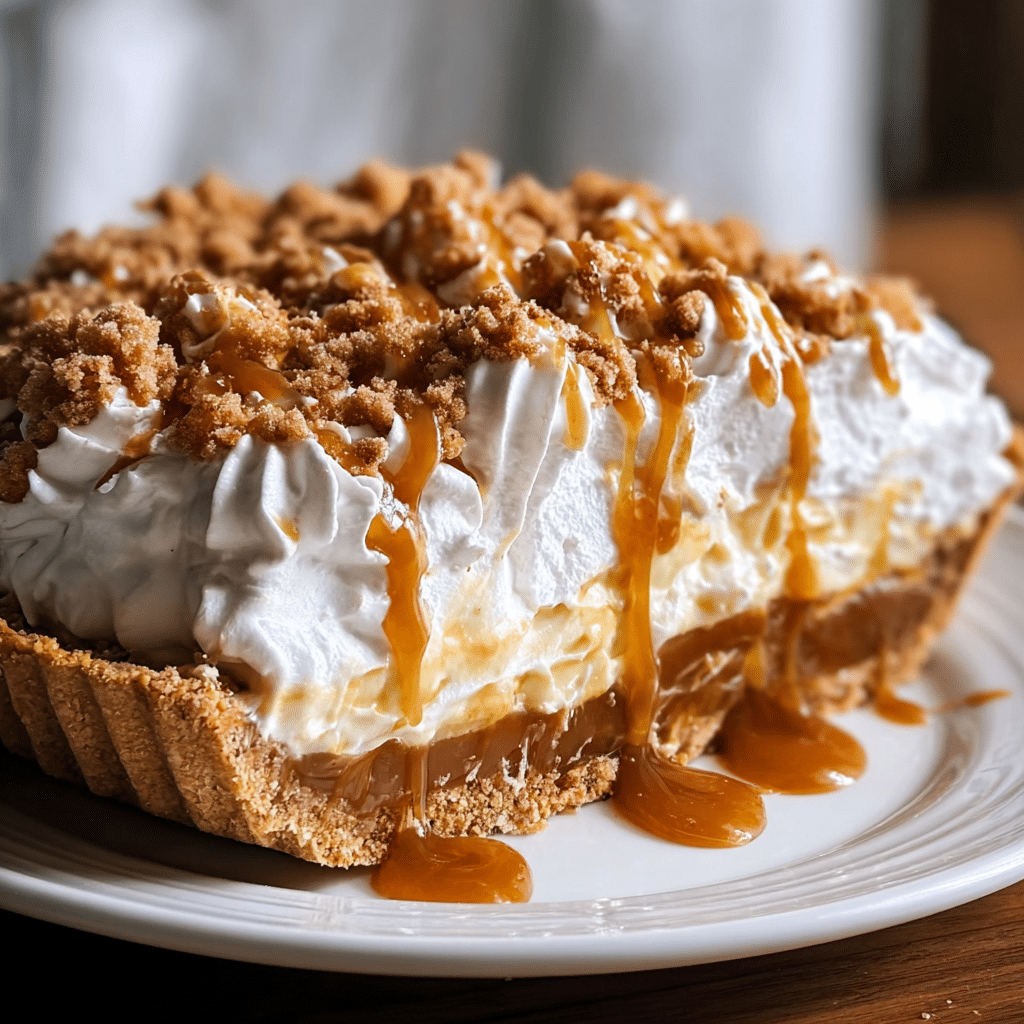
- Serve pie cold, directly out of the fridge. Top with fresh whipped cream and streusel to serve.
- Store in the refrigerator.
Each of these ingredients contributes to the overall flavor and texture of the layered milk bar. For instance, pumpkin puree is the star of the show, providing a rich, creamy base for the ganache while also giving that classic autumn flavor. It’s essential to choose pure pumpkin puree and not pumpkin pie filling, as the latter contains added sugars and spices that can overwhelm the recipe.
The heavy cream is crucial for both the ganache and the whipped cream, providing a luscious texture that melts in your mouth. When selecting heavy cream, look for a product with a high fat content (around 36% or more) to ensure the best results. I always recommend using unsalted butter for baking, as it gives you control over the saltiness of the final product.
Corn syrup in the ganache adds sweetness and helps create that smooth texture we crave in desserts. When it comes to chocolate, quality matters! Opt for high-quality white chocolate to ensure a creamy, not overly sweet ganache. A good white chocolate should have cocoa butter as the primary fat, which makes all the difference in flavor and texture.
As for the chewy salted caramel, sugar, cream, and butter are the trifecta that creates that delightful gooey consistency. The key here is patience; cooking the sugar until it reaches a perfect amber color will deliver a deep, rich flavor. Don’t rush this process, as it’s easy to burn sugar.
The pie crust is where you can let your creativity shine. If you’re pressed for time, a store-bought crust can be a lifesaver. However, making your own allows you to control the ingredients and flavor. The cornmeal adds a delightful texture and a hint of sweetness, which complements the pumpkin beautifully.
The streusel topping gives an extra layer of crunch and flavor, with oats adding heartiness and the warm spices of cinnamon and cardamom infusing the dish with warmth and comfort. Finally, the fresh whipped cream is the crowning glory of the layered milk bar. Sweetened with powdered sugar, it adds a lightness that balances the richness of the other components.
Shopping Tips
When shopping for ingredients, opt for seasonal produce whenever possible. Fresh pumpkins are often available in the fall, and using them instead of canned puree can elevate your pie. If you must use canned pumpkin, check the label to ensure it’s 100% pure pumpkin.
For the spices, consider buying whole spices and grinding them yourself. This simple step can significantly enhance the flavor profile of your layered milk bar. Look for high-quality chocolate at specialty stores or online; it can make a world of difference in your dessert.
Substitutions and Alternatives
If you have dietary restrictions, there are plenty of substitutions available. For a dairy-free version, use coconut cream instead of heavy cream and a dairy-free butter substitute. Gluten-free flour blends can replace regular flour in the pie crust and streusel topping. If you prefer to avoid corn syrup, you can use maple syrup or honey as alternatives, but keep in mind that they may alter the texture slightly.
Storage is also an essential consideration. Most of these ingredients, like flour and sugar, can be stored in a cool, dry place for months. However, heavy cream and butter should be kept refrigerated and used before their expiration dates. And remember, homemade caramel can be stored in an airtight container in the fridge for up to two weeks, so you can make it ahead of time!
Planning ahead and selecting quality ingredients not only enhances the flavor of your layered milk bar but also adds a personal touch that makes the dessert even more special. The care you take in choosing and preparing each ingredient will shine through in the final product, turning this seasonal delight into a memorable culinary experience.
Detailed Step-by-Step layered milk bar Cooking Instructions
Now that we’ve gathered all the essential ingredients for our layered milk bar, it’s time to roll up our sleeves and get into the nitty-gritty of the cooking process. Making Hilly’s Pumpkin Caramel Pie is a rewarding journey filled with delightful aromas and visual cues that signal each step’s success.
Preparation Steps
- Gather Your Ingredients: Start by collecting all your ingredients in one place. This mise en place approach not only saves time but also makes the process smoother. Ensure everything is measured out and prepped before you begin cooking.
- Preheat the Oven: Set your oven to 350°F (175°C) to ensure it’s hot and ready for the pie crust. A preheated oven guarantees even baking, which is crucial for a perfect crust.
- Prepare the Pie Crust: In a large mixing bowl, combine 1 1/2 cups of flour, 12 tablespoons of unsalted butter, 1/2 cup of fine ground cornmeal, heaping 1 tablespoon of white sugar, and 1/2 teaspoon of salt. Use a pastry cutter or your fingers to blend the ingredients until they resemble coarse crumbs. Gradually add ice-cold water and apple cider vinegar until the dough comes together. Roll it out on a floured surface and fit it into your pie dish.
- Blind Bake the Crust: To prevent a soggy bottom, blind bake the crust for about 15 minutes. Place parchment paper over the crust and fill it with pie weights or dried beans. This technique keeps the crust from puffing up. Once done, remove the weights and allow it to cool slightly.
Cooking Process
- Make the Pumpkin Ganache: In a medium saucepan, combine the pumpkin puree, heavy cream, corn syrup, unsalted butter, white chocolate, pumpkin pie spice, and salt. Heat over medium-low, stirring constantly until the chocolate melts and everything is fully combined. You want a smooth, creamy consistency. This step is essential for achieving the luxurious texture that defines our layered milk bar.
- Prepare the Chewy Salted Caramel: In another saucepan, combine 1 cup of white sugar, 1/4 cup of water, and 2 tablespoons of corn syrup. Cook over medium heat without stirring until the mixture turns a deep amber color. This process takes some patience, so keep an eye on it. Once it reaches the right color, carefully add the heavy cream, unsalted butter, salt, and vanilla extract. Stir until smooth. Be cautious, as the mixture will bubble vigorously!
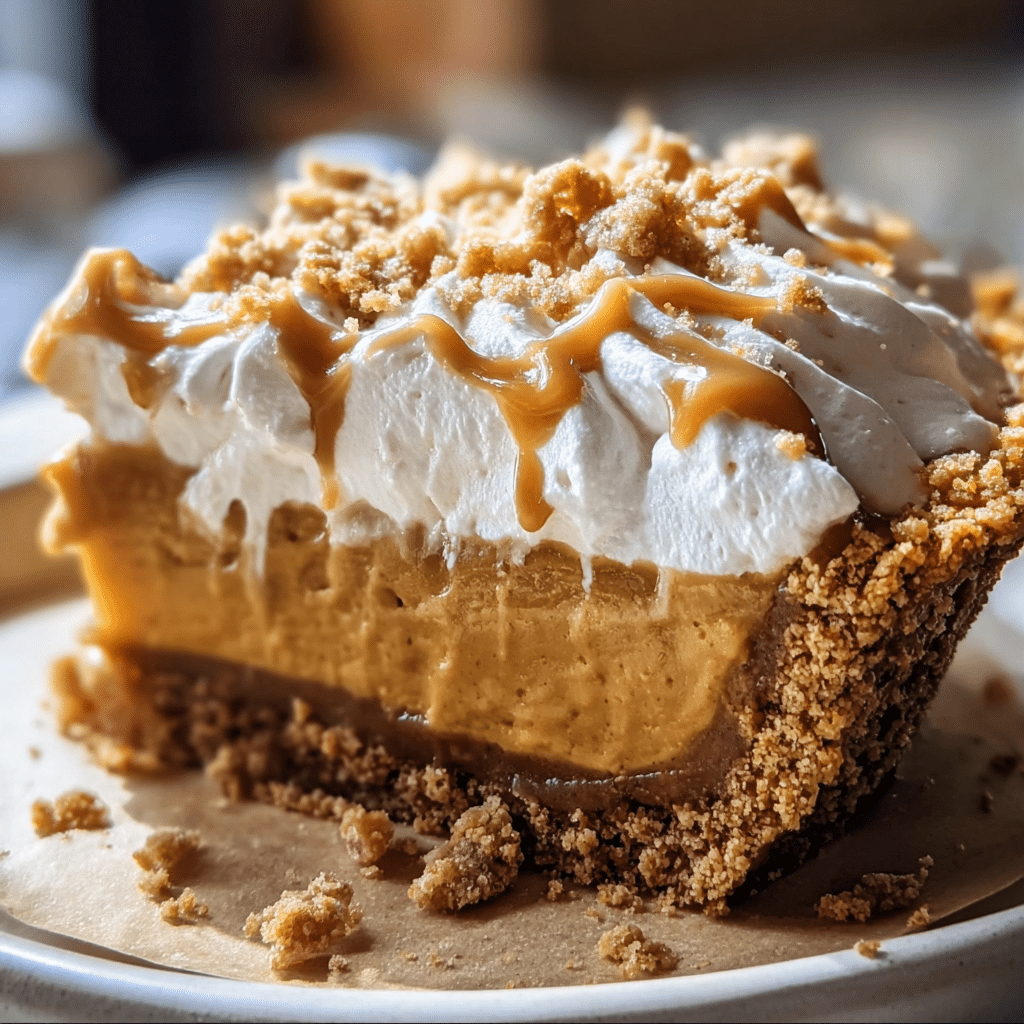
- Assemble the Layers: Start by pouring a layer of the pumpkin ganache into the cooled pie crust. Allow it to set slightly, about 10-15 minutes. Next, pour the chewy salted caramel over the ganache layer, spreading it evenly. Top it with another layer of pumpkin ganache and allow it to set completely in the fridge for at least an hour.
Final Assembly
- Prepare the Streusel Topping: While the pie is chilling, mix together 1/2 cup of flour, 1/3 cup of light brown sugar, 1/3 cup of rolled oats, 1 teaspoon of cinnamon, 1/2 teaspoon of cardamom, and a pinch of salt in a bowl. Cut in 6 tablespoons of unsalted butter until the mixture is crumbly. Spread this over the top of your chilled pie and return it to the oven for an additional 15 minutes, or until the topping is golden brown.
- Make the Fresh Whipped Cream: In a mixing bowl, beat 2 cups of heavy cream with 3 tablespoons of powdered sugar until soft peaks form. This light and fluffy topping will balance the richness of the ganache and caramel.
- Serve and Enjoy: Once the streusel has cooled slightly, slice the pie into portions and serve with a generous dollop of fresh whipped cream on top. This is the moment you’ve been waiting for—the first bite of your beautifully crafted layered milk bar is sure to evoke smiles and satisfied sighs!
Throughout this cooking process, keep an eye on the textures and aromas. The scent of the pumpkin and spices will fill your kitchen, creating an inviting atmosphere. Remember, baking is as much about the journey as it is about the finished product. Enjoy the process, and don’t be afraid to adjust flavors to make it your own. With these detailed steps, you’ll not only master the art of the layered milk bar but also create delicious memories in the kitchen.
Professional Tips and Techniques for layered milk bar
Creating a delicious layered milk bar, particularly one that embodies the essence of Hilly’s Pumpkin Caramel Pie, can be a rewarding yet intricate journey. With the right tips and techniques, you can elevate this dessert to new heights. Here, I’ll share some professional cooking techniques, troubleshooting advice, and presentation tips that will help you master the art of making a layered milk bar.
Professional Techniques
When it comes to crafting a layered milk bar, precision is key. One of the most essential professional techniques involves understanding the layering process. Each layer must be allowed to set properly before adding the next to create that stunning visual effect. I often find myself using a small offset spatula to gently smooth each layer, ensuring even distribution and preventing any unsightly lumps.
Another insider secret is to use high-quality ingredients. For the pumpkin layer, opt for pure pumpkin puree rather than the canned pie filling. This allows you to control the sweetness and spices better, creating a more authentic flavor profile. Additionally, consider using a combination of different types of chocolate for the milk bar’s chocolate layer. A blend of dark and milk chocolate can create a richer, more complex taste.
Temperature control is another critical factor in achieving the perfect layered milk bar. When melting chocolate, for instance, use a double boiler to avoid scorching. If you’re working with caramel, utilize a candy thermometer to achieve the soft-ball stage, ensuring that your caramel layer is both pourable and indulgent.
Troubleshooting Guide
Even seasoned cooks run into issues. One common problem when creating a layered milk bar is the separation of layers. If this happens, it could be due to improper cooling. Always allow each layer to cool completely before adding the next. If you find your layers are still sliding apart, try chilling the entire dessert for a longer period.
Another frequent challenge is achieving the perfect consistency for the caramel layer. If it’s too runny, it can seep into the other layers, while being too thick makes it difficult to pour. If you encounter this, simply reheat the caramel gently and add a touch more cream. This will help you achieve that luscious texture ideal for a layered milk bar.
Presentation Tips
Presentation is everything when it comes to desserts, especially a layered milk bar. To heighten the visual appeal, consider using a clear glass dish or individual parfait glasses. This allows the beautiful layers to shine through and gives your guests a sneak peek of the deliciousness to come.
For a finishing touch, garnish with toasted pecans or a sprinkle of cinnamon on top of the final layer. A drizzle of caramel sauce can also enhance the aesthetic while emphasizing the flavors. Don’t forget about the power of color! Fresh whipped cream can add a light, fluffy contrast against the rich colors of pumpkin and chocolate.
Furthermore, consider the use of edible flowers or herbs for a unique touch. A few sprigs of mint or edible pansies can add a pop of color and freshness that draws the eye and whets the appetite.
Wine and Beverage Pairings
Pairing beverages with your layered milk bar can elevate the entire dining experience. For a pumpkin caramel dessert, a sweet dessert wine like a late harvest Riesling or a Moscato complements the flavors beautifully. The floral notes and sweetness of these wines enhance the caramel’s richness and the pumpkin’s warmth.
If you prefer something non-alcoholic, consider serving a spiced chai latte or a rich hot chocolate. The warm spices in these drinks resonate with the flavors of your layered milk bar, creating a harmonious pairing that is sure to impress your guests.
In conclusion, mastering the layered milk bar, especially one inspired by Hilly’s Pumpkin Caramel Pie, is a delightful task that can be simplified with the right techniques and tips. By focusing on quality ingredients, precise technique, and beautiful presentation, you can create a dessert that is not just a treat but a celebration of flavors and creativity.
Creative Variations and Adaptations of layered milk bar
While Hilly’s Pumpkin Caramel Pie layered milk bar is a staple, the beauty of this dessert lies in its adaptability. There are countless ways to switch things up, whether you’re looking to incorporate seasonal ingredients, cater to specific dietary needs, or simply explore your culinary creativity. Let’s dive into some creative variations and adaptations that will keep your layered milk bar fresh and exciting!
Seasonal Variations
One of the most enjoyable aspects of cooking is utilizing seasonal ingredients. In the fall, pumpkin reigns supreme, but as the seasons change, so can your layered milk bar. In winter, consider swapping pumpkin for spiced pear or apple. A spiced apple caramel layer paired with a creamy vanilla base can create a cozy dessert perfect for chilly evenings.
In spring and summer, fresh berries can take center stage. Imagine a layered milk bar with a base of creamy lemon cheesecake, topped with a mixed berry compote. The bright colors and sweet-tart flavors are a delightful contrast to the heavier, spiced flavors of fall. You can also incorporate fresh herbs like basil or mint into your berry layer for a refreshing twist.
Dietary Adaptations
As our understanding of dietary restrictions evolves, so does our creativity in the kitchen. For those looking to enjoy a layered milk bar while adhering to specific dietary guidelines, the possibilities are endless. For a keto-friendly version, substitute traditional sweeteners with erythritol or stevia, and replace graham cracker crust with almond flour crust or nut-based layers.
If you’re catering to vegans, consider using coconut milk or almond milk instead of dairy. Aquafaba can be a fantastic substitute for whipped cream, creating a light and airy topping without any animal products. You can also experiment with using silken tofu blended with maple syrup and vanilla as a creamy layer — it’s surprisingly tasty!
Creative Twists
Don’t shy away from experimenting! Adding unexpected flavors can turn your layered milk bar into a culinary adventure. For instance, consider infusing your layers with spices like cardamom or chai for an exotic twist. A layer of matcha green tea can add both color and flavor, offering a unique contrast to the sweetness of the caramel and pumpkin layers.
Additionally, think about incorporating a layer of crunchy texture. Adding crushed cookies, nuts, or even a layer of graham cracker crumbs can provide a delightful contrast to the smooth layers of your milk bar. This textural element can make each bite more interesting and enjoyable.
Leftover transformations can also be a fun way to breathe new life into your layered milk bar. If you have leftover layers, consider turning them into parfaits with yogurt for breakfast or blending them into a smoothie. You can even freeze leftover layers in popsicle molds for a frozen treat that captures the essence of your original dessert.
In conclusion, the layered milk bar, especially one inspired by Hilly’s Pumpkin Caramel Pie, offers endless opportunities for creativity and adaptation. By embracing seasonal ingredients, dietary needs, and your adventurous spirit in the kitchen, you can ensure this dessert remains a beloved staple in your home for years to come. So go ahead, experiment, and craft a layered milk bar that reflects your personal taste and culinary flair!
Storage, Reheating, and Meal Prep for layered milk bar
When it comes to enjoying a delectable layered milk bar like Hilly’s Pumpkin Caramel Pie, knowing how to store it properly is essential to maintain its deliciousness for as long as possible. Whether you’re making this mouthwatering dessert for a holiday gathering or simply preparing it to enjoy throughout the week, understanding the storage methods will ensure that every bite remains as fresh and flavorful as the day it was made.
Short-term Storage
For short-term storage, your first line of defense is the refrigerator. After preparing your layered milk bar, allow it to cool completely at room temperature before wrapping it up. This is crucial because if you cover it while it’s still warm, condensation can accumulate, leading to a soggy texture.
To store your pie in the refrigerator, I recommend using an airtight container or wrapping it tightly with plastic wrap. If you have a pie dish with a lid, that’s even better! The goal is to keep the pie sealed to prevent it from absorbing any odors from other foods in the fridge. Generally, a well-stored layered milk bar can last for about 3 to 5 days in the refrigerator.
As a personal tip, when preparing meals in advance, I often slice my desserts into individual portions before storing. This not only makes it easier to grab a slice when the craving strikes, but it also helps maintain the integrity of the pie without exposing the entire dessert to air each time you open the container.
Freezing and Long-term Storage
If you want to enjoy your layered milk bar beyond the typical few days, freezing is a fantastic option. To freeze your pie, let it cool completely, then slice it into portions (if you haven’t already). Wrap each piece tightly in plastic wrap, ensuring there are no exposed areas, as this could lead to freezer burn. After wrapping, place the slices in a freezer-safe container or a heavy-duty freezer bag.
When stored correctly, the layered milk bar can last for about 2 to 3 months in the freezer. When you’re ready to enjoy a slice, simply transfer it to the refrigerator to thaw overnight. If you’re in a hurry, you can also thaw it at room temperature for about an hour, but avoid using the microwave as it can change the texture.
Freezing desserts can be a bit of a game changer, especially during busy seasons. I often make two pies at once – one for immediate enjoyment and one for later. It’s an easy way to keep desserts on hand for impromptu gatherings or late-night cravings!
Reheating Best Practices
When it comes to reheating your layered milk bar, the goal is to restore its original texture and flavor without overcooking it. If you’ve frozen your pie, allow it to thaw in the refrigerator, and then you can reheat it in the oven or microwave.
For oven reheating, preheat your oven to 350°F (175°C). Place the pie on a baking sheet lined with parchment paper to catch any drips. Cover it loosely with aluminum foil to prevent the top from browning too quickly. Heat for about 10-15 minutes, or until warmed through. The foil is essential here to maintain moisture, which keeps the pie from drying out.
If you opt for the microwave, heat individual slices in 15-30 second intervals. Check the pie frequently to prevent it from becoming too hot, as this can alter the creamy texture that makes the layered milk bar so delightful.
Food Safety Considerations
Food safety is paramount when storing any dessert, including your layered milk bar. Always ensure that your pie is cooled before refrigeration or freezing to avoid any bacterial growth. Additionally, make sure that your storage containers are clean and dry before you place your pie inside.
As for shelf life, remember that while it can last in the fridge for up to 5 days, it’s always best to trust your senses. If the pie looks or smells off, it’s wise to err on the side of caution and dispose of it. With desserts, freshness is key!
Ultimately, when it comes to storage, portioning your layered milk bar not only helps with meal prep but also makes it easy to enjoy whenever the craving strikes. These storage techniques not only extend the life of your pie but also keep each bite delectable and satisfying!
Nutritional Benefits and Health Information
Understanding the nutritional profile of Hilly’s Pumpkin Caramel Pie, or any layered milk bar, can help you appreciate its deliciousness while also being mindful of its health implications. The ingredients of this dessert, while indulgent, can also offer several benefits when enjoyed in moderation.
Nutritional Profile
The base of a typical layered milk bar usually includes ingredients like pumpkin puree, cream cheese, caramel sauce, and a crust that may be made from graham crackers or similar components. Let’s break down some of these key ingredients:
- Pumpkin Puree: This is the star of the show in any pumpkin pie. Pumpkin is low in calories but high in vitamins A and C, fiber, and antioxidants. A one-cup serving of pumpkin puree typically contains about 80 calories, making it a nutrient-dense addition to your dessert.
- Caramel Sauce: While delicious, caramel is high in sugar and calories. However, it also provides a sweet contrast to the earthy flavor of pumpkin, contributing to the overall flavor balance.
- Cream Cheese: This adds richness and creaminess to the layered milk bar. While it’s higher in fat, it also contains protein and calcium, making it a valuable ingredient in moderation.
- Graham Cracker Crust: This often contains refined sugars and fats, but it can also provide some fiber if made with whole grains.
When considering a slice of your layered milk bar, a typical serving may range from 200-300 calories, depending on portion size and the specific ingredients used. This can vary widely based on the recipe variations.
Health Benefits
One of the most appealing aspects of the layered milk bar is that it can be a source of several health benefits, particularly due to the pumpkin content. Pumpkin is rich in beta-carotene, which converts to vitamin A in the body, promoting healthy vision and skin. Its high fiber content also aids in digestion, helping to keep you fuller longer.
Additionally, spices commonly used in pumpkin desserts, such as cinnamon and nutmeg, have anti-inflammatory properties and can help regulate blood sugar levels. These spices not only add flavor but also contribute to an overall healthier profile for the dessert.
Dietary Considerations
For those with dietary restrictions, it’s crucial to consider the ingredients in your layered milk bar. For instance, if you’re gluten-sensitive, using a gluten-free graham cracker alternative can make this dessert more accessible. Additionally, those with lactose intolerance may consider using lactose-free cream cheese or non-dairy cream alternatives.
Vegans have options as well! Substituting traditional ingredients with plant-based versions, such as using silken tofu blended with maple syrup instead of cream cheese, can create a delicious vegan layered milk bar without sacrificing flavor.
When it comes to balancing indulgence with nutrition, consider enjoying your layered milk bar as an occasional treat rather than a daily dessert. Pairing it with a cup of herbal tea can enhance the experience while keeping the meal balanced.
In conclusion, Hilly’s Pumpkin Caramel Pie, or any layered milk bar, can be a delightful addition to your dessert repertoire. By understanding its nutritional value and health benefits, you can indulge in this sweet treat while feeling good about your choices. Keeping an eye on how it fits into your overall dietary goals will ensure that you savor every delicious bite!
Frequently Asked Questions About Layered Milk Bar
Layered milk bar hilly’s pumpkin caramel pie review
Hilly’s pumpkin caramel pie from the Milk Bar is a delightful fusion of rich pumpkin flavor and sweet caramel that appeals to both pumpkin lovers and dessert enthusiasts. The pie features a creamy, spiced pumpkin filling that is perfectly balanced by a buttery crust, making each bite a satisfying experience. Many reviewers have praised its unique layering technique, which adds a textural contrast that elevates the pie beyond a traditional offering. For those looking for a comforting yet innovative dessert, this pie is a must-try, especially during the fall season when pumpkin flavors are at their peak.
Layered milk bar hilly’s pumpkin caramel pie recipe
The recipe for Hilly’s pumpkin caramel pie from Milk Bar is a multi-layered delight that combines a spiced pumpkin filling, a caramel layer, and a flaky crust. To replicate this masterpiece, start by preparing a graham cracker crust, which adds a crunchy texture. Next, make the pumpkin filling by blending canned pumpkin puree with eggs, sugar, and a mix of spices such as cinnamon and nutmeg. Once the filling is set, pour a layer of homemade caramel sauce over the top, and allow it to chill in the refrigerator before serving. Don’t forget to garnish with whipped cream for an extra touch of indulgence!
Layered milk bar hilly’s pumpkin caramel pie ingredients
The key ingredients for Hilly’s pumpkin caramel pie include a graham cracker crust, pumpkin puree, eggs, granulated sugar, brown sugar, heavy cream, and a mix of spices like cinnamon, nutmeg, and ginger. The crust is typically made from crushed graham crackers combined with melted butter to create that perfect crunch. For the filling, be sure to use high-quality canned pumpkin for the best flavor, and don’t skip the caramel sauce, which adds a rich sweetness that complements the spiced pumpkin beautifully. Having all your ingredients prepped and ready will make the assembly process much smoother.
Milk bar pumpkin pie
The Milk Bar pumpkin pie is a unique take on the traditional pumpkin pie, characterized by its creamy filling and innovative layering technique. Unlike most pumpkin pies, which have a single layer of filling, the Milk Bar version features a delightful layer of spiced pumpkin filling topped with a luxurious caramel that adds depth and richness. This pie is not only visually appealing but also offers a burst of flavors that dance on your palate. When preparing this dish, consider serving it with a dollop of whipped cream or a sprinkle of sea salt to enhance its taste.
Hilly’s pumpkin pie milk bar
Hilly’s pumpkin pie at Milk Bar is well-known for its comforting flavors and unique texture that set it apart from traditional desserts. This pie features a rich pumpkin filling layered with decadent caramel, creating a delightful contrast that keeps you coming back for more. The crust is typically made from graham crackers, making it both easy to prepare and deliciously crunchy. For those who want to recreate this treat at home, focus on achieving the right balance between the spices in the filling and the sweetness of the caramel to capture the essence of Hilly’s pumpkin pie.
Milk bar pumpkin pie reddit
On Reddit, the Milk Bar pumpkin pie has sparked numerous discussions among dessert enthusiasts who share their experiences and tips for making it at home. Users often recommend experimenting with the spice levels in the pumpkin filling to suit personal preferences, as well as trying different types of crusts for a unique twist. Many have also commented on the importance of using high-quality ingredients, particularly the pumpkin puree and caramel, to achieve an authentic Milk Bar taste. If you’re looking for advice or variations, be sure to explore the many threads dedicated to this delicious dessert on Reddit!
Milk Bar pumpkin pie review
Reviews of the Milk Bar pumpkin pie often highlight its innovative layering and the harmonious blend of flavors that make it a standout dessert. Many people appreciate how the caramel layer enhances the traditional pumpkin filling, providing a sweet and savory contrast. The texture is frequently praised, as the creamy filling combined with the crunchy graham cracker crust creates a delightful mouthfeel. If you’re considering trying this pie, expect a modern twist on a classic that is sure to impress both family and friends during the holiday season!
Hilly’s pumpkin pie review
Hilly’s pumpkin pie has garnered rave reviews for its unique take on a beloved classic, with many fans praising its flavorful filling and decadent caramel topping. Reviewers often note the perfect balance of spices, which gives the pie warmth and depth, making it a comforting choice for fall gatherings. The texture is another highlight, as the creamy filling contrasts beautifully with the crunchy crust. If you’re a fan of pumpkin desserts, Hilly’s pumpkin pie is highly recommended for its innovative approach and delicious flavor profile!


