Meringue Christmas trees have become a delightful staple in my holiday baking repertoire, transforming my kitchen into a whimsical winter wonderland each December. The first time I attempted to create these enchanting confections, I was overwhelmed by the intricate beauty of these dessert trees. With their crisp, sugary bases and delicate, airy peaks, they were reminiscent of the snowy landscapes outside my window, appearing almost too beautiful to eat. As I carefully piped the meringue into the shape of a tree, I couldn’t help but feel a sense of nostalgia washing over me, recalling the holiday seasons of my childhood filled with laughter, warmth, and the sweet aroma of baked goods wafting through the air.
My initial encounter with meringue Christmas trees came during a festive gathering at my best friend’s house. Her mother, a culinary wizard, had crafted a stunning centerpiece of meringue trees, each one dusted with powdered sugar and adorned with colorful candies. My eyes widened in awe, and I eagerly awaited my turn to taste one. The moment I sank my teeth into that ethereal cloud of sweetness, I was transported to a magical realm—one that embodied the very spirit of Christmas. It was at that moment I realized I had to learn how to make these whimsical treats myself.
The Story Behind This Recipe
The origins of meringue date back to the 17th century, with various countries claiming the invention of this delightful concoction. The French and Italians both lay claim to the meringue’s creation, leading to distinct variations in preparation techniques. The basic recipe involves whipped egg whites combined with sugar, resulting in a light and airy texture that can be molded into various shapes. It wasn’t until the holiday season that the idea of transforming these meringue confections into festive Christmas trees emerged, blending tradition with creativity.
What sets meringue Christmas trees apart from other desserts is their unique visual appeal and the intricate process that goes into creating them. They are not just treats; they are edible art that can evoke joy and nostalgia. These festive trees can be customized with various toppings, from colorful sprinkles to edible glitter, allowing families to get creative and express their holiday spirit. This makes them a perfect project for busy families looking to engage in meaningful holiday traditions without spending hours in the kitchen.
Why You’ll Love This Dish
For busy families, meringue Christmas trees offer a quick and delightful dessert solution. The meringue mixture can be prepared in under 30 minutes, and once piped into tree shapes, they require minimal baking time. This means you can whip up a batch while preparing your holiday meal or hosting a gathering. Plus, the cleanup is relatively easy, making them a stress-free addition to your holiday festivities.
Seasonally, these delightful treats are perfect for holiday gatherings, Christmas parties, and even as a charming centerpiece for your festive table. The visual impact of these towering trees can captivate guests of all ages, sparking joy and excitement. As I watch my children decorate their meringue trees with their favorite candies, I am reminded of the importance of creating lasting memories during this magical season.
Each time I make meringue Christmas trees, I feel a deep emotional connection to the recipe, as it symbolizes the joy, love, and warmth that define the holiday season. The process of creating these trees with my family has become a cherished tradition, providing an opportunity to bond and share in the spirit of creativity. I promise that in this guide, you will learn everything from the basics of making meringue to decorating your trees like a pro, ensuring your experience is as magical as the treats themselves!
The Rich History and Cultural Significance of meringue christmas trees
The rich history of meringue Christmas trees intertwines with the broader story of meringue itself, a beloved dessert that has captured hearts around the globe. Meringue is believed to have originated in Switzerland, with the earliest documented recipes appearing in the 17th century. However, it was in France and Italy that meringue truly flourished, evolving into the various styles we know today, such as French, Italian, and Swiss meringue. Each method has its own unique characteristics, but they all share the same core ingredient: egg whites and sugar.
Origins and History
As meringue began to spread across Europe, it found its way into numerous traditional dishes. The concept of shaping meringue into festive forms is believed to have emerged during the Victorian era, when elaborate desserts were a hallmark of celebration. The idea of meringue Christmas trees seems to have taken hold in the mid-20th century, coinciding with the rise of home baking and the desire to create visually stunning desserts during the holiday season.
Over time, meringue Christmas trees have evolved beyond a simple dessert. They have become a canvas for creativity, with bakers experimenting with flavors, colors, and decorations. From classic white trees dusted with powdered sugar to vibrant green meringue trees adorned with rainbow candies, each rendition tells a story of culinary innovation and personal expression. This adaptability ensures that meringue trees remain relevant in contemporary baking culture.
Cultural Significance
In many cultures, desserts play a significant role in holiday celebrations, and meringue is no exception. In France, meringue is often featured in festive gatherings, while in Italy, it is a staple during special occasions. The visual appeal of meringue Christmas trees makes them an ideal centerpiece for holiday tables, signifying joy and togetherness. They encourage families to gather in the kitchen, fostering a sense of unity as they create and decorate their edible masterpieces.
Additionally, meringue has been embraced by chefs and pastry artists around the world. Renowned chefs have elevated meringue desserts to new heights, showcasing their versatility in fine dining. This intersection of tradition and modern culinary techniques keeps the legacy of meringue alive, ensuring that it remains a beloved treat across generations.
Nutritional Benefits
While meringue Christmas trees are undoubtedly a sweet indulgence, they also offer some nutritional benefits. Meringue is primarily made from egg whites, which are a good source of protein. They contain essential amino acids and are low in fat, making them a lighter dessert option compared to many traditional holiday treats. Furthermore, using natural food coloring and toppings can add a touch of nutrition, incorporating fruits and nuts that provide additional vitamins and minerals.
In conclusion, the history and cultural significance of meringue Christmas trees reveal a rich tapestry of tradition, creativity, and family bonding. As we embrace this delightful dessert during the holiday season, we not only celebrate its past but also create our own memories, passing down the joy of baking and sharing these whimsical trees with loved ones for generations to come.
Essential Ingredients for Perfect meringue christmas trees
Creating the perfect meringue Christmas trees is not just about skill; it’s also about using the right ingredients. Each component plays a crucial role in achieving that light, airy texture and beautiful finish that makes these festive treats a holiday favorite. Let’s delve into the essential ingredients you’ll need to whip up these delightful meringue Christmas trees.
Essential Ingredients
- 4 large egg whites (room temperature, 120g)
- 1/2 tsp cream of tartar (optional)
- 1 cup superfine caster or granulated sugar (200g)
- 1/2 tsp vanilla or almond extract (optional, 3g)
- Green gel food coloring
- Optional Decorations:
- Nonpareil sprinkles
- Star sprinkles
- Powdered sugar for dusting
Meringue Christmas Trees
Ingredients
French Meringue Trees
- 4 large egg whites, room temperature 120g
- 1/2 tsp cream of tartar – optional
- 1 cup superfine caster or granulated sugar 200g
- 1/2 tsp vanilla or almond extract – optional 3g
- green gel food coloring
Optional Decorations
- nonpareil sprinkles
- star sprinkles
- powdered sugar – for dusting
Instructions
- Preheat the oven to 200°F/93°C and line a large baking sheet with parchment paper or a silicone mat. Set aside.
- Before you whip up the meringue, make sure there are no traces of grease on the whisk attachment or in your bowl. Grease can prevent the meringue from whipping up properly. If you see or feel any grease, moisten a paper towel with vinegar and wipe the inside of the bowl and the whisk attachment to remove any grease.
- Then add 4, large egg whites into the bowl of a stand mixer with a whisk attachment and mix on medium speed until the surface of the egg whites is covered in small bubbles. Add 1/2 tsp cream of tartar and continue to mix until it reaches the soft peak stage and leaves visible tracks.
- Gradually mix 1 cup of granulated sugar into the egg whites over a few minutes while mixing on a medium-low speed. Increase the mixing speed to a medium-high speed (6 on a KitchenAid). When the meringue gets close to reaching stiff peaks, add 1/2 tsp of vanilla or almond extract and a squirt of green gel food coloring. Keep mixing until stiff, glossy peaks form. Don’t worry if the color of the meringue is lighter than you expect, we will be adding gel food coloring to the inside of the piping. Scrape around the sides of the bowl to make sure all the meringue is evenly colored.
- Fit a large piping bag with an open or closed star piping tip (like a Wilton 1M). Do not use a bigger piping tip than this, or the meringue won’t be able to keep its shape once it’s piped. Use a small paintbrush to brush green gel food coloring on the inside of the piping tip and piping bag. Then scoop the meringue into a large piping bag fitted with a large open or closed star piping tip. Seal the top of the bag with a rubber band or clip.
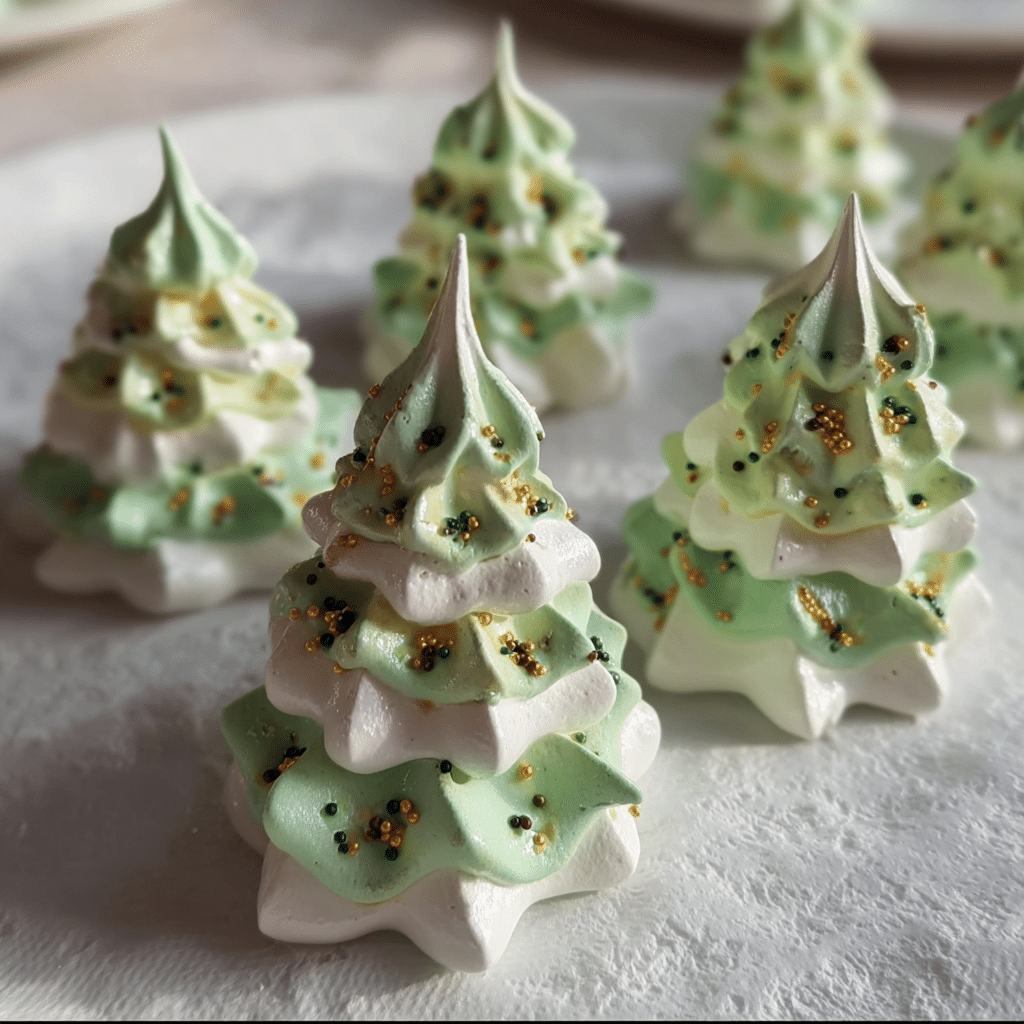
- Pipe little trees by piping three dollops of meringue on top of each other. These don’t spread as they bake, so they can be piped about 1 inch apart. Ideally, you’ll fit all the trees on one tray because these take so long to bake and cool. Toss nonpareil sprinkles over the meringues to look like Christmas ornaments. Add a star sprinkle to the top of each tree if desired.
- Bake the tray on the middle rack of your oven for 90 minutes, then turn the oven off and let the trees sit in the oven for another hour. Letting them gradually cool helps prevent them from cracking. At this point, the trees should be fully cooked and look and feel dry to the touch. If they still seem wet or moist, leave them in the oven for another half hour.
- Remove the tray from the oven. They should have a crunchy exterior and a soft, chewy center. Let the meringues cool fully to room temperature, then lightly dust them with powdered sugar using a fine sieve to make them look like snow. Enjoy! These can be stored at room temperature for up to two weeks.
Each ingredient in this list has a distinct purpose. The egg whites are the foundation of your meringue. When whipped, they create a foam that forms the structure of your Christmas trees. Room temperature egg whites whip up more easily and achieve a greater volume, so be sure to take them out of the fridge ahead of time.
Next, we have the cream of tartar, which is optional but highly recommended. This acidic powder stabilizes the egg whites and helps them maintain their structure during whipping. Think of it as an insurance policy for your meringue; it helps prevent it from collapsing, especially during baking. If you don’t have cream of tartar, you can substitute it with an equal amount of white vinegar or lemon juice.
Moving on to sugar, which is the sweetening agent in our meringue Christmas trees. Using superfine caster sugar is ideal because it dissolves more easily than granulated sugar, leading to a smoother texture. If you only have granulated sugar, you can pulse it in a food processor to achieve a finer consistency.
The vanilla or almond extract adds depth to the flavor of your meringue trees. While optional, it elevates the taste and can complement the sweetness of the sugar. Choose high-quality extracts for the best results, as the flavor will permeate through the meringue.
Green gel food coloring is what gives your meringue Christmas trees their festive hue. Gel food coloring is preferable over liquid food coloring because it provides a more vibrant color without altering the consistency of the meringue. Just a few drops will do the trick, so use it sparingly until you reach your desired shade.
Shopping Tips
When shopping for your ingredients, quality is key. Fresh egg whites will yield the best results, so consider sourcing them from a local farm or organic supplier. If you’re buying eggs from a grocery store, look for those that are labeled organic or free-range for the best flavor and quality. Check the expiration date to ensure freshness.
For the sugar, look for brands that specify “superfine” or “caster” sugar on the packaging. If you’re opting for powdered sugar for dusting later, make sure it’s freshly opened as it can clump over time. When it comes to extracts, choose pure extracts rather than imitation for richer flavor; they might be a bit pricier, but the taste difference is significant.
Substitutions and Alternatives
For those with dietary restrictions, there are a few substitutions you can make. If you need a vegan option, aquafaba (the liquid from canned chickpeas) can be whipped to mimic egg whites. Use about 3 tablespoons of aquafaba to replace each egg white. However, keep in mind that the texture might differ slightly. As for sugar, you can substitute with a sugar alternative like erythritol or monk fruit sweetener, but monitor the amounts since they can vary in sweetness.
When it comes to storage, keep your egg whites in the refrigerator until you’re ready to use them. Sugar has a long shelf life, but be sure to store it in a cool, dry place to prevent clumping. Food coloring should also be kept sealed and in a cool area to maintain its potency. For the optional decorations, sprinkles can last for months if stored in a dry place. Just be sure to check for any signs of moisture, which can lead to clumping.

In terms of budget, buying ingredients in bulk can save you money in the long run, especially if you plan to make multiple batches of meringue Christmas trees. Look for sales during the holiday season, as many stores will have discounts on baking supplies. Organic options may cost more, but they often yield better flavors and are free from pesticides, making them worth the investment.
With the right ingredients at hand, you’re well on your way to creating stunning meringue Christmas trees that will dazzle your holiday guests. The care you put into sourcing and selecting your ingredients will shine through in the final product, making your meringue creations not just delicious, but also a beautiful centerpiece for your festive celebrations.
Detailed Step-by-Step meringue christmas trees Cooking Instructions
Detailed Step-by-Step Meringue Christmas Trees Cooking Instructions
When it comes to crafting meringue Christmas trees, the process can seem daunting at first, but with a clear, step-by-step guide, you’ll find that it’s not only doable but also incredibly rewarding. The key is to be patient and meticulous, allowing the process to unfold while enjoying the fragrant anticipation of the holiday season. Let’s dive into the detailed instructions for creating these whimsical treats!
Preparation Steps
- Gather Your Ingredients and Equipment: Before you start, make sure you have all your ingredients measured and ready to go. You will need your egg whites, sugar, cream of tartar (if using), food coloring, and any decorations. Equipment-wise, you’ll need a mixing bowl (preferably glass or metal), a whisk or electric mixer, a spatula, piping bags with star tips, and baking sheets lined with parchment paper.
- Preheat Your Oven: Preheat your oven to 200°F (93°C). This low-and-slow baking method will help your meringue set without browning, creating that lovely white color we all adore in meringue Christmas trees.
- Prepare Your Baking Sheets: Line your baking sheets with parchment paper. For added precision, you can draw tree shapes on the underside of the parchment paper, so you have a guide to follow when piping. This way, your meringue Christmas trees will have a consistent shape and size.
- Whip the Egg Whites: In a clean mixing bowl, begin whipping your room temperature egg whites on medium speed until they become frothy. This usually takes about 1-2 minutes. If using cream of tartar, add it at this stage to help stabilize the egg whites.
- Add Sugar Gradually: Once your egg whites are frothy, slowly add the superfine caster sugar, about a tablespoon at a time. This gradual incorporation helps dissolve the sugar and ensures a glossy meringue. Continue to whip on high speed until the mixture forms stiff peaks, which can take around 5-7 minutes. The meringue should be shiny and hold its shape when you lift the whisk.
- Incorporate Flavor and Color: If you’re using vanilla or almond extract, gently fold it into the meringue using a spatula. Then, add a few drops of green gel food coloring. Fold carefully until you achieve an even color throughout. Remember, it’s easier to add more coloring than to correct a too-dark shade!
Cooking Process
- Pipe the Meringue Trees: Transfer the meringue into a piping bag fitted with a star tip. Begin piping your meringue onto the prepared parchment paper according to the tree shapes you’ve drawn. Start with a wide base and taper it towards the top to resemble a Christmas tree. You can create multiple layers by piping several smaller stars on top of each other.
- Decorate Your Meringue Trees: Before placing them in the oven, you can add decorations such as nonpareil or star sprinkles to the meringue trees for a festive touch. Lightly press them into the meringue so they adhere well during baking.
- Bake the Meringue Trees: Place your baking sheets in the preheated oven and bake for approximately 1.5 to 2 hours. The meringue should feel dry to the touch and easily peel away from the parchment paper. Avoid opening the oven door while baking, as sudden temperature changes can cause the meringue to crack.
- Cool Completely: Once baked, turn off the oven and allow the meringue to cool inside for at least an hour. This slow cooling process helps develop a crisp texture.
Final Assembly
- Dust with Powdered Sugar: Once your meringue Christmas trees are completely cool, lightly dust them with powdered sugar for a snowy effect. This adds an additional layer of sweetness and enhances the visual appeal.
- Display and Enjoy: Arrange your meringue Christmas trees on a festive platter or cake stand. They make a stunning centerpiece for any holiday gathering! If you’re not serving them immediately, store them in an airtight container at room temperature to maintain their crisp texture.
- Common Mistakes to Avoid: One common mistake is not allowing the egg whites to reach room temperature. Cold egg whites don’t whip up to their full potential, resulting in a denser meringue. Also, ensure your mixing bowl and utensils are clean and free from any grease, as this can hinder the whipping process.
- Professional Tips: For an extra touch, consider adding edible glitter or gold leaf to your meringue trees for a festive sparkle. And remember, practice makes perfect! The more you make meringue, the more comfortable you’ll become with the process.
With these detailed instructions, you’re poised to create stunning meringue Christmas trees that will enchant your friends and family. Enjoy the process, and let your creativity shine as you decorate these delightful treats!
Professional Tips and Techniques for meringue christmas trees
Creating delightful meringue Christmas trees can feel like a festive challenge, but with the right techniques and insider tips, you can master this charming dessert. Whether you’re a seasoned baker or a novice in the kitchen, these professional tips will guide you through the process, ensuring your meringue creations are not only beautiful but delicious as well.
Professional Techniques
To create stunning meringue Christmas trees, it’s essential to understand the science of meringue. At its core, meringue consists of whipped egg whites and sugar. The key is to achieve the perfect stiff peaks; this means that when you lift the whisk out of the mixture, the peaks stand tall without collapsing.
Start with room temperature egg whites, as they whip up more easily than cold ones. I often crack my eggs and let them sit for about 30 minutes before use. Ensure your mixing bowl is clean and free from any grease, as even a tiny amount can hinder the meringue from whipping properly. Using a glass or metal bowl is ideal; avoid plastic bowls, which can retain oils.
When you begin to whip the egg whites, do so on a low speed to create bubbles. Gradually increase the speed to medium, then high as the mixture begins to froth. Once the egg whites start to become foamy, add a pinch of cream of tartar or a splash of lemon juice to stabilize the meringue. This helps maintain the structure during baking.
Once you reach soft peaks, slowly add granulated sugar, about a tablespoon at a time. This gradual incorporation allows the sugar to dissolve fully, creating a glossy and stable meringue. You’ll know you’ve reached stiff peaks when the mixture holds its shape, and the meringue forms a sharp point when the whisk is lifted.
Troubleshooting Guide
Even the most experienced bakers can encounter issues when crafting meringue Christmas trees. Here are some common problems and solutions:
- Runny Meringue: If your meringue is too runny, it could be due to under-whipping. Continue to whip until you achieve the stiff peaks needed for your trees.
- Weeping Meringue: This occurs when sugar isn’t fully dissolved or if the meringue is baked at too high a temperature. Ensure you bake at a low temperature (around 200°F or 93°C) and keep the meringue in the oven until it’s completely dry.
- Cracks in the Meringue: Cracks can form if the meringue is overbaked or if it cools too quickly. To prevent this, turn off the oven after baking and let the meringue cool slowly inside.
Additionally, if you plan to make your meringue Christmas trees ahead of time, store them in an airtight container to keep them crisp. Humidity can cause meringues to soften, so it’s best to keep them away from moisture until you’re ready to serve.
Presentation Tips
Presentation is key when it comes to meringue Christmas trees. To create a visually stunning display, consider the following:
- Colorful Decorations: Use edible glitter, colored sugar, or melted chocolate to add a decorative touch. You can also pipe small ornaments using melted chocolate or royal icing.
- Accessorize: Create a whimsical scene by placing your meringue trees on a cake stand surrounded by edible snow (powdered sugar) or mini marshmallows. Fresh berries can add a pop of color and a burst of flavor.
- Layering: Use smaller meringue pieces to build a tiered effect, stacking them to create more dimension in your trees. You can use a bit of frosting or melted chocolate to help them stick together.
Finally, pair your delightful meringue Christmas trees with beverages. A light, sparkling wine or a sweet dessert wine complements the airy texture of meringue beautifully. For non-alcoholic options, consider a spiced apple cider or peppermint hot chocolate.
With these tips and techniques, you’re well on your way to creating stunning and delicious meringue Christmas trees that will impress your family and friends this holiday season. Remember, baking is as much about the joy of creation as it is about the final product. Enjoy the process!
Creative Variations and Adaptations of meringue christmas trees
When it comes to meringue Christmas trees, the possibilities for creativity are endless. From flavor twists to dietary adaptations, there’s something for everyone to enjoy during the festive season. Let’s explore some exciting variations and adaptations that can elevate your meringue game!
Seasonal Variations
One of the most delightful aspects of crafting meringue Christmas trees is the ability to incorporate seasonal flavors. Think about infusing your meringue with holiday spices like cinnamon, nutmeg, or ginger. Simply add a teaspoon of your desired spice to the sugar before incorporating it into the whipped egg whites. It adds warmth and a festive touch to your trees.
Another seasonal swap involves using flavored extracts. Vanilla is classic, but almond or peppermint extracts can give your meringues a unique flair. I once made peppermint meringue trees and decorated them with crushed candy canes—such a hit at my holiday gathering!
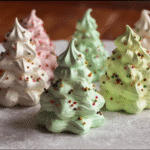
For a colorful twist, consider using natural food colorings to create a vibrant array of meringue. You can separate the meringue into different bowls, dye them various shades of green, red, or even blue, and pipe them into whimsical shapes, creating a rainbow of meringue Christmas trees.
Dietary Adaptations
In today’s culinary landscape, it’s essential to cater to various dietary needs. Thankfully, meringues can be quite versatile! For those following a vegan diet, aquafaba—the liquid from canned chickpeas—can replace egg whites. Whipping aquafaba to stiff peaks takes a bit longer, but the results are remarkably similar to traditional meringue.
If you’re looking to create meringue Christmas trees that are keto-friendly, consider using alternative sweeteners like erythritol or monk fruit instead of granulated sugar. Just be sure to adjust your quantities according to the sweetener’s potency compared to regular sugar.
For those sensitive to gluten, rest assured that meringues are naturally gluten-free. Just ensure any additional decorations you use, like sprinkles or chocolate, are also gluten-free.
Creative Twists
Let’s not stop at traditional flavors and shapes! Get creative with your meringue Christmas trees by incorporating different flavor profiles. Consider adding matcha powder for a green tea meringue or cocoa powder for a rich chocolate version. You can even swirl different flavors together for a marbled effect.
Transform your meringue trees into a show-stopping dessert by layering them between whipped cream and fresh fruits, creating a delightful meringue parfait. This not only looks stunning but also adds a delicious contrast of textures and flavors.
Lastly, think about different cooking methods. While baking is traditional, you can also try dehydrating your meringues. Using a dehydrator can create a unique texture and flavor, giving your meringue Christmas trees a different dimension entirely. Just ensure they dry out completely for the best results.
With these creative variations and adaptations, your meringue Christmas trees can become a delightful centerpiece for any holiday celebration. Embrace the joy of experimentation, and don’t be afraid to let your creativity shine!
Storage, Reheating, and Meal Prep for meringue christmas trees
If there’s one dessert that embodies the festive spirit of the holiday season, it’s undoubtedly meringue Christmas trees. These delightful confections, with their airy, light texture and whimsical appearance, are a favorite among both kids and adults alike. But once you’ve whipped up a batch of these enchanting treats, how do you store them to retain their delicate texture and festive charm? In this section, we will explore the best practices for storing, reheating, and meal prepping your meringue Christmas trees, ensuring that they stay fresh and delicious throughout the holiday season.
Short-term Storage
When it comes to short-term storage of your meringue Christmas trees, the goal is to keep them crisp and prevent moisture from ruining their delightful texture. If you plan to enjoy your meringue Christmas trees within a few days, follow these steps:
- Choose an Airtight Container: Select a container that can be sealed tightly. Glass or plastic containers with a tight-fitting lid work well. Avoid using metal containers as they can absorb moisture.
- Layering with Parchment Paper: To prevent the meringues from sticking together, place a layer of parchment paper at the bottom of the container. Add a layer of meringue Christmas trees, then place another sheet of parchment on top before adding more meringues. Repeat this process until the container is full.
- Keep in a Cool, Dry Place: Store the container in a cool, dry area away from direct sunlight. Ideally, the temperature should be below room temperature to help maintain their crispness.
With these steps, your meringue Christmas trees can last up to 5 days without losing their delightful crunch.

Freezing and Long-term Storage
If you want to prepare your meringue Christmas trees well in advance of the holiday celebrations, freezing is an excellent option. Freezing meringues can extend their shelf life significantly, allowing you to enjoy these treats long after the holidays are over. Here’s how to do it:
- Cooling First: Allow your meringue Christmas trees to cool completely after baking. This step is crucial, as any residual heat can create condensation when frozen, leading to soggy meringues.
- Use Freezer-Safe Containers: Transfer the cooled meringues to a freezer-safe container. Similar to short-term storage, place parchment paper between layers to prevent sticking.
- Seal and Label: Seal the container tightly and label it with the date. Meringue Christmas trees can be stored in the freezer for up to three months while maintaining their quality.
When you’re ready to enjoy your frozen meringue Christmas trees, simply remove them from the freezer and let them thaw at room temperature for about an hour. Avoid microwaving them, as this can ruin their texture.
Reheating Best Practices
The beauty of meringue Christmas trees is in their crisp texture, which can be compromised by reheating. In most cases, you won’t need to reheat meringues, but if you ever find yourself in a situation where you need to restore their original texture, here’s what to do:
- Oven Method: Preheat your oven to the lowest setting (around 200°F or 93°C). Place the meringue Christmas trees on a baking sheet lined with parchment paper and leave them in the oven for about 10-15 minutes. This will help to remove any moisture that may have accumulated.
- Cooling Rack: After removing them from the oven, let the meringues cool on a wire rack. This allows air to circulate and helps maintain their crispness.
Reheating is rarely necessary, but understanding these methods can help you salvage a batch if they ever lose their delightful crunch.
Meal Prep and Batch Cooking Strategies
One of the joys of making meringue Christmas trees is the ability to prepare them in advance. Meal prepping these festive treats allows you to enjoy the holidays without the stress of last-minute baking. Here are some strategies:
- Batch Baking: Consider baking large batches of meringue Christmas trees. The process is relatively simple, and they can be made in various sizes and colors to suit your holiday theme.
- Decorating Later: To save time, bake the meringues in advance and store them as outlined above. You can decorate them with icing, sprinkles, or edible glitter just before serving. This not only makes for a fresher look but also allows for creativity in decoration.
Meal prepping meringue Christmas trees means less time in the kitchen during the busy holiday season and more time to enjoy with family and friends.
Food Safety Considerations and Guidelines
When preparing and storing meringue Christmas trees, food safety should always be a priority. Here are some key considerations:
- Use Pasteurized Egg Whites: For safety, consider using pasteurized egg whites, especially if you are serving these treats to children, pregnant women, or anyone with compromised immunity.
- Monitor Storage Time: Be mindful of the storage timelines provided earlier. Consuming meringues beyond their shelf life can lead to quality degradation and potential food safety issues.
By following these guidelines, you can ensure that your meringue Christmas trees not only taste divine but are also safe for everyone to enjoy.
In conclusion, with these comprehensive storage, freezing, and meal prep strategies, you can make the most of your meringue Christmas trees this holiday season. Whether you choose to bake them in advance or whip them up right before your holiday gatherings, these festive delights are sure to bring joy and sweetness to your celebrations!
Nutritional Benefits and Health Information
As we dive into the delightful world of meringue Christmas trees, it’s essential to understand not just their whimsical appearance but also their nutritional profile. These airy confections are not only a feast for the eyes but can also offer some interesting nutritional benefits. Let’s explore the nutritional breakdown, health benefits, dietary considerations, and how you can enjoy meringue Christmas trees while keeping an eye on your health.
Nutritional Profile
At first glance, meringue Christmas trees may not strike you as a health food, but they do have some redeeming nutritional qualities. Typically made from egg whites and sugar, here’s a breakdown of the primary ingredients:
- Egg Whites: One large egg white contains about 17 calories, 4 grams of protein, and negligible fat. Egg whites are low in calories and high in protein, making them a great addition to many diets.
- Sugar: While sugar is a significant component, providing sweetness and structure, it’s important to consume it in moderation. Depending on your recipe, the amount of sugar will vary.
- Optional Add-ins: Many recipes for meringue Christmas trees call for flavorings like vanilla or almond extract, which bring in additional flavors without adding calories.
The overall calorie content of a meringue Christmas tree is relatively low compared to traditional holiday desserts, making them a more guilt-free indulgence. However, portion control is key since they are often enjoyed in larger quantities during festivities.
Health Benefits
While meringue Christmas trees may not be a nutritional powerhouse, they do have some benefits worth noting:
- High in Protein: The primary ingredient, egg whites, is an excellent source of protein, essential for muscle repair and growth. For those looking to increase their protein intake without the added fat of egg yolks, meringues can be a delightful option.
- Low in Calories: These treats are significantly lower in calories than many other desserts. This makes them a great option for those who want something sweet without derailing their dietary goals.
- Gluten-Free Treat: Meringue Christmas trees are naturally gluten-free, making them a safe treat for those with gluten intolerance or celiac disease.
Though they should be enjoyed in moderation, meringue Christmas trees can be a fun way to satisfy your sweet tooth without compromising your health goals.
Dietary Considerations
When it comes to dietary considerations, meringue Christmas trees can cater to various preferences and restrictions:
- Vegetarian-Friendly: Since meringues are made from egg whites, they are suitable for vegetarians but not for vegans. For vegan alternatives, aquafaba (the liquid from canned chickpeas) can be used as a substitute for egg whites, creating a similar texture.
- Nut-Free Option: Many traditional recipes for meringue Christmas trees do not include nuts, making them a safe choice for those with nut allergies. Just be cautious with any toppings or decorations that may contain nuts.
- Low-Fat Dessert: Meringues are naturally low in fat, making them a suitable choice for those looking to reduce their fat intake.
For individuals with specific dietary needs, meringue Christmas trees can be adapted to fit various lifestyles, allowing everyone to partake in the holiday festivities.
In conclusion, meringue Christmas trees may not be the first dessert that comes to mind when considering healthy treats, but they do offer some nutritional benefits that can make them a part of a balanced diet. With their low-calorie count, high protein content, and versatility for various dietary needs, these festive delights can be enjoyed without guilt during the holiday season. So go ahead, whip up a batch of meringue Christmas trees, and celebrate the joys of the season with a sweet treat that brings both delight and nourishment!
Frequently Asked Questions About Meringue Christmas Trees
Meringue Christmas tree tower
A meringue Christmas tree tower is a delightful and impressive dessert that can serve as a stunning centerpiece for your holiday table. To create this tower, pipe individual meringue “tree” shapes in varying sizes using a piping bag fitted with a star tip. Stack these meringue pieces on a sturdy base, such as a cake board, using royal icing to hold each layer together securely. For added flair, decorate the trees with edible glitter, mini candies, or colored sprinkles. Remember to allow the meringue to dry completely in a low-temperature oven to achieve that perfect crisp texture!
Old fashioned meringue christmas trees
Old-fashioned meringue Christmas trees evoke nostalgia with their classic flavors and elegant presentation. Typically, these meringues are made from simple ingredients like egg whites, sugar, and a hint of vanilla or almond extract for flavor. To achieve that traditional texture, beat the egg whites until stiff peaks form before gradually adding sugar, which helps create a glossy finish. For decoration, consider using crushed peppermint candies or chocolate chips to embellish the trees, capturing the festive spirit. Baking them slowly at a low temperature ensures they dry out completely, resulting in a melt-in-your-mouth treat.
Meringue christmas trees recipe
A simple meringue Christmas tree recipe starts with 4 large egg whites and 1 cup of granulated sugar. Preheat your oven to 200°F (93°C) and line a baking sheet with parchment paper. Whip the egg whites until soft peaks form, then gradually add the sugar while continuing to beat until you achieve stiff peaks and a glossy finish. Pipe the meringue into tree shapes, starting with larger bases and tapering to smaller tops, and bake for about 1.5 to 2 hours until dry. Once cooled, decorate with icing and festive sprinkles to create a beautiful holiday treat.
Meringue Christmas tree great british bake off
The Great British Bake Off features meringue Christmas trees as a popular challenge, showcasing bakers’ skills in creating both texture and aesthetics. Contestants are often judged on their ability to achieve a stable meringue with a crisp exterior and a soft, chewy interior. To channel your inner GBBO contestant, practice your piping skills to make uniform shapes and consider flavoring your meringue with spices or citrus zest for a unique twist. Baking at a low temperature ensures even drying, while allowing for creativity in decoration can elevate your tree to a show-stopping dessert.
Americas Test Kitchen Meringue Christmas Trees
America’s Test Kitchen offers a reliable approach to making meringue Christmas trees, emphasizing precision and technique. Their method typically involves a thorough whipping of egg whites with a pinch of cream of tartar for stability, followed by a gradual addition of sugar to create a smooth meringue. They recommend using a digital scale for accurate measurements to ensure consistency in your meringue. Additionally, allow the meringue shapes to dry in the oven with the door slightly ajar to prevent cracking. Finally, experiment with flavorings or add color to the meringue for a festive touch that reflects your holiday spirit.
Easy meringue christmas trees
For easy meringue Christmas trees, you’ll want a straightforward recipe that requires minimal ingredients and effort. Start with 2 egg whites and 1 cup of sugar, beating the egg whites until soft peaks form before gradually adding the sugar until stiff peaks are achieved. Use a piping bag to create tree shapes on a lined baking sheet, keeping the designs simple for a quick assembly. Bake at a low temperature (around 200°F) for about 1.5 hours to ensure they dry thoroughly without browning. To decorate, use store-bought icing and colorful candies for a fun and festive finish!


