Seasonally, mother’s day pink is a wonderful choice for spring celebrations. The soft pink hue aligns beautifully with blooming flowers and fresh greenery, making it an ideal dessert for the Mother’s Day brunch or a family gathering. It captures the essence of spring and the spirit of love that fills the air during this time. Every bite of this cake is a reminder of the warmth of family connections, evoking cherished memories that transcend generations.
This cake is more than just a recipe; it’s an emotional connection to my grandmother, my mother, and now, my own children. As I bake this cake, I can almost hear my grandmother’s laughter and feel her guiding hand on my shoulder. It’s a way for me to honor her legacy while creating new memories with my family. With each slice shared, the story of our family continues to unfold, woven together by the love and care that goes into every bite.
In this article, I promise to share everything you need to know about creating the perfect mother’s day pink cake for your loved ones. From the ingredients and equipment you’ll need to tips for achieving that perfect texture and flavor, you’ll be well-equipped to create a cake that not only looks beautiful but tastes divine. Get ready to impress your family and friends, and to create a new tradition that will be cherished for years to come.
The Story Behind This Recipe
As I mentioned earlier, my journey into the world of mother’s day pink began with my grandmother’s cherished recipe box. Each recipe card tells a story of its own, filled with notes in her delicate handwriting and the occasional flour smudge. The pink velvet cake stood out, not only for its unique color but also for the memories it held. I recall watching her carefully sift flour and cocoa, the air filled with the sweet scent of vanilla. She would always say, “Baking is an act of love.” Those words have stuck with me, and now, as I bake this cake for my children, I pass on that love and the same spirit of togetherness that my grandmother instilled in me.
Why You’ll Love This Dish
mother’s day pink is more than just a cake; it’s an expression of love and creativity. The vibrant color brings joy to any occasion, while the subtle flavors cater to a wide range of palates. Whether you’re celebrating Mother’s Day or simply wanting to create a special moment with your family, this cake is perfect. Plus, its simplicity makes it accessible for bakers of all levels. You don’t need to be a pastry chef to create a stunning centerpiece that will leave your loved ones in awe. The combination of ease and elegance makes this cake a must-try for any family.
The Rich History and Cultural Significance of mother’s day pink
The rich history and cultural significance of mother’s day pink are deeply rooted in the traditions of Southern baking. This cake, a delightful twist on the classic red velvet, has evolved over time, reflecting the changes in ingredients, techniques, and cultural influences. Understanding its origins allows us to appreciate this dessert not just as a sweet treat, but as a symbol of celebration, love, and family.
Origins and History
mother’s day pink can be traced back to the early 20th century, when red velvet cake gained popularity in the Southern United States. The original recipe was a simple chocolate cake made with cocoa powder, but the addition of buttermilk and vinegar created a chemical reaction that resulted in a tender, moist crumb. The vibrant red color came from the reaction between the cocoa and the acidic ingredients. However, as baking evolved, so did the colors and flavors. The pink version, often made with the addition of food coloring, emerged as a playful, lighter alternative to its red counterpart, perfect for springtime celebrations.
As the recipe spread beyond the South, it began to incorporate various regional flavors and ingredients. Some bakers added fruit purees or natural colorings to achieve the pink hue, while others experimented with different frostings, such as cream cheese or buttercream. This adaptability has allowed the mother’s day pink cake to evolve, making it a beloved dessert in many households across the country.
Cultural Significance
In many cultures, food plays a vital role in celebrations. The mother’s day pink cake has become a staple for Mother’s Day celebrations, symbolizing appreciation and love for mothers everywhere. It’s often served at family gatherings, birthday parties, and special occasions, uniting people through the shared experience of enjoying a delicious dessert. The act of baking this cake is an expression of love, a way to honor the matriarchs of families and create lasting memories.
Throughout the years, famous chefs and bakeries have embraced the pink velvet cake, putting their unique spin on it. This has helped to keep the tradition alive and relevant, with many modern interpretations emerging. The cake’s visual appeal makes it a favorite for social media sharing, encouraging families to showcase their creations and share their own stories connected to the dish.
Nutritional Benefits
While mother’s day pink may not be the healthiest option on the dessert table, it does have some nutritional benefits worth mentioning. The use of buttermilk not only adds moisture but also provides probiotics that can aid in digestion. Additionally, if you choose to incorporate natural fruit purees for coloring, you can boost the nutritional profile of your cake, adding vitamins and fiber. It’s essential to enjoy this cake in moderation, but knowing that it can have a few redeeming qualities makes indulging a little more justified.
In conclusion, the mother’s day pink cake is not just a delicious dessert; it’s a celebration of history, culture, and family. Its roots in Southern baking give it a rich background, while its evolution over time reflects the creativity and love of home bakers. Whether you’re baking it for yourself, your family, or as a gift for a loved one, this cake holds the promise of sweet memories and cherished moments that last a lifetime.
Essential Ingredients for Perfect mother’s day pink
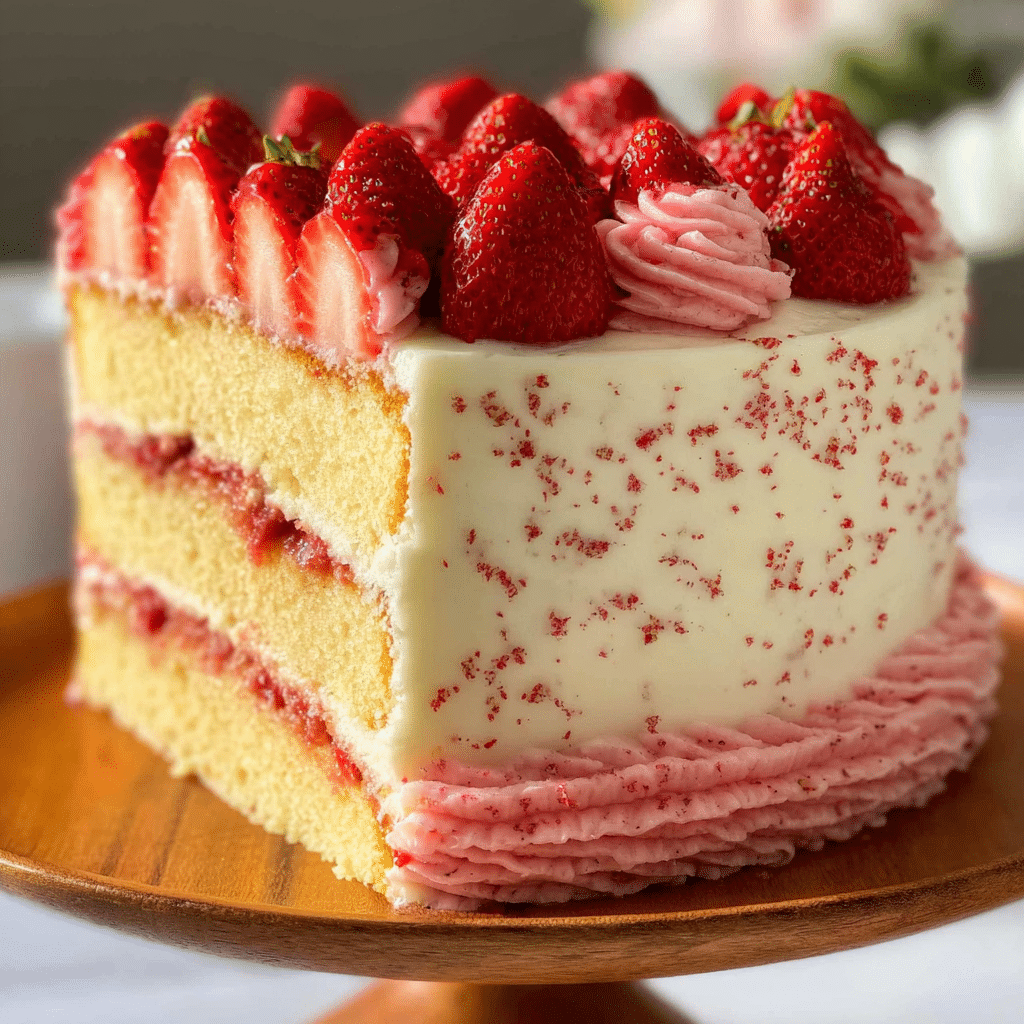
When it comes to creating a show-stopping dessert for Mother’s Day, nothing quite captures the essence of celebration like a beautiful Mother’s Day pink velvet cake. The vibrant hue and rich flavor profile make it a perfect centerpiece for your special brunch or dinner. To get started on this delightful baking adventure, let’s dive into the essential ingredients that will bring your cake to life.
Essential Ingredients
Here’s a complete list of the ingredients you’ll need to create the perfect Mother’s Day pink velvet cake:
- 3 cups cake flour (see notes)
- 1 tablespoon baking powder
- 1/2 teaspoon salt (see notes)
- 1/2 cup unsalted butter (softened, see notes)
- 1 cup white sugar
- 3 large eggs (room temperature)
- 2 teaspoons vanilla extract
- 1/4 teaspoon pink gel food coloring
- 1 cup buttermilk
- 1 cup butter (softened)
- 16 ounces cream cheese (softened)
- 5-6 cups powdered sugar
- 1 teaspoon vanilla extract

Mother’S Day Pink Velvet Cake
Ingredients
Cake
- 3 cups cake flour (see notes)
- 1 tablespoon baking powder
- 1/2 teaspoon salt (see notes)
- 1/2 cup unsalted butter (softened, see notes)
- 1 cup white sugar
- 3 large eggs (room temperature)
- 2 teaspoons vanilla extract
- 1/4 teaspoon pink gel food coloring
- 1 cup buttermilk
Cream Cheese Frosting
- 1 cup butter (softened)
- 16 ounces cream cheese (softened)
- 5–6 cups powdered sugar
- 1 teaspoon vanilla extract
Instructions
Get prepped
- Preheat the oven to 350°F. Grease 3 (8-inch) round cake pans with shortening or butter and set them aside.
Make the cake batter
- Whisk the 3 cups cake flour, 1 tablespoon baking powder and 1/2 teaspoon salt together in a medium mixing bowl.
- In a separate large mixing bowl, cream the 1/2 cup unsalted butter and 1 cup white sugar with an electric mixer until it is light and fluffy.
- Add 3 large eggs, one at a time, and beat until the last egg has been thoroughly mixed. Do not over-mix the batter from this point forward.
- Mix in the 2 teaspoons vanilla extract and 1/4 teaspoon pink gel food coloring, then alternate adding half of the dry ingredients and half of the 1 cup buttermilk until everything is just mixed. It’s okay if there are some lumps.
Pour and bake
- Divide the batter equally between the three cake pans, and smooth it out evenly. Bake the cakes for 20 minutes or until a toothpick inserted in the middle of the layers comes out clean. Rest the cakes for 10 minutes, then carefully remove the layers and place them on a cooling rack. Allow them to cool completely.
Cream Cheese Frosting
- In a large mixing bowl, use an electric mixer to blend 1 cup butter and16 ounces cream cheese. Gradually mix in 5-6 cups powdered sugar until the frosting is smooth and thick, then add 1 teaspoon vanilla extract.
Assembly
- Place one of the layers on a large plate, platter, or cake stand, and pipe about 1/4” of frosting on top. Use a spatula (an offset spatula works best) to spread out the frosting evenly, then place another cake layer on top. Frost that layer, too, then add the final cake layer on top and frost the top and the sides of the cake carefully to avoid having too many crumbs.
- Decorate the cake with pink sprinkles, if desired, and serve.
Ingredient Insights
Understanding the role and importance of each ingredient is crucial for achieving the best results. Let’s explore each component:
Cake Flour: Using cake flour instead of all-purpose flour is essential for creating a soft and tender cake. Cake flour has a lower protein content, resulting in less gluten formation, which keeps the cake light and fluffy. Always sift the flour before measuring to ensure accuracy and prevent clumping.
Baking Powder: Baking powder is a leavening agent that helps the cake rise. It’s important to check the expiration date on your baking powder to ensure it’s still active. If it’s past its prime, your cake might turn out dense and flat.
Salt: A small amount of salt enhances the flavors of your cake and balances the sweetness. It helps to bring out the flavor of the vanilla and the chocolate (if you choose to add any). Make sure to use fine salt for even distribution.
Unsalted Butter: The richness of unsalted butter adds flavor and moisture to your cake. Ensure it’s softened to room temperature for easy mixing. If you only have salted butter, just reduce the amount of additional salt in your recipe.
White Sugar: Sugar not only sweetens the cake but also contributes to its texture and moisture. The sugar helps to create a tender crumb and a lovely golden crust. For a richer flavor, you could experiment with brown sugar, but this will alter the final color.
Eggs: Eggs provide structure and stability to the cake. Using room temperature eggs is crucial as they incorporate better with the other ingredients, leading to a more uniform batter.
Vanilla Extract: Pure vanilla extract adds depth to the flavor profile. Always opt for pure over imitation for the best taste. You can also try experimenting with other extracts like almond for a unique twist.
Pink Gel Food Coloring: The gel food coloring is what gives the cake that signature pink hue. Gel coloring is more concentrated than liquid, so a little goes a long way. Always start with a small amount and gradually add more until you achieve your desired shade.
Buttermilk: This ingredient adds moisture and a subtle tang to the cake, contributing to its unique flavor. If you don’t have buttermilk on hand, you can make a quick substitute by mixing milk with a teaspoon of vinegar or lemon juice and letting it sit for a few minutes.
Cream Cheese: Cream cheese is the star of the frosting, providing a luscious texture and rich flavor. Ensure it’s softened to room temperature for easy blending with the butter and sugar.
Powdered Sugar: Powdered sugar is used to sweeten and thicken the frosting. It dissolves easily, ensuring a smooth and creamy consistency. Sifting powdered sugar before using it can help eliminate lumps.
Shopping Tips
When shopping for your ingredients, quality matters. Here are some tips to ensure you select the best products:
- Always check expiration dates on baking powder and dairy products.
- Choose organic or local products when possible for better flavor and freshness.
- Look for cream cheese that is full-fat for a rich frosting.
- When selecting food coloring, choose gel over liquid for more vibrant colors.
Substitutions and Alternatives
Dietary restrictions shouldn’t prevent you from enjoying a delicious cake. Here are some substitutions for common dietary needs:
- To make the cake gluten-free, swap the cake flour for a gluten-free cake blend.
- For dairy-free options, use coconut cream instead of cream cheese and a dairy-free butter substitute.
- For a vegan version, replace eggs with flaxseed meal and use a plant-based yogurt instead of buttermilk.
In conclusion, gathering the right ingredients is the first step to creating a stunning Mother’s Day pink velvet cake. Each ingredient plays a vital role in flavor, texture, and visual appeal. So take your time to choose wisely and prepare for a delightful baking experience that will surely impress your mom this Mother’s Day!
Detailed Step-by-Step mother’s day pink Cooking Instructions
Now that we have gathered all the essential ingredients for your Mother’s Day pink velvet cake, it’s time to roll up our sleeves and dive into the baking process. This step-by-step guide will ensure that your cake turns out perfectly delicious and visually stunning.
Preparation Steps
Before you start mixing, preparation is key to a smooth baking experience. This is often referred to as “mise en place,” a French term meaning “everything in its place.” Here’s how to prepare:
- Preheat Your Oven: Set your oven to 350°F (175°C). Preheating ensures that your cake bakes evenly. It’s important that the oven reaches the right temperature before the batter goes in.
- Prepare Your Cake Pans: Grease and flour two 9-inch round cake pans. You can also line the bottoms with parchment paper for easy removal. This helps to prevent the cake from sticking, ensuring a smooth flip once baked.
- Gather Your Ingredients: Measure out all your ingredients accurately. This is crucial for the chemistry of baking. Use a kitchen scale for precision if possible.
- Room Temperature Ingredients: Make sure your eggs and butter are at room temperature. This helps them blend more easily, resulting in a smoother batter.
- Sift the Dry Ingredients: In a large mixing bowl, sift together the cake flour, baking powder, and salt. Sifting aerates the flour, helping create a light and fluffy cake.
Cooking Process
Once you’re prepped and ready, it’s time to mix and bake!
- Mix the Butter and Sugar: In a large bowl, use an electric mixer to cream together the softened unsalted butter and white sugar until the mixture is light and fluffy. This usually takes about 3-5 minutes. Creaming incorporates air into the mixture, which helps the cake rise.
- Add the Eggs: Add the eggs one at a time, mixing well after each addition. This helps to fully incorporate them into the mixture, leading to a more homogenous batter.
- Incorporate the Vanilla: Pour in the vanilla extract and mix until combined. The aroma will fill your kitchen, setting the stage for the delightful cake to come.
- Mix in Food Coloring: Add the pink gel food coloring into the batter and mix until you achieve your desired shade of pink. Remember, you can always add more, but you can’t take it away!
- Combine Dry and Wet Ingredients: Alternating between the dry ingredients and buttermilk, add them to the butter mixture. Start with a third of the dry mixture, followed by half of the buttermilk. Repeat until everything is combined, making sure not to overmix. Overmixing can create a dense cake.
Final Assembly
Once your cake layers have baked, it’s time to assemble and decorate!
- Test for Doneness: After about 25-30 minutes of baking, insert a toothpick into the center of the cake. If it comes out clean or with a few moist crumbs, your cake is done. If not, give it a few more minutes.
- Cool the Cakes: Allow the cakes to cool in the pans for about 10 minutes, then carefully remove them and let them cool completely on a wire rack. This step is crucial to prevent the frosting from melting.
- Prepare the Frosting: In a large mixing bowl, combine softened cream cheese and softened butter. Beat until smooth. Gradually add the powdered sugar and vanilla extract, mixing until creamy. Adjust the consistency with more powdered sugar if necessary.
- Frost the Cake: Once the cakes are completely cool, place one layer on a serving plate. Spread a generous amount of frosting on top, then add the second layer and frost the top and sides of the cake. Use a spatula to create beautiful swirls or smooth it out for a sleek finish.
- Decorate: For a special touch, decorate the cake with fresh flowers, edible glitter, or sprinkles. This is where you can let your creativity shine!
- Slice and Serve: Your Mother’s Day pink velvet cake is now ready to be enjoyed. Slice it into pieces and serve with a smile. Don’t forget to take pictures to capture the moment!
In conclusion, baking a Mother’s Day pink velvet cake is not just about the ingredients and steps; it’s about the love and memories you create along the way. The joy of baking is amplified when shared with family and friends, making this cake not only a treat for the taste buds but also a celebration of cherished moments. Happy baking, and may your cake be as sweet as the memories you create this Mother’s Day!
Professional Tips and Techniques for mother’s day pink
When it comes to baking a stunning Mother’s Day Pink Velvet Cake, there are some professional tips and techniques that can take your creation from ordinary to extraordinary. This cake is not just a feast for the taste buds; it’s also a visual delight that embodies the spirit of Mother’s Day pink—a color that symbolizes love, warmth, and affection. Whether you’re a novice or an experienced baker, these insider secrets will help you achieve a perfect cake that will impress your mom and guests alike.
Professional Techniques
One of the first and most crucial steps in making a beautiful Mother’s Day pink velvet cake is selecting the right ingredients. Use high-quality cocoa powder and pure vanilla extract to enhance the flavor. The color is achieved through a combination of red food coloring and the natural reaction between the cocoa and buttermilk. For the best results, sift your dry ingredients together to ensure an even distribution. This step also helps to aerate the flour, resulting in a lighter cake.
When mixing your batter, it’s essential to cream the butter and sugar together until light and fluffy. This incorporates air into the mixture, which will give your cake a lovely rise. Be mindful of the mixing time; over-mixing can lead to a dense cake. If you’re using a stand mixer, it’s best to mix on a low speed after adding the flour to prevent gluten development, which can toughen the cake.
One of my favorite insider secrets for creating a moist cake is to add a little sour cream or yogurt to the batter. This not only contributes to moisture but also adds a slight tang that balances the sweetness of the cake. For an added layer of flavor, consider incorporating a splash of almond extract along with the vanilla.
Troubleshooting Guide
Even the most experienced bakers encounter issues from time to time. If your Mother’s Day pink velvet cake doesn’t rise as expected, it could be due to expired baking powder or baking soda. Always check your leavening agents before starting your baking adventure. Additionally, make sure to measure your ingredients accurately. Too much flour can lead to a dry cake, while too little might result in a cake that crumbles.
If you notice that your cake is doming in the center, you can level it out after baking. Allow the cake to cool completely, then use a serrated knife to trim the top. This will make for easier stacking and frosting. As for frosting, if your cream cheese frosting is too runny, try chilling it in the refrigerator for a bit or adding a bit of powdered sugar to thicken it up. On the other hand, if it’s too thick, a splash of milk can loosen it up.
Presentation Tips
Presentation is key when it comes to any special occasion cake, especially one celebrating Mother’s Day. To make your pink velvet cake stand out, consider decorating it with fresh flowers or edible petals that match the pink theme. Not only do they add beauty, but they also bring a fresh element to your dessert. Use a cake stand that enhances the color of the cake; a white or pastel stand will make the pink pop.
For an elegant touch, pipe decorative frosting around the base and top of the cake. A simple technique is to use a star tip to create a rosette pattern. You can also add sprinkles or edible glitter for a bit of sparkle. If you’re feeling adventurous, consider making a layered effect by alternating between layers of pink velvet and a contrasting flavor, such as chocolate or vanilla.
When it comes to beverage pairings, consider serving your Mother’s Day pink velvet cake with a glass of sparkling rosé or a light fruit-infused tea. The effervescence will cleanse the palate beautifully, allowing each bite of cake to shine. For a non-alcoholic option, a homemade strawberry lemonade can add a refreshing touch that complements the cake’s flavor profile.
Finally, if you’re making this cake ahead of time, you can freeze it once it’s cooled completely. Wrap it tightly in plastic wrap and foil, and it will keep in the freezer for up to three months. Just remember to let it thaw in the fridge overnight before frosting and serving. This strategy can save you time on the day of your celebration, allowing you to focus on making memories with your loved ones.
Creative Variations and Adaptations of mother’s day pink
While the classic Mother’s Day pink velvet cake is a stunning showstopper on its own, there are many creative variations and adaptations that can make it even more special. From seasonal ingredients to dietary modifications, these ideas will inspire you to personalize your cake for the special occasion.
Seasonal Variations
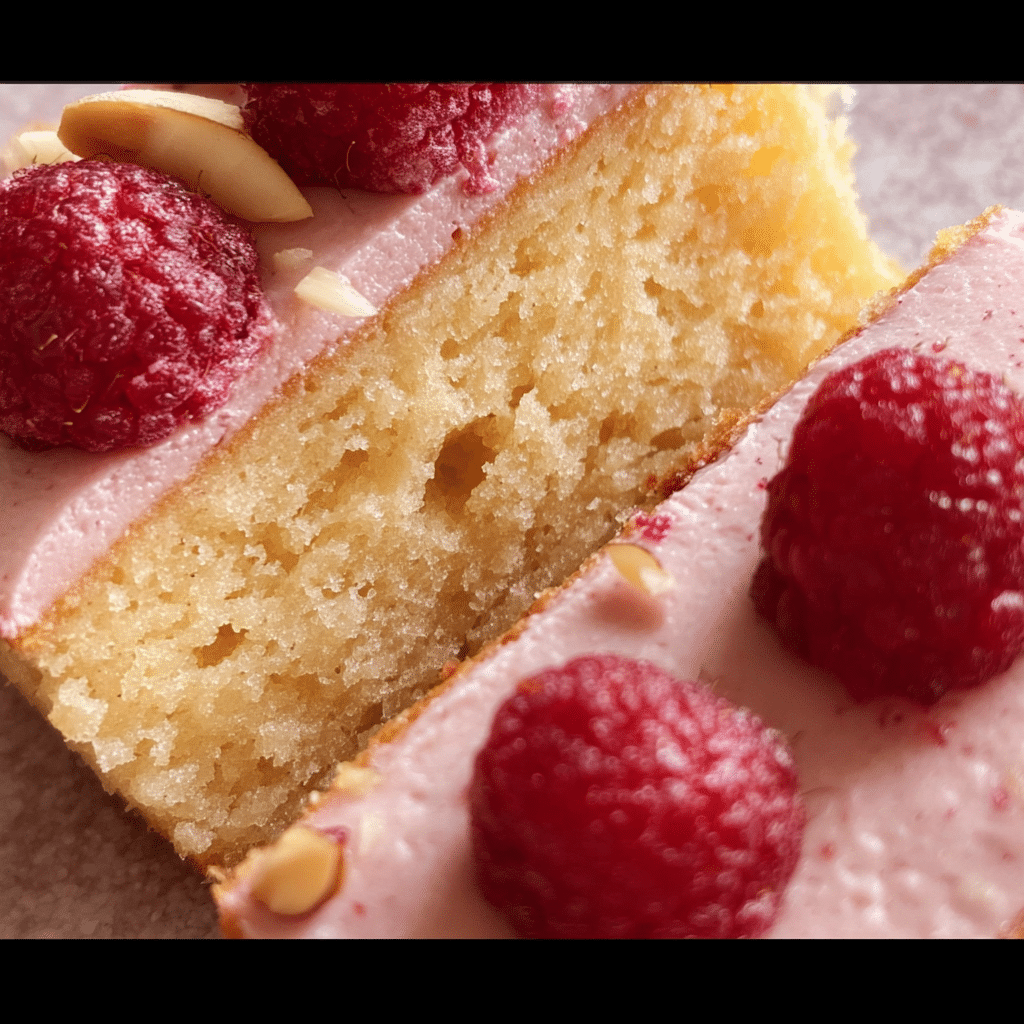
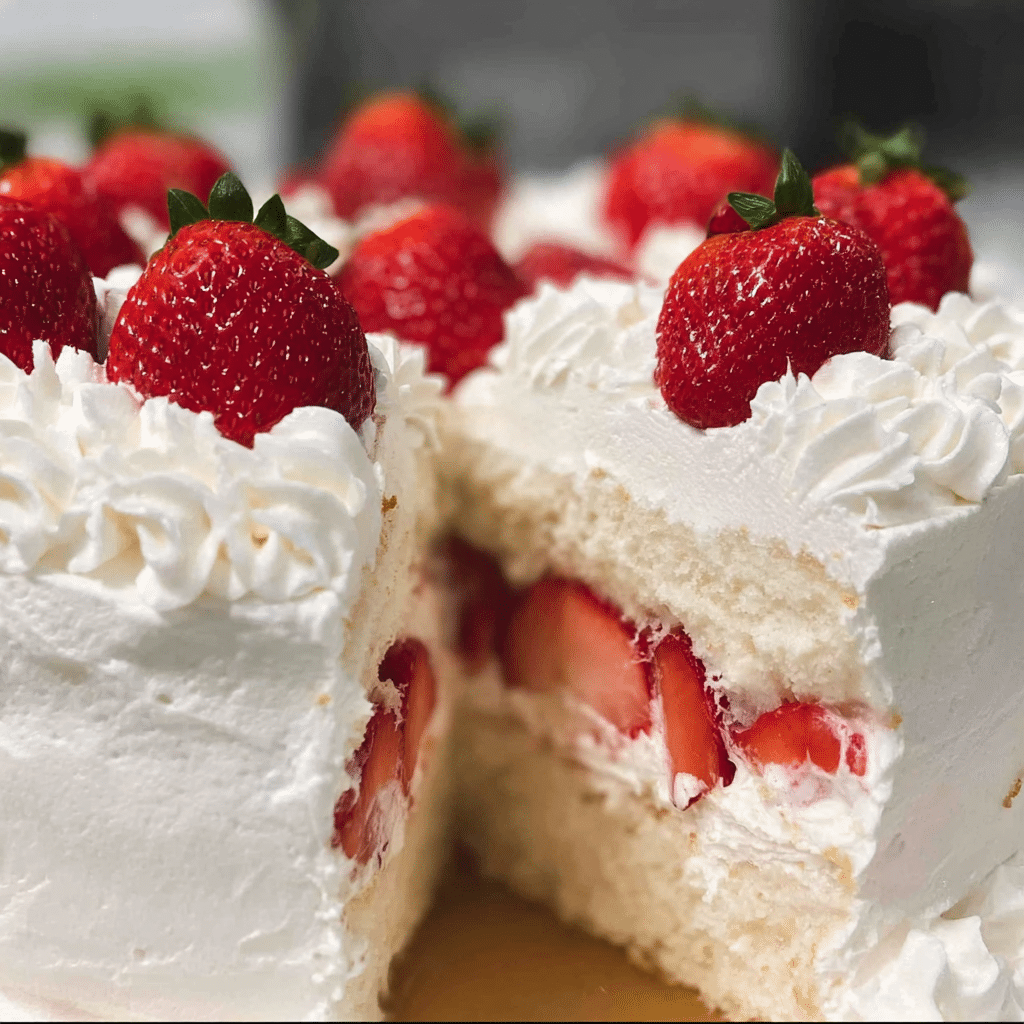
One way to make your Mother’s Day pink cake unique is by incorporating seasonal flavors. For spring, consider adding fresh strawberries or raspberries to your batter or using them as a topping. This not only enhances the visual appeal but also introduces a burst of flavor that complements the sweetness of the cake. You could also infuse your frosting with strawberry puree to create a delightful fruity flavor that ties into the pink theme.
If you’re looking to celebrate the vibrant colors of spring, consider creating a pastel rainbow effect by layering different shades of pink, peach, and lavender cake. This can be achieved by adjusting the amount of food coloring in the batter. Each layer could be separated by a light cream cheese frosting to maintain the integrity of each color while adding a luscious texture.
Dietary Adaptations
In today’s world, accommodating various dietary needs is more important than ever. If you’re looking to create a gluten-free version of the Mother’s Day pink cake, you can substitute all-purpose flour with a gluten-free blend. Just ensure that the blend contains xanthan gum to provide the necessary structure. For a vegan adaptation, replace eggs with flaxseed meal or applesauce, and use plant-based butter and non-dairy milk for the batter and frosting.
If you’re aiming for a lower-calorie option, consider using a combination of almond flour and coconut flour, which can add a nutty flavor while reducing carbohydrates. You can also cut back on sugar by using natural sweeteners like stevia or monk fruit sweetener. Just remember that these alternatives can affect the texture, so you may need to experiment a bit.
Creative Twists
To take your Mother’s Day pink cake to the next level, think outside the box with creative twists. For example, you can add a hint of spice by incorporating cinnamon or cardamom into your batter. This adds a warm, aromatic flavor that contrasts beautifully with the sweetness. If you’re feeling adventurous, experiment with an unexpected flavor combination, like lavender or rose water, to elevate the cake’s profile while maintaining its delicate pink hue.
Another fun idea is to change the cooking method. Instead of baking, you could make pink velvet cupcakes or even a cake in a jar, which can be a delightful and portable option for picnics or gatherings. Just layer the cake and frosting in a mason jar for an adorable presentation that allows guests to enjoy their dessert easily.
If you have leftover cake, don’t let it go to waste! Transform it into cake pops by crumbling the leftover cake and mixing it with frosting. Roll the mixture into balls, dip them in chocolate, and decorate them with sprinkles. This not only repurposes your cake but also creates a fun treat that can be shared with friends and family.
In conclusion, whether you stick with the classic Mother’s Day pink velvet cake or opt for one of these creative variations, the most important aspect is the love and effort you put into it. Baking is not just about the end result; it’s about the memories you create along the way. Embrace your inner baker, and don’t be afraid to experiment. Your mom will appreciate the thoughtfulness behind your delicious creation, no matter how you choose to make it your own.
Storage, Reheating, and Meal Prep for mother’s day pink
When it comes to baking a delectable mother’s day pink velvet cake, one of the most important aspects to consider is how to properly store, reheat, and prepare this delicious treat for future enjoyment. Understanding the right storage techniques can help you maintain the cake’s flavor, texture, and overall quality, making sure that your celebratory dessert remains a star attraction at your Mother’s Day gathering.
Short-term Storage
If you find yourself with leftover slices of your stunning mother’s day pink velvet cake, short-term storage is your best option for keeping it fresh. Ideally, you’ll want to store the cake in an airtight container. If the cake is frosted, gently cover it with plastic wrap or place it in a cake dome to prevent the frosting from becoming damaged or sticking to the wrap. It’s best to keep your cake in the refrigerator if you live in a warmer climate or if the cake has cream cheese frosting, which can spoil if left out at room temperature.
When storing the cake in the refrigerator, be mindful of the temperature setting. Ideally, you want your fridge to be at or below 40°F (4°C). The cake will remain fresh in the refrigerator for about 3 to 5 days. If you notice any signs of mold or an off smell, it’s best to discard it. Also, remember that the longer the cake sits, the more it may dry out. If you plan on enjoying your cake over several days, consider portioning it out to minimize the number of times the entire cake is opened and exposed to air.
Freezing and Long-term Storage
For longer storage, freezing is an excellent option for your mother’s day pink velvet cake. Freezing allows you to enjoy this delightful dessert well beyond the initial celebration. To freeze your cake, first ensure it is completely cooled; this helps prevent condensation from forming inside the wrapping. Slice the cake into individual portions or freeze it whole, depending on your preference.
Wrap each slice or the whole cake in plastic wrap, ensuring it is tightly sealed to prevent freezer burn. If you want to add an extra layer of protection, consider wrapping the cake in aluminum foil or placing it in a freezer-safe airtight container. A good rule of thumb is to label the wrapping with the date so you can keep track of its shelf life. In the freezer, your mother’s day pink velvet cake can last for about 2 to 3 months without significant loss of quality.
When you’re ready to enjoy your frozen cake, transfer it to the refrigerator to thaw overnight before serving. This gradual thawing method helps maintain the cake’s moisture. If you’re in a hurry, you can also thaw it at room temperature for a few hours, but be cautious not to leave it out for more than two hours to avoid any food safety issues.
Reheating Best Practices
If you prefer to serve your mother’s day pink velvet cake warm, reheating is a wonderful option. The best way to reheat it is in the oven. Preheat your oven to 350°F (175°C) and wrap the slices in aluminum foil to prevent them from drying out. Place the wrapped slices directly on the oven rack or on a baking sheet and heat for about 10 to 15 minutes, or until warmed through. The foil will help retain moisture while the cake warms, ensuring it doesn’t become dry or crumbly.
Alternatively, if you’re short on time, you can use the microwave. Place a slice of the cake on a microwave-safe plate and cover it with a damp paper towel to retain moisture. Heat it on medium power for about 15 to 30 seconds, checking regularly to avoid overheating. This method can soften the cake nicely, but be cautious as microwaving can sometimes change the texture, making it a bit more rubbery if overdone.
While reheating, always check the temperature of the cake to ensure it reaches at least 165°F (74°C) to guarantee food safety. If you have cream cheese frosting or any perishable fillings, ensure they’re also heated properly. Remember, your mother’s day pink velvet cake is a labor of love, and taking the time to store and reheat it correctly will make all the difference in enjoying its delightful flavors and textures.
In terms of meal prep, consider baking the cake in advance if you’re preparing for a gathering. You can bake and freeze the layers ahead of time, allowing you to assemble and frost it just before serving. This way, you can enjoy the day with your loved ones without being stuck in the kitchen. With these storage techniques, you can savor every delicious bite of your mother’s day pink velvet cake long after the celebration has ended.
Nutritional Benefits and Health Information
As we gather to celebrate Mother’s Day, indulging in a slice of mother’s day pink velvet cake is a delightful experience that many look forward to. However, it’s essential to understand what we’re consuming, which brings us to the nutritional aspects of this beloved dessert. By breaking down the ingredients and their nutritional profiles, we can enjoy our cake with a bit more awareness of its health implications.
Nutritional Profile
The basic ingredients of a classic mother’s day pink velvet cake include flour, sugar, cocoa powder, butter, eggs, buttermilk, and food coloring. Each of these components contributes to the cake’s flavor, texture, and nutritional value. On average, a slice of cake (1/12 of a 9-inch round cake) can range from 300 to 400 calories, depending on the frosting and specific ingredients used.
Carbohydrates are the primary macronutrient in cake, providing a quick source of energy. A slice typically contains about 40-50 grams of carbohydrates, with around 25-30 grams coming from sugars. The fat content is another significant factor, usually around 15-20 grams per slice, mostly from butter or oil used in the recipe. Additionally, there are typically 3-4 grams of protein per serving, mainly from the eggs and milk.
Health Benefits
While cake is often seen as a treat rather than a health food, some ingredients in a mother’s day pink velvet cake can offer surprising benefits. For instance, buttermilk can be a good source of calcium and vitamin B12, both of which are essential for bone health and energy metabolism. Cocoa powder, often included in velvet cakes, contains flavonoids that have antioxidant properties and may contribute to heart health. However, moderation is key. Enjoying a slice in the context of a balanced diet can make it a delightful part of your celebratory meal.
Another benefit of homemade cake is that you can control the ingredients. Using organic eggs, grass-fed butter, and even natural food colorings can enhance the nutritional quality compared to store-bought options, which may contain preservatives and artificial ingredients.
Dietary Considerations
When considering dietary restrictions, the mother’s day pink velvet cake can be modified to accommodate various needs. For those who are gluten-sensitive, substituting all-purpose flour with a gluten-free blend can yield a delicious result without sacrificing flavor. Vegans can replace eggs with flax eggs or apple sauce and use dairy-free butter and milk alternatives. These modifications allow everyone to enjoy a piece of the celebration without feeling left out.
It’s also worth noting that the cake can be made lighter by reducing the sugar content or opting for a lighter frosting like whipped cream instead of traditional cream cheese frosting. This can significantly lower the calorie count and make it a more suitable option for those watching their sugar intake. Additionally, incorporating whole grain flour can add fiber to the cake, enhancing its nutritional profile.
When comparing a mother’s day pink velvet cake to other desserts, it’s similar in calorie content to many other layer cakes but often perceived as more decadent due to its rich color and flavor. Unlike fruit-based desserts, velvet cake lacks the natural vitamins and antioxidants found in fruits, so it’s essential to balance your overall dessert choices with some healthier options, like fresh fruit or a salad, during your meal.
Ultimately, enjoying a slice of mother’s day pink velvet cake is about celebrating love, memories, and the joy of baking. By being aware of its nutritional content and making mindful choices, you can savor every bite without guilt. So go ahead, indulge in that cake, and relish the sweet moments with your family on this special day.
Conclusion: Mastering the Perfect mother’s day pink
Creating the perfect mother’s day pink is more than just following a recipe—it’s about understanding the techniques, ingredients, and cultural significance behind this beloved dish. Throughout this comprehensive guide, we’ve explored everything from the historical origins to modern variations, ensuring you have all the knowledge needed to make this recipe your own.
Whether you’re a beginner cook or an experienced chef, the techniques and tips we’ve shared will help you create a mother’s day pink that’s not only delicious but also meaningful. Remember that cooking is a journey of discovery, and each time you make this dish, you’ll learn something new.
We encourage you to experiment with the variations we’ve discussed, adapt the recipe to your dietary needs, and most importantly, share it with the people you love. Food has the incredible power to bring people together, and Mother’s Day Pink Velvet Cake is the perfect dish to create lasting memories around your dinner table.
Don’t forget to share your cooking adventures with us on social media, and feel free to ask questions in the comments below. Happy cooking!
Share this recipe and let us know how it turned out! Tag us on social media for a chance to be featured.