mother’s day sponge, a delightful and airy cake, holds a special place in my heart and kitchen. The first time I encountered this recipe was during a particularly hectic week leading up to Mother’s Day a few years ago. I was searching for something that would not only please my mom but also be simple enough for my busy schedule. As I flipped through my old family recipe book, I stumbled upon a handwritten note from my grandmother, detailing her version of a sponge cake. It was a nostalgic moment, reminiscent of my childhood when I would watch her bake in the kitchen, the aroma of vanilla and eggs wafting through the air. I knew I had to recreate this cake, not just for my mother, but also to honor my grandmother’s legacy.
The beauty of the mother’s day sponge cake lies in its simplicity and versatility. Traditionally made with just a handful of ingredients—eggs, sugar, flour, and butter—this cake is all about technique. My grandmother would always emphasize the importance of beating the eggs to the perfect consistency, and it became a cherished ritual for me. This cake is a blank canvas, allowing for endless variations; you can add lemon zest, vanilla, or even cocoa powder to create different flavors. What makes it special is not only the taste but the memories associated with it.
The Story Behind This Recipe
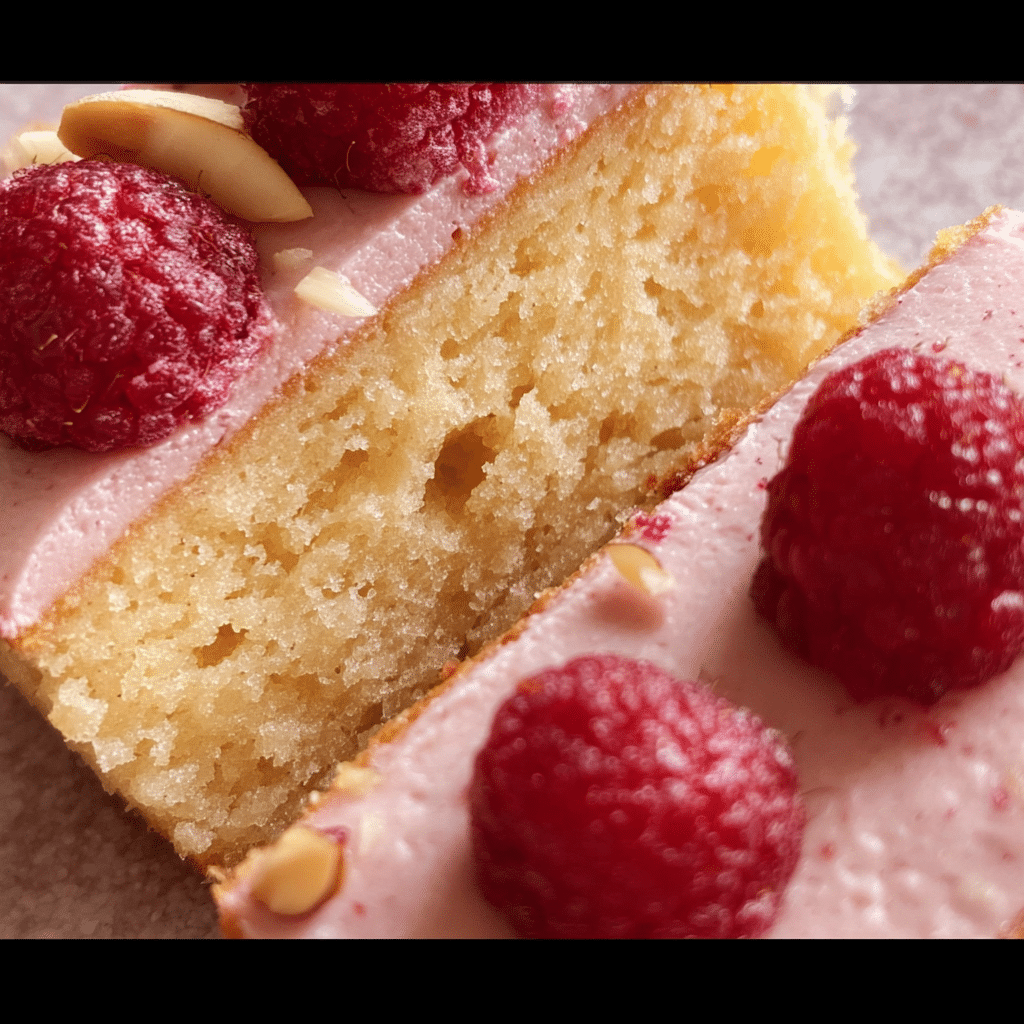
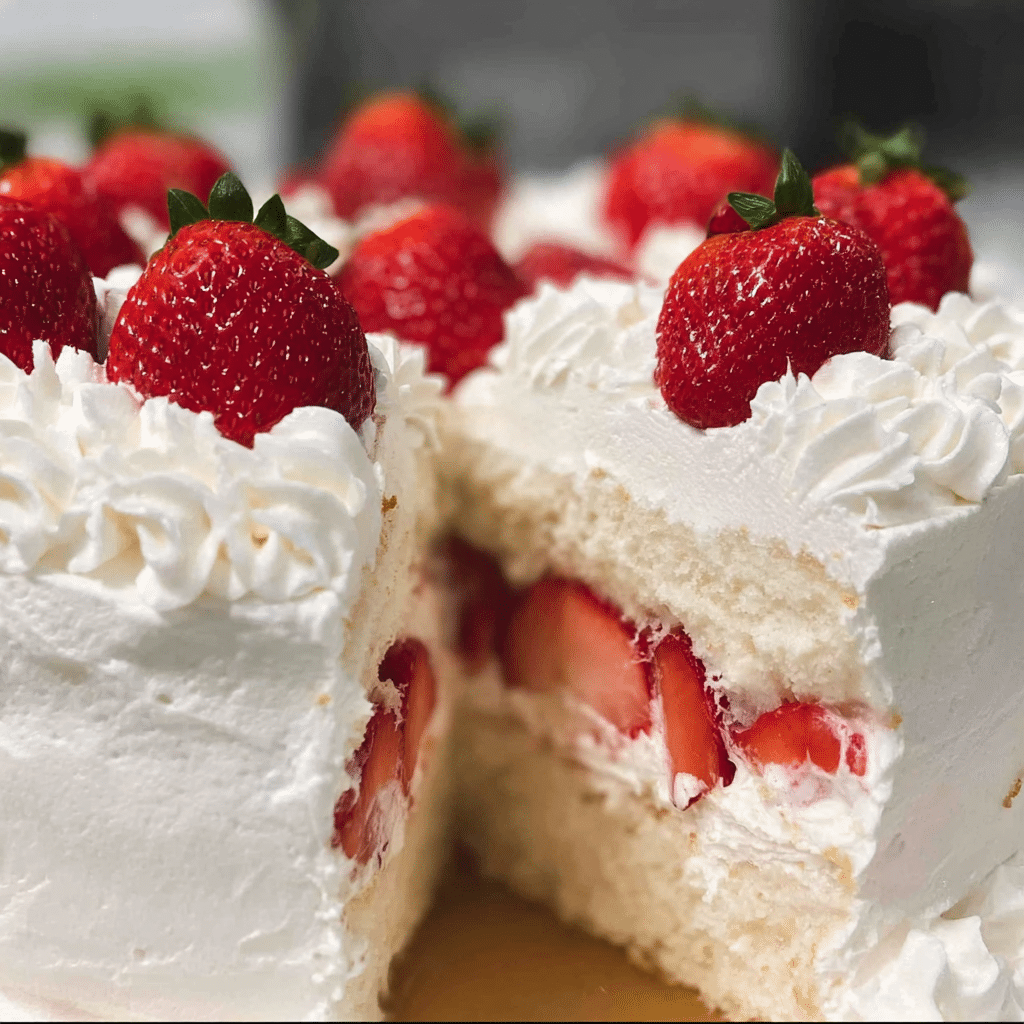
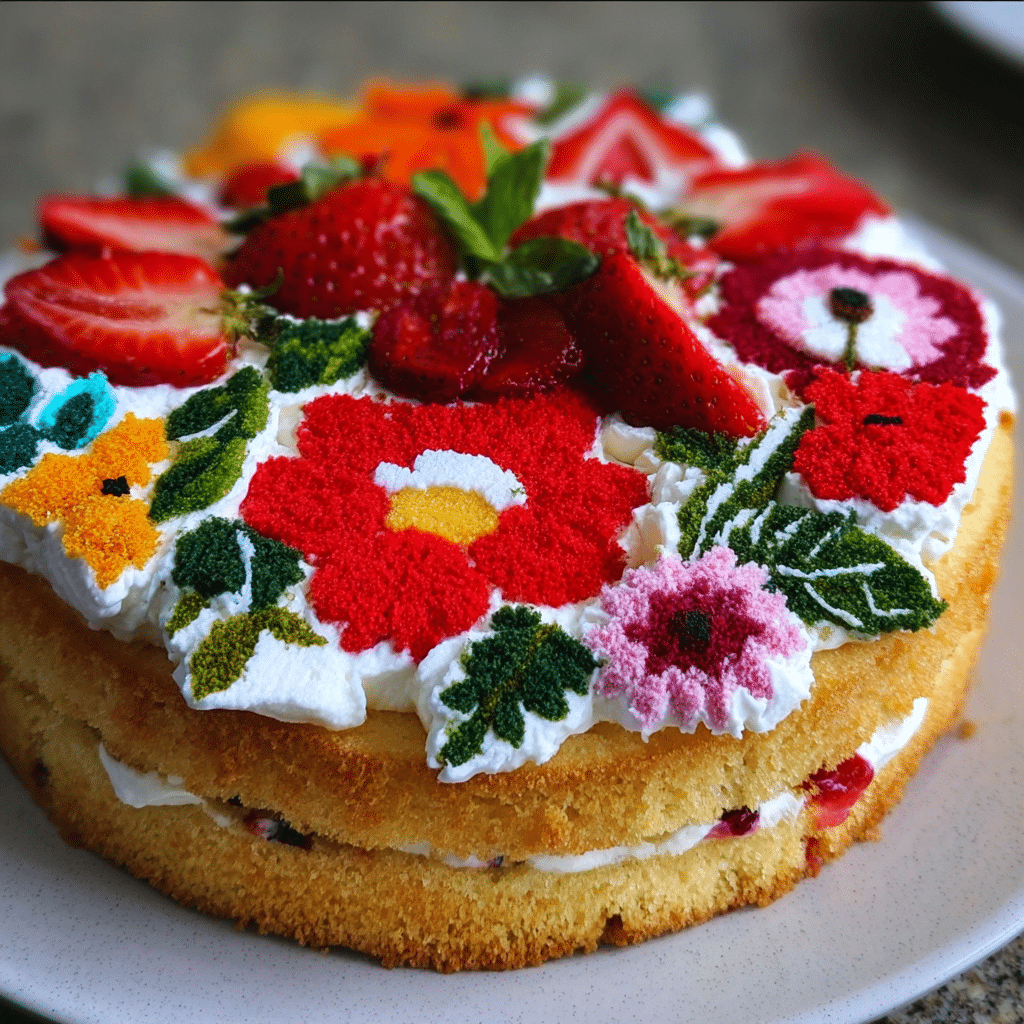
As I delved deeper into the preparation of the mother’s day sponge, I realized that it was more than just a cake; it was a vessel for love and connection. Each layer I whipped up reminded me of the times spent with my family, sharing stories and laughter over slices of cake. The lightness of the sponge, paired with a fluffy whipped cream and fresh strawberries, turned into a celebration of spring and motherhood. It became the perfect dessert for our gatherings, symbolizing not just the sweetness of the occasion but also the love that binds us together.
For busy families, the mother’s day sponge cake is a lifesaver. The straightforward recipe means you can whip it up in under an hour, even on the busiest of days. Its adaptability allows you to prepare it ahead of time, so you can spend more quality moments with your loved ones rather than slaving away in the kitchen. During the spring season, when Mother’s Day rolls around, the sponge cake is especially relevant as it coincides with the blooming of flowers and the freshness of seasonal fruits. A light cake adorned with berries or a citrus glaze feels just right as the weather warms up, making it a perfect dish to celebrate the season.
Emotionally, this mother’s day sponge cake connects generations. It’s not just about the cake; it’s about the stories shared, the laughter echoing in the kitchen, and the love that permeates every bite. Each time I bake it, I reflect on the women in my family who have passed down their culinary wisdom. This recipe embodies not just a tradition but also a celebration of motherhood in all its forms. With this article, I promise to guide you through the ins and outs of making your own mother’s day sponge cake, sharing tips and variations that will elevate your baking experience.
Why You’ll Love This Dish
In the upcoming sections, you’ll learn everything you need to know about crafting the perfect mother’s day sponge. From mastering the techniques that result in a light, airy cake to exploring creative toppings and fillings, this guide will equip you to impress your loved ones. Whether you’re baking for your own mother, a special mother figure in your life, or even treating yourself, the mother’s day sponge is the perfect choice to make any occasion feel extraordinary. So, preheat your oven and let’s get started on this delightful journey of baking and bonding!
The Rich History and Cultural Significance of mother’s day sponge
The rich history and cultural significance of mother’s day sponge cake is a fascinating tale that spans generations and continents. To truly appreciate this delightful dessert, it’s essential to explore its origins and how it has evolved into a beloved staple for many families around the world. The sponge cake, as we know it today, has roots dating back to the 17th century. Although its exact origins are somewhat nebulous, many historians believe it emerged in Europe, particularly in Italy and Spain, where the culinary arts began to flourish.
Origins and History
In Italy, the genoise cake represents one of the earliest forms of sponge cake. Named after the city of Genoa, this cake was made using a simple method of mixing eggs and sugar over heat until frothy, then folding in flour. This technique created a light texture that was unlike any other dessert of the time. The introduction of baking powder in the 19th century revolutionized sponge cakes, making them easier to prepare and more consistent in texture. As recipes spread across Europe, each region began to adapt the sponge cake to reflect local flavors and traditions.
In England, the sponge cake became a popular choice for afternoon tea, often layered with jam and cream. This tradition of serving sponge cake during social gatherings solidified its place as a celebratory dessert, perfect for occasions like Mother’s Day. The cake’s airy texture and adaptability meant it could be dressed up for special occasions or enjoyed as a simple dessert at home. Over the years, the mother’s day sponge cake has become a symbol of love and appreciation, making it the quintessential dessert for honoring mothers and mother figures.
Cultural Significance
The cultural significance of the mother’s day sponge cake extends beyond its deliciousness. In many cultures, baking a cake for someone is seen as an act of love and care. For Mother’s Day, the sponge cake serves as a gesture of gratitude, allowing us to express our appreciation for the countless sacrifices mothers make every day. In countries like the United Kingdom, it’s common to bake a special cake for mothers, often accompanied by heartfelt notes and gifts. This tradition has been embraced in various forms worldwide, with families customizing the recipes to include regional flavors and ingredients.
Moreover, the mother’s day sponge cake has been featured in numerous cookbooks and culinary shows, with famous chefs putting their unique spins on this classic recipe. Chefs like Mary Berry and Paul Hollywood have popularized sponge cakes, showcasing their versatility and elegance. Restaurants and bakeries around the world also celebrate this cake, especially during the spring season, when flowers bloom and families gather to honor motherhood.
Nutritional Benefits
While the mother’s day sponge cake is undoubtedly a treat, it also offers some nutritional benefits worth noting. Made primarily from eggs and flour, sponge cakes can be a source of protein thanks to the eggs. They can also be lower in fat compared to other cakes, especially if you choose to replace butter with healthier alternatives like yogurt or applesauce. When topped with fresh fruit, as is often the case for Mother’s Day celebrations, the cake becomes even more nutritious, providing vitamins and minerals alongside its sweetness.
In recent years, with the rise of health-conscious baking, many home bakers are adapting traditional recipes to suit their dietary needs. This evolution reflects the changing landscape of baking, where the mother’s day sponge cake can now be made gluten-free or vegan, ensuring that everyone can partake in the celebration. This adaptability not only honors the traditional aspects of the recipe but also embraces modern culinary practices, making it a dish that continues to evolve.
In conclusion, the mother’s day sponge cake is not just a dessert; it’s a symbol of love, tradition, and family. Its rich history, cultural significance, and nutritional benefits make it a worthy addition to any Mother’s Day celebration. As you prepare to bake your own version, remember that you are participating in a long-standing tradition that connects you to countless others who have shared this experience. So gather your ingredients, embrace the journey of baking, and get ready to create sweet memories that will last a lifetime.
Essential Ingredients for Perfect mother’s day sponge
When it comes to creating a delightful mother’s day sponge cake, the foundation lies in the ingredients. Each component plays a crucial role, not only in flavor but also in texture and overall success of the cake. In this section, we’ll dive into the essential ingredients needed for a perfect mother’s day sponge, along with important tips on sourcing, storing, and substituting to suit various dietary needs.
Essential Ingredients
- 6 egg yolks: Egg yolks provide richness and moisture to the sponge cake. They help create a tender crumb and contribute to the cake’s overall flavor. When selecting eggs, look for fresh, organic options if possible, as they tend to yield better results. You can tell if eggs are fresh by checking the sell-by date and performing a float test.
- 4 Tbsp. sugar: Sugar adds sweetness and helps with the leavening process. It’s important to use granulated sugar for a smooth texture. For a healthier alternative, consider using coconut sugar, but be aware that it may alter the cake’s final color and flavor slightly.
- 4 Tbsp. vegetable oil: This ingredient helps keep the sponge moist. Vegetable oil is preferable due to its neutral flavor, but you can also use melted coconut oil for a subtle tropical twist. Make sure to measure accurately for the best results.
- 4 Tbsp. whole milk: Milk adds moisture and richness. Using whole milk is ideal, but low-fat varieties can work in a pinch. Always use fresh milk; check that it is within its expiration date.
- 2 tsp. vanilla extract: Vanilla extract enhances the flavor of the mother’s day sponge. Opt for pure vanilla extract rather than imitation for the best flavor. If you’re feeling adventurous, try using almond extract for a unique twist.
- 1 cup all-purpose flour: Flour provides the structure of the cake. For a light sponge, it’s essential to use all-purpose flour that has a moderate protein content. Consider sifting it before use to aerate the flour, which helps create a fluffier cake.
- 6 egg whites: Egg whites are crucial for leavening and lightness. They should be at room temperature for optimal whipping. When separating eggs, be careful not to include any yolk as this can prevent the whites from whipping properly.
- 2 Tbsp. cornstarch: Cornstarch helps stabilize the cake and contributes to a more delicate crumb. It can also absorb moisture, which is beneficial for preventing the cake from becoming too dense.
- 1/2 tsp. vinegar: Vinegar is an often-overlooked ingredient that helps to stabilize the egg whites, allowing them to hold their volume better. White vinegar or apple cider vinegar works well in this recipe.
- 4 Tbsp. sugar: This additional sugar, added to the whipped egg whites, helps to stabilize them, making your sponge light and airy.
- Food dye gel (not liquid): If you’d like to add some color to your mother’s day sponge, gel food coloring is the way to go. It disperses evenly without adding extra liquid to your batter.

Mother’S Day Sponge Cake
Ingredients
- 6 egg yolks
- 4 Tbsp. sugar
- 4 Tbsp. vegetable oil
- 4 Tbsp. whole milk
- 2 tsp. vanilla extract
- 1 cup all-purpose flour
- 6 egg whites
- 2 Tbsp. cornstarch
- 1⁄2 tsp. vinegar
- 4 Tbsp. sugar
- food dye gel (not liquid)
Whipped Cream Filling
- 2 cups heavy whipping cream
- 5 Tbsp. confectioners sugar
- dash salt
- 2 tsp. vanilla
- fresh fruit or jam (optional)
Instructions
- Preheat the oven to 375 degrees, then grease an 8″ circular pan with cooking spray. Cut out parchment paper to fit inside the pan perfectly. Using an edible marker, trace your design onto the piece of parchment paper to your liking. This is the design we will be tracing with our batter later on.
- Separate the egg yolks and egg whites. Place the egg yolks in a large bowl and the egg whites in a medium-sized bowl. Set the egg whites aside for now.
- Whisk together the egg yolks, sugar, vegetable oil, milk, and vanilla.
- Sift in the flour and cornstarch to the wet ingredients. Then whisk until the batter is nice and smooth.
- In the bowl of a stand mixer fit with a whisk attachment, whisk the 6 egg whites until frothy. Slowly add in the vinegar and sugar while whipping up the egg whites.
- Whisk the egg whites until stiff peaks form. This is very important! Make sure the egg whites have formed stiff peaks before adding them to the batter in the next step.
- Fold the egg whites into the egg yolk batter until everything is fully combined. Be careful not to over-mix at this step. If you over-mix, the egg whites will deflate and cause a runny, thin batter. Mix just until the egg whites are evenly distributed throughout.
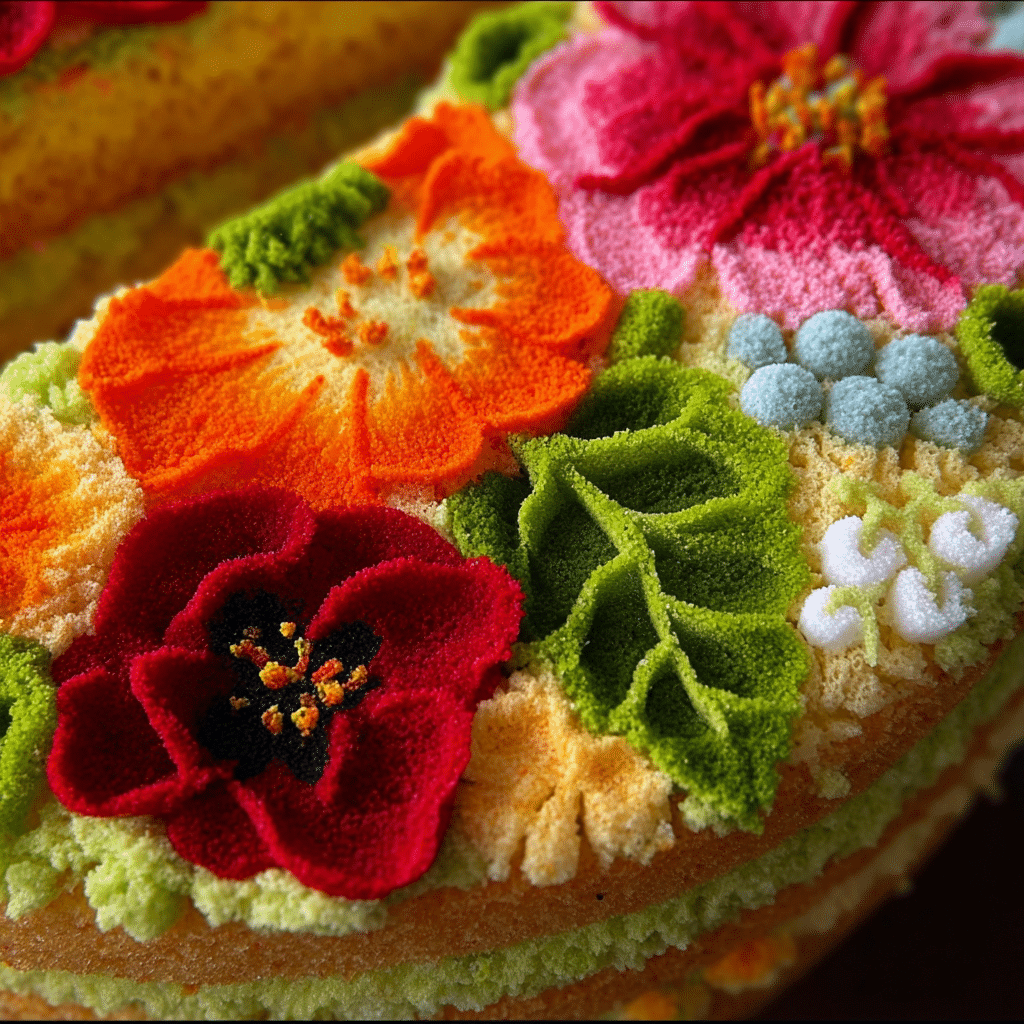
- Remove a few teaspoons of batter at a time and use food gel to dye each color one at a time depending on the colors needed for your design. You only need to remove a small amount of each color but pay close attention to the design you’re tracing.
- Place your colored batter into piping bags.
- Pipe black outlines around your traced designs then go ahead and fill in these piped traced lines with color.
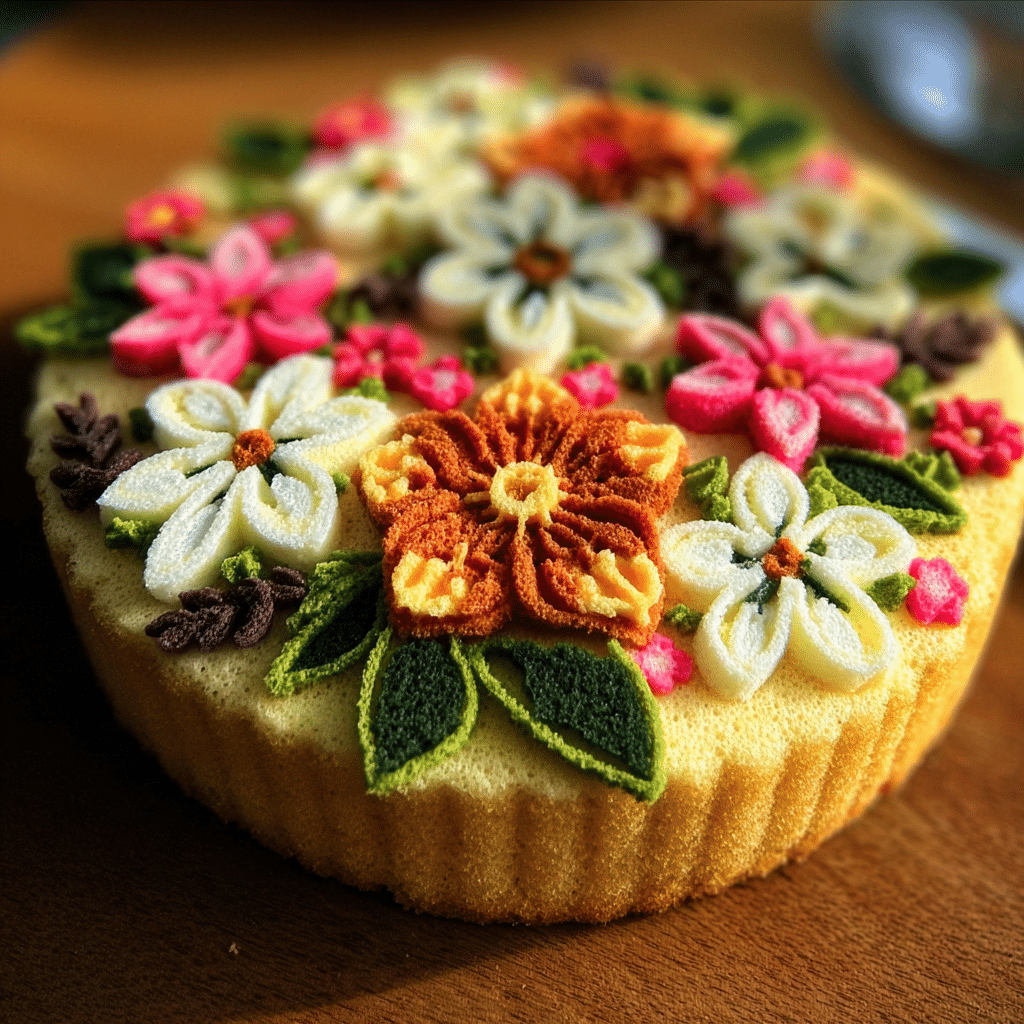
- Once you’ve added all of your designs to your cake, let it sit in the fridge for 5-8 minutes then pipe the uncolored batter on top to cover your design. Bake for 8-9 minutes.
- Once the designed cake has finished baking flip the cake out of the pan and peel the parchment paper off of the design as soon as it comes out of the pan. Use the remaining batter to bake one or two more layers of cake. Allow the cakes to cool completely. While the cakes cool, prepare the whipped cream.
- In the bowl of a stand mixer fit with the whisk attachment, and whisk the cream, sugar, and vanilla until stiff peaks have formed and you have reached a whipped cream consistency.
- Assemble the cake by placing a layer of cake (the undesigned cake) on the bottom, then pipe a layer of whipped cream. Top the entire cake off with the designed cake. Feel free to add the filling of your choice as well as any additional decorations that you want.
- Store in the fridge until serving, enjoy!
- This cake can be made ahead of time but is best enjoyed fresh. If you plan to make this ahead of time, be sure to seal the cake tightly in plastic wrap to keep it fresh.
Whipped Cream Filling
- 2 cups heavy whipping cream: Heavy cream is essential for a rich and fluffy filling. Make sure to use fresh cream that is well-chilled for the best whipping results.
- 5 Tbsp. confectioners sugar: This sugar dissolves easily and adds just the right amount of sweetness without adding graininess. Adjust the quantity based on your sweetness preference.
- Dash salt: A small pinch of salt enhances the flavor of the whipped cream, balancing the sweetness.
- 2 tsp. vanilla: Similar to the sponge, vanilla in the whipped cream filling adds depth of flavor.
- Fresh fruit or jam (optional): For a touch of freshness and additional flavor, layer in some fresh berries or a dollop of your favorite jam. Seasonal fruits like strawberries or raspberries are perfect for a Mother’s Day celebration.
Shopping Tips
When shopping for ingredients for your mother’s day sponge, consider the quality of each item. Opt for organic eggs and dairy when possible, as they tend to have better flavor and nutritional profiles. Fresh produce is key, especially if you’re adding fruits to your cake. Visiting a local farmer’s market can yield excellent results, but grocery stores often have good selections as well. Always check expiration dates on dairy and eggs and inspect for any signs of spoilage.
Substitutions and Alternatives
If you’re cooking for someone with dietary restrictions or preferences, there are plenty of substitutions you can make. For a dairy-free option, you can replace heavy cream with coconut cream and use almond milk instead of whole milk. For gluten-free baking, consider using a gluten-free flour blend, keeping in mind that texture may vary. Sugar can be substituted with alternatives like maple syrup or agave nectar, but remember that this may impact the moisture content of your cake.
In summary, gathering the right ingredients for your mother’s day sponge is the first step toward creating a delightful treat that will impress. Quality matters, so take your time in selecting each component, considering substitutions as needed. With the right ingredients, your cake will not only be a feast for the eyes but also a delicious centerpiece for your Mother’s Day celebration.
Detailed Step-by-Step mother’s day sponge Cooking Instructions
Once you have all your ingredients gathered and ready, it’s time to dive into the exciting process of making your mother’s day sponge cake. This cake is not just a dessert; it’s a heartfelt gesture, a way to show love and appreciation to that special person in your life. Let’s break down the process step by step, ensuring you have all the tips and techniques you need to achieve that perfect sponge.
Preparation Steps
- Preheat your oven: Set your oven to 350°F (175°C) to ensure it’s hot and ready for your cake. This is crucial for the leavening process, so don’t skip this step.
- Prepare your baking pan: Grease a round 9-inch cake pan with a bit of oil or butter, and then line the bottom with parchment paper. This will help your sponge release easily after baking.
- Gather your tools: You’ll need a mixing bowl, a hand or stand mixer, a spatula, measuring cups and spoons, and a whisk. Having everything ready will make the process smoother.
- Separate the eggs: Carefully separate the egg yolks from the egg whites, placing them in different bowls. Ensure no yolk gets into the whites, as this will prevent them from whipping up properly.
- Measure all ingredients: Measure out your sugar, flour, and other components beforehand. This is known as mise en place and helps the cooking process go smoothly.
Cooking Process
- Beat the egg yolks: In a mixing bowl, whisk the 6 egg yolks with 4 tablespoons of sugar until the mixture is pale and creamy. This should take about 3-5 minutes. The sugar will help to aerate the yolks, creating a light base.
- Add oil and milk: Slowly drizzle in the vegetable oil and milk while continuing to whisk. This will create an emulsion, ensuring your sponge remains moist.
- Incorporate vanilla: Add in the vanilla extract, blending it well into the mixture. The aroma will be delightful!
- Sift in the dry ingredients: Gradually sift in the flour, cornstarch, and vinegar, folding gently to combine. Avoid overmixing, as this can lead to a dense sponge.
- Whip the egg whites: In a clean bowl, beat the 6 egg whites until frothy. Gradually add 4 tablespoons of sugar and continue to beat until stiff peaks form. This is a crucial step for achieving that airy texture.
- Fold in the egg whites: Gently fold the whipped egg whites into the batter in three additions. Use a spatula and be careful not to deflate the mixture. This step is vital for the sponge’s lightness.
- Add food dye (optional): If you wish to incorporate color, now is the time to add a few drops of gel food dye. Gently fold until evenly distributed.
- Pour into the pan: Carefully pour the batter into your prepared cake pan, smoothing the top with a spatula.
- Bake: Place the pan in the oven and bake for about 25-30 minutes. You’ll know it’s done when a toothpick inserted in the center comes out clean, and the cake springs back when lightly pressed.
- Cool the cake: Once baked, remove the cake from the oven and let it cool in the pan for 10 minutes. Then, turn it out onto a wire rack to cool completely. This is where the magic happens as the sponge sets.
Final Assembly
- Prepare the whipped cream: While your cake is cooling, whip the heavy whipping cream in a mixing bowl until it starts to thicken. Gradually add 5 tablespoons of confectioners sugar, a dash of salt, and 2 teaspoons of vanilla. Continue whipping until soft peaks form. Be careful not to over-whip, as this can lead to butter formation.
- Layer the cake: Once your sponge is completely cool, slice it in half horizontally to create two layers. Place one layer on your serving plate.
- Add whipped cream filling: Spread a generous layer of whipped cream over the bottom layer. If you’re adding fresh fruit or jam, now is the time to scatter them on top of the cream.
- Top with second layer: Carefully place the second sponge layer on top of the whipped cream filling. You can dust the top with powdered sugar for an elegant finish.
- Chill before serving: For best results, let the assembled cake chill in the refrigerator for at least 30 minutes before serving. This helps the flavors meld together and makes slicing easier.
And there you have it—a step-by-step guide to creating a beautiful mother’s day sponge cake that is sure to impress. Remember, the key to a successful sponge is all in the technique and the love you put into it. Enjoy the process and savor the moments shared with your loved ones as you celebrate this special day!
Professional Tips and Techniques for mother’s day sponge
When it comes to baking the perfect Mother’s Day sponge, there are several professional tips and techniques that can elevate your cake from good to extraordinary. Whether you’re a seasoned baker or just starting, understanding the nuances of making a sponge cake can make all the difference. Let’s dive into some invaluable insights that will ensure your Mother’s Day sponge is a showstopper.
Professional Techniques
One of the cornerstones of a successful Mother’s Day sponge is the method of incorporating air into your batter. This is where the magic happens! Start with room temperature eggs, as they whip better and yield a fluffier cake. When beating the eggs and sugar together, use a stand mixer or hand mixer to achieve that light, airy texture. Aim for a pale yellow color and a consistency that leaves a ribbon-like trail when you lift the whisk. This process is known as “aeration,” and it’s crucial for a light sponge.
Another professional secret is to fold in your dry ingredients gently. Instead of mixing vigorously, which can deflate the batter, use a spatula to fold in flour, ensuring you maintain that airy structure. This technique is particularly important when making a Mother’s Day sponge as the texture is key to its success.
For an added depth of flavor, consider infusing your batter with vanilla extract or citrus zest. These subtle additions can elevate your cake, making it not just a dessert but a memorable experience. Additionally, if you’re brave enough, you could even experiment with flavored syrups or liquors that complement the cake’s sweetness.
Troubleshooting Guide
No matter how experienced you are, baking can sometimes go awry. One common problem with sponge cakes is drying out. This usually happens if you over-bake or if the cake is not stored properly after cooling. A good rule of thumb is to check for doneness a few minutes before the recipe suggests. The cake should spring back when lightly pressed and a toothpick inserted should come out clean but not dry.
If your Mother’s Day sponge sinks in the middle, this could be due to underbaking or opening the oven door too soon. Resist the urge to peek until the minimum baking time has passed! If you do happen to have a sunken cake, don’t fret—it can still be salvaged by slicing it into layers and adding a generous amount of frosting. Trust me; it’ll still taste divine!
Presentation Tips
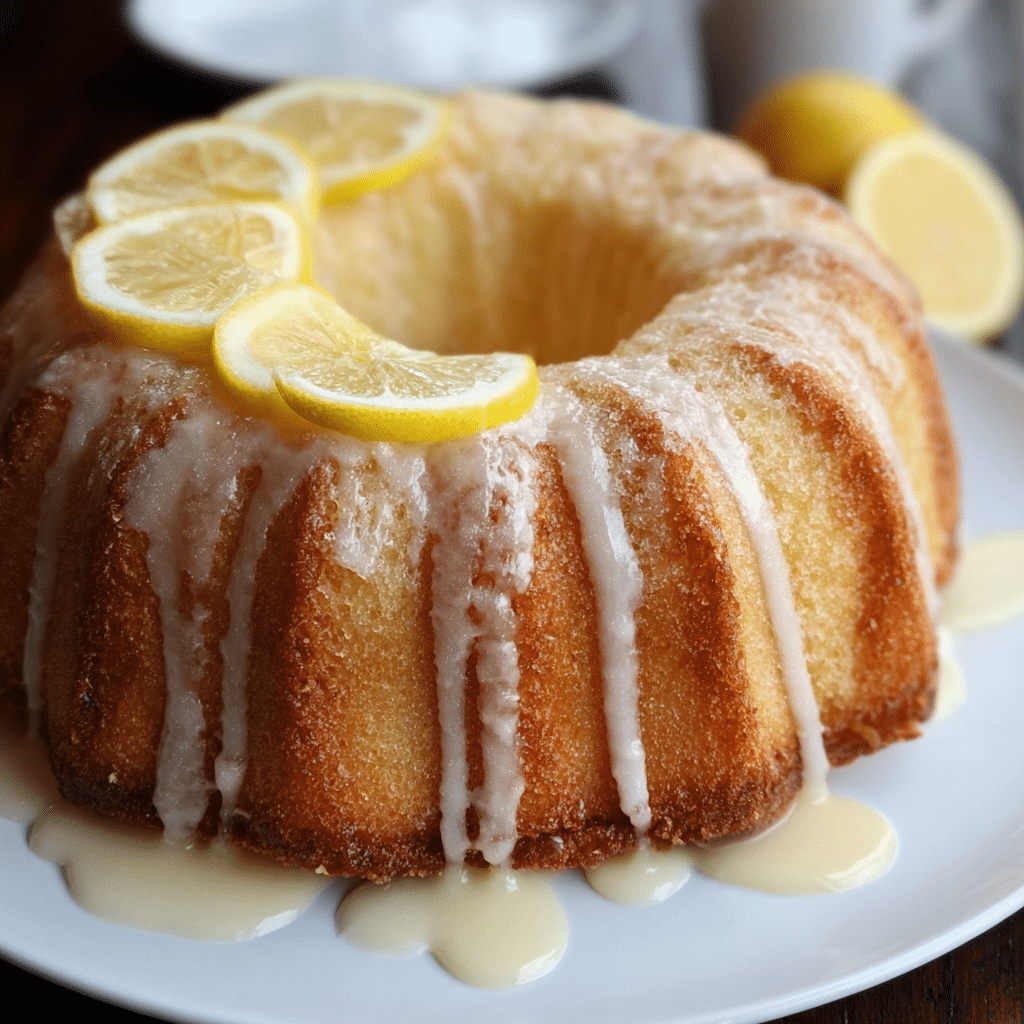
Once you’ve mastered the art of baking a perfect Mother’s Day sponge, the next step is making it visually appealing. After cooling, consider dusting the top with powdered sugar or serving it with fresh berries—a classic combination that adds color and freshness. A dollop of whipped cream or a scoop of ice cream makes for a delightful pairing. If you want to take it up a notch, a light drizzle of lemon glaze can add a beautiful shine and extra flavor.
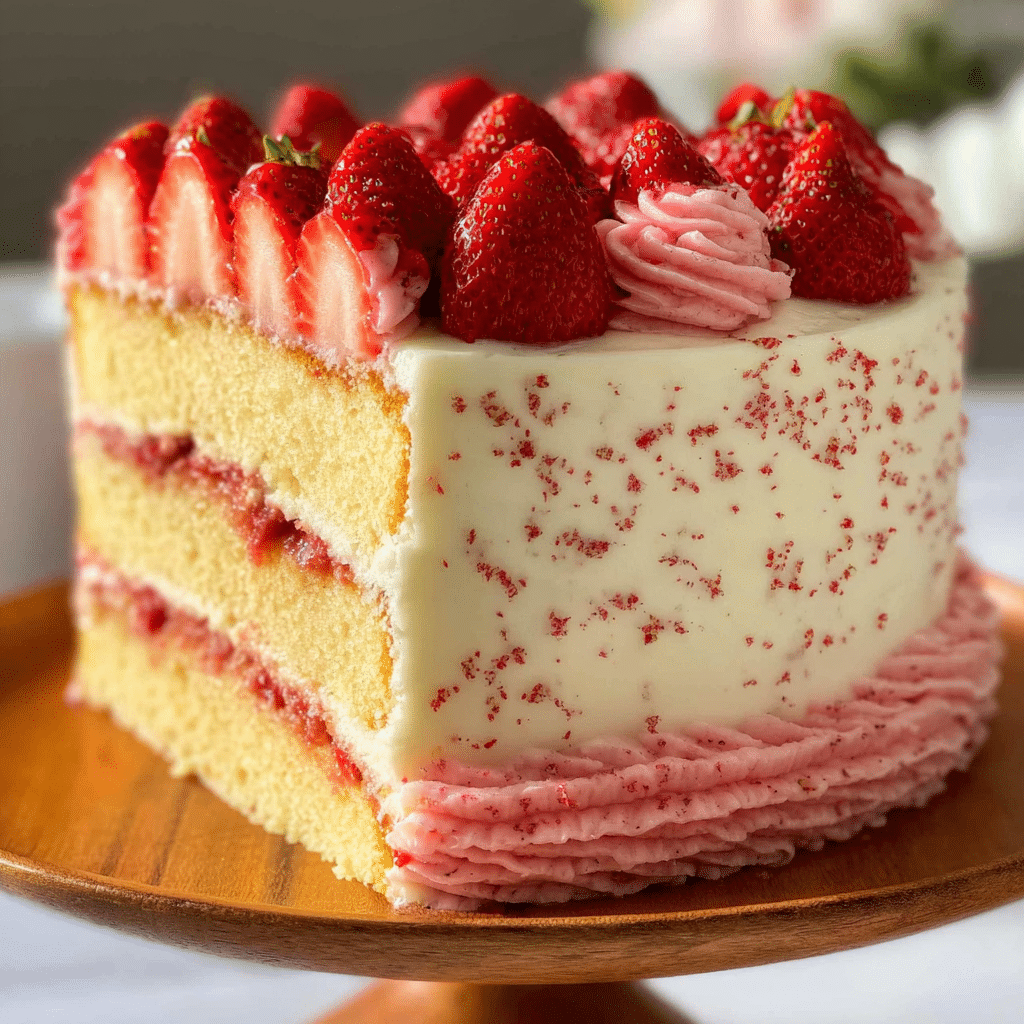
For those who are more adventurous, try layering your sponge with different fillings like jam, custard, or fresh fruit. This not only enhances the flavor but also adds visual interest. When stacking layers, ensure that your fillings are even to prevent any leaning or collapsing. Use a cake stand to elevate your Mother’s Day sponge and make it the centerpiece of your celebration!
Equipment Recommendations
Investing in the right tools can also significantly impact your baking experience. A good quality stand mixer can save you time and effort while providing consistent results when whipping your eggs. Additionally, a set of measuring cups and spoons ensures accuracy in your ingredients, which is vital when baking. Don’t forget to use a reliable oven thermometer to guarantee your oven is at the correct temperature. An oven that’s too hot or too cold can lead to a disastrous sponge!
Make-Ahead and Meal Prep Strategies
If you’re planning to bake for Mother’s Day, consider making your sponge a day ahead. Once baked and cooled completely, wrap it tightly in plastic wrap to keep it moist. You can also freeze your sponge for up to three months, allowing you to pull it out whenever you’re ready to assemble your cake. Just remember to let it thaw completely before icing or decorating!
Scaling the Recipe Up or Down
Whether you’re hosting a large gathering or a small family celebration, you can easily scale your Mother’s Day sponge recipe. If you need to increase the quantity, simply multiply each ingredient by the same factor. Conversely, if you’re looking to make a smaller cake, divide the ingredients accordingly. Just remember to adjust your baking time, as smaller cakes may bake faster!
Lastly, when it comes to pairing beverages, consider serving your Mother’s Day sponge with a light sparkling wine or a refreshing cup of tea. The effervescence and acidity in the wine can cut through the sweetness of the cake, balancing out flavors beautifully.
By incorporating these tips and techniques into your baking repertoire, you’ll not only create a delicious Mother’s Day sponge but also impress everyone at your celebration with your newfound skills. Happy baking!
Creative Variations and Adaptations of mother’s day sponge
Mother’s Day is the perfect occasion to showcase your creativity in the kitchen, especially when it comes to baking a sponge cake. While the traditional Mother’s Day sponge is delightful on its own, there are countless variations and adaptations you can explore to make the day even more special. Let’s take a journey through some creative twists that will ensure your cake stands out this Mother’s Day.
Seasonal Variations
One of the best ways to make your Mother’s Day sponge unique is to incorporate seasonal ingredients. Spring brings a bounty of fresh fruits, and what better way to celebrate than by using them in your cake? Strawberries, raspberries, and blueberries are vibrant, flavorful, and perfect for a light sponge. You can fold these berries into the batter for a fruity explosion or use them as a topping. A strawberry coulis drizzled over the top can add an elegant touch and a burst of flavor.
As the weather warms, consider infusing your sponge with floral notes. Lavender, for instance, can offer a delicate flavor profile that pairs beautifully with whipped cream. Just a teaspoon of culinary lavender can transform your Mother’s Day sponge into a fragrant delight. Similarly, elderflower syrup can be a lovely addition, providing a light sweetness reminiscent of springtime.
Dietary Adaptations
In today’s culinary world, accommodating different diets is essential. If you’re looking to make a Mother’s Day sponge that caters to dietary needs, there are many adaptations you can try. For a gluten-free version, substitute regular flour with a gluten-free blend. Many brands now offer blends that work perfectly in baking, ensuring your sponge remains light and fluffy.
If you need a vegan option, you can replace eggs with flaxseed meal or a commercial egg replacer. Applesauce works wonders as well, adding moisture and a hint of sweetness. When using plant-based milk, such as almond or coconut, consider how these flavors will contribute to your overall cake. Opt for a neutral-flavored milk for a classic sponge or something more pronounced for added character.
Creative Twists
Don’t shy away from experimenting with flavors! You can easily infuse your Mother’s Day sponge with different extracts or spices. For instance, a touch of almond extract can add a marzipan-like flavor, while spices like cinnamon or nutmeg can give your cake a warm, cozy feel. If you’re feeling adventurous, why not try a matcha sponge? The vibrant green color and earthy flavor can provide a stunning presentation and a unique taste.
For a decadent twist, consider filling your sponge with layers of chocolate ganache or a rich pastry cream. You could even whip up a lemon curd to spread between the layers for a zesty surprise. The contrast of flavors and textures can elevate your Mother’s Day sponge to a whole new level.
Different Cooking Methods
While the traditional method of baking in the oven is the most common, don’t hesitate to explore alternative cooking methods. A slow cooker can be an excellent tool for making a moist sponge cake without the risk of drying it out. Simply pour your batter into the greased slow cooker and cook on low for about 2-3 hours, checking for doneness. This method is particularly great if you’re short on oven space!
Alternatively, you can try steaming your sponge. Steaming allows for a tender crumb and keeps the cake moist. This method is popular in various cultures, particularly in Asian cuisines. A bamboo steamer works wonders—just ensure you line it with parchment paper to prevent sticking.
Leftover Transformation Ideas
If you happen to have leftover Mother’s Day sponge, don’t let it go to waste! One fantastic way to utilize leftover cake is by making cake pops. Crumble the sponge, mix it with frosting, then form into balls and dip in chocolate. These bite-sized treats are perfect for sharing, and kids love them!
Another idea is to transform your sponge into a trifle. Layer pieces of the sponge with custard, whipped cream, and fresh fruit in a glass dish for an eye-catching dessert. Not only does this make for a beautiful presentation, but it also gives a new life to the cake while adding delicious flavors and textures.
Ultimately, the possibilities are endless when it comes to creating variations of your Mother’s Day sponge. By embracing seasonal ingredients, dietary adaptations, and creative twists, you’ll be able to craft a cake that not only celebrates the occasion but also showcases your baking prowess. Happy baking, and may your Mother’s Day sponge be the highlight of the day!
Storage, Reheating, and Meal Prep for mother’s day sponge
When it comes to creating the perfect mother’s day sponge, one of the most frequently overlooked aspects is how to properly store it. After all, you want your sponge cake to be as delightful as it was on the day it was baked. Whether you’re preparing for a small gathering or planning to send some cake home with family, understanding the right storage methods is crucial for maintaining freshness and flavor.
Short-term Storage
If you’ve made your mother’s day sponge cake and plan to serve it within a few days, storing it properly in the refrigerator is key. To start, ensure that your cake is completely cooled; storing a warm cake can create condensation, leading to sogginess.
Once cooled, wrap the sponge cake tightly in plastic wrap or store it in an airtight container. This will help retain moisture while preventing the cake from absorbing any odors from the fridge. For cakes with delicate toppings or frostings, it’s advisable to place a piece of wax paper or parchment between the cake and the wrap to avoid sticking.
It’s important to note that a properly stored sponge cake can last in the refrigerator for about 3 to 5 days. If you’ve made a layered mother’s day sponge, consider slicing it into portions before wrapping. This not only makes it easier to grab a slice but also helps to minimize the exposure of the cake to air, which can lead to drying out.
Freezing and Long-term Storage
For those who want to prepare their mother’s day sponge cake well in advance, freezing is an excellent option. A sponge cake freezes beautifully, and when done right, it can retain its delightful texture and flavor for several months. Start by allowing the cake to cool completely, just as you would for short-term storage. Then, wrap the cake tightly in plastic wrap, ensuring there are no air pockets. For added protection, wrap it again in aluminum foil or place it in a freezer-safe bag.
When freezing slices, make sure to separate each piece with a layer of parchment paper before wrapping. This prevents the slices from sticking together, making it easy to take out just the amount you need. A frozen mother’s day sponge cake can last for up to 3 months in the freezer, retaining quality if wrapped properly.
When it’s time to enjoy your frozen cake, the best way to thaw it is to transfer it to the refrigerator for several hours or overnight. This slow thawing helps maintain its texture. If you’re in a hurry, you can also leave it at room temperature for a couple of hours, but avoid using a microwave as it can cause the cake to become rubbery.
Reheating Best Practices
While sponge cakes are typically enjoyed at room temperature, there may be occasions when you want to give your mother’s day sponge a little warmth. To do this effectively, preheat your oven to 350°F (175°C). Wrap the cake in aluminum foil to prevent it from drying out and place it in the oven for about 10-15 minutes. This gentle reheating will refresh the cake without compromising its airy texture.
For individual slices, you can use a microwave on low power, but be cautious—microwaving can easily lead to uneven heating. A few seconds at a time, checking frequently, is the best approach. If you prefer a more traditional method, a toaster oven can also do the trick, offering a nice crispness to the outside while warming the inside.
Food safety is another critical aspect to consider when storing your mother’s day sponge cake. It’s essential to avoid leaving the cake at room temperature for more than a couple of hours, especially if the cake is frosted or contains perishable fillings. Always keep an eye on the shelf life; cakes stored in the refrigerator should ideally be consumed within a week, while frozen cakes should be marked with the date so you can track how long they’ve been stored.
When it comes to portioning and packaging, think about your audience. If you’re sending slices home with guests, consider using small, decorative boxes or containers that will keep the cake secure. For larger portions, a cake box with a secure lid is perfect. Not only does this keep the cake safe, but it also makes for a lovely presentation when sharing your mother’s day sponge with others.
Ultimately, the key to enjoying your mother’s day sponge cake lies in the care you take during storage and reheating. By following these guidelines, you can ensure that each slice remains a delicious reminder of the love and effort you put into baking it.
Nutritional Benefits and Health Information
When celebrating Mother’s Day, the last thing on anyone’s mind might be the nutritional value of the cake being served. However, understanding the nutritional profile of your mother’s day sponge can enhance your appreciation for it, especially when considering dietary needs or healthier modifications. After all, we want to indulge without feeling guilty!
Nutritional Profile
The typical mother’s day sponge cake is made from simple ingredients: flour, sugar, eggs, and butter. Each of these components contributes to the overall nutritional value of the cake. For a standard slice (about 1/12 of a cake), you can expect roughly:
- Calories: 200-250
- Carbohydrates: 30-35g
- Protein: 3-5g
- Fat: 8-12g
This breakdown can vary significantly based on the recipe variations and the inclusion of additional ingredients such as frosting or fillings. For example, adding whipped cream or fruit can increase both the calorie count and the nutritional benefits.
Health Benefits
While a slice of cake may not be the first food that comes to mind when thinking of health benefits, there are certainly ingredients within your mother’s day sponge that offer some positives. Eggs, for instance, are a significant source of protein and contain essential amino acids that are vital for muscle repair and growth. They also provide important nutrients like vitamin D and B12.
The flour used in your sponge cake, particularly if you opt for whole wheat or almond flour, can also add fiber to the mix. Fiber is essential for digestive health and can help you feel fuller for longer, which is especially useful if you’re watching your portion sizes on special occasions.
If you decide to incorporate fruits into the cake, such as strawberries or raspberries, you’ll also be adding antioxidants and vitamins that can boost overall health. These fruits not only enhance the flavor of your mother’s day sponge but also contribute to a more balanced dessert.
Dietary Considerations
When preparing a mother’s day sponge, it’s essential to consider dietary restrictions and allergies. Common allergens in sponge cakes include gluten (from flour) and dairy (from butter). For those with gluten sensitivities, you can easily substitute almond flour or a gluten-free flour blend to create a delicious alternative. Additionally, using coconut oil or dairy-free butter can cater to those with lactose intolerance.
Another consideration is sugar content. Traditional sponge cakes can be quite sweet, which can be a concern for those managing their sugar intake. To accommodate this, you might consider using natural sweeteners, such as honey or maple syrup, as substitutes. These alternatives can provide a different flavor profile while still keeping the cake delicious.
In terms of calorie content, portion control is crucial. If you’re serving cake as part of a larger meal, consider slicing smaller pieces. Pairing your mother’s day sponge with a side of fresh fruit can also help balance the meal, providing more fiber and nutrients and lessening the indulgence of the cake itself.
As with many traditional desserts, the key to enjoying a mother’s day sponge lies in moderation. You can savor the flavors and textures of your cake while also being mindful of your dietary needs. Remember, it’s perfectly okay to enjoy a slice of cake on a special day; just be aware of how it fits into your overall dietary goals.
Ultimately, by understanding the nutritional aspects of your mother’s day sponge, you can make informed choices that allow you to enjoy this beloved dessert without compromising your health. Whether you’re baking for a gathering or simply treating yourself, a thoughtful approach to nutrition can enhance your overall experience.
Conclusion: Mastering the Perfect mother’s day sponge
Creating the perfect mother’s day sponge is more than just following a recipe—it’s about understanding the techniques, ingredients, and cultural significance behind this beloved dish. Throughout this comprehensive guide, we’ve explored everything from the historical origins to modern variations, ensuring you have all the knowledge needed to make this recipe your own.
Whether you’re a beginner cook or an experienced chef, the techniques and tips we’ve shared will help you create a mother’s day sponge that’s not only delicious but also meaningful. Remember that cooking is a journey of discovery, and each time you make this dish, you’ll learn something new.
We encourage you to experiment with the variations we’ve discussed, adapt the recipe to your dietary needs, and most importantly, share it with the people you love. Food has the incredible power to bring people together, and Mother’s Day Sponge Cake is the perfect dish to create lasting memories around your dinner table.
Don’t forget to share your cooking adventures with us on social media, and feel free to ask questions in the comments below. Happy cooking!
Share this recipe and let us know how it turned out! Tag us on social media for a chance to be featured.