No bake mint desserts have a special place in my heart, and there’s nothing quite like a no bake mint Oreo pie to capture the essence of indulgence without all the fuss. I first stumbled upon this delightful recipe during a family gathering where my aunt, known for her effortless entertaining skills, whipped it up in no time. With a vibrant green hue and a tantalizing minty aroma, the pie was an instant hit. Everyone raved about how the cool mint flavor paired beautifully with the chocolatey crust, and I was captivated. In that moment, I realized that no bake mint desserts could be the perfect solution for busy families looking to satisfy their sweet tooth without spending hours in the kitchen.
The Story Behind This Recipe
The magic of no bake mint desserts, particularly the Oreo pie, lies not just in their simplicity but in their versatility. As someone who often juggles work, family, and a busy social calendar, I appreciate recipes that allow me to create something impressive without sacrificing my precious time. The no bake mint Oreo pie became a staple in my repertoire, a go-to dessert for birthdays, holidays, and even impromptu gatherings with friends. Whenever I make this pie, I’m reminded of my aunt’s easy-going nature and her ability to bring people together over food.
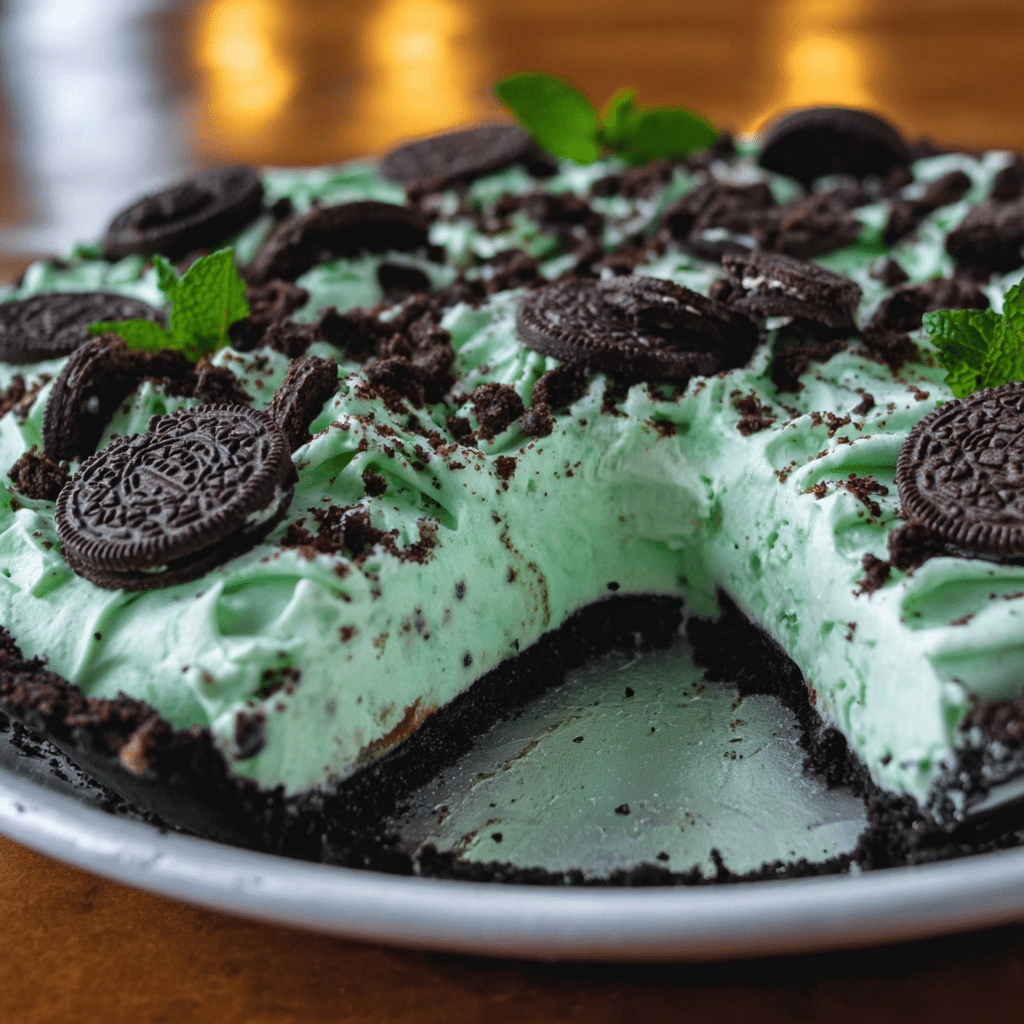
Originating from the classic no-bake dessert trend that gained popularity in the mid-20th century, this pie is a modern twist on traditional recipes that often required lengthy baking times. The combination of crushed Oreo cookies, cream cheese, and whipped topping creates a rich, velvety texture that is simply irresistible. This dessert not only appeals to the taste buds but is also visually stunning, making it a favorite centerpiece for any gathering.
What makes this no bake mint Oreo pie truly special is the marriage of flavors and textures. The crunch of the Oreo crust, the smoothness of the mint filling, and the lightness of the whipped topping create a symphony of sensations that dance on your palate. For busy families, this recipe offers an opportunity to involve the kids in the kitchen, allowing them to crush the cookies and mix the filling. It’s a fun way to create lasting memories while teaching culinary skills.
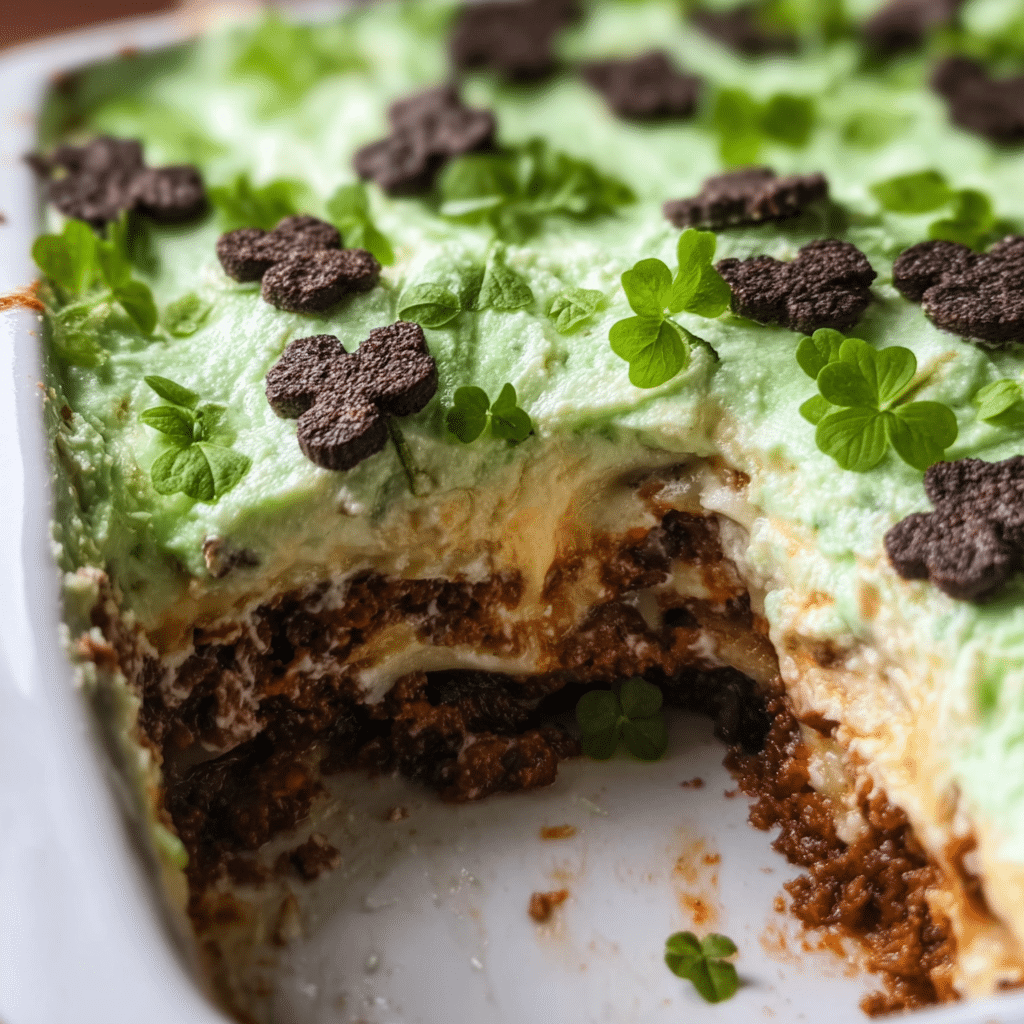
Seasonally, this pie shines during the warmer months. However, its refreshing mint flavor makes it a delightful treat year-round. Whether it’s a summer barbecue or a winter holiday party, the no bake mint Oreo pie can adapt to any occasion. I often find myself making it for St. Patrick’s Day, adding a festive touch with green food coloring, or during the holidays when chocolate and mint reign supreme. It’s a dessert that transcends seasons and celebrations, bringing joy and comfort to all who indulge.
For me, this pie carries an emotional connection that goes beyond its taste. It’s a reminder of family gatherings, laughter, and shared moments around the dinner table. Each slice brings back memories of those carefree days when the simple act of eating dessert felt like the greatest joy. As I prepare to share this recipe with my readers, I promise you’ll discover not just how to make a delicious no bake mint Oreo pie, but also how to create memories that will last a lifetime.
Why You’ll Love This Dish
In this guide, you’ll learn the step-by-step process to create a flawless no bake mint Oreo pie, alongside tips for customizing it to suit your taste. Whether you prefer a more intense mint flavor or a creamy texture, I’ll share secrets that will elevate your dessert-making game. You’ll also discover variations that include different crusts, fillings, and toppings, ensuring that you can make this pie your own. So grab your mixing bowl and get ready to embark on a culinary adventure that will not only satisfy your sweet tooth but will also bring a little joy into your life.
The Rich History and Cultural Significance of no bake mint
The rich history of no bake mint desserts, particularly the beloved no bake mint Oreo pie, is a testament to the evolution of American dessert culture. While the origins of mint desserts can be traced back to various culinary traditions, the no bake aspect of this particular recipe reflects a shift toward convenience and accessibility in home cooking. The 1960s and 1970s saw a rise in no bake desserts, largely due to the advent of convenience foods and a growing interest in quick and easy recipes that didn’t require the use of an oven.
Origins and History
The concept of no bake desserts is rooted in the idea of creating delightful confections without the time and effort required for baking. As households began to embrace convenience, recipes that involved minimal cooking methods gained popularity. The no bake mint Oreo pie, with its combination of crushed Oreos, cream cheese, and whipped topping, emerged as a favorite among busy families. Its ease of preparation and no-fuss nature made it an ideal choice for gatherings and celebrations.
Regionally, variations of no bake desserts can be found across the United States. From the classic cheesecake to the decadent chocolate mousse, these recipes often share similar elements—graham cracker or cookie crusts, creamy fillings, and a chill in the refrigerator to set. The no bake mint Oreo pie brings together these elements in a stylish and delicious way, showcasing the adaptability of dessert recipes to fit the needs of families everywhere.
Over the years, the no bake mint Oreo pie has evolved to include various flavor profiles and presentations. Some may choose to incorporate fresh mint leaves for a more natural taste, while others might experiment with different types of cookies for the crust, such as chocolate chip or vanilla wafers. This recipe is uniquely flexible, allowing home cooks to tailor it to their preferences while still honoring the traditional elements that make it so beloved.
Cultural Significance
No bake mint desserts have become a staple in American culture, often gracing tables during holidays, birthdays, and family gatherings. The mint chocolate combination is particularly popular during St. Patrick’s Day, where the vibrant green color and refreshing flavor align perfectly with the holiday’s themes. Beyond this, the no bake mint Oreo pie has found its place in potlucks and barbecues, where its ease of transport and ability to please a crowd make it a desirable choice.
Famous chefs and culinary influencers have also embraced the no bake mint Oreo pie, showcasing it on social media platforms and cooking shows. This exposure has further cemented its status as a beloved dessert, inspiring home cooks to recreate it in their kitchens. As it continues to gain popularity, the no bake mint Oreo pie serves as a reminder of the joy that food can bring to our lives, especially when shared with loved ones.
Nutritional Benefits
While desserts are often seen as indulgent treats, the no bake mint Oreo pie can also offer some nutritional benefits when prepared with care. For instance, using low-fat cream cheese and reduced-fat whipped topping can make this dessert a lighter option. Additionally, the mint used in the recipe not only adds flavor but also boasts several health benefits. Mint is known for its digestive properties and can help soothe an upset stomach, making it a refreshing choice after a heavy meal.
Moreover, the pie can be adapted to cater to various dietary needs. Substituting gluten-free Oreos for traditional ones or using dairy-free alternatives for the cream cheese can make this dessert accessible to those with dietary restrictions. Thus, the no bake mint Oreo pie stands out not only for its taste and ease of preparation but also for its potential to be a more mindful dessert choice.
In conclusion, the no bake mint Oreo pie is a testament to the evolution of American desserts, combining convenience, flavor, and cultural significance into one delightful dish. Its rich history, regional variations, and adaptability make it a cherished recipe that continues to bring families together, creating memories one slice at a time.
Essential Ingredients for Perfect no bake mint
When it comes to crafting the perfect no bake mint pie, the choice of ingredients is key. Each component contributes not only flavor but also texture and visual appeal. In this section, we’ll delve deep into the essential ingredients required to create a delightful no bake mint pie, ensuring that your dessert turns out perfectly every time.
Essential Ingredients
Here’s a complete list of the ingredients you’ll need:
- 40 Mint Oreo cookies
- 1/2 cup unsalted butter, melted
- 1/4 cup dark chocolate chips
- 2 tablespoons heavy whipping cream
- 1 1/2 cups heavy whipping cream
- 1 tablespoon EZ Gel
- 8 ounces cream cheese
- 1 1/2 cups powdered sugar
- 1/2 teaspoon mint extract or emulsion
- 1 drop green food coloring
- 8 Mint Oreo cookies, crushed
- 1 cup heavy whipping cream
- 1/3 cup powdered sugar
- 1/2 teaspoon vanilla
Now, let’s explore the significance of each ingredient in this no bake mint masterpiece.
Print
No Bake Mint Oreo Pie
Ingredients
For the Oreo Crust
- 40 Mint Oreo cookies
- 1/2 cup unsalted butter, melted
For the Ganache
- 1/4 cup dark chocolate chips
- 2 tablespoons heavy whipping cream
For the Mint Cookies and Cream Filling
For the Whipped Topping
- 1 cup heavy whipping cream
- 1/3 cup powdered sugar
- 1/2 teaspoon vanilla
Instructions
For the Mint Oreo Crust
- Using a food processor or blender, pulse the cookies until you’ve created a fine crumb. (No need to remove the cream filling).
- Combine the Mint Oreo crumbs and melted butter in a mixing bowl. Mix until the crumbs are “wet.”
- Firmly press the Oreo mixture into an 8-inch or 9-inch pie pan, making sure to form the crust up the sides of the pan.
- Set aside.
For the Ganache
- Combine the chocolate chips and cream in a microwave safe bowl. Microwave in 20 to 30 second intervals until the chocolate chips melt and create a silky smooth consistency when you stir.
- Allow the ganache to cool before spreading on top of the pie crust.
Refrigerate the crust with the ganache on it while you make the filling.
For the Mint Cookies and Cream Filling
-
- In a chilled stainless steel bowl, beat the heavy whipping cream on high speed. While beating the cream, gradually sprinkle in the EZ Gel. Beat the cream until semi-stiff peaks form. Set aside.
- In a separate mixing bowl, combine the cream cheese, powdered sugar, and mint extract. Mix until smooth.
- Gently fold the whipped cream into the cream cheese mixture.
- Fold in a small dollop of green food coloring, followed by the broken cookie pieces.
Evenly spread the filling on top of the pie crust.
For the Whipped Topping
- Combine the heavy whipping cream, powdered sugar and vanilla in a stainless steel bowl. Beat until soft speaks form. Spread the whipped cream on top of the pie or use the Wilton 1M piping tip to pipe buttercream around the edges.
- Refrigerate at least three hours before serving.
Can be made ahead of time and stored in the refrigerator overnight, covered.
Ingredient Roles and Importance
The first star of our show is the Mint Oreo cookies. These cookies not only form the crust of our pie but also infuse it with that beloved minty flavor. Their chocolatey exterior pairs perfectly with the creamy filling, creating a delightful contrast.
Next up is the unsalted butter. Melting the butter allows it to bind the crushed Oreo cookies together, creating a sturdy and delicious crust. Always opt for unsalted butter to control the saltiness of your pie, allowing the mint flavor to shine through.
Dark chocolate chips add a rich depth of flavor to the pie. These chips will be melted and swirled into the filling, enhancing the overall taste profile while also providing a hint of indulgence.
The heavy whipping cream is essential for achieving that luscious, airy texture. By whipping it, we incorporate air, making the filling light and fluffy. You’ll notice we use heavy whipping cream multiple times in this recipe, as it’s crucial for both the filling and the topping.
EZ Gel is a secret weapon in this recipe, providing stability to the filling. It ensures that your no bake mint pie holds its shape without the need for baking. This is particularly useful for creating that perfect slice when serving your dessert.
Cream cheese contributes a creamy, tangy flavor that balances the sweetness of the pie. It provides structure and richness, making each bite satisfying.
Powdered sugar sweetens the filling without the graininess of granulated sugar, ensuring a smooth texture. It’s essential for achieving that velvety mouthfeel.
The mint extract or emulsion is the essence of our no bake mint flavor. Choose a high-quality extract for the best results. A drop of green food coloring is optional but adds a fun pop of color, emphasizing the minty freshness.
Finally, the crushed Mint Oreo cookies serve as a delightful garnish, adding texture and visual appeal to your pie.
Shopping Tips
When shopping for these ingredients, consider quality over quantity. For instance, choose fresh cream cheese with a good fat content, as it will yield a richer flavor and texture. Look for heavy whipping cream that has at least 36% fat for the best whipping results.
For the Mint Oreo cookies, you can typically find these in the cookie aisle of your local grocery store. If they’re not available, the regular Oreos can be used with a bit of added mint extract for flavor. However, the signature taste of the Mint Oreo is hard to replicate.
Also, when selecting chocolate chips, opt for high-quality dark chocolate for the best flavor payoff. Brands that use real cocoa and have a higher cocoa content will provide a richer taste that complements the mint beautifully.
Substitutions and Alternatives
For those with dietary restrictions, there are several ways to adapt this no bake mint recipe. If you need a gluten-free option, substitute the Mint Oreo cookies with gluten-free sandwich cookies. There are many brands available that offer a similar taste and texture.
If you’re looking to reduce calories or fat, consider using reduced-fat cream cheese and light whipped cream. Just keep in mind that this may alter the texture and richness of the pie slightly.
For those who are vegan, you can find plant-based cream cheese and whipped cream alternatives that work well. Just ensure that the ingredients are suitable for your dietary needs.
Lastly, if you don’t have EZ Gel, you can omit it but be aware that your pie may not hold its shape as well without it. A little experimentation may be needed to find a suitable alternative if you choose to skip it.
Storing your ingredients properly is also key. Keep your heavy cream and cream cheese refrigerated until you’re ready to use them. If you have leftover Mint Oreo cookies, store them in an airtight container to maintain their freshness.
In conclusion, by carefully choosing each ingredient and understanding their roles, you can create a no bake mint pie that’s not only delicious but also visually stunning. With these tips and suggestions in hand, you’re well-equipped to embark on this delightful culinary adventure!
Detailed Step-by-Step no bake mint Cooking Instructions
Now that you have all the essential ingredients for your no bake mint pie, it’s time to roll up your sleeves and dive into the exciting process of creating this delightful dessert. With clear instructions and a few personal cooking tips, you’ll be able to impress your family and friends with your baking prowess. Let’s get started!
Preparation Steps
- Gather Your Ingredients: Before you begin, make sure you have all the ingredients on hand. This is known as mise en place, a French term meaning “everything in its place.” Having everything ready will make the process smoother and more enjoyable.
- Prepare the Crust: Start by crushing the 40 Mint Oreo cookies into fine crumbs. You can do this using a food processor or by placing them in a ziplock bag and crushing them with a rolling pin. The goal is to achieve a fine crumb that will hold together well when mixed with the melted butter.
- Mix the Crust: In a mixing bowl, combine the crushed cookies with 1/2 cup of melted unsalted butter. Stir until all the crumbs are evenly coated. This mixture should hold together when pressed. If it feels too dry, add a bit more melted butter.
- Press the Crust: Transfer the cookie mixture into a 9-inch pie pan. Using the back of a measuring cup or your fingers, firmly press the mixture into the bottom and up the sides of the pan. Make sure to create an even layer, as this will be the base of your pie.
Cooking Process
- Chill the Crust: Once your crust is ready, place it in the refrigerator for about 15-20 minutes to help it set. This will ensure it holds its shape when you add the filling.
- Melt the Chocolate: While the crust is chilling, melt the 1/4 cup of dark chocolate chips with 2 tablespoons of heavy whipping cream in a microwave-safe bowl. Heat in 20-second intervals, stirring in between, until smooth. Allow it to cool slightly before using.
- Make the Cream Cheese Filling: In a large mixing bowl, beat the 8 ounces of cream cheese until smooth and creamy. Gradually add 1 1/2 cups of powdered sugar, mixing until well combined. This step is crucial for achieving a silky filling.
- Whip the Cream: In a separate bowl, whip 1 1/2 cups of heavy whipping cream until stiff peaks form. This process is essential, as it adds lightness to the filling. Be careful not to over-whip, or it may become grainy.
- Combine Ingredients: Gently fold the whipped cream into the cream cheese mixture. Use a spatula to combine, being careful not to deflate the whipped cream. This will ensure your filling remains airy and fluffy.
- Add Flavorings: Mix in 1/2 teaspoon of mint extract and a drop of green food coloring to your filling. The food coloring is optional, but it adds a lovely minty hue that makes the pie visually appealing.
- Incorporate Melted Chocolate: Drizzle in the melted chocolate and fold it gently into the filling until just combined. This will add a rich chocolate flavor that complements the mint perfectly.
- Finish Filling: Finally, fold in the crushed 8 Mint Oreo cookies for added texture and an extra burst of minty flavor.
Final Assembly
- Fill the Crust: Take your chilled crust from the refrigerator and pour the cream cheese filling into it. Use a spatula to spread it evenly across the crust, smoothing the top for a polished look.
- Chill the Pie: Cover the pie with plastic wrap and place it in the refrigerator for at least 4 hours, or overnight if you have the time. This allows the filling to set properly, making it easier to slice.
- Prepare the Topping: When you’re ready to serve, whip up 1 cup of heavy whipping cream with 1/3 cup of powdered sugar and 1/2 teaspoon of vanilla until stiff peaks form. This will be your light and airy topping.
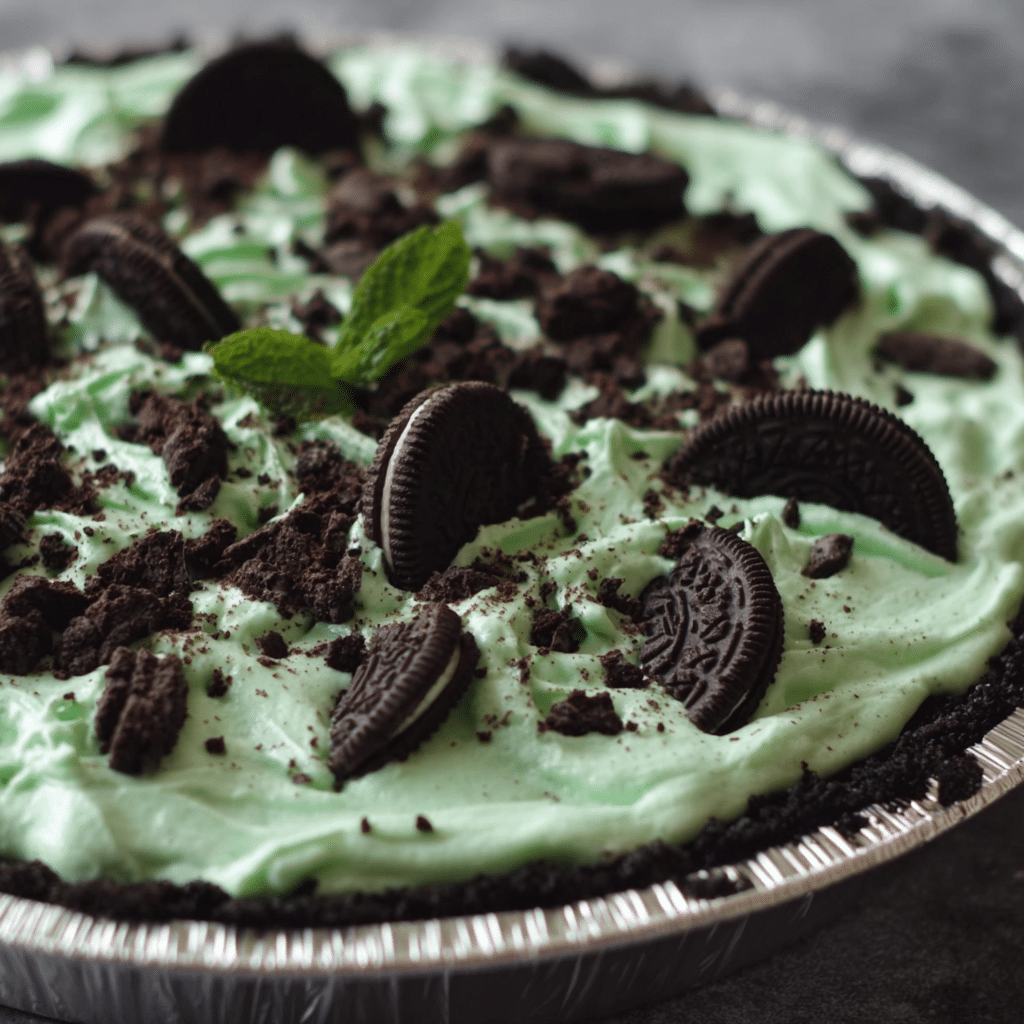
- Top the Pie: Spread the whipped cream topping over the chilled pie, creating peaks for a beautiful presentation. Feel free to get creative here, perhaps adding a sprinkle of crushed Oreos on top for an extra touch.
- Serve and Enjoy: Slice your no bake mint pie into wedges and serve chilled. Watch the faces of your family and friends light up as they take their first bites of this refreshing, minty dessert!
Throughout this process, remember that patience is key. Rushing through the steps can lead to common mistakes, such as over-whipping the cream or not allowing the pie to chill long enough. Take your time, enjoy the process, and savor the delightful anticipation of serving up this no bake mint pie. Happy baking!
Professional Tips and Techniques for no bake mint
When it comes to creating the perfect no bake mint dessert, the right techniques can elevate your pie from simple to sensational. As someone who has spent countless hours in the kitchen experimenting with no-bake desserts, I’ve gathered an arsenal of professional tips and techniques that will not only save you time but also ensure that your no bake mint pie turns out perfectly every time.
Professional Techniques
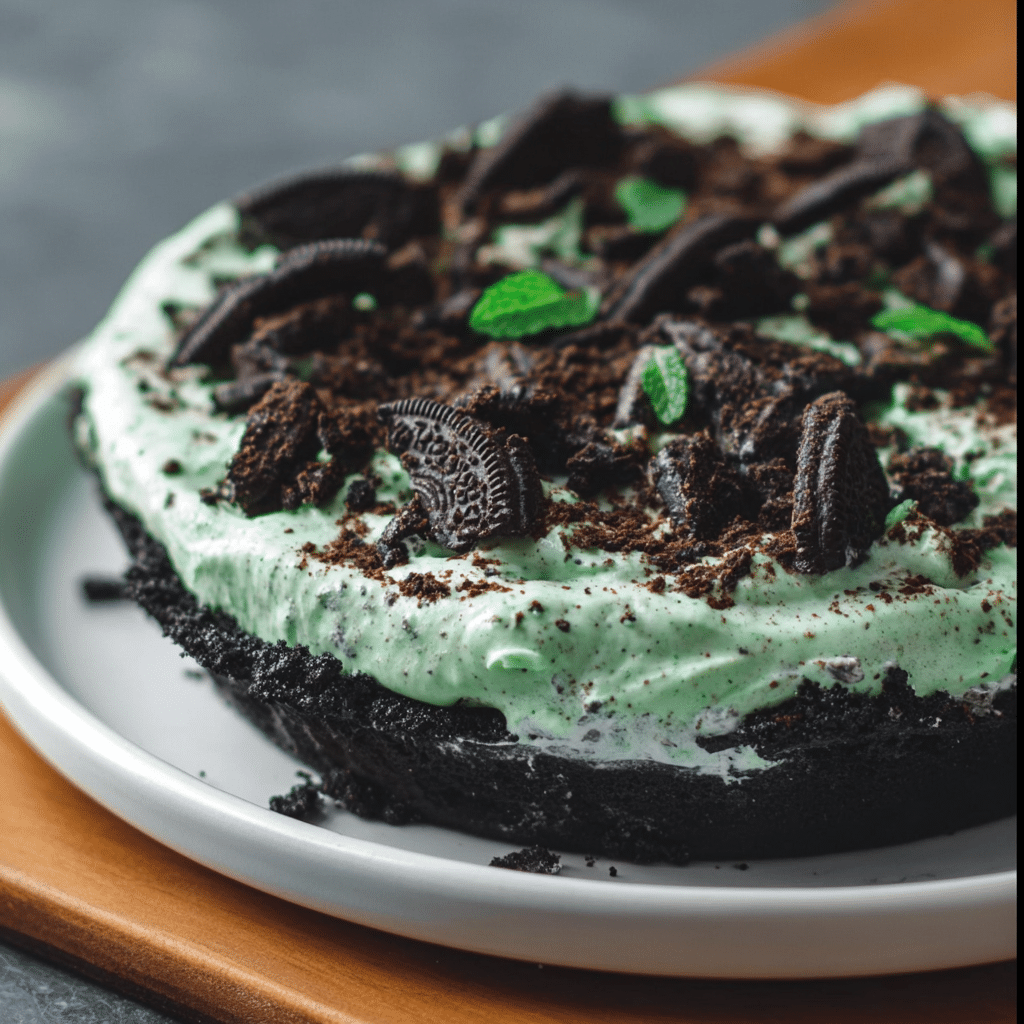
First and foremost, let’s talk about the base of your no bake mint pie: the crust. While traditional recipes often call for store-bought graham cracker crusts, making your own can add an extra layer of flavor and texture. I recommend using crushed Oreo cookies, mixed with a bit of melted butter. This combination not only enhances the mint flavor but also brings a delightful crunch to each bite. Aim for a 1:1 ratio of cookie crumbs to butter, and press the mixture firmly into your pie dish to avoid crumbling later.
Next, for the filling, using high-quality cream cheese and whipped topping will make a noticeable difference in taste and texture. Be sure to let your cream cheese soften at room temperature before mixing. This ensures a smoother blend without lumps. For the mint flavor, I suggest using pure peppermint extract rather than imitation. The latter can sometimes have an artificial taste that detracts from the refreshing sensation you’re aiming for in a no bake mint pie.
Another insider secret is to fold in the whipped topping gently rather than stirring vigorously. This preserves the light, airy texture of the filling, resulting in a fluffy, decadent pie. For a pop of color and flavor, consider adding a few drops of green food coloring to your filling; it’s a fun touch that enhances the visual appeal, especially for festive occasions.
Troubleshooting Guide
Even with the best intentions, sometimes things don’t go as planned in the kitchen. If your no bake mint pie seems too soft or runny, it may not have set properly. This can happen if the filling ingredients were too warm when mixed. To troubleshoot, try chilling the pie for an extra hour or two. If that doesn’t work, you can whip up a small batch of gelatin to fold into the filling, which will help it set more firmly.
Another common issue is a crust that crumbles when you slice the pie. To prevent this, make sure you press the crust down firmly into the pie dish. If you find that it’s still falling apart, you can add a bit more melted butter to the crust mixture to help it bind together better.
Presentation Tips
Presentation is key when it comes to serving your no bake mint pie. After all, we eat with our eyes first! Once your pie is set, consider garnishing it with whipped cream, crushed mint leaves, or even shaved chocolate for an extra touch of elegance. A simple drizzle of chocolate sauce on top can also elevate the dessert visually and add an extra layer of flavor.
When serving, use a sharp knife that’s been warmed under hot water; this will help you achieve clean, smooth slices. For a fun twist, consider serving your pie in individual cups or jars, especially for parties or gatherings. This not only enhances the visual appeal but also makes for an easy grab-and-go dessert.
Wine and beverage pairings can also enhance the experience. A light, sweet dessert wine or a mint-infused cocktail can complement the flavors beautifully. If you prefer non-alcoholic options, consider serving the pie with a refreshing mint lemonade or iced tea.
Lastly, if you’re looking to make your no bake mint pie ahead of time, it can be stored in the refrigerator for up to three days. Just be sure to cover it with plastic wrap to keep it fresh. This make-ahead strategy is perfect for busy weeks or gatherings, allowing you to impress your guests with minimal last-minute effort.
Creative Variations and Adaptations of no bake mint
The classic no bake mint pie is a delightful treat on its own, but why stop there? The beauty of this dessert lies in its versatility, allowing for countless variations that can cater to different tastes and occasions. As someone who loves to experiment in the kitchen, I’ve discovered numerous creative adaptations that can transform your traditional recipe into something new and exciting.
Seasonal Variations
One of the easiest ways to adapt your no bake mint pie is by incorporating seasonal ingredients. During the summer months, fresh mint leaves can be infused into the filling for a burst of garden-fresh flavor. Simply muddle the leaves with a bit of sugar before adding them to your cream cheese mixture. In the fall, consider swapping out the mint for pumpkin spice to create a unique autumn-inspired pie. The key is to maintain the creamy texture while experimenting with different flavor profiles.
For the winter holidays, adding crushed peppermint candies on top can provide a festive touch, both in taste and appearance. This not only enhances the mint flavor but also adds a delightful crunch that contrasts beautifully with the creamy filling. You can even mix in some crushed candy canes into the filling for an extra peppermint punch!
Dietary Adaptations
Accommodating dietary restrictions doesn’t mean sacrificing flavor or enjoyment. If you’re looking to create a keto-friendly version of your no bake mint pie, you can substitute the sugar with a low-carb sweetener like erythritol or stevia. For the crust, consider using almond flour mixed with melted butter instead of traditional cookie crumbs. This not only keeps the pie low-carb but also adds a nutty flavor that’s simply delightful.
If you’re catering to a vegan audience, swap the cream cheese for a plant-based alternative and use coconut cream for the whipped topping. A vegan butter can replace regular butter in the crust, and you can sweeten the filling with maple syrup or agave. This version not only meets dietary needs but is also rich and satisfying.
Creative Twists
There’s no limit to how you can get creative with your no bake mint pie! Consider adding layers of different flavors to create a more complex dessert. For instance, you could create a chocolate mint pie by incorporating melted chocolate into the filling or using a chocolate crust. Alternatively, try adding a layer of raspberry or strawberry puree between the crust and the mint filling for a refreshing fruit twist.
Thinking about the cooking methods, while this recipe is primarily for a no-bake pie, you could also experiment with a baked crust if you prefer a firmer texture. Just keep an eye on it while it’s baking to ensure it doesn’t get too hard. Additionally, you can explore making mini versions of the pie using muffin tins for single-serving delights, perfect for parties or picnics.
And let’s not forget about leftovers! If you find yourself with extra pie, consider transforming it into a delicious parfait. Layer the leftover filling with crushed cookies and whipped cream in a glass for a simple yet impressive dessert that will wow your family and friends.
In conclusion, the world of no bake mint pie is as expansive as your imagination. With a few modifications, this classic dessert can cater to every season, dietary preference, and personal taste. So go ahead, get creative, and let your culinary adventures begin!
Storage, Reheating, and Meal Prep for no bake mint
When it comes to the delightful world of desserts, few things are as satisfying as a No Bake Mint Oreo Pie. Not only is it a breeze to whip up, but it also offers a refreshing minty flavor that tantalizes the taste buds. However, one of the most pressing questions that often arises after creating this scrumptious treat is: how do I store it? In this article, we’ll delve into the best practices for storing, freezing, and reheating your no bake mint creation, ensuring you get the most out of your delightful dessert.
Short-term Storage
After you’ve prepared your No Bake Mint Oreo Pie, the first step is to ensure it is stored properly to maintain its freshness and flavor. The best way to store it in the short term is by placing it in an airtight container. If you don’t have a container that fits the pie perfectly, you can cover it tightly with plastic wrap or aluminum foil. This keeps the pie from absorbing any odors from the refrigerator and helps maintain its texture.
For short-term storage, your pie can be kept in the refrigerator for up to one week. However, it’s important to consider that the texture may change slightly the longer it sits, as the crust can become softer due to moisture. If you plan to enjoy your pie over several days, consider cutting it into individual portions. This not only makes serving easier but also allows you to minimize the exposure of the entire pie to air and moisture each time you take a slice out. Individual portions can be stored in small containers or wrapped in plastic wrap.
Freezing and Long-term Storage
For those who want to keep their No Bake Mint Oreo Pie for a longer period, freezing is a fantastic option. Freezing allows you to enjoy this delicious dessert even weeks after you’ve made it. To freeze your pie, start by making sure it is completely set in the refrigerator, usually for about 4 to 6 hours. Once set, you can either freeze it whole or in slices. If you choose to freeze it whole, wrap the pie tightly with plastic wrap, followed by aluminum foil to prevent freezer burn. Be sure to label it with the date, as a No Bake Mint Oreo Pie can last in the freezer for about 2 to 3 months.
If you prefer to freeze individual slices, place them on a baking sheet lined with parchment paper and freeze until solid. Once frozen, wrap each slice in plastic wrap and then in aluminum foil. This method allows you to easily grab a slice whenever you have a craving. When you’re ready to enjoy your frozen pie, transfer it to the refrigerator to thaw overnight, or let it sit at room temperature for about 30 minutes before serving. Just remember, while freezing can extend the life of your dessert, the texture may change slightly, so it’s best to consume it within the recommended time frame for the best quality.
Reheating Best Practices
While you might think that a No Bake Mint Oreo Pie doesn’t require reheating, there are times when you might want to freshen it up, especially if it’s been sitting in the fridge for a few days. One popular method is to bring the pie to room temperature before serving. Simply take it out of the refrigerator and allow it to sit for about 20-30 minutes. This enhances the flavor and makes the filling creamier, providing a delightful contrast to the crunchy crust.
If you’ve frozen your pie and want to enjoy it warm, consider using a microwave for a quick reheat. However, it’s crucial to do this carefully to avoid melting the filling too much. Use the defrost setting or heat it in short intervals, checking frequently until it’s warmed through. The goal is to warm the pie without compromising its creamy texture.
When it comes to meal prep, the No Bake Mint Oreo Pie is a dream. You can prepare the filling and the crust separately, storing each component in the refrigerator. This way, you can assemble the pie just before serving, ensuring it maintains its freshness. Additionally, consider making multiple pies for a gathering or special occasion. Not only does this save time, but it also allows you to experiment with different variations, such as adding layers of fruit or drizzling chocolate on top.
Food safety is paramount when storing any dish, and the No Bake Mint Oreo Pie is no exception. Always ensure that your pie is stored at the correct temperature, and be mindful of how long it’s been sitting out at room temperature. The general guideline is no more than two hours to prevent any foodborne illnesses. When in doubt, trust your senses—if it looks or smells off, it’s better to err on the side of caution.
In conclusion, understanding how to properly store, freeze, and reheat your No Bake Mint Oreo Pie can greatly enhance your dessert experience. With these tips and techniques, you can enjoy this delicious treat for days or even weeks, all while maintaining its irresistible flavor and texture.
Nutritional Benefits and Health Information
As we dive into the nutritional aspects of the No Bake Mint Oreo Pie, it’s important to recognize that this dessert, while indulgent, can also offer some nutritional benefits depending on the ingredients used. The focus keyword here is “no bake mint,” which perfectly encapsulates the delightful essence of this dessert. Let’s explore its nutritional profile, health benefits, and dietary considerations so you can enjoy your pie guilt-free.
Nutritional Profile
The No Bake Mint Oreo Pie is primarily made from ingredients such as Oreo cookies, cream cheese, whipped topping, and mint extract. To give you a clearer picture, let’s break down the nutritional content of a typical slice of this pie. On average, a slice (about 1/8th of the pie) contains approximately 300-400 calories. The macronutrient distribution is generally around 20 grams of fat, 30 grams of carbohydrates, and 2-4 grams of protein.
In terms of vitamins and minerals, this pie is not a significant source, as it is primarily a dessert. However, the presence of cream cheese adds calcium, which is essential for bone health. The whipped topping can provide some additional calories and fats, so being mindful of portion sizes is key when enjoying this treat.
Health Benefits
While desserts are often viewed as treats to be enjoyed in moderation, the No Bake Mint Oreo Pie does offer a few health benefits, primarily from its key ingredients. For instance, the cream cheese used in the filling provides some protein and calcium. These nutrients are crucial for maintaining strong bones and muscles. Additionally, the mint extract not only adds flavor but may also have digestive benefits, as peppermint is known for its soothing properties on the stomach.
Moreover, Oreos, while not the healthiest cookie option, do have a nostalgic value and can evoke feelings of happiness and comfort. Enjoying your No Bake Mint Oreo Pie in moderation can be a part of a balanced diet, allowing you to indulge while still making room for nutritious foods in your meals.
Dietary Considerations
If you have dietary restrictions or allergies, it’s essential to consider the ingredients in the No Bake Mint Oreo Pie. The traditional recipe contains gluten, dairy, and added sugars. However, there are plenty of alternatives available if you’re looking to make this dessert more inclusive. For a gluten-free option, consider using gluten-free cookies as a substitute for Oreos. Additionally, you can use dairy-free cream cheese and whipped toppings to cater to those with lactose intolerance or dairy allergies.
For those watching their sugar intake, you can experiment with sugar alternatives such as stevia or erythritol to create a lower-sugar version of the pie. These modifications can help you enjoy a delicious dessert without straying too far from your dietary goals.
In conclusion, while the No Bake Mint Oreo Pie is a delightful treat that might not be classified as a health food, understanding its nutritional profile and making thoughtful ingredient choices can enhance your dessert experience. Whether you’re serving it at a gathering or enjoying a slice at home, this pie can fit into various dietary plans when prepared mindfully. So go ahead, indulge in a slice of this minty delight—just remember to savor every bite!