Pumpkin crisp is more than just a dessert; it’s a warm hug on a chilly autumn day, a delightful blend of spices, and a celebration of seasonal flavors that brings families together. I first stumbled upon this deliciously simple recipe during a particularly busy week in October, when the leaves were turning and the air was crisp with the scent of impending winter. Juggling work, family, and the daily chaos that comes with it, I was searching for a quick yet wholesome dessert that would satisfy my craving for all things pumpkin. After a few quick searches online, I came across a pumpkin crisp recipe that promised both ease and flavor. Little did I know that this dish would become a staple in my kitchen and a cherished part of our family gatherings.
As I prepared my first pumpkin crisp, I felt an overwhelming sense of nostalgia wash over me. The warm spices—cinnamon, nutmeg, and ginger—filled my kitchen, transporting me back to my grandmother’s home where we would gather around the table, indulging in her famous pumpkin pie. However, this crisp was different; it was a more casual, laid-back version that didn’t require the precision of pie-making but still delivered that comforting pumpkin flavor. The first bite was a revelation—sweet, spiced pumpkin filling topped with a crunchy oat topping—simple yet utterly satisfying.
The Story Behind This Recipe
Historically, pumpkin crisp takes inspiration from classic American desserts that celebrate the harvest, particularly during the fall. Its roots can be traced back to traditional dishes that utilized seasonal ingredients and focused on using what families had available. The dish reflects a time when cooking was not only about sustenance but also about community and family. In many households, the arrival of fall meant that pumpkins were abundant, and they were often transformed into various dishes, from pies to soups to crisps.
What makes pumpkin crisp unique is its versatility and ease of preparation. Unlike its more formal cousin, pumpkin pie, which can sometimes intimidate novice bakers with its crust requirements, pumpkin crisp strips down the complexity, allowing the flavors to shine without the fuss. For busy families looking for quick dinner solutions, this recipe is a lifesaver. You can prepare it in a matter of minutes and pop it in the oven while you finish up dinner or help the kids with their homework. The smell of pumpkin crisp baking will fill your home, creating an inviting atmosphere that makes everyone feel cozy.
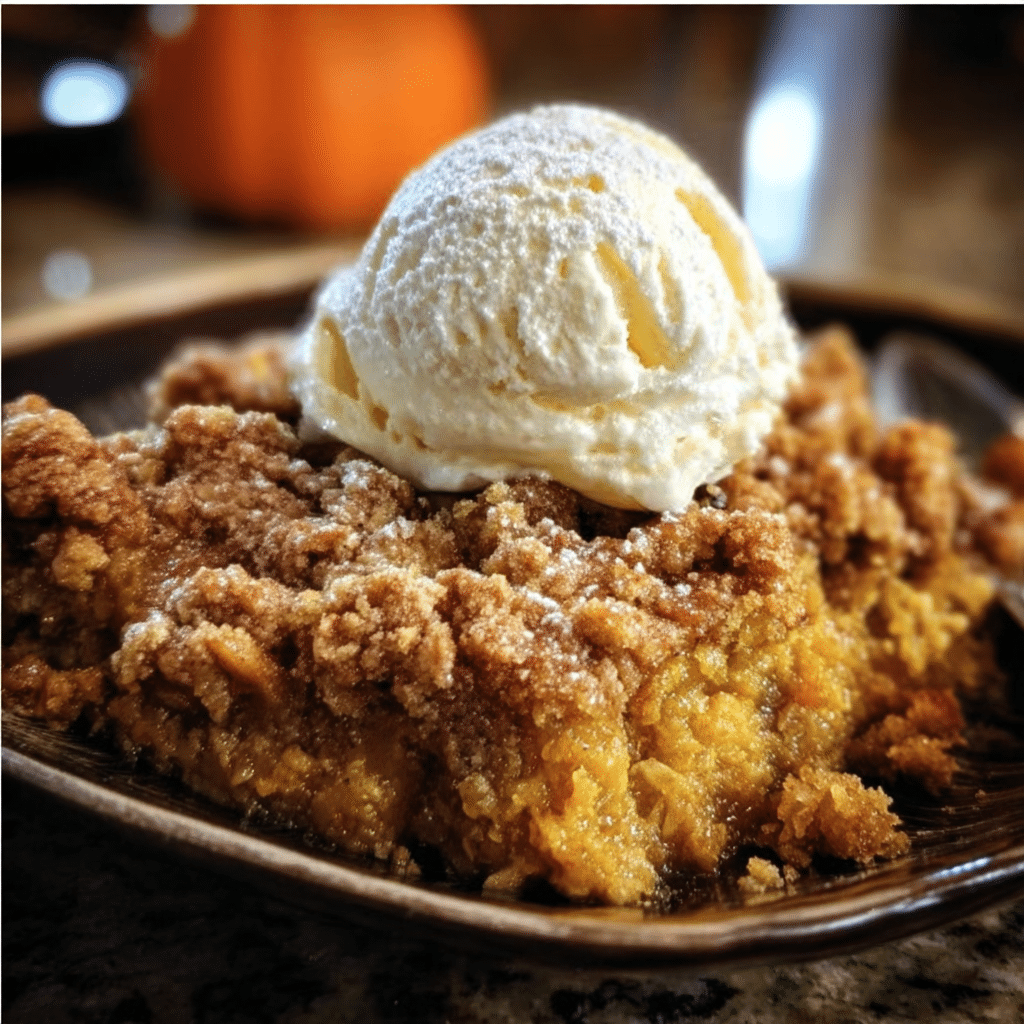
Moreover, pumpkin crisp is particularly relevant during the fall season, making it a perfect dessert for Thanksgiving gatherings, Halloween parties, or just a cozy night in. It’s a dish that encourages sharing, whether you’re serving it warm with a scoop of vanilla ice cream or enjoying it cold the next morning with your coffee. Each spoonful brings back memories of family traditions, laughter, and the joy of simple pleasures.
As you dive into this guide on pumpkin crisp, I promise you’ll learn not only how to make this delectable dish but also the stories and traditions that surround it. You’ll discover tips for perfecting the recipe, variations to suit your family’s preferences, and the little secrets that will make your pumpkin crisp a standout at any gathering. So, grab your apron and let’s embark on this flavorful journey together!
Why You’ll Love This Dish
What sets pumpkin crisp apart is that it’s adaptable. Whether you prefer a more traditional approach or want to experiment with flavors like chocolate or pecan, there’s room for creativity. The ease of preparation, coupled with the rich flavors and textures, makes this dish a delightful addition to any meal. Additionally, the nutritional benefits of pumpkin, which is packed with vitamins and fiber, make this dessert not only delicious but also a healthier choice compared to many other sweets. So next time you’re looking for a dessert that brings warmth and comfort to your table, remember pumpkin crisp—it might just become a cherished tradition in your home as it has in mine.
The Rich History and Cultural Significance of pumpkin crisp
The rich history and cultural significance of pumpkin crisp are woven into the very fabric of American culinary traditions. As we delve deeper into its origins, we can see how this delicious dessert has evolved while remaining a beloved choice across generations. Pumpkin crisp, with its warm spices and comforting textures, is a dish that embodies the spirit of autumn and the joy of gathering with loved ones.
Origins and History
While pumpkin crisp as we know it today may not have a singular documented origin, its roots can be traced back to the early American settlers who relied on local produce for sustenance. Pumpkins were a staple in their diets, not just for their nutritional value but for their versatility in cooking. The indigenous peoples of North America were among the first to cultivate pumpkins, using them in a variety of ways, from stews to desserts. As European settlers arrived, they adapted these traditions, creating their own sweet and savory dishes that highlighted the bountiful harvests.
Over the years, recipes for pumpkin desserts evolved, particularly in New England, where the abundance of pumpkins during the fall led to creative uses in baking. The crisp variation likely emerged as a more casual and accessible option, allowing families to enjoy the flavors of pumpkin without the intricate processes involved in making a pie. This dessert quickly became popular in homes across America, especially as the concept of “comfort food” took hold in the 20th century.
Cultural Significance
Pumpkin crisp is often associated with the fall season, particularly around Thanksgiving and Halloween, when pumpkins are front and center in markets and homes. It has become a staple dessert for many families during these holidays, symbolizing the warmth of home cooking and the joy of sharing meals with loved ones. It’s common to find pumpkin crisp at potlucks and seasonal gatherings, where its inviting aroma and delicious taste bring people together.
Traditionally, this dish is served warm, perhaps with a scoop of ice cream or a dollop of whipped cream, making it a comforting end to a hearty meal. In many households, the act of preparing pumpkin crisp is also a cherished family tradition, passed down through generations. Children often help in the kitchen, learning the importance of cooking and the joy of creating something delicious to share with others.
Nutritional Benefits
Beyond its delightful taste, pumpkin crisp also boasts several nutritional benefits, making it a more wholesome dessert option. Pumpkins are low in calories yet rich in essential vitamins and minerals, such as vitamin A, vitamin C, and potassium. They are also a great source of dietary fiber, which can aid in digestion and help maintain a healthy weight. By incorporating pumpkin into your desserts, you’re not only indulging your sweet tooth but also providing your body with valuable nutrients.
Additionally, the oats and nuts often used in the crisp topping can contribute to heart health, providing healthy fats and additional fiber. This makes pumpkin crisp not only a delicious treat but also a dessert that can fit into a balanced diet when enjoyed in moderation. As we explore the many ways to prepare and enjoy pumpkin crisp, we celebrate not just the flavors but the history and cultural significance that make this dish so special.
In conclusion, pumpkin crisp is a wonderful representation of American culinary traditions. Its origins reflect the resourcefulness of early settlers, while its evolution showcases the adaptability of recipes over time. Whether shared during a festive gathering or enjoyed as a comforting treat on a quiet evening, pumpkin crisp holds a special place in the hearts and homes of many families. As you embrace the joy of making this dish, remember that you are also participating in a rich tradition that connects us all through food.
Essential Ingredients for Perfect pumpkin crisp
When it comes to creating the perfect pumpkin crisp, the right ingredients are absolutely essential. Each component not only contributes to the flavor and texture but also plays a crucial role in the overall success of the dish. Let me take you through the essential ingredients needed for this delightful autumn treat, sharing my personal experiences and some tips along the way.
Essential Ingredients
- 8 oz cream cheese (room temperature) – The creamy base of the pumpkin crisp, cream cheese adds richness and a slight tang, balancing the sweetness of the pumpkin and maple syrup. Using room temperature cream cheese ensures it blends smoothly without any lumps.
- 15 oz canned pumpkin puree (not pumpkin pie filling) – Canned pumpkin puree is the star of the show. It provides the dish with a deep, earthy flavor and a vibrant orange color. Be sure to choose pure pumpkin puree, as pumpkin pie filling contains added sugars and spices that may alter the final taste.
- 2/3 cup pure maple syrup – This natural sweetener brings a warm, caramel-like flavor to the pumpkin crisp. Pure maple syrup is preferable over imitation syrup, which often contains artificial flavors and high fructose corn syrup.
- 3 large eggs – Eggs act as a binding agent, helping to hold all the ingredients together while providing moisture and richness. Fresh eggs are always best; look for ones with a clean shell and a recent expiration date.
- 1 tbsp pumpkin pie spice – A blend of warm spices like cinnamon, nutmeg, and ginger, pumpkin pie spice enhances the autumnal flavor profile of the crisp. You can buy it pre-made or mix your own for a fresher taste.
- 1 tsp vanilla extract – Vanilla extract adds a lovely aromatic quality to the dish, complementing the pumpkin and spices. Opt for pure vanilla extract over imitation for the best flavor.
- 3/4 cup rolled oats – Rolled oats provide texture and heartiness to the crisp topping. They absorb moisture and create a satisfying crunch when baked. Look for gluten-free oats if you’re catering to dietary restrictions.
- 3/4 cup whole wheat pastry flour or all-purpose flour – This flour is essential for binding the crisp topping together. Whole wheat pastry flour gives a nuttier flavor and higher fiber content, but all-purpose flour works just as well.
- 3/4 cup brown sugar (packed) – Brown sugar brings moisture and a deep, caramel flavor to the topping. The molasses present in brown sugar adds complexity, making it an ideal choice for fall desserts.
- 1/2 cup chopped pecans – Pecans add a delightful crunch and nutty flavor. You can toast them lightly before adding for an even more robust taste.
- 1 1/2 tsp pumpkin pie spice – This is an additional amount to enhance the flavor of the filling, ensuring every bite is packed with that signature autumnal spice blend.
- 1/4 tsp salt – A pinch of salt helps to balance the sweetness and brings out the flavors of all the other ingredients.
- 6 tbsp unsalted butter (melted) – Butter adds richness and helps to create that golden, crispy topping. Using unsalted butter gives you better control over the saltiness of the dish.

Pumpkin Crisp
Ingredients
Crisp Mixture
- 2 cups (180 g) quick-cooking oats
- 2 cups (250 g) all-purpose flour
- 1 cup (200 g) light brown sugar, packed
- 2 teaspoons pumpkin pie spice
- 1 cup (2 sticks / 227 g) unsalted butter, cold, cubed
Pumpkin Mixture
- 3 large eggs, room temperature
- 1 cup (200 g) granulated sugar
- 1 can (15 ounces) pure pumpkin
- 1 cup (240 g) heavy cream
- 2 teaspoons pumpkin pie spice
- 1 teaspoon vanilla extract
- ½ teaspoon kosher salt
Instructions
-
Preheat oven to 375°. Lightly spray a 12-inch oven-safe skillet* with nonstick cooking spray. Set aside.
Crisp Mixture
-
Combine the oats, flour, brown sugar, and pumpkin spice together. Add in the cubed butter and use your hands or a fork to combine. You want the butter to be no larger than pea-sized.
-
Spread 4 cups of crisp mixture over the bottom and up the sides of the prepared skillet and press flat. Set the remaining crisp mixture aside.
Pumpkin Mixture
-
In a large bowl, whisk together the eggs and sugar until combined.
-
Add pumpkin, cream, vanilla, pumpkin pie spice, and kosher salt. Whisk ingredients together until smooth.
-
Pour the pumpkin mixture on top of the layer of crisp in the skillet.
-
Sprinkle the remaining crisp mixture over top of the pumpkin.
-
Bake uncovered at 375°F for 35-45 minutes, or until golden brown.
-
Serve (warm or cold) with whipped cream or ice cream.
Shopping Tips
When it comes to shopping for ingredients for your pumpkin crisp, quality matters. For the best results, I recommend visiting local farmers’ markets or organic grocery stores where you can find fresh, seasonal ingredients. Look for cream cheese that is smooth and creamy, free from any additives. For pumpkin puree, ensure it’s made from 100% pumpkin to avoid the sugary pitfalls of pie filling. As for maple syrup, the darker varieties often have a more robust flavor, making them an excellent choice for baking.
Substitutions and Alternatives
If you’re dealing with dietary restrictions or simply looking to make substitutions, there are plenty of options. For a dairy-free version, consider using vegan cream cheese and coconut cream in place of regular cream cheese. If you’re avoiding eggs, a mixture of flaxseed meal and water (1 tablespoon of flaxseed meal mixed with 2.5 tablespoons of water) can act as a binding agent. For sweeteners, honey or agave syrup can replace maple syrup if desired, though it may alter the flavor slightly. Gluten-free or almond flour can be used as a substitute for whole wheat pastry flour, ensuring everyone can enjoy this delicious dessert.
With these essential ingredients in hand, you are well on your way to creating a mouth-watering pumpkin crisp that will be the star of your autumn gatherings. Each component plays a vital role in crafting a dish that is not only delicious but also deeply rooted in the comfort and warmth of the fall season. So, let’s dive into the cooking process and bring this delightful recipe to life!
Detailed Step-by-Step pumpkin crisp Cooking Instructions
Creating the perfect pumpkin crisp is not just about the ingredients; it’s about mastering the process. From preparation to assembly, each step is an opportunity to infuse love and care into your dish. Join me as I guide you through the detailed step-by-step instructions to make this delightful pumpkin crisp.
Preparation Steps
- Gather your ingredients: Start by collecting all your ingredients and measuring them out. This mise en place approach will make the cooking process smoother and less stressful. Make sure your cream cheese is at room temperature for easy mixing.
- Preheat the oven: Preheat your oven to 350°F (175°C). This step is crucial as it ensures that your pumpkin crisp bakes evenly and achieves that perfect golden-brown top.
- Prepare the baking dish: Grease a 9×13-inch baking dish with a little butter or non-stick spray. This will prevent the pumpkin crisp from sticking and make for easier serving.
Cooking Process
- Mix the cream cheese and pumpkin: In a large mixing bowl, beat the room temperature cream cheese with an electric mixer until smooth. Gradually add the canned pumpkin puree, mixing until fully combined. The cream cheese should be well integrated without any lumps.
- Add the sweeteners: Pour in the pure maple syrup and add 3 large eggs one at a time, mixing well after each addition. This incorporation of ingredients helps to create a smooth, custardy filling.
- Incorporate the spices: Add 1 tablespoon of pumpkin pie spice, 1 teaspoon of vanilla extract, and 1/4 teaspoon of salt. These ingredients will round out the flavor profile, giving your pumpkin crisp that unmistakable fall essence.
- Prepare the crisp topping: In another bowl, combine the rolled oats, whole wheat pastry flour (or all-purpose flour), packed brown sugar, and the additional 1 1/2 teaspoons of pumpkin pie spice. Stir until well mixed.
- Mix in the pecans and butter: Add the chopped pecans and melted unsalted butter to the dry ingredients. Mix until everything is evenly coated, creating a crumbly texture that will bake to a delightful crisp.
Final Assembly
- Layer the filling: Pour the creamy pumpkin mixture into the prepared baking dish, spreading it evenly with a spatula. This layer should be smooth and even, creating a solid base for the crisp topping.
- Add the crisp topping: Spoon the oat and pecan mixture over the pumpkin filling. Use your hands to gently press down on the topping, ensuring it adheres well to the filling beneath.
- Bake the pumpkin crisp: Place the baking dish in the preheated oven and bake for about 30 minutes. You’ll know it’s done when the filling is set and the topping is golden brown and crispy.
- Cool and serve: Once out of the oven, allow the pumpkin crisp to cool for at least 10-15 minutes before serving. This cooling time helps the layers firm up, making it easier to cut into squares. Serve warm, perhaps with a dollop of whipped cream or a scoop of vanilla ice cream for an extra special treat.
Throughout this process, remember to trust your senses. The aroma of spices wafting through your kitchen, the golden color of the topping, and the smoothness of the filling all signal that you’re on the right track. Common mistakes include overmixing the cream cheese, which can lead to a lumpy filling, or not allowing the pumpkin crisp to cool long enough, resulting in a messy serving. Taking your time and following these steps will ensure that your pumpkin crisp turns out perfectly every time. Enjoy the delightful experience of baking, and relish the joy of sharing this seasonal treat with family and friends!
Professional Tips and Techniques for pumpkin crisp
The joy of cooking is often found in the little details that elevate a simple dish into something truly special. When it comes to making a delicious pumpkin crisp, there are several professional tips and techniques that will not only enhance the flavors but also make the process smoother and more enjoyable. Whether you’re a novice in the kitchen or a seasoned pro, these insights will empower you to create a pumpkin crisp that’s sure to impress.
Professional Techniques
To start off, let’s talk about the pumpkin. Choosing the right pumpkin is crucial. While you might be tempted to grab any pumpkin from the grocery store, I highly recommend going for a sugar pumpkin or pie pumpkin. These varieties are sweeter and have a smoother texture, making them perfect for desserts. When preparing your pumpkin, you can either roast it or use canned pumpkin puree. If you opt for fresh pumpkin, cut it in half, scoop out the seeds, and roast it at 400°F (200°C) for about 45 minutes until tender. The roasting process caramelizes the sugars, enriching the flavor of your pumpkin crisp.
Next, let’s dive into the crisp topping. The key to achieving that perfect crunch lies in the balance of ingredients. Aim for a combination of oats, flour, brown sugar, and butter. I always recommend using cold butter and cutting it into the dry ingredients with a pastry cutter or your fingers until it resembles coarse crumbs. This technique ensures that your topping is both crumbly and crispy; you want to avoid over-mixing, which can lead to a dense topping.
When layering your pumpkin mixture and crisp topping, be generous! A thick layer of the crisp topping not only adds texture but also helps to counterbalance the creamy pumpkin filling. Don’t shy away from adding spices like cinnamon, nutmeg, or ginger to your pumpkin mixture; they create a warm, comforting flavor that’s synonymous with fall.
Troubleshooting Guide
Even the best cooks sometimes face challenges. If your pumpkin crisp turns out too watery, it might be due to excess moisture in your pumpkin puree. To remedy this, you can let the pumpkin mixture sit for a bit after mixing in the eggs and sugar, allowing some moisture to evaporate before baking. Another common issue is a soggy bottom—this can happen if you don’t bake the crisp long enough. A good rule of thumb is to bake until the topping is golden brown and the pumpkin filling is set.
For those who find that their topping isn’t crisping up as desired, consider increasing the oven temperature slightly during the last few minutes of baking. Just keep a close eye to prevent burning! If you’re looking for a more indulgent treat, adding chopped nuts to your topping can provide extra crunch and flavor. Pecans or walnuts work beautifully here.
Presentation Tips
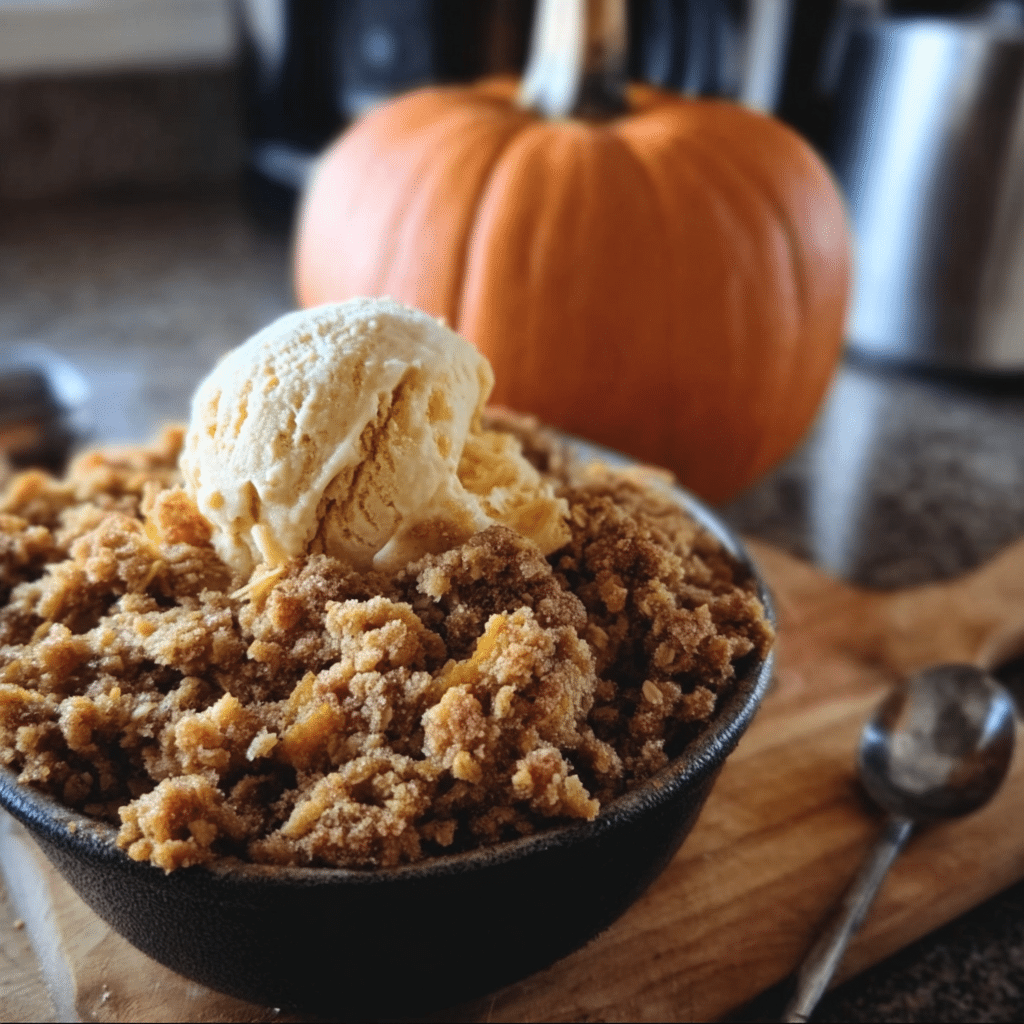
After pouring your heart into making a delicious pumpkin crisp, presentation is the final touch that makes it truly shine. Consider serving it warm from the oven in a beautiful cast-iron skillet or a rustic baking dish. The contrast of the golden crisp topping against the vibrant orange pumpkin filling is visually stunning.
For an extra layer of elegance, top each serving with a dollop of whipped cream or a scoop of vanilla ice cream. Drizzling caramel sauce over the top can also add a touch of decadence. If you’re feeling adventurous, sprinkle some toasted pumpkin seeds or a dash of cinnamon on top for added flair.
Pairing your pumpkin crisp with the right beverage can enhance the overall experience. A light-bodied white wine, like a Riesling, complements the sweetness of the pumpkin while balancing the spices. Alternatively, a warm spiced cider can evoke the cozy feelings of fall, making it the perfect accompaniment.
Lastly, if you plan to serve this as part of a larger gathering, consider preparing individual servings in ramekins. Not only does this make for stunning presentation, but it also allows for easy serving and portion control. With these professional tips and techniques, you’re well on your way to creating a pumpkin crisp that will leave a lasting impression.
Creative Variations and Adaptations of pumpkin crisp
One of the most delightful aspects of cooking is the freedom to experiment and make a dish your own. When it comes to pumpkin crisp, there are countless creative variations and adaptations that can cater to different tastes, dietary needs, and seasonal ingredients. Let’s explore some exciting ways to elevate your pumpkin crisp beyond the traditional recipe.
Seasonal Variations
While pumpkin crisp is a beloved fall dessert, it can be adapted to showcase other seasonal ingredients. For instance, during the winter months, you could incorporate mashed sweet potatoes or butternut squash into the filling for a slightly different flavor profile. A hint of maple syrup can also be added for a touch of sweetness and warmth.
In the spring, consider swapping out the pumpkin for fresh rhubarb or strawberries, creating a delightful fruit crisp. You can use a similar oat topping and bake it the same way, allowing you to enjoy the fresh flavors of the season while keeping the comforting elements of a crisp.
Dietary Adaptations
As the conversation around dietary preferences continues to evolve, it’s essential to have variations of pumpkin crisp that cater to different needs. For those following a keto diet, you can substitute traditional sugar with a sugar alternative like erythritol or stevia. Using almond flour instead of regular flour can also keep the carb count low while still providing a tasty crisp topping.
For vegan adaptations, the eggs in the pumpkin mixture can be replaced with a flaxseed meal mixed with water—a common egg substitute in vegan baking. Additionally, use coconut oil or vegan butter in place of regular butter to maintain that rich, indulgent flavor without any animal products.
If gluten is a concern, try using gluten-free oats and a gluten-free all-purpose flour blend for your topping. You’ll still achieve that delightful texture without compromising on flavor. The beauty of pumpkin crisp is that it can easily be tailored to suit various diets, ensuring everyone can enjoy a slice!
Creative Twists
For those who love to experiment in the kitchen, consider adding unique flavor profiles to your pumpkin crisp. One idea is to incorporate chocolate chips or chunks into the pumpkin mixture for a rich, decadent touch. Alternatively, adding a splash of bourbon or rum can elevate the flavor, lending a warm complexity that pairs beautifully with the spices.
Another fun twist is to introduce spices from different cuisines. For instance, adding cardamom or allspice can provide an unexpected depth to the dish. For a little heat, consider a pinch of cayenne pepper or chili powder in the pumpkin filling to create a sweet and spicy flavor combination that will surprise your taste buds.
If you find yourself with leftover pumpkin crisp, don’t let it go to waste! You can transform it into a breakfast treat by crumbling it over yogurt or oatmeal, giving your morning routine a delightful boost. Alternatively, make pumpkin crisp parfaits by layering the filling and topping with whipped cream or Greek yogurt for a fun and easy dessert.
In summary, the possibilities for variations on pumpkin crisp are nearly endless. By being open to seasonal ingredients, dietary adaptations, and creative twists, you can keep this beloved dish fresh and exciting. Whether you’re serving it at a holiday gathering or enjoying it on a cozy evening at home, a well-crafted pumpkin crisp is always a crowd-pleaser.
Storage, Reheating, and Meal Prep for pumpkin crisp
When it comes to enjoying a delicious pumpkin crisp, knowing how to properly store, reheat, and prepare this delightful dessert can enhance your overall experience. Whether you’ve just baked a fresh batch or you’re lucky enough to have some leftovers, understanding the best practices for storage is essential. Let’s dive into the details!
Short-term Storage
After you’ve baked your pumpkin crisp, the first question might be, “How do I store this so it stays fresh?” If you plan to enjoy your pumpkin crisp within a few days, the refrigerator is your best friend. Allow the crisp to cool completely before transferring it to an airtight container. This helps prevent condensation, which can lead to a soggy topping—definitely not what you want!
For short-term storage, you can also cover the dish tightly with plastic wrap or aluminum foil. Just make sure it’s sealed well to keep out any odors from the fridge. In the refrigerator, pumpkin crisp can last for about 3 to 5 days. If you’re like me and you enjoy your desserts warm, save a slice or two for later and heat it up again when the craving strikes.
Freezing and Long-term Storage
Now, if you find yourself with a surplus of pumpkin crisp or you want to prepare ahead of time for a holiday gathering, freezing is an excellent option. To freeze your pumpkin crisp, first ensure that it’s completely cooled. This step is crucial because placing a warm dessert in the freezer can create ice crystals, leading to unwanted texture changes. Once cooled, portion the crisp into individual servings or keep it whole, depending on your preference.
Wrap the pumpkin crisp tightly in plastic wrap, followed by a layer of aluminum foil to provide additional protection against freezer burn. For longer-term storage, consider using a freezer-safe container. Label the container with the date so you know exactly how long it’s been in there. When properly stored, pumpkin crisp can last up to 3 months in the freezer. Just imagine pulling out a slice of this fall favorite in the middle of summer!

Reheating Best Practices
Reheating your pumpkin crisp without losing its delightful texture is key to enjoying it again. The oven is the best method for reheating, as it allows for even heating and helps restore some of that crispiness. Preheat your oven to 350°F (175°C). If you have a whole dish, reheat it for about 20-25 minutes, covering it with aluminum foil to prevent the topping from browning too much. For individual servings, about 10-15 minutes should suffice. You can also microwave individual portions if you’re short on time; just be sure to keep an eye on it to avoid overheating.
Another tip? If you want to refresh the topping, consider adding a sprinkle of oats or nuts before reheating. This can reinvigorate that beloved crunchy element of your pumpkin crisp!
Meal Prep and Batch Cooking Strategies
As a busy person who loves to cook, I’ve found that meal prepping with pumpkin crisp is a game-changer. You can prepare your pumpkin filling ahead of time and store it in the refrigerator for about 3 days. This way, when you’re ready to indulge, all you need to do is assemble the crisp layer on top and bake it fresh. Alternatively, you could make the entire dish on a weekend, freeze portions, and pull them out as needed throughout the week. This strategy makes dessert an easy mid-week treat, and it’s perfect for those moments when you need a little pick-me-up!
Food Safety Considerations and Guidelines
When it comes to food safety, always err on the side of caution. If your pumpkin crisp has been sitting out at room temperature for more than two hours, it’s best to discard it to avoid any risk of foodborne illness. Also, when reheating, ensure that the internal temperature reaches at least 165°F (74°C) to guarantee safety. Keeping your kitchen and storage utensils clean will also help prevent any cross-contamination.
Shelf Life Expectations
Understanding the shelf life of your pumpkin crisp is essential for minimizing waste and ensuring deliciousness. As mentioned earlier, when stored in an airtight container in the fridge, pumpkin crisp lasts about 3 to 5 days. In the freezer, you can expect it to maintain its quality for about 3 months. After this period, the texture and flavor may start to deteriorate, although it might still be safe to eat. If you notice any signs of freezer burn or off smells, it’s best to err on the side of caution and toss it.
Portioning and Packaging Tips
For those who love to share or want to control their portions, consider cutting your pumpkin crisp into individual servings before freezing. This makes it easy to grab a slice whenever you need a sweet treat without having to defrost the whole dish. Use parchment paper between slices if you want to avoid sticking. Additionally, when packaging for the freezer, opt for vacuum-sealed bags if possible. These not only save space but also help preserve the quality of your pumpkin crisp for longer.
In conclusion, mastering the art of storage, reheating, and meal prep with pumpkin crisp can elevate your enjoyment of this fall favorite. With a little planning and care, you can savor the flavors of pumpkin crisp anytime you want!
Nutritional Benefits and Health Information
When we think of pumpkin crisp, we often picture a warm, comforting dessert that embodies the essence of autumn. But beyond its delicious flavor and enticing aroma, pumpkin crisp also boasts a variety of nutritional benefits that can make it a delightful addition to your diet. Let’s explore the nutritional profile, health benefits, and dietary considerations of this seasonal treat.
Nutritional Profile
The key ingredients in pumpkin crisp include pumpkin puree, oats, flour, butter, sugar, and spices like cinnamon and nutmeg. Each of these components contributes to the overall nutritional value of the dish. On average, a serving of pumpkin crisp (about 1/8 of a 9×13 dish) contains approximately 250-300 calories, depending on the specific recipe and portion sizes. Let’s break it down further:
- Calories: 250-300 calories per serving
- Carbohydrates: 35-45 grams
- Protein: 3-5 grams
- Fat: 10-15 grams
- Fiber: 2-4 grams
- Sugars: 10-15 grams
This breakdown reveals that pumpkin crisp is primarily a carbohydrate-rich dessert, with a moderate amount of fats and protein. The fiber content, primarily from the oats and pumpkin, can help with digestion and provide a feeling of fullness, making it a satisfying treat.
Health Benefits
One of the standout ingredients in pumpkin crisp is pumpkin puree, which brings with it a host of health benefits. Pumpkin is rich in vitamins A and C, both powerful antioxidants that can help bolster your immune system. Vitamin A is particularly important for maintaining good vision and skin health, while vitamin C plays a crucial role in collagen production and overall skin vitality.
Pumpkin also contains potassium, which is essential for heart health and helps regulate blood pressure. Additionally, the fiber found in pumpkin and oats can contribute to improved digestive health, making pumpkin crisp not just a tasty dessert, but also a wholesome one when enjoyed in moderation.
Dietary Considerations
When it comes to dietary considerations, pumpkin crisp can cater to various dietary needs with a few modifications. For those looking to reduce sugar intake, consider using natural sweeteners like maple syrup or honey, which can enhance the flavor without the added refined sugars. Gluten-free individuals can easily substitute regular flour with almond flour or a gluten-free flour blend, allowing everyone to enjoy this delightful dessert.
If you’re watching your fat intake, you can also experiment with reducing the amount of butter or opting for a healthier fat, such as coconut oil. These modifications ensure that pumpkin crisp can fit into various dietary lifestyles while still delivering on taste.
Comparison with Similar Dishes
When comparing pumpkin crisp to other popular fall desserts, such as pumpkin pie or apple crisp, it’s interesting to note the nutritional differences. Pumpkin pie typically has a higher calorie count due to the crust and added sugars, whereas pumpkin crisp, with its oat topping, can provide more fiber and a heartier texture. Apple crisp, while also delicious, usually contains more sugars, particularly if made with sweetened apples. This makes pumpkin crisp a slightly healthier choice while still offering that comforting warm dessert experience.
In summary, pumpkin crisp is more than just a seasonal indulgence; it’s a dish that can provide nutritional benefits while satisfying your sweet tooth. With its rich flavor, healthful ingredients, and customizable nature, pumpkin crisp is an autumn treat that you can feel good about enjoying!
Frequently Asked Questions About Pumpkin Crisp
How can I make a pumpkin crisp vegan?
To create a delicious vegan pumpkin crisp, substitute the dairy and eggs in the traditional recipe with plant-based alternatives. Use coconut oil or vegan butter instead of regular butter for the topping, and consider using a flaxseed meal mixed with water as an egg replacer (1 tablespoon of flaxseed meal mixed with 2.5 tablespoons of water per egg). For the filling, ensure that the pumpkin puree and spices are free from animal products, which is generally the case. Additionally, check that any sweeteners used, such as brown sugar, are vegan-friendly. This way, you can enjoy a tasty dessert that aligns with a vegan lifestyle.
Is pumpkin crisp a healthy dessert option?
Pumpkin crisp can be a healthier dessert choice compared to traditional sweets if you make a few mindful adjustments. Use natural sweeteners like maple syrup or coconut sugar instead of refined sugars to reduce the glycemic index. Incorporating whole grain oats into the topping adds fiber, which can promote digestive health. Additionally, pumpkin itself is a nutrient-dense ingredient, rich in vitamins A and C, so you’re getting beneficial nutrients in every bite. Remember to control portion sizes to fully enjoy this treat without overindulging.
How can I make a pumpkin crisp with oats?
To incorporate oats into your pumpkin crisp, use rolled oats or quick oats for the topping mixture. Combine oats with flour, brown sugar, and spices like cinnamon and nutmeg, then blend in melted butter or a vegan alternative until crumbly. This mixture will create a hearty and textured topping that complements the smoothness of the pumpkin filling. If you prefer a chewier texture, you can slightly increase the amount of oats and reduce the flour. Bake until the topping is golden brown and crisp for the best results.
Can I turn pumpkin crisp into a cake?
Yes, you can transform pumpkin crisp into a delightful cake by modifying the recipe slightly. Begin with a pumpkin cake base, which can be made using flour, sugar, baking powder, and spices mixed with pumpkin puree and plant-based milk. Pour the batter into a greased cake pan and then layer the crisp topping made from oats, flour, and butter or coconut oil on top before baking. This will create a delicious combination of moist cake and crunchy topping, giving you the best of both worlds. Bake until a toothpick inserted into the cake comes out clean, and enjoy this unique twist on the classic dessert!


