Quick & easy recipes are a lifesaver for any home cook, especially when life gets hectic. I remember the first time I stumbled upon the recipe for apple crisp. It was a chilly autumn afternoon, and I was buried under a pile of homework while my family was busy preparing for a gathering. My aunt had always been the designated dessert maker, but that day, she was tied up with other tasks. In a moment of spontaneity, I decided to take matters into my own hands and whip up something delicious. I rummaged through the pantry and found a bag of apples sitting patiently on the counter. That’s when the idea of making a quick & easy apple crisp struck me. I was amazed at how simple it was to combine those apples with some oats, sugar, and butter, and before I knew it, the warm aroma of baked apples filled the kitchen.
The beauty of this dish lies not only in its flavor but also in its rich cultural history. Apple crisp, or apple crumble as it’s sometimes called, has its roots deeply embedded in American and British culinary traditions. The dish is believed to have originated during World War II when rationing made traditional pie making difficult. Instead of making a crust, cooks learned to top their fruit fillings with a mixture of flour, sugar, and oats, creating a delightful crisp topping that was not only quick but also resourceful. This humble dessert showcases the ingenuity of home cooks who sought to create comfort food with the limited ingredients available to them.
The Story Behind This Recipe
What makes this quick & easy apple crisp recipe particularly special is its versatility. It’s a dish that can be made year-round, and its simplicity invites creativity. You can easily swap out apples for other fruits like peaches or berries, depending on what’s in season or what you have on hand. I remember making it for the first time and feeling a sense of accomplishment as my family gathered around the table, eagerly waiting for their servings. The warm, gooey apples mingled with the crunchy topping created a perfect harmony of textures and flavors that made my heart swell with pride.
This dessert is perfect for busy families looking for quick dinner solutions because it takes only about 30 minutes prep time and 30 minutes in the oven. It’s an ideal weeknight dessert or a special treat for weekend gatherings. On those busy evenings when everyone is tired and cranky, the thought of indulging in a warm bowl of apple crisp can bring a smile to anyone’s face. Plus, it’s an easy dish for kids to help with, from peeling apples to sprinkling the topping, making it a fun family activity.
Seasonal relevance is another aspect of the quick & easy apple crisp that cannot be overlooked. Autumn is the prime time for apple picking, and there’s a certain joy in turning freshly picked apples into a dessert that warms both the heart and the home. However, this recipe is not limited to fall; it can be enjoyed any time of the year, especially when you want to evoke those cozy autumn vibes. The emotional connection tied to apple crisp is profound; it’s often associated with family gatherings, holidays, and celebrations, making it a cherished dish in many households.
In this article, you will learn not just how to make a quick & easy apple crisp, but also how to customize it to fit your taste and dietary needs. I’ll share tips on the best apples to use, how to achieve the perfect topping, and ways to elevate this classic dessert to a new level. By the end, you’ll find that this quick & easy apple crisp recipe is not just a dessert; it’s an experience that brings people together.
The Rich History and Cultural Significance of quick & easy
The quick & easy apple crisp has a rich history and cultural significance that spans generations. To truly appreciate this beloved dessert, it’s essential to delve into its origins and how it has evolved over time. This dish is a quintessential representation of comfort food, and its roots can be traced back to the 19th century in the United States and the United Kingdom. As mentioned earlier, it emerged as a practical solution to the challenges of wartime cooking, where rationing made traditional baking methods difficult. The apple crisp allowed cooks to use what was available to create something comforting and satisfying.
Origins and History
The earliest versions of apple crisp likely originated from the British crumble, which featured a similar topping of flour, sugar, and fat. However, the American adaptation of apple crisp struck a chord with home cooks for its simplicity and quick preparation time. The introduction of oats into the topping not only added texture but also a wholesome element, making it a favorite among families looking for nutritious yet quick desserts. Over the years, the recipe has been passed down, with each family adding their unique twist, whether it’s incorporating spices like cinnamon or nutmeg or experimenting with different fruit fillings.
As apple farming expanded across America, particularly in regions like New England, the availability of fresh apples contributed to the dish’s popularity. Apple orchards became a staple of American agriculture, and with them, the tradition of apple picking and making apple crisp flourished. Today, you’ll find variations of this recipe not only in homes but also in restaurants, ranging from gourmet interpretations to rustic, homemade versions.
Cultural Significance
The cultural significance of quick & easy apple crisp is deeply tied to the concept of comfort food. It evokes feelings of nostalgia and warmth, often reminding people of their childhood and family gatherings. During the fall season, apple crisp becomes a staple at Thanksgiving tables across America. It’s a dessert that pairs beautifully with a scoop of vanilla ice cream or a dollop of whipped cream, making it a celebratory end to a hearty meal. Moreover, it’s often made for casual get-togethers or potluck dinners, where it serves as a symbol of hospitality and warmth.
In various regions, you might find unique takes on the apple crisp, showcasing local fruits or signature spices. For instance, in the Pacific Northwest, where berries are abundant, you might encounter a mixed berry apple crisp that incorporates fresh blackberries or raspberries. This regional variation not only highlights the local produce but also contributes to the dish’s evolving nature.
Nutritional Benefits
From a nutritional standpoint, quick & easy apple crisp can be a healthier dessert choice compared to many other options. Apples are rich in dietary fiber and Vitamin C, making them a beneficial addition to any meal. The oats in the crisp topping provide whole grains that can aid digestion and contribute to heart health. By reducing the sugar content or using alternatives like honey or maple syrup, you can create a healthier version without sacrificing flavor. Additionally, the dish can be easily modified to cater to gluten-free diets by using gluten-free oats and flour.
This evolution of the quick & easy apple crisp showcases not only its adaptability but also its role in bringing families together around the table. Whether enjoyed on a chilly autumn evening or as a sweet treat to celebrate a special occasion, this dish remains a timeless classic that resonates with many. In the following sections, we will explore how you can make your own quick & easy apple crisp that honors this rich history while satisfying your family’s sweet tooth.
Essential Ingredients for Perfect quick & easy
When it comes to baking, especially for a delightful dessert like apple crisp, having the right ingredients can make all the difference. This quick & easy apple crisp recipe requires a selection of fresh, quality ingredients that not only contribute to the flavor but also create that perfect texture we all crave. Let’s dive into the essential components that will bring your apple crisp to life.
Essential Ingredients
- Apples: 6-8 medium-sized apples (Granny Smith, Honeycrisp, or a mix)
- Granulated Sugar: ½ cup
- Brown Sugar: ½ cup
- All-Purpose Flour: 1 cup
- Old-Fashioned Oats: 1 cup
- Ground Cinnamon: 1 teaspoon
- Salt: ¼ teaspoon
- Unsalted Butter: ½ cup (1 stick, melted)
- Vanilla Extract: 1 teaspoon (optional)
Now, let’s explore the role and importance of each ingredient. The star of the show, the apples, are crucial for that comforting, tart-sweet flavor. I recommend using a mix of tart and sweet apples, like Granny Smith and Honeycrisp, to give your crisp depth and complexity. The granulated sugar helps to sweeten the apples, while the brown sugar adds a hint of molasses flavor, enhancing the overall taste.
All-purpose flour is key for thickening the apple mixture, providing a nice base for the crisp topping, while the old-fashioned oats contribute to that wonderful, chewy texture we all love. Ground cinnamon elevates the flavor profile, giving it that warm, cozy aroma that fills your kitchen as it bakes. A pinch of salt balances all the sweetness, making each bite harmonious.
Unsalted butter, when melted, binds the topping together and creates that delightful crunch. I often add a splash of vanilla extract because it rounds out the flavors beautifully, although it’s totally optional. Each ingredient plays a vital role in achieving the ultimate quick & easy apple crisp.
Print
Quick & Easy Recipe – Complete Guide
Ingredients
- 1/2 cup all-purpose flour
- 1/2 cup old fashioned oats, (don’t use the quick ones)
- 1/2 cup light brown sugar, lightly packed
- 1/2 teaspoon cinnamon
- 1/8 teaspoon salt
- 1/2 cup (1 stick) cold unsalted butter, diced into small cubes
- 1/3 cup chopped pecans, optional (I use)
APPLE FILLING
- 3 tablespoons unsalted butter melted
- 4 tablespoons half & half
- 2 tablespoons all-purpose flour
- 1/4 cup light brown sugar, lightly packed
- 1 teaspoon pure vanilla extract
- 3/4 teaspoon cinnamon
- Pinch of salt
- 5 large granny smith apples, about 2 to 2 1/2 pounds
Instructions
Preheat oven to 375 degrees. Butter a 9 x 13 baking dish and set aside. If you don’t have a 9 x 13 baking dish, use an oval casserole dish or any dish close to this size.
STREUSEL TOPPING
- In a medium bowl, whisk together the flour, oats, brown sugar, cinnamon, and salt. Add the butter and mix the butter into the dry ingredients with your fingers, but don’t try mashing the butter. It will melt into the mixture when it’s in the oven. You want a crumbly mixture. Set aside.
APPLE FILLING
- In a small bowl, whisk together the butter, half & half, and flour. Add the brown sugar, vanilla, cinnamon, and salt and whisk together until all ingredients are wet. Set aside.
- Peel and slice the apples into thin slices about 1/8 inch in thickness, no more than 1/4 inch. The thinner they are the quicker they will bake through.
- Drizzle the wet filling mixture over the apples and use two forks to lightly mix and coat the apples with the filling. Transfer the apples to the prepared baking dish.
- Sprinkle the streusel topping over the apples, making sure to cover the entire surface.
- Bake for approximately 40 minutes or until the topping is a nice golden brown. Remove from oven and allow to cool for 10 minutes and serve.
- Serve with vanilla ice cream or ice cream and caramel ice cream topping.
Shopping Tips
When shopping for your ingredients, quality is paramount. For apples, look for firm, unbruised specimens. If possible, visit a local farmer’s market during apple season for the freshest options. The fall months are typically when apples are at their peak, but many varieties are available year-round in grocery stores.
For sugars, consider organic options if you’re looking for a cleaner product. Opt for brown sugar that is soft and moist, as this will help in achieving that lovely caramel flavor in your crisp. When selecting oats, choose old-fashioned rather than instant for the best texture. Check the label for minimal processing.
As for butter, unsalted is preferable since it gives you control over the saltiness of your dish. If you’re trying to cut costs, store brands often provide just as good quality as name brands. Don’t hesitate to ask staff at your local store for recommendations on organic versus conventional products based on your budget.
Substitutions and Alternatives
For those with dietary restrictions, there are several substitutions you can make. If gluten is a concern, you can easily swap all-purpose flour with a gluten-free blend, or oat flour, which pairs nicely with the oats in the recipe. For a refined sugar alternative, consider using coconut sugar or maple syrup instead of granulated or brown sugar, though you may need to adjust the measurements slightly.
If you prefer a dairy-free version, coconut oil or a vegan butter substitute can replace the unsalted butter. You can also use almond or oat milk in place of regular milk if you choose to add a topping or serve it with ice cream.
Storage is simple; store your apples in a cool, dry place. They often last for weeks if kept properly. For the oats and flour, keep them in airtight containers to prolong freshness. By following these tips and making thoughtful selections, you’ll create a quick & easy apple crisp that’s not only delicious but also aligned with your dietary preferences.
Detailed Step-by-Step quick & easy Cooking Instructions
Creating a quick & easy apple crisp is not only a rewarding experience, but it’s also a delightful way to spend time in the kitchen, especially as the aroma of baked apples fills your home. Let’s walk through the detailed steps to ensure your apple crisp turns out perfectly every time.
Preparation Steps
- Preheat your oven: Start by preheating your oven to 350°F (175°C). This ensures that your crisp will bake evenly.
- Prepare the apples: While the oven is heating, wash, peel, and slice your apples. Aim for even slices, about ¼-inch thick. This will help them cook uniformly. As you slice, place them in a large mixing bowl and sprinkle them with the granulated sugar and ½ teaspoon of cinnamon. Toss the apples gently to coat them well.
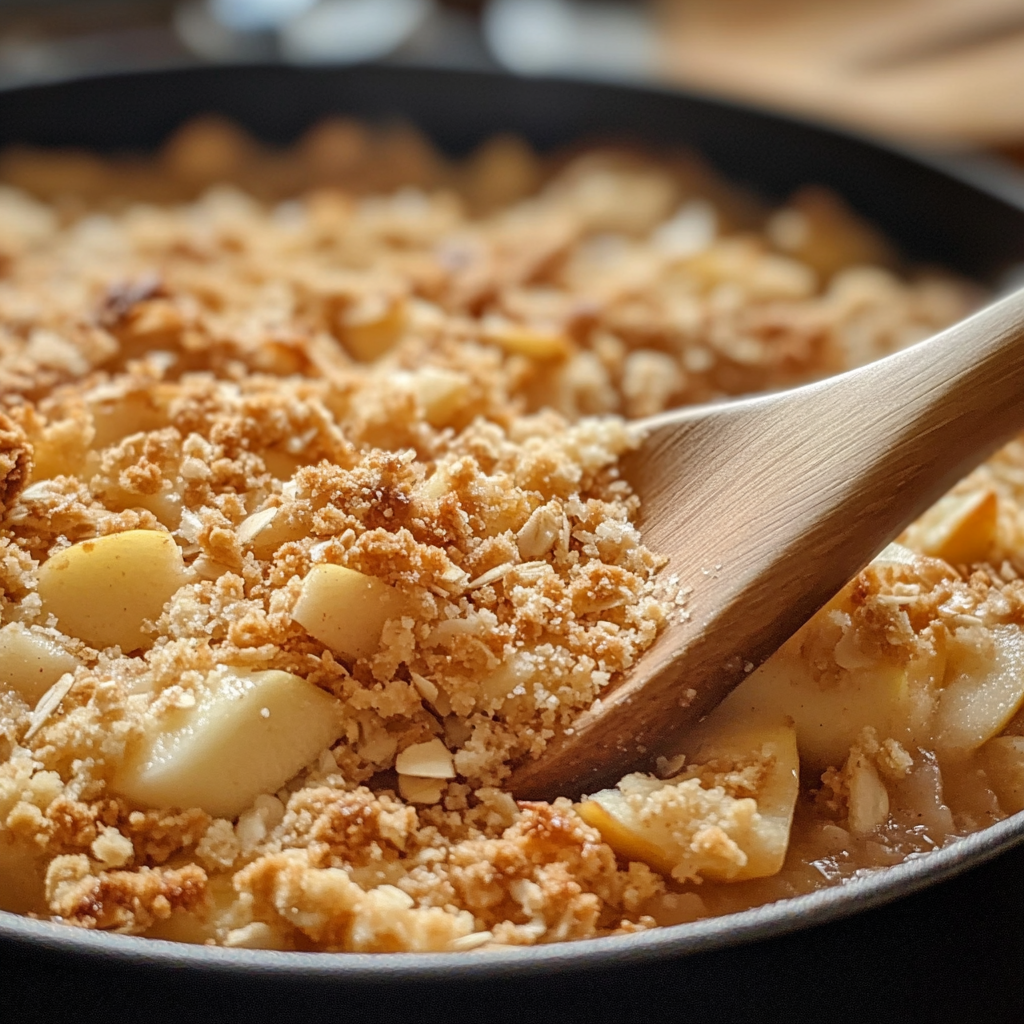
- Mix the topping: In another bowl, combine the oats, flour, brown sugar, remaining cinnamon, and salt. Stir these ingredients together until they are evenly mixed. Then, pour in the melted butter and mix until the mixture resembles a crumbly texture. This is the secret to achieving that crunchy topping!
Cooking Process
- Assemble the crisp: Grease a 9×13-inch baking dish with a bit of butter or cooking spray. Spread the apple mixture evenly across the bottom of the dish. Then, sprinkle the oat topping generously over the apples, covering them completely.
- Bake: Place the baking dish in the preheated oven. Bake for approximately 30 minutes or until the topping is golden brown and the apples are bubbling. You’ll know it’s done when you can see the juices from the apples bubbling up around the edges.
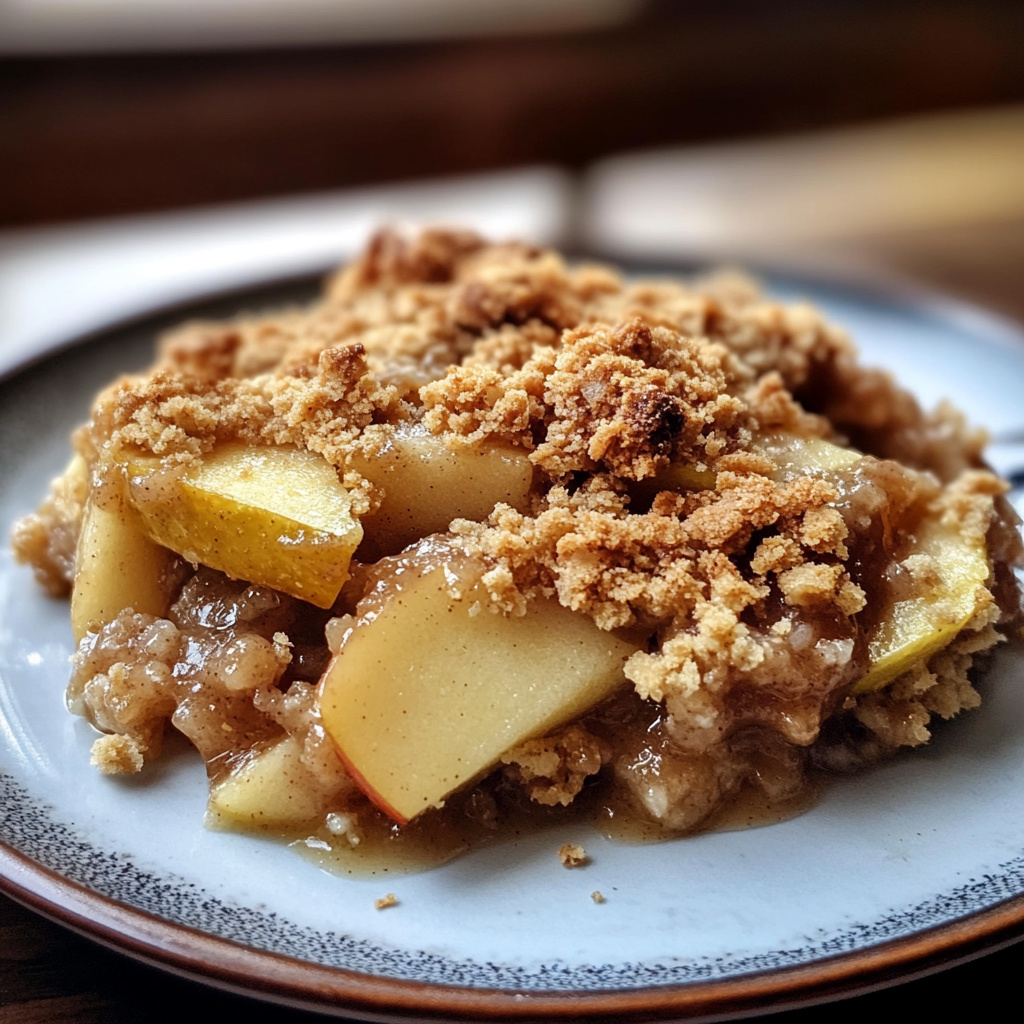
- Cool and serve: Once out of the oven, allow your apple crisp to cool for about 10-15 minutes. This cooling time helps the juices to thicken slightly, making it easier to serve. It’s a wonderful dish warm, but it’s also delightful at room temperature!
Final Assembly
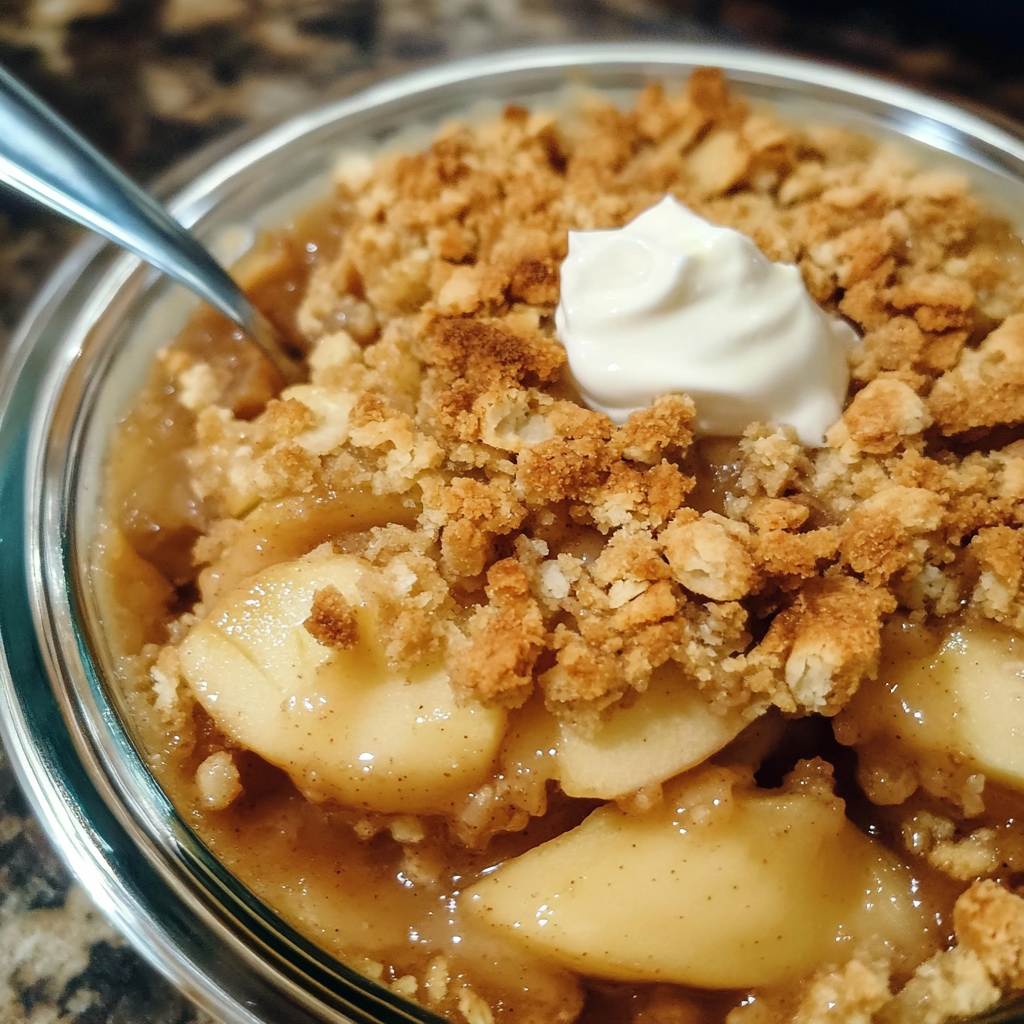
When you’re ready to serve, scoop out generous portions into bowls, perhaps with a dollop of whipped cream or a scoop of vanilla ice cream. The contrast between the warm apples and the cold ice cream is heavenly. And here’s a pro tip: if you want to elevate your dish, drizzle a little caramel sauce over the top for an extra layer of flavor.
Timing is essential when baking. Use the 30-minute bake time to tidy up your kitchen, set the table, or prepare any accompanying items like drinks or side dishes. If you’re multitasking, make sure to keep an eye on the crisp as it bakes. Visual cues like browning on the topping and bubbling juices are your best indicators of doneness.
Common mistakes include overbaking, which can lead to a dry topping, or underbaking, which can leave your apples too firm. Always check for that bubbling juice, and don’t hesitate to adjust your baking time based on your oven’s temperament. Remember, every oven is different!
Finally, food safety is key. Ensure that your apples are fresh and check for any signs of spoilage. Baked goods like this apple crisp can be stored in the refrigerator for up to five days, though I doubt it will last that long with how delicious it is!
By following these detailed instructions, you will master this quick & easy apple crisp recipe that is sure to impress your family and friends. Happy baking!
Professional Tips and Techniques for quick & easy
When it comes to creating a quick & easy apple crisp, there are some professional tips and techniques that can elevate your dish from good to extraordinary. Whether you are a novice baker or a seasoned pro, understanding the ins and outs of this delightful dessert can make all the difference. Let’s dive into the world of apple crisp, exploring the essential techniques, troubleshooting common issues, and honing your presentation skills.
Professional Techniques
First and foremost, the key to a great apple crisp lies in the quality of the ingredients. Always choose fresh, ripe apples for your filling. Varieties like Granny Smith, Honeycrisp, or Braeburn are perfect for their balance of sweetness and tartness. If you’re looking for a quick & easy method, consider pre-slicing the apples. You can use a mandoline for uniform slices or simply grab a good old-fashioned peeler and knife. Remember, the thinner the slices, the quicker they cook, providing that perfect tender bite.
Next, let’s talk about the crumb topping. A classic apple crisp topping is made from oats, flour, butter, and sugar. For a truly quick & easy recipe, consider using cold butter and your hands to mix the ingredients until they resemble coarse crumbs. This method not only speeds up the process but also allows for a more rustic texture. If you’re feeling adventurous, add a dash of cinnamon or nutmeg for a warm, inviting flavor that will complement the apples beautifully.
For those with a little more experience in the kitchen, try using a food processor to combine the topping ingredients. Just pulse until you achieve the desired texture, and you’ll save time while ensuring an even distribution of flavors. This is especially helpful when scaling recipes up or down. If you’re preparing a larger batch for a gathering, doubling the topping is a breeze with this method!
Troubleshooting Guide
Even with the best techniques, things can go awry when baking. One common issue is a soggy bottom crust. This can happen if the apples release too much moisture during baking. A quick solution is to toss the apple slices with a tablespoon of flour or cornstarch before adding them to the baking dish. This will help absorb excess juices and keep your crisp from becoming a mushy mess. Additionally, if you notice that your topping is browning too quickly while baking, simply cover it loosely with aluminum foil until the apples are done.
Another potential pitfall is a topping that lacks crunch. If you want to ensure a crispy finish, consider adding nuts like walnuts or pecans to the topping mix. Not only do they add a delightful crunch, but they also provide a rich, nutty flavor that enhances the overall dish. If you find that your topping lacks texture despite following the recipe, try baking it in a wider dish. This allows for better heat circulation, resulting in a crisply baked topping.
Presentation Tips
When it comes to plating your quick & easy apple crisp, presentation can be just as important as flavor. Use a shallow, wide dish to serve; this not only showcases the beautiful layers but also makes it easier for guests to serve themselves. Consider garnishing with a scoop of vanilla ice cream or a dollop of whipped cream. The contrast of the warm apple crisp with cold ice cream is not only visually appealing but also creates a delightful temperature contrast in each bite.
For a touch of elegance, sprinkle some cinnamon or powdered sugar on top before serving. Fresh mint leaves or edible flowers can also add a pop of color and sophistication to your dish. If you’re serving it for a special occasion, consider using individual ramekins for personal servings, which adds an intimate touch while making the serving process more straightforward.
Lastly, don’t forget to think about beverage pairings! A sweet, crisp white wine, like a Riesling or a lightly sparkling Prosecco, can complement the flavors of the apple crisp beautifully. For a non-alcoholic option, try a spiced apple cider or a warm chai tea that echoes the comforting spices found in the dessert. Pairing your dessert with the right drink can transform a simple meal into an unforgettable experience.
In conclusion, with these professional tips and techniques, your journey to creating a quick & easy apple crisp will not only be enjoyable but also immensely satisfying. By selecting the right ingredients, mastering a few techniques, and honing your presentation skills, you’ll be well on your way to impressing family and friends with this delightful dish!
Creative Variations and Adaptations of quick & easy
Apple crisp is a beloved dessert that has stood the test of time, thanks to its versatility and ease of preparation. While the classic version is undoubtedly delicious, there are countless creative variations and adaptations you can explore to make your quick & easy apple crisp uniquely yours. Let’s delve into how you can switch things up with seasonal ingredients, dietary modifications, and innovative twists.
Seasonal Variations
One of the joys of cooking is adapting recipes to reflect the changing seasons. In the fall, you might want to incorporate pumpkin puree or butternut squash into your apple crisp for a delightful autumnal twist. Mixing in roasted pecans can also add a delightful crunch and flavor that captures the essence of the season. As spring approaches, consider using rhubarb alongside your apples for a tart contrast that brightens the dish. You could even experiment with berries in the summer, like blueberries or raspberries, to create a mixed fruit crisp that bursts with fresh flavor.
Don’t forget about the spices! While cinnamon is a classic choice for apple crisp, you can switch it up based on the season. For winter, consider adding allspice or cardamom for a warm, cozy flavor. During the summer, a hint of fresh ginger can bring a bright and zesty finish to your dish. By using seasonal ingredients and spices, you can create a quick & easy apple crisp that reflects the flavors of the time of year.
Dietary Adaptations
In today’s diverse culinary landscape, dietary needs are more varied than ever. Fortunately, apple crisp can easily be adapted to cater to different diets without losing any of its charm. For those following a keto lifestyle, consider substituting traditional sugars with erythritol or monk fruit sweetener. You can also replace regular flour with almond flour or coconut flour for a low-carb topping. These modifications can make your dessert fit perfectly into a keto meal plan while still being a quick & easy treat.
If you’re looking for vegan options, simply replace the butter with coconut oil or a vegan butter alternative. Make sure to choose a plant-based sweetener and ensure that your oats are certified gluten-free if necessary. This way, you can create a delicious vegan apple crisp that everyone can enjoy, regardless of dietary restrictions.
Creative Twists
When it comes to creativity in the kitchen, there are no bounds! Why not take your apple crisp on a culinary journey by incorporating international flavors? For instance, add a splash of bourbon or rum to the apple filling for a decadent twist. You could also mix in some caramel sauce to create a caramel apple crisp that will please any sweet tooth.
For a delightful crunch, consider adding crushed cookies, like gingersnaps or graham crackers, to your crumb topping. Not only does this provide texture, but it also introduces new flavors that can elevate your dish. If you’re feeling particularly adventurous, try incorporating savory elements such as cheese. A sprinkle of aged cheddar on top of the crisp before baking can create an unexpected and delicious contrast to the sweetness of the apples.
Another fun idea is to transform your apple crisp leftovers into a breakfast treat! Simply mix the leftover crisp with yogurt and a drizzle of honey for a delicious parfait. Or, you could bake it into pancakes or waffles for a brunch that feels indulgent yet remains quick & easy.
In summary, the world of apple crisp is full of possibilities. By experimenting with seasonal ingredients, accommodating dietary needs, and infusing your own creative twists, you can create a dish that’s not only quick & easy but also uniquely yours. So, go ahead and let your culinary imagination run wild as you explore the delicious variations of this timeless classic!
Storage, Reheating, and Meal Prep for quick & easy
When it comes to a quick & easy apple crisp recipe, one of the most important considerations is how to store it properly to maintain its deliciousness for later enjoyment. Whether you’ve made a big batch for a gathering or just a small dish for yourself, understanding storage techniques can help you savor those delightful flavors even after the initial baking. Let’s dive into the details!
Short-term Storage
After baking your scrumptious apple crisp, it’s essential to let it cool to room temperature before storing it. This is a crucial step to ensure that condensation doesn’t form, which can lead to a soggy topping. Once cooled, you can store your apple crisp in the refrigerator. A well-sealed container is your best friend here. I recommend using an airtight glass or plastic container that’s large enough to hold your dessert without squishing it. If you don’t have one, you can also cover the dish with plastic wrap or aluminum foil, but make sure it’s tightly secured.
In the fridge, your quick & easy apple crisp will stay fresh for about 3 to 5 days. If you think you won’t finish it in that time, consider portioning it out into smaller containers. This not only makes it easier to grab a quick dessert but also helps in keeping the rest fresh. Just remember to avoid scooping directly from the main dish if you want to keep it nice and fluffy!
Freezing and Long-term Storage
If you’ve made a larger batch or simply want to save some for later, freezing is a fantastic option! To freeze your apple crisp, follow the same cooling process as before. Once cooled, you can transfer it to a freezer-safe container or wrap it tightly with plastic wrap, followed by aluminum foil to prevent freezer burn. A good tip here is to portion them into single servings, which makes it incredibly convenient for quick desserts later on!
When it comes to freezing, your quick & easy apple crisp can last for up to 3 months. Just be sure to label the containers with the date so you can keep track of how long it’s been stored. When you’re ready to enjoy your crisp, there’s no need to thaw it beforehand. You can bake it straight from the freezer, but keep in mind that it may take a bit longer in the oven. Aim for around 10-15 minutes longer than the original baking time, or until it’s heated through and the topping is crispy once again.
Reheating Best Practices
Reheating your apple crisp properly is key to maintaining its delightful texture and flavor. If you’re reheating a portion from the fridge, preheat your oven to around 350°F (175°C). Place the apple crisp in a baking dish and cover it with foil to prevent the topping from burning. Heat it for about 15-20 minutes or until it’s warmed through. If you like your topping extra crispy, remove the foil in the last 5 minutes of reheating.
For frozen apple crisp, you can follow the same method mentioned above. However, if you’re in a rush, the microwave is an option too. Just be cautious; while it’s quick, microwaving can lead to a softer topping. Heat it in short intervals (about 30 seconds) and check frequently to avoid overcooking.
Food safety is paramount when storing any food, and apple crisp is no exception. Always ensure that your apple crisp is stored in a clean container and kept at the right temperature. The USDA suggests that food should not be left at room temperature for more than two hours, especially if you’re expecting leftovers. Keeping this in mind will help you enjoy your quick & easy apple crisp safely!
Understanding how to store, freeze, and reheat your apple crisp can significantly enhance your baking experience. Not only will you be able to enjoy this delightful dessert on your own schedule, but you’ll also impress friends and family with your savvy meal prep skills. Now that you know how to keep your apple crisp fresh and delicious, you’ll always have a tasty treat ready to warm your heart!
Nutritional Benefits and Health Information
As we dive into the nutritional side of our quick & easy apple crisp recipe, you might be surprised to learn that this classic dessert can be both delicious and nutritious. Understanding the nutritional benefits and health information related to the ingredients we use can help us make informed choices about our food. Let’s break down the key components and see how they contribute to a balanced diet.
Nutritional Profile
At its core, an apple crisp is primarily made up of apples, oats, flour, sugar, and butter. Each of these ingredients plays a role in the overall nutritional profile. For a typical serving of apple crisp, you can expect to consume around 200-300 calories, depending on the portion size and the specific ingredients used.
Apples are the star ingredient, providing dietary fiber, vitamin C, and various antioxidants. One medium apple contains about 95 calories and 4 grams of fiber, which is great for digestion and can help keep you feeling full. The oats in the crisp topping contribute additional fiber and can help lower cholesterol levels. A half-cup of oats contains around 150 calories and is packed with vitamins, minerals, and antioxidants.
While sugar and butter do add calories, they also play a significant role in creating that delightful flavor and texture we love. However, if you’re looking to reduce sugar or fat, there are plenty of modifications you can make without sacrificing taste!
Health Benefits
One of the primary health benefits of our quick & easy apple crisp comes from the apples themselves. Apples are known for their high levels of antioxidants, which help combat oxidative stress and may reduce the risk of chronic diseases. The fiber found in apples and oats not only promotes healthy digestion but can also contribute to heart health by helping to lower cholesterol levels.
Moreover, the natural sweetness from the apples means you can often reduce the amount of added sugar in your crisp, making it a healthier dessert option. You can even experiment with natural sweeteners like honey or maple syrup to add depth to the flavor while keeping the calorie count lower.
Dietary Considerations
When it comes to dietary considerations, our quick & easy apple crisp can be adapted to meet various needs. For those who are gluten-sensitive, you can easily substitute regular flour with gluten-free flour or even almond flour. If you’re looking for a vegan option, swapping butter for coconut oil or a plant-based butter can do the trick, and you can replace the sugar with a natural sweetener like agave syrup.
Additionally, if you’re mindful of your sugar intake, consider using a sugar substitute or reducing the overall amount of sugar in the recipe. Remember, you can always enhance the sweetness of your apple crisp through the natural flavors of the apples themselves!
In conclusion, our quick & easy apple crisp recipe not only satisfies your sweet tooth but also offers a range of nutritional benefits. From the wholesome fiber in the oats and apples to the antioxidant properties of the fruit, this dessert can fit nicely into a balanced diet. Whether you’re enjoying it as an occasional treat or making it a regular part of your meal plan, feel good knowing you’re indulging in something that brings joy to your taste buds while still being mindful of your health!
Frequently Asked Questions About Quick & Easy
Old fashioned apple crisp recipe
An old fashioned apple crisp recipe typically combines sliced apples with a mix of sugar, cinnamon, and a crumbly topping made from flour, butter, and oats. To enhance the flavor, consider adding a touch of lemon juice to the apples to brighten their taste and prevent browning. For the topping, use cold butter and mix it with your dry ingredients until it resembles coarse crumbs, which will create a delightful crunch when baked. Baking the crisp at a high temperature, around 350°F (175°C), allows the apples to soften while the topping becomes golden and crispy. Serve warm, ideally with a scoop of vanilla ice cream for a classic dessert experience.
Quick and easy apple desserts recipes
For quick and easy apple desserts, consider recipes like apple nachos, where thinly sliced apples are drizzled with caramel sauce and sprinkled with nuts or chocolate chips. Another great option is baked apples, which involve cored apples stuffed with a mixture of brown sugar, cinnamon, and nuts, then baked until tender. If you’re short on time, try making a simple apple compote by simmering diced apples with sugar, cinnamon, and a splash of water until soft, which can be served over yogurt or pancakes. For a no-bake option, simply layer sliced apples with yogurt and granola for a refreshing parfait. These recipes are perfect for satisfying your sweet tooth without spending too much time in the kitchen.
Apple crisp recipe with oats
An apple crisp recipe that incorporates oats offers a lovely texture and added nutrition. Start by mixing sliced apples with sugar, cinnamon, and a bit of flour for thickening, then place them in a baking dish. For the topping, combine rolled oats with flour, brown sugar, and melted butter, mixing until crumbly. The oats will toast beautifully during baking, creating a hearty and satisfying crunch. Bake at 350°F (175°C) for about 30-40 minutes, until the top is golden brown and the apples are bubbly. This recipe is not only delicious but also allows for customization; feel free to add nuts or spices like nutmeg to enhance the flavor!
Easy apple dessert recipes with few ingredients
Easy apple dessert recipes can be made with just a handful of ingredients, making them perfect for busy days. One simple option is to slice apples and toss them with cinnamon sugar, then bake until tender for a quick treat. You can also create apple turnovers using store-bought puff pastry; just fill with sliced apples mixed with sugar and cinnamon, fold, and bake until golden. Another quick recipe is to make apple slices topped with peanut butter and a sprinkle of granola for a nutritious snack or dessert. These recipes highlight how minimal ingredients can still yield delicious results, perfect for satisfying cravings without a lot of fuss.


