Soft Christmas thumbprint cookies are a beloved holiday treat that brings warmth and joy to every gathering. My first encounter with these delightful cookies was during a bustling family gathering at my grandmother’s house. The kitchen was filled with the aroma of baked goods, laughter, and the sound of holiday music playing softly in the background. As I stepped into the kitchen, I was immediately drawn to a plate of cookies that caught my eye with their vibrant colors – the soft, buttery cookies adorned with glistening dollops of jam. Little did I know that this would be the beginning of my love affair with soft Christmas thumbprint cookies.
My grandmother had a special way of making these cookies, a technique passed down through generations. I remember standing on a stool, eagerly helping her mix the dough, my hands getting dusted with flour while she shared stories of her own childhood and her mother’s baking adventures. It was in those moments that I learned not just about baking but also about the love and tradition that each cookie held. Each thumbprint was a small imprint of our family’s history, a delicious reminder of the connections that bind us together, especially during the holidays.
The Story Behind This Recipe
The tradition of thumbprint cookies dates back centuries, with origins believed to trace back to Eastern Europe. Traditionally, these cookies were made during the holiday season, often filled with fruit preserves or nut pastes. While the exact origins remain somewhat elusive, it’s widely accepted that various cultures have their own renditions of thumbprint cookies, each adding a unique twist. In Scandinavian countries, for instance, these cookies are known as “Hallongrotta” or raspberry caves, typically filled with raspberry jam, while other regions may opt for chocolate or nut fillings.
What makes soft Christmas thumbprint cookies particularly special is their versatility and ease of preparation. Unlike many holiday treats that require intricate techniques or hours of baking, these cookies can be whipped up quickly, making them ideal for busy families. The dough comes together in just a matter of minutes, and with the kids helping to create the thumbprints, it becomes a fun family activity. The simplicity of the recipe allows for creativity, as you can choose your favorite jams or even chocolate ganache to fill the centers, making them truly your own.
As the holiday season approaches, these cookies become a staple in many homes. They are perfect for cookie exchanges, holiday parties, or simply enjoying with a cup of hot cocoa while sitting by the fire. Their soft texture and sweet filling provide comfort, evoking memories of cherished family gatherings. The emotional connection to these cookies runs deep for many, as they often serve as a bridge to our past, reminding us of the love and warmth we felt during those special moments.
In this guide, I promise to take you on a journey through the world of soft Christmas thumbprint cookies. From understanding the history and cultural significance of this delightful treat to mastering the perfect recipe, you will discover why these cookies deserve a place in your holiday traditions. Whether you are a seasoned baker or a beginner in the kitchen, you will find tips and tricks to ensure your thumbprint cookies turn out soft, delicious, and perfectly festive. So, let’s dive into the wonderful world of soft Christmas thumbprint cookies!
The Rich History and Cultural Significance of soft christmas thumbprint
The rich history and cultural significance of soft Christmas thumbprint cookies weave an intricate tale that spans continents and generations. These delightful treats are not just a simple dessert; they represent a fusion of traditions, flavors, and stories that have been passed down through the ages. Understanding where these cookies come from enriches our experience in making and sharing them, especially during the holiday season.
Origins and History
As mentioned earlier, soft Christmas thumbprint cookies are thought to have originated in Eastern Europe. The earliest versions were made with basic ingredients such as butter, sugar, flour, and a filling, typically made from preserved fruits or nuts. These cookies were often crafted for special occasions, particularly during the winter months when families would gather to celebrate the holidays. The thumbprint itself is a charming touch, allowing bakers to create a little well in the dough to hold the sweet filling. This simple yet effective technique has been embraced by various cultures, leading to numerous regional variations.
In Scandinavian countries, for example, these cookies take on a unique identity. Known as “Hallongrotta,” they are traditionally filled with raspberry jam and are a staple during Christmas celebrations. The name translates to “raspberry cave,” highlighting the delightful way the jam sits nestled within the cookie. Similarly, in Jewish communities, thumbprint cookies, or “babka thumbprints,” are often filled with chocolate or nut pastes, particularly enjoyed during Hanukkah. These variations show how adaptable the thumbprint cookie can be, allowing different cultures to incorporate their local ingredients and flavors.
Cultural Significance
The cultural significance of soft Christmas thumbprint cookies cannot be overstated. They are often associated with family gatherings, celebrations, and cherished memories. In many homes, baking thumbprint cookies becomes a holiday tradition, where generations come together to create and enjoy these treats. In fact, many families have their own secret recipes that have been passed down through the years, each adding personal touches and memories to the mix.
Traditionally, these cookies have been served during festive occasions, including Christmas, New Year’s celebrations, and other family gatherings. They are often included in cookie platters alongside other holiday favorites, showcasing the diverse flavors and textures that celebrate the season. Sharing these cookies with friends and neighbors during the holidays fosters a sense of community and connection, reinforcing the idea that food has the power to bring people together.
Nutritional Benefits
While soft Christmas thumbprint cookies are undeniably a treat meant for indulgence, they also offer some nutritional benefits, particularly if you choose your fillings wisely. The base of these cookies typically includes butter, sugar, and flour, which provide energy. However, when you opt for fruit preserves, you introduce natural sugars, vitamins, and antioxidants into the mix. Using whole-grain flour can also enhance the nutritional profile by adding fiber and essential nutrients.
Additionally, incorporating nuts into the filling can provide healthy fats and protein, making these cookies not only delicious but also somewhat satisfying in moderation. While they are certainly a sweet indulgence, understanding the nutritional aspects can help you make mindful choices about how and when to enjoy them.
As we delve deeper into the art of making soft Christmas thumbprint cookies, we’ll explore recipes, tips, and techniques to ensure you can create these delightful treats in your own kitchen. Embrace the rich history and cultural significance behind each cookie, and allow them to become a part of your own family’s holiday traditions.
Essential Ingredients for Perfect soft christmas thumbprint
When it comes to baking soft Christmas thumbprint cookies, the right ingredients are essential for achieving that delightful texture and flavor that makes them a holiday favorite. Each ingredient plays a vital role, and understanding their purpose will not only enhance your cookies but also elevate your baking experience. Here’s a detailed look at the essential ingredients you’ll need to create the perfect soft Christmas thumbprint.
Essential Ingredients
- 1 cup (226 g) unsalted butter, softened to room temperature
- 1/3 cup (70 g) granulated sugar
- 1/3 cup (70 g) light brown sugar, tightly packed
- 1 large egg yolk
- 3/4 teaspoon vanilla extract
- 2 1/4 cup (280 g) all-purpose flour
- 2 teaspoons cornstarch
- 1/2 teaspoon salt
- 1/2 cup granulated sugar for rolling (optional)
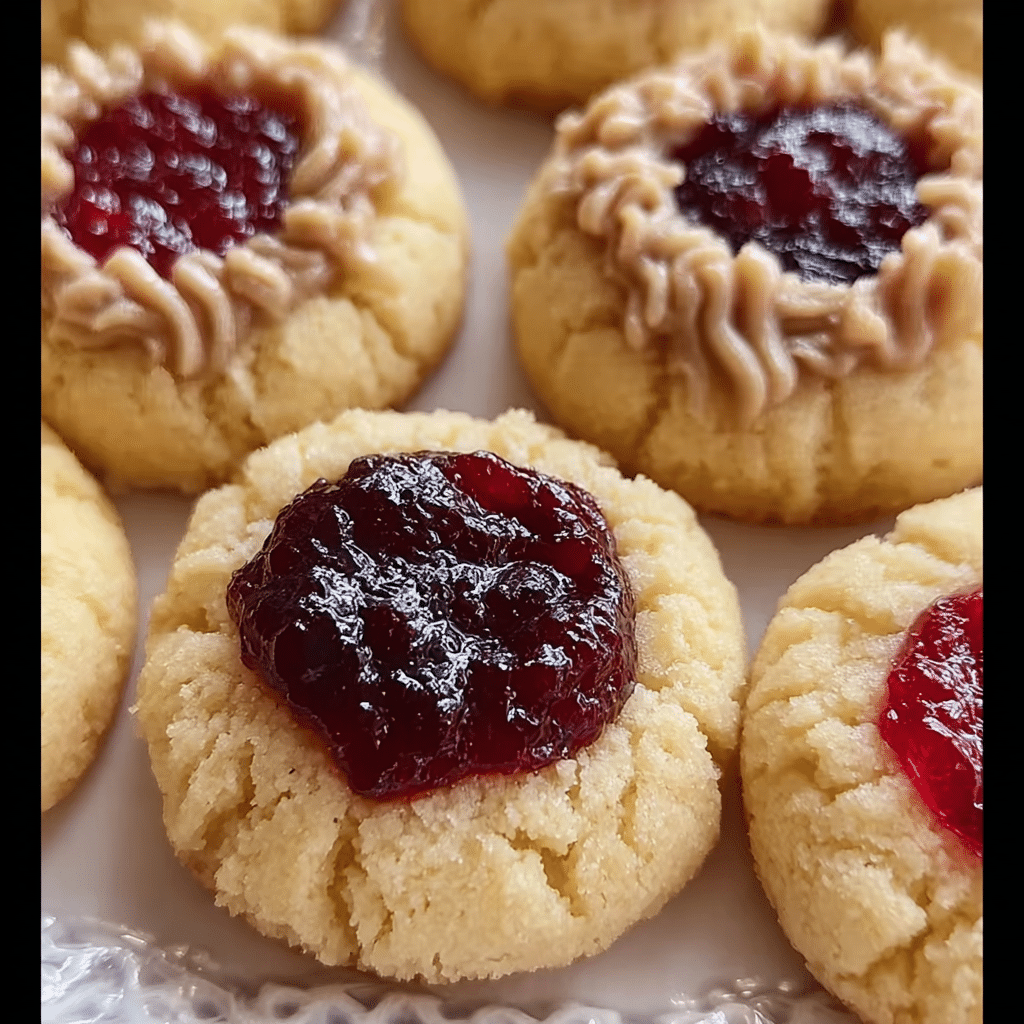
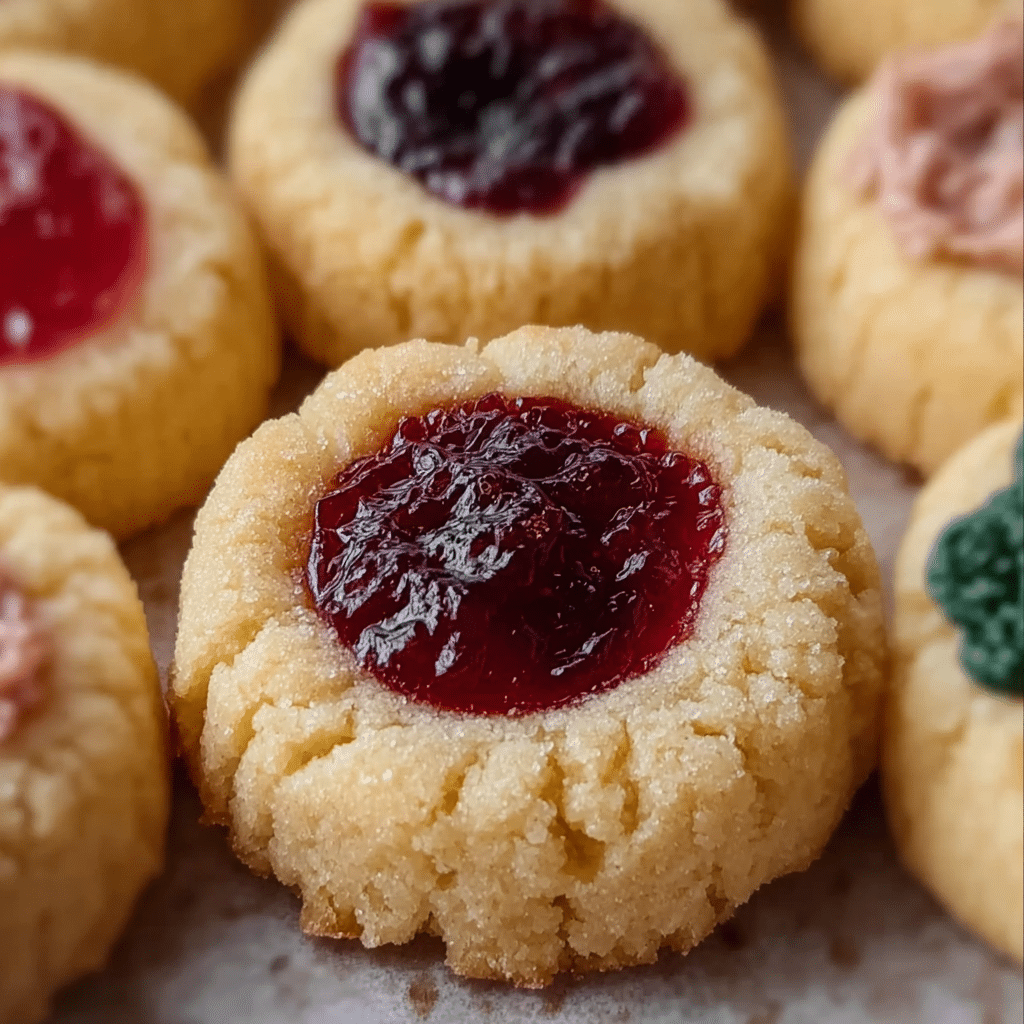
- 1/3 cup (105 g) jam or preserves of your choice (I used raspberry preserves for this recipe)
Soft Christmas Thumbprint Cookies
Ingredients
- 1 cup (226 g) unsalted butter softened to room temperature
- ⅓ cup (70 g) sugar
- ⅓ cup (70 g) light brown sugar, tightly packed
- 1 large egg yolk
- ¾ teaspoon vanilla extract
- 2 ¼ cup (280 g) all purpose flour
- 2 teaspooons cornstarch
- ½ teaspoon salt
- ½ cup sugar for rolling (optional)
- ⅓ cup (105 g) jam or preserves flavor of your choice — I used raspberry preserves for this recipe
Instructions
- Place butter in the bowl of a stand mixer (you may instead use a large bowl and an electric hand mixer) and beat until creamy.
- 1 cup (226 g) unsalted butter
- Scrape down the sides of the bowl, add sugars, and beat, gradually increasing mixer speed to medium-high until ingredients are well-combined (about 30-60 seconds).
- ⅓ cup (70 g) sugar,⅓ cup (70 g) light brown sugar, tightly packed
- Add egg yolk and vanilla extract and beat well.
- 1 large egg yolk,¾ teaspoon vanilla extract
- In a separate bowl, whisk together flour, cornstarch, and salt.
- 2 ¼ cup (280 g) all purpose flour,2 teaspooons cornstarch,½ teaspoon salt
- With mixer on low speed, gradually add flour mixture to wet ingredients until completely combined. This dough will seem very dry and crumbly, so be sure to pause occasionally to scrape the sides and bottom of the bowl. If it starts to strain your mixer you can use your hands to finish working the dough together.
- Scoop cookie dough into 1 Tablespoon-sized balls and roll very well (so that the dough is round and there are no cracks/seams in the cookie dough — this will help keep your thumbprints from cracking).
-
Roll in granulated sugar (if using) and place on a wax-paper covered plate or small cookie sheet. Use your thumb or the rounded back of a teaspoon to gently press an indent in the center of the cookie dough. Repeat until all of the dough has been used.½ cup sugar
- Transfer cookie dough to freezer and chill for 30 minutes.
-
Once dough is done chilling, preheat oven to 375F (190C) and place your jam in a small microwave-safe bowl. Heat briefly (about 5-10 seconds) or until jam is not hot but is no longer firm and is easy to stir.⅓ cup (105 g) jam or preserves
- Spoon jam into each thumbprint, filling each indent to the brim.
- Once oven is preheated, place cookies at least 2″ apart on a parchment paper-lined cookie sheet and bake on 375F (190C) for 11 minutes or until edges are just beginning to turn golden brown.
- Allow cookies to cool completely on baking sheet before enjoying.
Let’s break down the importance of each ingredient:
1. Unsalted Butter: Butter is the foundation of your cookie dough. Using unsalted butter allows you to control the salt content of your cookies, letting the sweet and buttery flavors shine. Make sure your butter is softened to room temperature; this ensures it creams well with the sugars, leading to a light and airy texture. Look for high-quality butter for the best flavor.
2. Granulated Sugar and Brown Sugar: The combination of white and brown sugar creates a perfect balance of sweetness and moisture. Granulated sugar contributes to the cookie’s crisp edges, while brown sugar, with its molasses content, adds depth and chewiness. Always pack your brown sugar tightly to ensure you’re using the correct amount.
3. Egg Yolk: Using only the yolk enhances the richness of the cookies. The fat in the yolk contributes to the soft texture that characterizes soft Christmas thumbprint cookies. It’s important to separate the yolk from the white carefully to avoid any contamination in your dough.
4. Vanilla Extract: This ingredient adds warmth and complexity to your cookies. Opt for pure vanilla extract over imitation vanilla for a more robust flavor. Vanilla is a hallmark of holiday baking, invoking memories of cozy kitchens and festive gatherings.
5. All-Purpose Flour: Flour provides structure to your cookies. The ratio of flour to other ingredients is critical; too much flour can lead to dry cookies, while too little can make them too soft. Always spoon and level your flour when measuring to avoid packing it down.
6. Cornstarch: This ingredient is essential for achieving that soft texture. Cornstarch tenderizes the dough, making the cookies melt in your mouth. It’s a secret ingredient that many bakers use to create soft, delicate cookies.
7. Salt: Adding salt enhances the flavors in your cookies. It balances the sweetness and brings out the natural flavors of the butter and sugars. Don’t skip this ingredient; it’s crucial for a well-rounded taste.
8. Sugar for Rolling: Rolling the cookies in sugar before baking adds a lovely sparkle and sweetness to the finished product. This is optional, but it does make for a beautiful presentation.
9. Jam or Preserves: The filling is what makes thumbprint cookies special. You can use any flavor you love; raspberry is a classic choice, but feel free to experiment with strawberry, apricot, or even chocolate spreads. The jam adds a burst of flavor and a lovely contrast to the soft cookie base.
Shopping Tips
When shopping for these ingredients, consider the quality and freshness of each. For butter, look for brands that use high-quality cream without additives. For sugars, organic options can enhance flavor and offer a more natural sweetness. Fresh vanilla extract is also a worthwhile investment, as it significantly elevates your baking.
Seasonal availability can affect your ingredient choices, especially for jams and preserves. During the holidays, many stores carry unique flavors that might not be available year-round. Don’t hesitate to explore local markets for homemade jams, which can bring an extraordinary touch to your cookies.
Substitutions and Alternatives
If you have dietary restrictions, there are several substitutions you can make without compromising too much on flavor or texture. For a dairy-free option, use vegan butter instead of regular butter. Coconut oil can also work; however, it may impart a slight coconut flavor.
For a gluten-free version, consider using a 1:1 gluten-free flour blend, which often contains xanthan gum to mimic the elasticity of wheat flour. Make sure to check the ingredient labels for any potential allergens.
For those avoiding sugar, you can experiment with natural sweeteners like maple syrup or agave nectar, though adjustments may be needed in the dry ingredient ratios. Always taste and adjust accordingly!
Finally, proper storage of your ingredients is key to maintaining their freshness. Keep flour in a cool, dry place, preferably in an airtight container. Butter can be kept in the refrigerator but bring it to room temperature before using. Jams and preserves should be stored in the fridge after opening to ensure longevity.
Now that we’ve covered the essential ingredients for soft Christmas thumbprint cookies, you’re well on your way to creating these delightful treats that will surely become a holiday staple in your home.
Detailed Step-by-Step soft christmas thumbprint Cooking Instructions
Now that we have gathered all the essential ingredients for our soft Christmas thumbprint cookies, it’s time to dive into the detailed step-by-step instructions for making these holiday delights. Following these instructions carefully will help you achieve the perfect cookies that are soft, chewy, and bursting with flavor.
Preparation Steps
- Preheat Your Oven: Start by preheating your oven to 350°F (175°C). This is a crucial step, as you want your cookies to bake evenly. Preheating ensures that the cookies start cooking as soon as they go in the oven.
- Gather Your Tools: Prepare your baking tools: you’ll need a mixing bowl, a hand mixer or stand mixer, measuring cups and spoons, a spatula, and a baking sheet lined with parchment paper. Having everything ready will streamline your baking process.
- Soften the Butter: If you haven’t already, make sure your unsalted butter is softened to room temperature. This is pivotal for easy mixing. If you forgot to take it out of the fridge, you can cut it into small cubes and let it sit for about 15 minutes to soften quicker.
- Mix the Sugars and Butter: In your mixing bowl, combine the softened butter, granulated sugar, and brown sugar. Using a hand mixer or stand mixer, beat them together on medium speed until the mixture is light and fluffy. This process incorporates air into the batter, creating a tender cookie.
- Add the Egg Yolk and Vanilla: Once the butter and sugars are well combined, add the large egg yolk and vanilla extract. Mix until everything is fully incorporated. The mixture should appear smooth and creamy.
- Sift and Combine Dry Ingredients: In a separate bowl, sift together the all-purpose flour, cornstarch, and salt. Sifting helps to aerate the flour and removes any lumps. Gradually add the dry ingredients to your wet mixture, mixing on low speed until just combined. Be careful not to over-mix; this can lead to tough cookies.
- Chill the Dough: Once your dough is mixed, cover the bowl with plastic wrap and refrigerate for at least 30 minutes. Chilling the dough helps to firm it up, making it easier to handle and shape into thumbprints.
Cooking Process
- Prepare for Baking: After chilling, take the dough out of the refrigerator. If you’re rolling your cookies in sugar, pour the 1/2 cup of granulated sugar into a shallow dish for easy coating.
- Form the Cookie Balls: Using a tablespoon or cookie scoop, scoop out portions of dough and roll them into balls about 1 inch in diameter. Roll each ball in the granulated sugar (if using) until fully coated. This step adds sweetness and a beautiful appearance to your cookies.
- Make the Thumbprint: Place the cookie balls on the prepared baking sheet, spacing them about 2 inches apart. Using your thumb or the back of a measuring spoon, gently press down in the center of each ball to create a well for the jam.
- Add the Jam: Fill each thumbprint with about 1/2 teaspoon of your chosen jam or preserves. Be careful not to overfill, as the jam can bubble over while baking.
- Bake the Cookies: Place the baking sheet in the preheated oven and bake for about 12-15 minutes, or until the edges are lightly golden. Keep an eye on them; you want them to be soft and slightly set. The jam will bubble, and the cookies should look slightly puffy.
- Cool the Cookies: Once baked, remove the cookies from the oven and let them cool on the baking sheet for about 5 minutes. This allows them to set before transferring them to a wire rack. Use a spatula to carefully move the cookies without damaging the thumbprint.
Final Assembly
- Let Them Cool Completely: Allow the cookies to cool completely on a wire rack. This step is crucial for achieving the right texture. As they cool, they will firm up slightly but remain soft.
- Store the Cookies: Once cooled, store your soft Christmas thumbprint cookies in an airtight container at room temperature. They can last up to a week, but I doubt they’ll stick around that long!
- Enjoy the Process: Baking is not just about the end product; it’s about enjoying the process. As you bake these cookies, take a moment to savor the aromas filling your kitchen and the memories being created. Baking with loved ones can make the experience even more special.
- Share and Celebrate: These soft Christmas thumbprint cookies are perfect for sharing with family and friends during the holiday season. They make great gifts when packaged beautifully and are sure to bring smiles to everyone’s faces.
As you follow this detailed guide, remember that baking is an art, and like any art form, it takes practice to perfect. Don’t be discouraged if your first batch doesn’t turn out exactly as you envisioned. With each attempt, you’ll learn and improve, making your soft Christmas thumbprint cookies an even sweeter success!
Professional Tips and Techniques for soft christmas thumbprint
When it comes to baking, especially during the festive season, creating the perfect soft Christmas thumbprint cookies can be both a joyful and challenging experience. These delightful treats are not only delicious but also a canvas for creativity, making them a favorite among home bakers. Here we will delve into professional tips and techniques that can elevate your cookie-making game, troubleshoot common problems, and provide practical advice for presenting your sweet creations.
Professional Techniques
To achieve the best results with your soft Christmas thumbprint cookies, employing professional techniques is crucial. First, let’s start with the dough. The key to a soft cookie lies in the balance of ingredients. Ensure that your butter is at room temperature—this means it should be soft enough to make an indentation with your finger but not melted. Creaming the butter and sugar together until light and fluffy is an essential step. This process incorporates air into the mixture, contributing to the cookie’s softness.
Another important aspect is the choice of flour. For a tender texture, consider using cake flour instead of all-purpose flour. The lower protein content in cake flour results in a softer cookie. Additionally, avoid overmixing the dough once you add the flour; this can lead to tough cookies, which is the opposite of what we want for our soft Christmas thumbprint cookies.
When it comes to the thumbprint itself, it’s best to create a well-defined indentation before baking. Using the back of a measuring spoon or your thumb, gently press down into the center of each cookie, but be careful not to go all the way through. This indentation will hold the filling beautifully, creating that signature thumbprint effect.
Troubleshooting Guide
Even the most experienced bakers encounter issues from time to time. Here’s a troubleshooting guide for common problems you may face while making your soft Christmas thumbprint cookies:
- Cookies spreading too much: This can happen if your dough is too warm. Ensure that your dough is chilled for at least 30 minutes before baking. If they still spread, consider adding a bit more flour next time.
- Cookies too hard: If your cookies are coming out harder than expected, you might have overbaked them. Keep a close eye on your cookies in the oven, and take them out when the edges are just set, as they will continue to firm up while cooling.
- Uneven baking: For even baking, make sure to rotate your baking sheets halfway through the baking time. This is especially important in ovens that have hot spots.
Presentation Tips
Once your soft Christmas thumbprint cookies are baked to perfection, it’s time to present them beautifully. First, consider how you will fill the thumbprints. Popular fillings include raspberry jam, chocolate ganache, or even a rich caramel sauce. For a festive touch, you can sprinkle some crushed candy canes or chopped nuts on top of the filling before it sets.
For an elegant presentation, arrange your cookies on a decorative platter. You might want to dust them lightly with powdered sugar for a snowy effect. Adding some greenery, like sprigs of rosemary or holly, can enhance the festive feel. If you’re packaging them as gifts, consider using clear cellophane bags tied with colorful ribbons—this adds a personal touch that friends and family will appreciate.
As for beverage pairings, consider serving your soft Christmas thumbprint cookies with a warm cup of spiced chai or a rich hot chocolate. For a more adult pairing, a glass of dessert wine or a creamy eggnog can complement the sweet flavors of your cookies beautifully.
Finally, if you plan to make these cookies ahead of time, they freeze wonderfully. Just ensure that they are completely cooled before placing them in an airtight container. You can also freeze the dough itself, rolling it into balls and freezing them before baking. When you’re ready to bake, simply add a couple of extra minutes to the baking time. With these tips, your soft Christmas thumbprint cookies are sure to impress during the holiday season!
Creative Variations and Adaptations of soft christmas thumbprint
While the classic soft Christmas thumbprint cookie is delicious on its own, there are countless creative variations and adaptations to explore. The beauty of these cookies lies not only in their taste but also in their versatility. Let’s dive into some exciting seasonal twists, dietary modifications, and innovative cooking methods that can elevate your baking experience.
Seasonal Variations
One of the most delightful aspects of baking during the holidays is the ability to incorporate seasonal ingredients into your recipes. For instance, consider swapping out the traditional jam filling for something a bit more festive. Pumpkin spice filling made with pureed pumpkin, cinnamon, and nutmeg can add a warm, autumnal flavor to your soft Christmas thumbprint cookies. Alternatively, cranberry-orange filling is a refreshing twist that reflects the bright flavors of the season.
Another fun idea is to incorporate holiday flavors directly into the cookie dough. Adding spices like ginger, nutmeg, or allspice can create a delightful spiced cookie that pairs perfectly with your favorite fillings. You could also infuse the dough with a splash of peppermint extract for a minty twist, making your cookies perfect for Christmas gatherings.
Dietary Adaptations
As more people seek dietary modifications, it’s essential to have options that cater to different needs without sacrificing flavor. For a gluten-free version of the soft Christmas thumbprint cookies, simply substitute traditional flour with a gluten-free blend. Many blends are designed to mimic the texture of all-purpose flour, allowing your cookies to remain soft and chewy.
If you’re looking for a vegan alternative, you can replace the butter with coconut oil or a vegan butter substitute and use flaxseed meal mixed with water as an egg replacer. This not only maintains the cookie’s moisture but also adds a subtle nutty flavor. Sweeteners like maple syrup or agave nectar can be used to keep your cookies deliciously sweet while ensuring they are plant-based.
Creative Twists
To truly make your soft Christmas thumbprint cookies stand out, consider adding a creative twist. One idea is to use different types of chocolate for the filling—dark chocolate, white chocolate, or even a mix. You could also experiment with flavor combinations by pairing unexpected ingredients, such as almond filling with a raspberry swirl or even a savory twist with cheese and herbs for a unique holiday appetizer.
For those who enjoy a bit of spice, think about adding chili powder or cayenne pepper to the dough or filling for a sweet and spicy kick. This balance of flavors can create a delightful surprise for your guests!
As for cooking methods, while baking is traditional, you can also consider using a stovetop method for a chewy texture. By cooking the cookies on a griddle, you’ll achieve a completely different texture while still enjoying that classic thumbprint shape. You could even try creating thumbprint cookies in a slow cooker, allowing them to bake gently over several hours.
Lastly, if you find yourself with leftover cookies, don’t fret! They can be transformed into a delightful crust for cheesecakes or crumbled over ice cream for a sweet topping. The possibilities are endless when it comes to reinventing your soft Christmas thumbprint cookies.
In conclusion, the world of soft Christmas thumbprint cookies is rich with creativity, seasonal flavors, and dietary adaptations. Whether you stick to the classic recipe or venture into new territories, these cookies will surely bring joy to your holiday celebrations!
Storage, Reheating, and Meal Prep for soft christmas thumbprint
When it comes to baking, one of the most common dilemmas is how to properly store your delectable creations. For those of us who adore soft Christmas thumbprint cookies, understanding the best ways to store, reheat, and even meal prep these sweet delights is essential. Whether you’re baking for a holiday gathering or just indulging in a personal treat, having a plan for storage can ensure your cookies retain their texture and flavor long after they come out of the oven.
Short-term Storage
After you’ve baked your soft Christmas thumbprint cookies, it’s important to let them cool completely on a wire rack. This cooling process allows steam to escape, preventing sogginess. Once cooled, you can store your cookies in an airtight container. I recommend using a container made of glass or high-quality plastic, as these materials do a better job at keeping moisture out compared to cardboard. If you’re planning to eat your cookies within a week, you can simply place a sheet of parchment paper between layers of cookies to prevent them from sticking together.
For short-term storage in the refrigerator, you can keep your cookies in an airtight container for about 5 to 7 days. Although the fridge can extend the cookie’s shelf life, be cautious, as it can also dry them out. To combat this, you can place a slice of bread in the container; the moisture from the bread will help maintain your cookies’ softness. This little trick has saved many batches of cookies from becoming stale in my kitchen!
Freezing and Long-term Storage
If you want to extend the lifespan of your soft Christmas thumbprint cookies even further, freezing is the way to go. I often bake a double batch of my favorite cookies and freeze half for later enjoyment. To freeze your cookies, wait until they are completely cooled and then place them in a single layer on a baking sheet. Pop the baking sheet in the freezer for about 2 hours until the cookies are firm. This method prevents them from sticking together and allows for easy portioning later.
Once the cookies are frozen, transfer them to a freezer-safe bag or container. Be sure to label the container with the date to keep track of how long they’ve been stored. Properly frozen, your soft Christmas thumbprint cookies can last for up to 3 months. When you’re ready to enjoy them, simply remove the desired number of cookies from the freezer and let them sit at room temperature for about 30 minutes. If you prefer a warm cookie, you can pop them in the microwave for a few seconds.
Reheating Best Practices
To maintain the quality of your soft Christmas thumbprint cookies when reheating, avoid using a microwave unless you’re in a rush. The microwave can make cookies rubbery if overheated. Instead, preheat your oven to 350°F (175°C) and place the cookies on a baking sheet lined with parchment paper. Heat them for about 5 to 7 minutes. This method not only warms the cookies but also helps restore their original soft texture, making them taste almost as good as fresh out of the oven.
For those who prefer using the microwave, heat your cookies in short intervals of 10-15 seconds. Keep an eye on them to prevent overheating. A fantastic tip is to place a cup of water in the microwave alongside the cookies; the steam helps to keep them soft and moist.
Meal Prep and Batch Cooking Strategies
Meal prep is all the rage these days, and it can definitely apply to your baking endeavors! If you’re preparing for the holidays or simply want to have a sweet treat on hand, consider baking your soft Christmas thumbprint cookies ahead of time. You can also prepare the dough in advance. This is one of my favorite strategies, as it allows me to whip up fresh cookies at a moment’s notice. Simply prepare the cookie dough, shape it into balls, and freeze them as mentioned earlier. When you’re ready to bake, you can take the frozen dough balls straight from the freezer, make your thumbprint, fill them with jam, and bake as directed, adding a couple of extra minutes to the baking time.
Food safety is crucial when it comes to storing baked goods. Always ensure your cookies are completely cool before placing them in a container to prevent condensation, which can lead to mold. If you notice any signs of spoilage, such as an unusual odor or appearance, it’s best to err on the side of caution and dispose of the cookies. Generally, if stored properly, your soft Christmas thumbprint cookies will remain delicious and safe to eat within the outlined timeframes.
In conclusion, mastering the art of storage for your soft Christmas thumbprint cookies not only enhances their shelf life but also preserves their delightful texture and flavor. With proper techniques, you can enjoy these cookies long after the holiday season has passed!
Nutritional Benefits and Health Information
As we dive into the world of baking and the sweet joy of crafting soft Christmas thumbprint cookies, it’s essential to also consider their nutritional value. While these cookies are undeniably a treat, understanding their nutritional profile can help you enjoy them in a balanced way. Let’s break down the components of these delightful cookies and see how they fit into a healthy lifestyle.
Nutritional Profile
A typical soft Christmas thumbprint cookie contains a variety of ingredients, each contributing to its flavor and texture. The base of the cookie usually includes flour, sugar, butter, and eggs, along with a filling, often made from fruit preserves. Here’s a rough estimate of the nutritional breakdown for one cookie:
- Calories: 120-150
- Fat: 6-8g
- Carbohydrates: 18-22g
- Protein: 1-2g
- Sugar: 8-10g
This profile can vary significantly based on the specific ingredients used and the size of the cookies, but it gives a general idea of what to expect. While these cookies may not win any awards for being health food, they certainly can be enjoyed in moderation as part of a balanced diet.
Health Benefits
Let’s not forget that some of the ingredients in soft Christmas thumbprint cookies can offer health benefits! For instance, if you choose to use whole grain flour instead of all-purpose flour, you’ll increase the fiber content, which can aid digestion and promote feelings of fullness. Additionally, using natural fruit preserves as a filling can add some vitamins and antioxidants, particularly if you opt for varieties that are low in added sugars. The fruit can provide a slight nutritional boost, offering vitamins like vitamin C and certain minerals depending on the type of fruit used.
Moreover, if you’re making these cookies at home, you have complete control over the ingredients. You can substitute healthier alternatives, like using coconut oil instead of butter, or incorporating nut flours for added protein and healthy fats. These small changes can help transform your soft Christmas thumbprint cookies into a more nutritious treat.
Dietary Considerations
For those with dietary restrictions, making soft Christmas thumbprint cookies can be easily adjusted to fit various needs. For gluten-free eaters, using gluten-free flour blends can yield delightful results. If you’re looking to reduce sugar intake, many recipes can be modified to include natural sugars or sugar substitutes. Just be sure to follow the conversion guidelines for the best results.
Allergens are also something to consider. Traditional recipes may contain common allergens like gluten, dairy, and eggs. However, with the rise of alternative ingredients, you can easily find substitutes. For example, flaxseed meal can replace eggs in vegan recipes, and nut milks can stand in for dairy. This way, everyone can enjoy the enchanting taste of soft Christmas thumbprint cookies during the holiday season.
In terms of fitting these cookies into various diet plans, moderation is key. For those following a low-carb or ketogenic diet, it may be best to enjoy these cookies sparingly or in small portions. However, on a holiday occasion, they can certainly be a delightful indulgence that contributes to the joy of the season.
In summary, while soft Christmas thumbprint cookies are certainly a treat, understanding their nutritional value and how to make them fit into a healthy lifestyle can allow you to enjoy them guilt-free. With thoughtful ingredient choices, you can create a version of these classic cookies that not only satisfies your sweet tooth but also aligns with your health goals.
Frequently Asked Questions About Soft Christmas Thumbprint
Soft Christmas thumbprint cookies recipe
To make soft Christmas thumbprint cookies, you’ll need basic ingredients such as flour, butter, sugar, and eggs. Start by creaming together the butter and sugar until light and fluffy, then mix in the egg and vanilla extract. Gradually add the flour and blend until a soft dough forms. After rolling the dough into balls, use your thumb to create an indention in the center of each cookie before baking. For added flavor, consider incorporating almond extract or spices like nutmeg and cinnamon to the dough.
Soft Christmas thumbprint cookies with icing
For soft Christmas thumbprint cookies with icing, start with your basic thumbprint cookie recipe. Once the cookies are baked and cooled, you can prepare a simple icing by mixing powdered sugar with milk or water until smooth. To elevate the festive feel, add food coloring or vanilla extract to the icing. Drizzle or pipe the icing over the thumbprints, allowing it to set before serving. For a fun twist, consider using flavored icing like peppermint or orange to complement the holiday spirit.
Old fashioned thumbprint cookies
Old fashioned thumbprint cookies typically feature a rich, buttery dough that is both soft and crumbly. The classic recipe often includes ingredients like all-purpose flour, butter, sugar, and a hint of vanilla. To achieve that nostalgic texture, be sure to cream the butter and sugar thoroughly for a light and airy cookie. Fill the thumbprint with traditional jams such as raspberry or apricot for an authentic experience. For an extra burst of flavor, consider adding chopped nuts to the dough or as a topping on the jam.
Easy soft Christmas thumbprint cookies
To create easy soft Christmas thumbprint cookies, focus on using a simple dough that requires minimal ingredients. A basic combination of butter, sugar, flour, and an egg will yield great results without complicating the process. Roll the dough into balls, create thumb impressions, and fill them with your choice of jam or chocolate. For a quick baking method, you can chill the dough for just 30 minutes instead of longer, allowing for easier handling. Additionally, using store-bought jam can save time while still delivering delicious flavors.
Best soft Christmas thumbprint cookies
The best soft Christmas thumbprint cookies are characterized by their tender texture and rich flavor, achieved through the right balance of ingredients. For a superior dough, use high-quality butter and avoid overmixing to prevent tough cookies. Experiment with different fillings like lemon curd or Nutella to find your favorite combination. Additionally, consider chilling the dough before baking to help maintain the shape and enhance the flavors. A sprinkle of sea salt on top of the jam-filled cookies can elevate the taste, creating a delightful contrast.
3 ingredient thumbprint cookies
Making 3 ingredient thumbprint cookies is a quick and convenient option, requiring only flour, butter, and sugar. Mix equal parts softened butter and sugar until creamy, then gradually add in flour until a dough forms. Roll the mixture into small balls and press your thumb in the center to create a thumbprint. Fill each indention with your favorite jam or chocolate, then bake until lightly golden. This minimalist approach not only saves time but also allows you to enjoy a delicious treat with limited ingredients.
Types of thumbprint cookies
There are various types of thumbprint cookies, each offering unique flavors and textures. Traditional versions often feature fruit preserves such as raspberry or apricot, while others may utilize chocolate ganache or peanut butter filling. Some bakers incorporate spices or citrus zest into the dough for added dimension. Variations also exist in the dough itself, with options for nut-based or gluten-free recipes. Experimenting with different nuts or toppings, like crushed almonds or coconut flakes, can create delightful twists on the classic thumbprint cookie.
Soft thumbprint cookies
Soft thumbprint cookies are prized for their tender and chewy texture, which can be achieved by properly creaming butter and sugar. Using cake flour in place of all-purpose flour can also contribute to a softer bite. Be sure not to overbake them; they should be lightly golden around the edges while remaining soft in the center. To maintain their softness, store the cookies in an airtight container with a slice of bread, which helps keep them moist. Adding a touch of sour cream or cream cheese to the dough can enhance the softness even further.


