Thanksgiving cheese ball is not just a dish; it’s an experience wrapped in nostalgia, flavors, and the warmth of family gatherings. I still remember the first time I encountered this delightful appetizer. It was during a family Thanksgiving dinner at my aunt’s house, where the aroma of roasted turkey filled the air. Among the traditional dishes, there was this intriguing cheese ball, adorned with herbs and nuts, sitting proudly on the table. I was hesitant at first, but once I took my first bite, it was love at first taste. The creamy texture combined with the crunch of nuts was a revelation, making me realize that this dish was more than just a simple cheese spread; it was a canvas for flavors and creativity.
As a child, I was always drawn to the colorful spread of dishes that my family presented each Thanksgiving. However, this cheese ball stood out not just for its aesthetics but for its ability to bring people together. Everyone around the table was eager to share their variations of the dish, each person putting their twist on it, whether that was adding spices, incorporating different types of cheese, or changing the nuts used for coating. It was at that moment I understood how food could be a storyteller, revealing family traditions and personal histories in every bite.
The Story Behind This Recipe
The thanksgiving cheese ball has roots that are both diverse and rich. Cheese has been a part of human diets for thousands of years, with various cultures adopting and adapting cheese-making techniques. The cheese ball, as we know it, is believed to have originated in the United States during the mid-20th century, becoming popular as an appetizer for cocktail parties and holiday gatherings. It’s fascinating to think about how this dish has evolved from a simple cheese spread to a centerpiece on holiday tables across the nation.
This recipe is special because it encapsulates the spirit of Thanksgiving—a time for gratitude, sharing, and togetherness. Unlike many other dishes that require hours of preparation, the Thanksgiving cheese ball can be whipped up in no time, making it perfect for busy families navigating the chaos of the holiday season. With just a handful of ingredients, you can create a rich and flavorful appetizer that will wow your guests without compromising your time spent with loved ones.
Why You’ll Love This Dish
Another reason why the thanksgiving cheese ball is a must-have for your Thanksgiving table is its seasonal relevance. The fall harvest offers a wonderful variety of flavors that can be integrated into the cheese ball, such as cranberries, pecans, and herbs like rosemary and thyme. These ingredients not only add depth to the dish but also celebrate the bountiful season we are in. Picture a beautifully crafted cheese ball that reflects the colors and tastes of autumn, inviting your guests to dive in and savor the essence of the season.
Emotionally, this dish has a profound connection to me. It symbolizes the coming together of family and friends, laughter and storytelling, and the creation of new memories while honoring old ones. As I prepare the cheese ball each year, I reminisce about those Thanksgiving dinners with my family, and I hope to pass on that sense of togetherness to my own children. I cherish the moments when we gather around the table, sharing stories, and enjoying the fruits of our labor. It’s not just about the food but the love and effort we put into creating these meals.
In this guide, you will learn everything you need to know about making the perfect thanksgiving cheese ball. From the original recipe to creative variations, serving tips, and even how to make it a centerpiece at your Thanksgiving celebration, I promise you’ll come away with the knowledge and confidence to impress your guests. Let’s dive into the wonderful world of cheese balls and discover how this simple dish can transform your holiday experience.
The Rich History and Cultural Significance of thanksgiving cheese ball
The thanksgiving cheese ball carries with it a history that reflects the evolution of culinary traditions in America. Its origins are somewhat murky, but it is believed to have gained traction in the mid-20th century when home entertaining became a popular pastime. As people began to explore more sophisticated flavors and presentation styles, the cheese ball emerged as an elegant yet simple option for gatherings. The combination of cream cheese with various flavorings quickly made it a favorite among hosts looking to impress without extensive culinary skills.
Origins and History
thanksgiving cheese ball became synonymous with holiday entertaining, a way for families to showcase their culinary creativity while staying true to the essence of comfort food.
Cultural Significance
thanksgiving cheese ball has become more than just an appetizer; it is a symbol of hospitality and celebration. During the Thanksgiving season, when families gather to express gratitude and share meals, the cheese ball serves as a conversation starter, inviting guests to mingle and share their own stories and recipes. It’s often the first dish to disappear from the table, a testament to its deliciousness and the way it brings people together.
Nutritional Benefits
thanksgiving cheese ball can be a surprisingly healthy option when made with care. Cheese is an excellent source of protein and calcium, and when paired with nuts, it adds healthy fats and fiber to the mix. You can also enhance the nutritional value by incorporating herbs and spices, which not only add flavor but also provide antioxidants and other health benefits. By choosing lower-fat cheeses and adding fresh vegetables or whole grain crackers for serving, you can create a balanced appetizer that satisfies without compromising health. thanksgiving cheese ball is a dish steeped in history and cultural significance, evolving over time to remain a beloved staple on holiday tables. Its adaptability allows for endless variations, making it a versatile choice that can cater to diverse palates while nourishing the spirit of togetherness that defines the Thanksgiving season. As we continue to celebrate this dish, we also honor the connections it fosters and the memories it helps create, making every bite a little piece of home.
Essential Ingredients for Perfect thanksgiving cheese ball
Essential Ingredients for Perfect Thanksgiving Cheese Ball
Creating the ultimate thanksgiving cheese ball begins with the right ingredients. Each component contributes not only to the flavor but also to the texture and aesthetic appeal of this festive appetizer. Below, I’ll break down the essential ingredients, their roles, how to choose the best quality, and tips for sourcing them, ensuring your Thanksgiving cheese ball is a crowd-pleaser.
Essential Ingredients
- 8 oz cream cheese, softened
- 1 cup shredded sharp cheddar cheese
- 1/2 cup crumbled blue cheese or feta
- 1/4 cup finely chopped green onions
- 1/4 cup chopped nuts (walnuts or pecans)
- 1 tablespoon Worcestershire sauce
- 1 teaspoon garlic powder
- 1 teaspoon onion powder
- 1 cup assorted crackers (for serving)
- Fresh herbs (like parsley or chives) for garnish
Each of these ingredients plays a crucial role in the overall flavor profile of your thanksgiving cheese ball. The cream cheese serves as the base, providing a creamy texture that binds the other ingredients together. Sharp cheddar adds a punch of flavor, while blue cheese or feta introduces a tangy element. Green onions offer a mild onion flavor and a fresh crunch, while the nuts contribute a delightful crunch and richness. The Worcestershire sauce, garlic powder, and onion powder enhance the savory aspects of the cheese ball, making it truly irresistible.
Print
Thanksgiving Cheese Ball Recipe – Complete Guide
Ingredients
- 16 ounces cream cheese , softened
- 2 cups freshly grated sharp cheddar cheese (avoid pre-shredded cheese)
- 2 green onions , chopped
- 1 teaspoon Worcestershire sauce
- 1 teaspoon hot pepper sauce
- 1 teaspoon dried parsley flakes
- 1/2 teaspoon garlic powder
- 1/2 teaspoon Dried oregano
- dash freshly ground black pepper
- 2/3 cup pecans , finely chopped
Instructions
-
Place cream cheese in a mixing bowl then mix until smooth. Add cheese, green onion, Worcestershire sauce, hot sauce, parsley, garlic powder, oregano. and pepper then mix well to combine.
-
Use a rubber spatula to scrape the sides of the bowl and gather the mixture into one lump. Lightly grease your hands and form the mixture into a round ball.
-
Place the pecans on a plate. Hold the cheese ball in one hand and use the other hand to scoop the pecans onto the outside of the ball, pressing them in gently and turning the ball to coat all sides.
-
Cover the cheeseball in cling wrap and refrigerate for about 1 hour to allow it to firm up. Take it out of the refrigerator about 20 minutes before serving to allow it to soften just slightly. Serve with crackers, pretzels, vegetables or anything else you’d love to dip in cheese!
Shopping Tips
When shopping for your ingredients, quality should be your top priority. Here are some tips:
- Cream Cheese: Look for full-fat cream cheese for a richer flavor. Check the expiration date to ensure freshness.
- Cheddar Cheese: Opt for a block of cheese that you can shred yourself instead of pre-shredded options. Pre-shredded cheese often contains anti-caking agents that can affect the texture of your cheese ball.
- Blue Cheese or Feta: Choose high-quality cheese from a reputable brand. Crumbly, rich, and fresh cheese will elevate your dish. Smell it first; it should have a pleasant aroma without any musty scent.
- Green Onions: Select firm green onions with vibrant green tops. They should not be wilted or yellowing.
- Nuts: Look for raw or lightly toasted nuts without added salt or flavoring to keep the focus on the cheese ball.
In terms of seasonal availability, many of the ingredients are staples and can be found year-round. However, purchasing nuts during the fall can often yield better prices due to the holiday season. Farmers’ markets can be excellent sources for fresh herbs and green onions, enhancing both the flavor and freshness of your thanksgiving cheese ball.
Substitutions and Alternatives
Not everyone has the same dietary preferences or restrictions, so here are some substitutions:
- Vegan Cheese: For a dairy-free version, use vegan cream cheese and shredded cheese alternatives. There are many options available that melt well.
- Gluten-Free Crackers: If you need gluten-free options, look for certified gluten-free crackers that offer similar textures and flavors.
- Herb Substitutes: If fresh herbs are unavailable, dried herbs can be used, though you’ll want to use them sparingly since dried herbs are more concentrated.
For storage, keep your ingredients refrigerated until you’re ready to prepare your thanksgiving cheese ball. Once assembled, the cheese ball can be wrapped tightly in plastic wrap and stored in the refrigerator for up to a week. This makes it a great make-ahead option for your Thanksgiving gathering.
Lastly, let’s talk about cost-saving tips. Buying in bulk can significantly reduce the cost of nuts and cheese. Alternatively, consider making a smaller cheese ball or using fewer expensive ingredients while still maintaining a delicious flavor. Organic versus conventional ingredients is another consideration; organic cheeses and nuts may come at a premium but can provide peace of mind regarding pesticide residues and animal welfare. Ultimately, choose what aligns best with your budget and values.
Detailed Step-by-Step thanksgiving cheese ball Cooking Instructions
Now that you have gathered your ingredients, it’s time to roll up your sleeves and create the perfect thanksgiving cheese ball. This step-by-step guide will ensure that your cheese ball is not only delicious but also visually appealing and ready to impress your guests.
Preparation Steps
- Gather Your Equipment: Before you start, ensure you have all the necessary tools. You’ll need a mixing bowl, a spatula, measuring cups, a cutting board, and a food processor (if you prefer to finely chop your ingredients).
- Soften the Cream Cheese: Take the cream cheese out of the refrigerator at least 30 minutes before you start. It needs to be soft enough to mix easily with the other ingredients. You can speed up this process by cutting it into smaller chunks.
- Chop Ingredients: Finely chop the green onions and any nuts you are using. If you’re using blue cheese, crumble it into small pieces. This ensures even distribution throughout the cheese ball.
- Measure Ingredients: Carefully measure out your shredded cheddar, Worcestershire sauce, garlic powder, and onion powder. Having everything pre-measured (a technique known as mise en place) will make the mixing process smoother.
Cooking Process
While you might think that making a cheese ball is as simple as mixing everything together, there are techniques that elevate it from good to great.
- Mix the Base: In a large mixing bowl, combine the softened cream cheese, shredded cheddar, and crumbled blue cheese. Use a spatula to mix them together until smooth and creamy. The goal is to have a uniform texture, so keep mixing until you don’t see any lumps of cream cheese.
- Add Flavorings: Next, fold in the chopped green onions, nuts, Worcestershire sauce, garlic powder, and onion powder. Use a gentle folding motion to maintain the airy texture of the cheese ball. Be careful not to over-mix.
- Taste Test: This is the fun part! Take a small spoonful of the mixture and taste it. This is your chance to adjust the seasoning if needed. If you want it spicier, add a dash of hot sauce or cayenne pepper.
- Form the Cheese Ball: Once you’re satisfied with the flavor, use your hands to shape the mixture into a ball. It should be compact but not too dense. If you have trouble shaping it, refrigerate it for 10-15 minutes to firm it up.
Final Assembly
Now that your cheese ball is formed, it’s time to make it visually appealing.
- Coat the Cheese Ball: Pour the chopped nuts onto a plate and roll the cheese ball in them until it’s fully coated. This not only adds texture but also gives it a beautiful appearance.
- Chill Before Serving: Wrap the cheese ball in plastic wrap and refrigerate it for at least 1 hour before serving. This allows the flavors to meld together and the cheese ball to firm up.
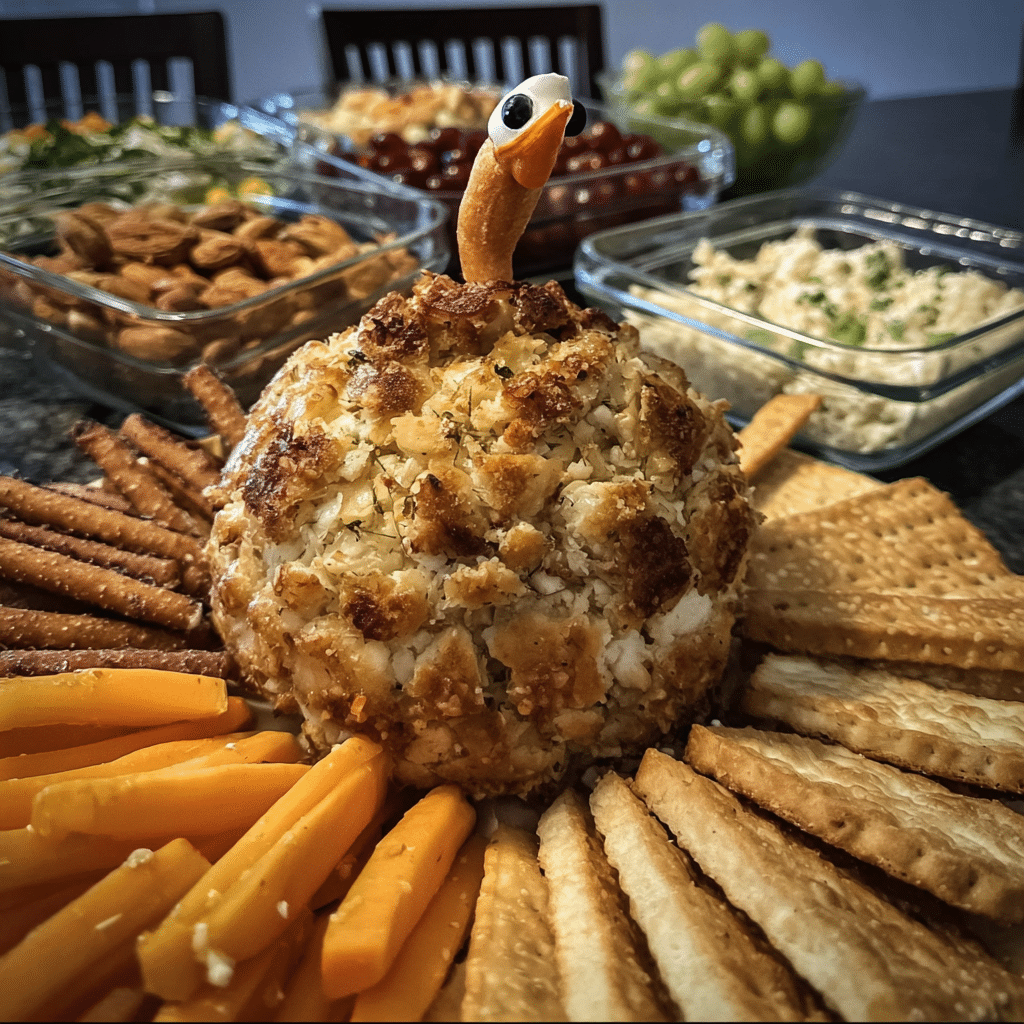
- Serve with Crackers: When ready to serve, place your cheese ball on a beautiful serving platter. Surround it with an assortment of crackers, fruits, or vegetables for dipping. Fresh herbs can be used for garnish, adding a pop of color.
- Enjoy! As you present your thanksgiving cheese ball to your guests, watch their faces light up with joy. The combination of creamy cheese, crunchy nuts, and fresh flavors is sure to be a hit at your Thanksgiving gathering!
In terms of timing, the entire process should take around 30 minutes, but remember the chilling time. Make sure to plan accordingly, especially if you’re making multiple dishes for Thanksgiving. Also, be mindful of food safety; keep your cheese ball refrigerated until you’re ready to serve it.
In conclusion, making a thanksgiving cheese ball is not only an enjoyable cooking experience but also a wonderful way to bring people together. By following these detailed instructions, you’ll create a delicious appetizer that will be the talk of your Thanksgiving feast!
Professional Tips and Techniques for thanksgiving cheese ball
When it comes to creating the perfect Thanksgiving cheese ball, there’s a world of culinary knowledge to explore. This delightful appetizer isn’t just a blend of cheeses; it’s an embodiment of creativity, flavor balance, and presentation. As someone who has spent countless Thanksgivings experimenting with cheese balls, I am thrilled to share some professional tips and techniques that will elevate your Thanksgiving cheese ball to a whole new level.
Professional Techniques
Crafting a Thanksgiving cheese ball is an art that involves understanding the textures and flavors of various cheeses. Start with a base cheese, such as cream cheese or goat cheese, which provides a creamy texture that binds well with other ingredients. When mixing in additional cheeses, like cheddar, blue cheese, or mozzarella, consider their moisture content and flavor profiles. A well-balanced cheese ball typically includes a combination of creamy, tangy, and sharp cheeses.
One of the insider secrets I’ve learned over the years is to let your cheese come to room temperature before mixing. This not only makes it easier to blend but also enhances the flavors. If you’re feeling adventurous, try adding a splash of Worcestershire sauce or some finely chopped herbs to infuse your cheese ball with additional depth. For those with a love for textures, incorporating nuts or crispy bacon bits can create a delightful crunch that contrasts with the creaminess of the cheese.
Troubleshooting Guide
Every chef encounters challenges, and when making a Thanksgiving cheese ball, it’s no different. One common issue is a cheese ball that’s too soft or runny. This can happen if the cheese is too warm or if you’ve added too many liquid ingredients. To fix this, try adding a bit of grated cheese or some crushed nuts to absorb the excess moisture. Conversely, if your cheese ball is too firm, mixing in a little more softened cream cheese can help achieve that perfect spreadable texture.
Another pitfall is the flavor imbalance. If your cheese ball tastes bland, consider adjusting your seasonings. A pinch of salt, a dash of garlic powder, or a sprinkle of fresh herbs can make a world of difference. Don’t be shy about tasting your mixture before forming it into a ball. Remember, it’s easier to add more seasoning than to take it away!
Presentation Tips
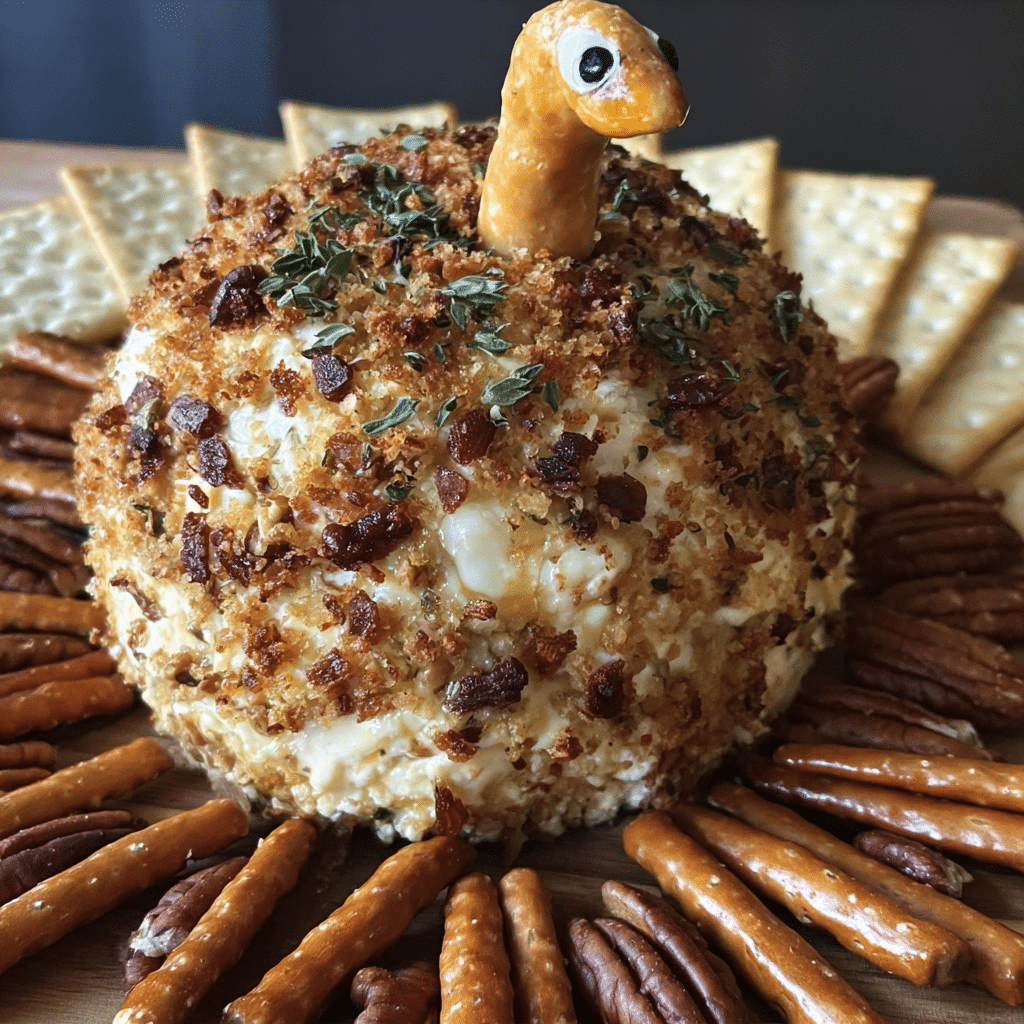
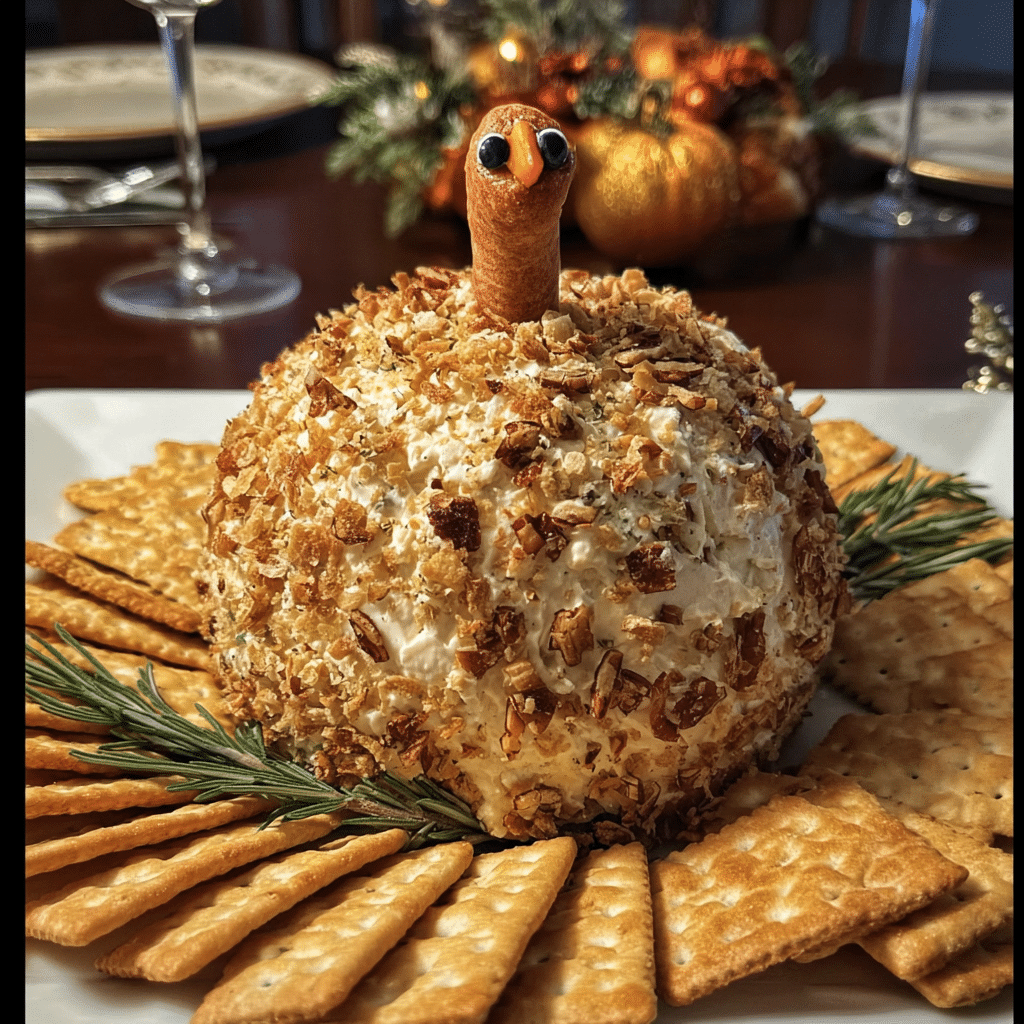
Presentation is key when serving a Thanksgiving cheese ball. After all, we eat with our eyes first! Shape your cheese ball into a smooth sphere for a classic look, or get creative with different shapes – a pumpkin for fall or a turkey for Thanksgiving can be a hit! Once shaped, roll your cheese ball in chopped nuts, herbs, or even edible flowers for a festive touch.
Serve your cheese ball on a beautiful platter surrounded by an array of dippers. Think crackers, fresh veggies, or even slices of apple or pear for a sweet contrast. For an added pop of color, consider garnishing your platter with sprigs of rosemary or other fresh herbs that complement the flavors of your cheese ball.
Wine and Beverage Pairings
The right beverage can elevate your Thanksgiving cheese ball experience. A crisp white wine like Sauvignon Blanc pairs beautifully with the tanginess of cream cheese, while a full-bodied red like Cabernet Sauvignon can enhance the nuttiness of stronger cheeses. If you prefer a non-alcoholic option, consider serving sparkling apple cider or a spiced cranberry mocktail to complement the flavors of your cheese ball.
Incorporating these professional tips and techniques will not only enhance the flavor and texture of your Thanksgiving cheese ball but also make the entire experience more enjoyable for you and your guests. Whether you’re a novice cook or a seasoned pro, these insights will help you create a memorable appetizer that brings everyone to the table!
Creative Variations and Adaptations of thanksgiving cheese ball
The beauty of a Thanksgiving cheese ball lies in its versatility. While the traditional cheese ball is a classic, there are countless creative variations and adaptations that can make your dish stand out on the holiday table. As someone who loves to experiment in the kitchen, I can attest to the joy of adding a personal twist to this beloved appetizer. Let’s dive into some innovative ways to customize your Thanksgiving cheese ball!
Seasonal Variations
Incorporating seasonal ingredients can take your Thanksgiving cheese ball to new heights. Consider adding roasted pumpkin puree or finely chopped roasted butternut squash for a creamy texture and subtly sweet flavor that embodies the essence of fall. Adding dried cranberries or chopped apples can introduce a delightful sweetness and a pop of color, making your cheese ball as visually appealing as it is delicious.
Another seasonal variation could include using sage or thyme, which are synonymous with Thanksgiving flavors. Mixing in these herbs lends an earthy aroma that complements the richness of the cheese while providing a festive touch. For an unexpected twist, try incorporating maple syrup into your cheese ball for a hint of sweetness that pairs perfectly with savory ingredients.
Dietary Adaptations
As food preferences become more diverse, creating a Thanksgiving cheese ball that caters to various dietary needs is essential. For those following a keto diet, use cream cheese and incorporate shredded cheddar or mozzarella while avoiding any high-carb additives. You can also add spices like smoked paprika or cayenne to bring in flavor without the carbs.
If you’re accommodating vegan guests, there are excellent alternatives available. Cashew cream cheese, made by blending soaked cashews with nutritional yeast, lemon juice, and garlic, can serve as a fantastic base. You can further enhance the flavor by adding herbs and spices, or even some finely grated vegan parmesan for an umami kick.
Gluten-free options are also simple to achieve. Just ensure your dippers, such as rice crackers or veggie sticks, are certified gluten-free. This way, everyone can enjoy the cheese ball without worry.
Creative Twists
For those who love spice, consider adding jalapeños or crushed red pepper flakes to your cheese ball mix. This can bring a wonderful heat that contrasts beautifully with the creaminess of the cheese. Alternatively, you can experiment with international flavors by incorporating feta cheese and sun-dried tomatoes for a Mediterranean twist, or even a hint of curry powder for an exotic flair.
Don’t forget about cooking methods! While the traditional cheese ball is typically served cold, you can also bake it for a gooey, melty version that’s perfect for colder weather. Just shape your ingredients into a ball, coat it with breadcrumbs, and bake until golden brown. This variation is sure to impress your guests and add a warm touch to your Thanksgiving spread.
Lastly, if you find yourself with leftovers, don’t fret! Transform your cheese ball into a delicious pasta sauce by melting it down with a bit of cream and tossing it with your favorite noodles. You can also spread it on a sandwich or mix it into a salad for a quick and flavorful meal.
With these creative variations and adaptations, your Thanksgiving cheese ball can become a true centerpiece of your holiday feast. Embrace the spirit of experimentation, and let your culinary creativity shine!
Storage, Reheating, and Meal Prep for thanksgiving cheese ball
When it comes to preparing a thanksgiving cheese ball, one of the most important aspects to consider is how to store it properly. Whether you’re making one for your family gathering or prepping several for a party, understanding the best practices for storage, reheating, and meal prep can ensure that your cheese ball remains fresh and delicious. Let’s dive into the details!
Short-term Storage
If you’ve just prepared your thanksgiving cheese ball and are planning to serve it within a few days, short-term storage is straightforward. First and foremost, you need to select the right container. I always recommend using an airtight container, which can be found in various sizes and shapes. This helps prevent the cheese ball from drying out and protects it from other odors in the refrigerator.
Once your cheese ball is formed, wrap it tightly in plastic wrap before placing it in the container. The plastic wrap adds an extra layer of protection, keeping moisture in and air out. Make sure to mark the date on the container so you can keep track of how long it has been stored. Generally, a thanksgiving cheese ball can last in the refrigerator for about 5 to 7 days if stored properly.
During my Thanksgiving gatherings, I often make multiple cheese balls with different flavors. Storing them in labeled containers not only helps in keeping track of their freshness but also makes it easy for guests to choose their favorite. It’s all about organization in the kitchen!
Freezing and Long-term Storage
If you’ve made more cheese balls than you can consume within a week, freezing them is a great option. Freezing your thanksgiving cheese ball can extend its shelf life to about 2 to 3 months. However, certain factors play a crucial role in maintaining the cheese ball’s texture and flavor during the freezing process.
To freeze your cheese ball, ensure it’s well-wrapped in plastic wrap first, then place it in a freezer-safe container or a heavy-duty freezer bag. Removing as much air as possible will help prevent freezer burn. Before serving, it’s essential to allow the cheese ball to thaw in the refrigerator for several hours or overnight. This gradual thawing helps maintain the creamy texture that makes cheese balls so delightful.
I’ve learned through experience that some ingredients freeze better than others. For example, if you’re including fresh herbs or delicate ingredients, consider adding them just before serving instead of before freezing. This way, they will retain their vibrant flavor and texture.
Reheating Best Practices
While cheese balls are typically served cold or at room temperature, you might find yourself wondering how to reheat one if you prefer it warm. The good news is that you can gently heat a cheese ball in the oven. Preheat your oven to a low temperature, around 250°F (120°C), and place the cheese ball on a baking sheet. Heat for about 10-15 minutes, checking frequently to ensure it doesn’t become overly soft or start to melt into a puddle.
Reheating a thanksgiving cheese ball can create a whole new flavor profile, especially if you’ve added ingredients like bacon or melted cheese. This transformation can surprise your guests in the best way possible! Just remember to serve it warm alongside your favorite dippers or crackers.
In addition to reheating, portioning your cheese ball for meal prep can be beneficial. Consider making small, individual cheese balls instead of one large one. This allows you to freeze them separately, making it easy to pull out just what you need for a quick snack or appetizer.
When it comes to food safety, it’s vital to keep an eye on how long your cheese ball has been stored, both in the fridge and freezer. Always follow the “first in, first out” principle, using the older cheese balls first. If at any point your cheese ball develops an off smell or unusual texture, it’s best to err on the side of caution and discard it.
In summary, storing your thanksgiving cheese ball properly ensures that it remains a delightful addition to your holiday spread. By using airtight containers for short-term storage, following best practices for freezing, and knowing how to reheat it safely, you can enjoy this classic appetizer for days to come!
Nutritional Benefits and Health Information
As we gather around the table for Thanksgiving, it’s easy to overlook the nutritional value of our beloved dishes. Enter the thanksgiving cheese ball, a creamy, flavorful appetizer that can be both indulgent and nutritious. Understanding its nutritional benefits can help you enjoy this treat guilt-free and make informed choices for your holiday meals.
Nutritional Profile
The nutritional profile of a typical cheese ball can vary significantly based on the ingredients used. A standard cheese ball often contains cream cheese, shredded cheese, and various flavorings like herbs, spices, and nuts. Let’s break down the key components.
For a cheese ball made from 8 oz of cream cheese and 8 oz of shredded cheddar, you’re looking at approximately:
- Calories: 400-500 calories
- Fat: 35-40 grams
- Protein: 15-20 grams
- Carbohydrates: 5-10 grams
- Sodium: 600-700 mg
These figures can change dramatically with added ingredients, such as nuts (which increase healthy fats and protein), or dried fruits (which add sugars and carbohydrates). Always consider customizing your cheese ball to fit your nutritional needs while still enjoying the flavors!
Health Benefits
One of the main ingredients in a thanksgiving cheese ball is cheese, which has several health benefits. Cheese is a good source of calcium, which is essential for maintaining strong bones and teeth. It also provides protein, which is vital for muscle repair and growth. Additionally, cheese contains vitamins like A and B12, both of which support overall health.
Adding ingredients like fresh herbs can boost the health profile even further. For example, parsley is rich in antioxidants, while walnuts add omega-3 fatty acids, promoting heart health. This means that your cheese ball can be more than just a tasty snack; it can also contribute positively to your overall nutrition.
Dietary Considerations
As with any dish, dietary considerations are essential when preparing a thanksgiving cheese ball. For those with lactose intolerance, consider using lactose-free cheese or cream cheese alternatives to keep the dish enjoyable for everyone. Additionally, if you or your guests are following a gluten-free diet, make sure to serve the cheese ball with gluten-free crackers or veggie sticks for dipping.
Vegetarians can easily enjoy this dish, but for those following vegan diets, there are numerous plant-based cheese options available today. Using cashew cheese or store-bought vegan cream cheese can create a delicious alternative that still captures the spirit of a cheese ball.
When planning your holiday menu, also consider the caloric content of your cheese ball compared to other appetizers. It’s often rich and filling, so offering smaller portions can help guests enjoy without overindulging. Pairing it with fresh vegetables can enhance the meal’s overall nutritional value and balance the richness of the cheese.
In conclusion, your thanksgiving cheese ball can be a delightful addition to your holiday feast, offering both flavor and nutrition. By understanding its nutritional profile, health benefits, and dietary considerations, you can create a dish that pleases everyone at the table. So go ahead, mix up that cheese ball with love and creativity, and enjoy a deliciously healthy Thanksgiving!
Frequently Asked Questions About Thanksgiving Cheese Ball
Thanksgiving cheese ball recipe easy
Creating an easy Thanksgiving cheese ball is all about simplicity and flavor. Start by combining 8 ounces of softened cream cheese with 1 cup of shredded cheddar cheese in a mixing bowl. Add in some finely chopped green onions, garlic powder, and a pinch of salt for extra flavor. Once well-mixed, form the mixture into a ball and roll it in chopped nuts or herbs for added texture and presentation. Chill for at least an hour before serving to allow the flavors to meld, and serve it with an assortment of crackers or fresh vegetables for a delightful appetizer.
Thanksgiving cheese ball with cream cheese
A Thanksgiving cheese ball featuring cream cheese is a festive and creamy addition to your holiday spread. Begin by blending 8 ounces of softened cream cheese with your choice of flavorings, such as crumbled bacon, dried cranberries, or herbs like dill and parsley. For a savory twist, consider adding some garlic powder or Worcestershire sauce. Once fully combined, shape the mixture into a ball and roll it in finely chopped nuts or a mix of herbs to create a beautiful crust. Let it chill in the refrigerator for a few hours to enhance the flavors, and serve with crackers, apple slices, or celery sticks for a delightful contrast.


