Witches fingers treats are not just another spooky snack for Halloween; they are a delightful blend of creativity, flavor, and a dash of fun that can transform any gathering into a festive celebration. My journey into the world of witches fingers treats began a few Halloweens ago when I stumbled upon a whimsical recipe in a well-worn cookbook that belonged to my grandmother. As a child, I would eagerly await visits to her house, where the kitchen would be filled with the sweet aroma of baked goods. One particular Halloween, she introduced me to these ghoulishly delightful treats, and from that moment on, they became a staple in our family celebrations.

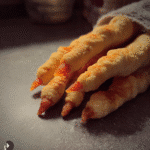
The first time I made witches fingers treats, I remember the excitement bubbling within me. My children watched wide-eyed as I shaped the dough into elongated fingers, carefully placing almond slivers at the tips to mimic fingernails. I couldn’t help but chuckle at the sight; they looked both eerie and delicious. The laughter we shared while creating these treats is a cherished memory, and it reminds me of the joy that can be found in kitchen adventures. Over the years, witches fingers treats have morphed into our family’s Halloween tradition, where we gather around the kitchen table, each person contributing their touch to the creepy cookie. What makes this recipe so special is not just the taste but the memories and connections it fosters.
The Story Behind This Recipe
Witches fingers treats have historical roots that trace back to the ancient practice of baking breads and cookies shaped like various objects or figures, often reflecting cultural beliefs and traditions. While the exact origins of these whimsical cookies are somewhat murky, they have become particularly popular in the United States, especially during the Halloween season. This particular recipe is a playful take on the classic almond cookie, but it transforms the ordinary into something extraordinary with just a few tweaks.
The recipe has evolved significantly over time, adopting various flavors and textures depending on the region and the cook’s preferences. Some families prefer a buttery shortbread base, while others opt for a chewy almond dough. My grandmother’s version used a simple sugar cookie dough, which I still favor for its versatility and ease of preparation. No matter how you make them, the essential element remains: the fun of creating something that looks a bit spooky but tastes absolutely delightful.
Why You’ll Love This Dish
Witches fingers treats are perfect for busy families looking for quick and easy dinner solutions. With a prep time of merely 30 minutes, these treats are not only a hit among kids but also allow parents to engage in a fun cooking experience without spending hours in the kitchen. The ingredients are simple and often found in most pantries, making them a go-to treat for last-minute Halloween parties or school functions.
Seasonally, witches fingers treats are ideal for the month of October when the air is crisp and the scent of autumn is in the air. They make excellent additions to Halloween parties, school events, or even as a playful treat after a day of pumpkin picking. The emotional connection to this dish is profound; they evoke memories of laughter, creativity, and a sense of community. I can still hear my children’s giggles as they helped shape the dough, and their delight when they bit into the sweet, almond-infused cookie.
In this guide, readers will learn not only how to prepare witches fingers treats but also the history behind them and tips to make them uniquely theirs. The process of making these cookies is more than just a cooking lesson; it’s a chance to create lasting memories with loved ones as you share stories and laughter in the kitchen. So, gather your ingredients, put on your aprons, and let’s dive into the magical world of witches fingers treats!
The Rich History and Cultural Significance of witches fingers treats
The rich history and cultural significance of witches fingers treats are as fascinating as their appearance is whimsical. These treats, often made around Halloween, are a playful concoction that has evolved through the centuries. The origins of such spooky-themed foods can be traced back to various cultural traditions where food played a central role in celebrations. In many cultures, the act of baking was not only about sustenance but also about storytelling, ritual, and community bonding.
Origins and History
As the recipe traveled through time, it underwent various adaptations, with different regions adding their unique twists. In Germany, for instance, there is a traditional cookie known as “Hexenfinger” (witch’s finger), which closely resembles what we now recognize as witches fingers treats. These cookies are often flavored with spices such as cinnamon or nutmeg, giving them a warm, inviting flavor that contrasts beautifully with their spooky appearance.
Cultural Significance
Witches fingers treats have become increasingly popular in the United States due to the rise of Halloween celebrations. The growing trend of Halloween parties has made these cookies a staple in many households. They are often used as a fun and interactive treat that allows families to bond over baking and decorating. Children love the creativity involved in shaping the cookies and adding “nails,” while parents appreciate the opportunity to teach their kids about cooking and the joy of homemade treats.
Moreover, witches fingers treats serve as excellent conversation starters at parties, often eliciting laughter and delight from guests. They embody the spirit of Halloween—playful, slightly spooky, and utterly delicious. Many families have made it a tradition to bake these treats together each October, passing down the recipe through generations, which enhances their cultural significance as symbols of togetherness.
Nutritional Benefits
Beyond their playful appearance, witches fingers treats can also offer some nutritional benefits. The primary ingredient, almond flour or ground almonds, provides healthy fats, protein, and fiber, making them a more nutritious option compared to standard sugar cookies. Almonds are also rich in vitamin E, magnesium, and antioxidants, contributing to overall health.
Though these treats are often viewed as indulgent, using wholesome ingredients can make them a more balanced option for family gatherings. By incorporating natural sweeteners or whole-grain flours, you can further enhance their nutritional profile, making them enjoyable and guilt-free. Plus, engaging children in the baking process can teach them valuable lessons about healthy eating and cooking fundamentals.
As we explore further into the world of witches fingers treats in this guide, readers will not only discover how to recreate this spooky delight but also appreciate the rich tapestry of cultural history that surrounds it. So, roll up your sleeves, gather your loved ones, and let’s celebrate the magic of witches fingers treats—where every bite is a reminder of joy, creativity, and connection.
Essential Ingredients for Perfect witches fingers treats
When it comes to crafting the perfect Witches Fingers treats, the ingredients you choose can make all the difference between a spooky success and a ghoulish flop. These delightful, creepy cookies are not only visually captivating, but they also combine a variety of textures and flavors that will enchant your guests at any Halloween gathering. Let’s delve into each ingredient that plays a crucial role in creating these whimsical cookies.
Essential Ingredients
- 1 cup butter, softened: Butter is the foundation of any great cookie. It adds richness and a tender texture, making the Witches Fingers treats melt in your mouth. Using unsalted butter is preferred, as it allows you to better control the salt content in your cookies.
- 1 cup confectioners’ sugar: This finely ground sugar not only sweetens the dough but also contributes to a smooth texture. Confectioners’ sugar helps to create the delicate crumb that characterizes these treats.
- 1 large egg: The egg acts as a binding agent, holding all the ingredients together. It also adds moisture and richness to the dough.
- 1 teaspoon almond extract: This extract introduces a nutty flavor that complements the almonds we’ll use for the fingertips. It’s a subtle yet essential flavor that sets your Witches Fingers treats apart.
- 1 teaspoon vanilla extract: Vanilla is a classic flavor booster that enhances the overall sweetness and aroma of the cookies. It pairs beautifully with the almond extract, creating a rich flavor profile.
- 2 ⅔ cups all-purpose flour: Flour provides the structure for the cookies. The right amount of flour is crucial; too much can lead to dry cookies, while too little can result in flat, unappealing treats.
- 1 teaspoon baking powder: This leavening agent helps the cookies rise slightly, giving them a tender texture while still maintaining their shape.
- 1 teaspoon salt: Salt is vital in bringing out the flavors of the other ingredients. It balances the sweetness and enhances the overall taste of the cookies.
- ¾ cup whole almonds: These will serve as the fingernails for our Witches Fingers treats. Their crunchy texture and nutty flavor are a perfect accompaniment to the sweet cookie base.
- 1 (0.75-ounce) tube red decorating food gel or seedless strawberry jam: This is the finishing touch that gives our cookies a spooky appearance. The red gel or jam resembles blood, making it an ideal addition for Halloween-themed treats.
Witches Fingers treats for halloween
Ingredients
- 1 cup butter, softened
- 1 cup confectioners’ sugar
- 1 large egg
- 1 teaspoon almond extract
- 1 teaspoon vanilla extract
- 2 ⅔ cups all-purpose flour
- 1 teaspoon baking powder
- 1 teaspoon salt
- ¾ cup whole almonds
- 1 (.75-ounce) tube red decorating food gel or seedless strawberry jam, or as needed
Instructions
- Beat butter, confectioners’ sugar, egg, almond extract, and vanilla together in a large bowl with an electric mixer until smooth. Gradually add flour, baking powder, and salt, continually beating until combined. Wrap dough in plastic wrap and refrigerate for 20 to 30 minutes.
- Preheat the oven to 325 degrees F (165 degrees C). Lightly grease baking sheets.
- Remove dough from the refrigerator in small amounts. Scoop 1 heaping teaspoon at a time onto a piece of waxed paper. Use the waxed paper to roll dough into a thin finger-shaped cookie. Press 1 almond into one end of each cookie to give the appearance of a long fingernail. Squeeze cookie near the tip and again near the center of each to give the impression of knuckles. You can also cut into dough with a sharp knife at the same points to help give a more finger-like appearance. Repeat with remaining dough. Arrange shaped cookies on the prepared baking sheets.
- Bake in the preheated oven until cookies are slightly golden in color, 20 to 25 minutes.
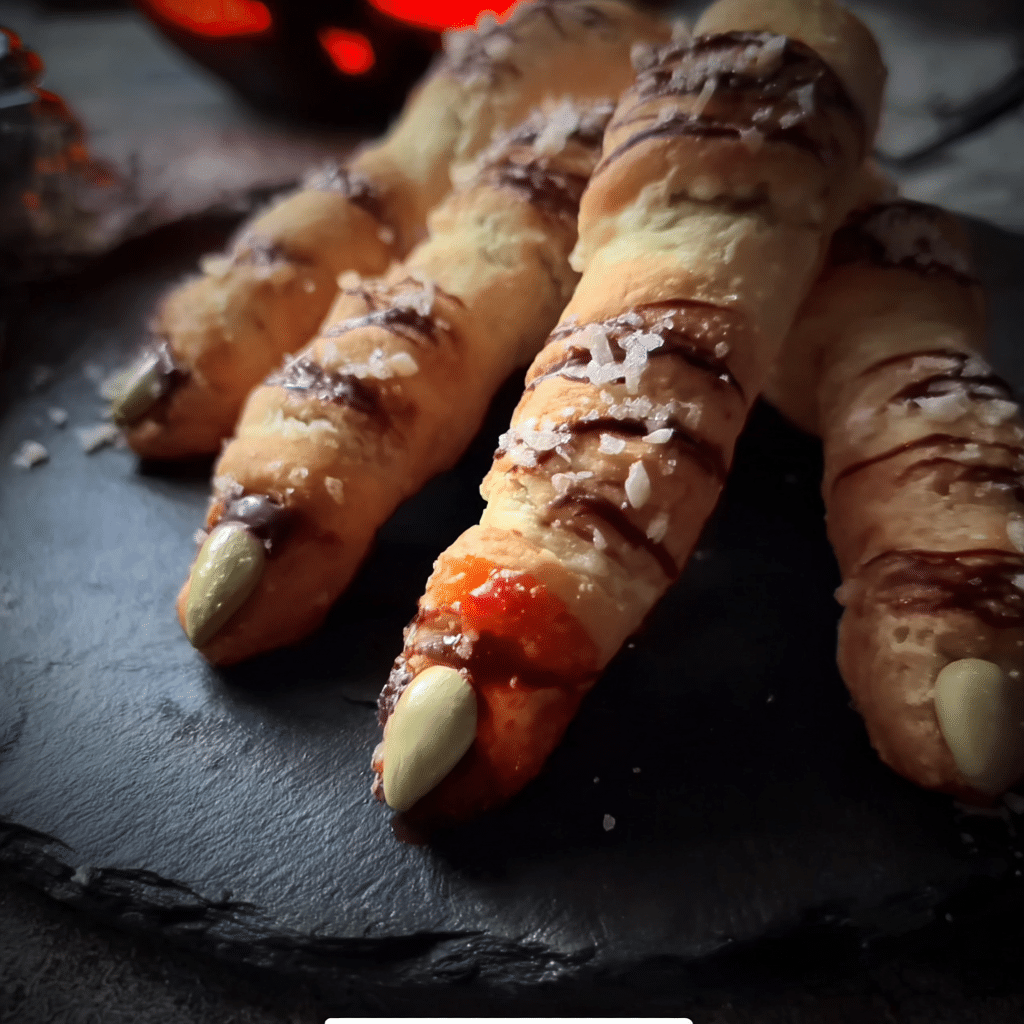
- Remove almond from the end of each cookie; squeeze a small amount of red decorating gel into the cavity. Replace almond to cause jam to ooze out around the tip of cookies
Shopping Tips
When shopping for ingredients, quality is key. For butter, look for brands that use high-quality cream without additives. Organic butter can provide a richer flavor but comes at a premium price. Confectioners’ sugar should be fresh; check the expiration date, as it can clump over time. For extracts, opt for pure vanilla and almond extracts rather than imitation versions for a more authentic taste.
When it comes to flour, consider organic all-purpose flour, as it often has a better flavor and texture. Whole almonds should be fresh and crunchy; try to avoid any with discoloration or a stale smell. For the red gel or jam, choose a product with fewer artificial ingredients for a cleaner taste.
Substitutions and Alternatives
Not everyone can enjoy traditional cookies, so here are some substitutions to accommodate dietary restrictions:
- Dairy-Free: Substitute the butter with a dairy-free alternative such as coconut oil or vegan butter. Make sure to use a non-dairy milk substitute for moisture if necessary.
- Gluten-Free: Replace the all-purpose flour with a gluten-free flour blend. Look for blends that contain xanthan gum to ensure a similar texture.
- Nut-Free: If there’s an allergy to nuts, replace the almond extract with additional vanilla extract and omit the almonds. You can also use sunflower seeds for a similar crunch.
Storage tips for these ingredients are essential to maintain their freshness. Keep butter in the fridge and wrap it tightly to prevent it from absorbing odors. Store confectioners’ sugar in a cool, dry place, and it should last for months. Flour should be kept in an airtight container to avoid pests and moisture. Whole almonds can be stored in the fridge to extend their shelf life, while the red gel or jam should be refrigerated after opening.
Creating Witches Fingers treats is not just about following a recipe; it’s about selecting the right ingredients that will elevate your baking game. With the knowledge of each ingredient’s role, quality indicators, and smart shopping tips, you’ll be well on your way to impressing your family and friends with these delightfully spooky cookies this Halloween!
Detailed Step-by-Step witches fingers treats Cooking Instructions
Now that we have gathered all the essential ingredients for our Witches Fingers treats, it’s time to get into the nitty-gritty of the baking process. This step-by-step guide will walk you through preparing, baking, and assembling these delightful cookies, ensuring that your Halloween treat is both spooky and delicious. Let’s get started!
Preparation Steps
- Preheat your oven: Begin by preheating your oven to 350°F (175°C). This ensures that your cookies bake evenly and achieve the perfect texture.
- Prepare your baking sheets: Line two baking sheets with parchment paper. This not only prevents the cookies from sticking but also makes for easy cleanup.
- Gather your tools: You’ll need a mixing bowl, a hand mixer or stand mixer, measuring cups and spoons, a spatula, and a cookie scoop or your hands for shaping the cookies. Having everything ready will streamline your baking process.
Cooking Process
- Mix the butter and sugar: In your mixing bowl, cream together the softened butter and confectioners’ sugar using the mixer on medium speed. This process should take about 2-3 minutes until it becomes light and fluffy. The aeration is crucial for achieving a tender texture in your cookies.
- Add the egg and extracts: Beat in the large egg, almond extract, and vanilla extract until well combined. This step adds moisture and flavor to your dough.
- Combine dry ingredients: In a separate bowl, whisk together the all-purpose flour, baking powder, and salt. This ensures that the leavening agent is evenly distributed throughout the flour.
- Incorporate the dry ingredients: Gradually add the dry mixture to your wet ingredients, mixing on low speed to avoid flour clouds. Stop when just combined; overmixing can lead to tough cookies.
- Shape the cookies: Using your hands or a cookie scoop, take a small amount of dough and roll it into a finger-like shape. Aim for about 3-4 inches in length and slightly tapered at one end to resemble a finger. Place them on the prepared baking sheets, leaving space between each cookie as they will spread slightly while baking.
- Attach the almonds: Press a whole almond into the tapered end of each cookie to represent a fingernail. Ensure it’s firmly in place but doesn’t go all the way through the dough.
- Bake: Place the baking sheets in the oven and bake for 15-18 minutes, or until the edges are lightly golden. Keep an eye on them, as baking times can vary based on your oven. The visual cue here is a slight firmness to the touch; the center might still appear soft but will set as they cool.
Final Assembly
- Cool the cookies: Once baked, remove the sheets from the oven and allow the Witches Fingers treats to cool on the baking sheets for about 5 minutes before transferring them to a wire rack. This prevents them from breaking apart.
- Decorate: After the cookies have cooled completely, it’s time to get creative! Use the red decorating food gel or seedless strawberry jam to create blood-like drips around the almond tip and wherever you fancy. This is where the spooky factor really comes into play, and it’s a perfect chance to let your creativity shine!
- Serve and enjoy: Arrange your Witches Fingers treats on a platter for a ghoulishly delightful presentation. These treats are sure to be the centerpiece of your Halloween festivities, and your guests will be both horrified and delighted!
As you prepare your Witches Fingers treats, keep in mind that baking is an art as much as it is a science. Don’t be afraid to experiment with shapes, sizes, and decorations. Remember to take your time, enjoy the process, and most importantly, have fun! The joy of creating these spooky treats is just as important as the final product. Happy baking!
Professional Tips and Techniques for witches fingers treats
When it comes to creating the perfect witches fingers treats for Halloween, there’s more to it than just following a simple recipe. With a few professional tips and techniques, you can elevate your spooky snack game to a whole new level. Whether you’re a seasoned baker or a novice in the kitchen, these insights will help you craft witches fingers that not only look terrifyingly delightful but also taste amazing.
Professional Techniques
First and foremost, let’s talk about the base of our witches fingers treats: the dough. For an exceptionally chewy and flavorful treat, consider chilling your dough before baking. This allows the flavors to meld together and results in a firmer texture that shapes beautifully into the finger form. I often make my dough a day ahead and let it sit in the refrigerator overnight. The anticipation only adds to the excitement of Halloween!
Another insider secret is to use almond extract in your dough. While vanilla is the go-to flavor for many baking recipes, almond extract adds a nutty depth that pairs wonderfully with the other ingredients. Just a teaspoon can transform your witches fingers into a hauntingly delicious treat that will leave your guests guessing what the secret ingredient is.
When shaping the fingers, don’t rush the process. Take your time to create realistic knuckles and fingernails. I use a small knife to carve out the knuckles and make the tips of the fingers look like they’re slightly bent, which gives them a more lifelike appearance. Additionally, using sliced almonds for the nails not only enhances the spooky look but also adds a delightful crunch to each bite.
Troubleshooting Guide
Even the most experienced bakers face challenges in the kitchen, especially when creating something as unique as witches fingers treats. Here are some common problems and how to troubleshoot them:
- Too dry or crumbly dough: If your dough is too dry, it could be due to over-measuring the flour. Always spoon your flour into the measuring cup and level it off instead of scooping directly from the bag. If you find your dough is still too crumbly, add a tablespoon of milk or water to help bind it together.
- Flat fingers: If your fingers spread too much during baking, it’s likely that your butter was too warm or you didn’t chill the dough long enough. Make sure to chill it for at least 30 minutes before baking for the best results.
- Browning too quickly: If your fingers are browning too fast, consider lowering the oven temperature by 25°F and extending the baking time. This will ensure that they cook evenly without burning.
Presentation Tips
Once your witches fingers treats are baked to perfection, it’s time to present them in a way that will wow your guests. Consider placing them on a spooky platter lined with black parchment paper or a rustic wooden board. To enhance the eerie vibe, add a few fake spiders or cobwebs around the treats. You can also whip up a simple “blood” sauce using raspberry preserves or a red fruit sauce, drizzling it artfully around the fingers for a dramatic effect.
For serving, I like to use small, clear condiment cups filled with the “blood” sauce to allow guests to dip their witches fingers in. It not only looks appealing but also adds an interactive element to your Halloween gathering. And remember, the more creative you get with your presentation, the more fun your guests will have!
Lastly, don’t forget about drink pairings. A spiced apple cider or a dark, rich stout beer can complement the flavors of your witches fingers treats beautifully. If you want to keep it family-friendly, consider serving a fizzy witch’s brew made with ginger ale and green food coloring for that extra spooky touch. With these tips in hand, you’re well on your way to creating witches fingers that will haunt your taste buds for years to come!
Creative Variations and Adaptations of witches fingers treats
The delightful thing about witches fingers treats is that they can be easily adapted to suit various tastes and dietary preferences. In this section, we’ll explore several creative variations and adaptations that can breathe new life into your Halloween festivities.
Seasonal Variations
One of the best aspects of making witches fingers treats is the ability to incorporate seasonal ingredients. For example, why not add some pumpkin spice to the dough in the fall? This can be achieved by mixing in a tablespoon of pumpkin puree and a teaspoon of pumpkin spice blend. Not only does it enhance the flavor profile, but it also gives your treats a lovely autumnal twist.
In the spring, consider using citrus zest such as lemon or orange to brighten up the flavor. The zest will add a refreshing note that contrasts beautifully with the almond flavor. You can also experiment with adding finely chopped dried fruits like cranberries or apricots for a chewy texture and unexpected flavor bursts.
Dietary Adaptations
As our culinary world becomes more inclusive, it’s essential to consider various dietary needs when preparing witches fingers treats. For those following a vegan lifestyle, substitute the butter with a plant-based alternative and use aquafaba (the liquid from chickpeas) instead of eggs. This will allow you to create delicious vegan witches fingers that everyone can enjoy.
If you need to make gluten-free witches fingers, look for a high-quality gluten-free flour blend. I recommend using a blend that contains xanthan gum to help with the structure and texture of the treats. You’ll be amazed at how well they hold up compared to traditional recipes!
Creative Twists
For those looking to add a unique flair to their witches fingers treats, consider experimenting with international flavors. How about a matcha-infused dough for a green twist? The earthy flavor of matcha would pair well with the almond, while also creating an eye-catching treat that’s perfect for Halloween.
You can also try infusing the dough with spices like cardamom or cinnamon for a warm, aromatic touch. Alternatively, sprinkle some crushed pistachios on top of your fingers before baking for a nutty crunch that is visually appealing and delicious.
When it comes to cooking methods, while baking is the traditional route, you can also try making a no-bake version of witches fingers treats. Using a combination of oats, nut butter, and chocolate, you can create a fun and healthy twist that’s perfect for kids. Simply shape the mixture into fingers, chill until firm, and decorate with almond slices for nails.
Leftovers can also be transformed into delightful snacks. Crumble any remaining witches fingers into a bowl and mix with yogurt or ice cream for a spooky parfait. Alternatively, they can be crushed and used as a topping for festive cupcakes or Halloween-themed desserts.
With these creative variations, your witches fingers treats will stand out at any Halloween gathering. Embrace the spirit of the season and let your imagination run wild as you experiment with flavors, textures, and presentations!
Storage, Reheating, and Meal Prep for witches fingers treats
When it comes to creating memorable treats for Halloween, witches fingers treats hold a special place in my heart. Not only are they delightfully spooky, but they also boast a delicious flavor that keeps everyone coming back for more. However, once you’ve made a batch of these eerie delicacies, you may find yourself wondering how to store them properly to maintain their freshness. In this section, we’ll explore various storage methods, reheating techniques, and meal prep strategies to ensure your witches fingers treats remain as enticing as the day you made them.
Short-term Storage
After whipping up a batch of witches fingers treats, the first thing to consider is short-term storage. If you plan to serve these spooky snacks within a few days, the refrigerator is your best friend. To keep them fresh, place your witches fingers treats in an airtight container. Glass containers with tight-fitting lids are excellent choices, as they help prevent moisture loss while keeping out unwanted odors.
When stacking your witches fingers treats in the container, consider using parchment paper between layers to avoid any sticky mishaps. This simple step can help preserve the shape and presentation of your treats. Also, be mindful of the temperature; your refrigerator should be set to 40°F (4°C) or lower to ensure food safety.
Generally, witches fingers treats can last in the refrigerator for about 3 to 5 days. However, I find that their flavor tends to peak within the first 48 hours, so if you can, aim to enjoy them fresh! If you have leftover treats that you don’t think you’ll consume within that timeframe, don’t fret — we’ll discuss freezing options shortly.
Freezing and Long-term Storage
If you want to keep your witches fingers treats for a longer duration, freezing is a fantastic option! When properly stored, these spooky snacks can maintain their quality for up to three months in the freezer. To freeze your witches fingers treats effectively, first, ensure they are completely cooled. Freezing warm treats can create condensation, leading to ice crystals and freezer burn.
Next, wrap each treat individually in plastic wrap, ensuring they are tightly sealed to prevent air exposure. After wrapping, place them in a heavy-duty freezer bag or an airtight container. If you’re using a container, make sure to leave some space at the top, as treats may expand slightly when frozen. Label the container with the date to keep track of how long they’ve been stored.
When you’re ready to indulge in your frozen witches fingers, simply remove the desired number of treats and let them thaw in the refrigerator overnight. If you’re in a hurry, you can thaw them at room temperature for about an hour. Just be cautious not to leave them out for too long to avoid any food safety concerns.
Reheating Best Practices
When it comes to reheating, the goal is to maintain the texture and flavor of your witches fingers treats. The microwave is a quick option, but it can make treats soggy if you’re not careful. To avoid this, place your treat on a microwave-safe plate and cover it with a damp paper towel. Heat in short intervals of 10-15 seconds, checking frequently until warmed through.
For a crisper texture, consider using the oven. Preheat your oven to 350°F (175°C), then place your witches fingers treats on a baking sheet lined with parchment paper. Heat for about 5-10 minutes, keeping an eye on them to prevent over-browning. This method not only warms the treats but also restores some of that delightful crispiness.
On the topic of meal prep, witches fingers treats can be a fun and festive addition to your Halloween prep. Consider making a double batch a few days before your Halloween party. Store half in the refrigerator and freeze the other half for later use. This strategy allows you to enjoy freshly made treats while also having a backup for last-minute gatherings or unexpected guests.
Finally, let’s not forget about food safety. Always practice good hygiene in the kitchen. Wash your hands, use clean utensils, and ensure that your storage containers are sanitized. When it comes to shelf life, be cautious; if your treats develop an off smell or unusual appearance, it’s best to err on the side of caution and discard them.
In conclusion, whether you’re storing your witches fingers treats for a couple of days or planning to enjoy them weeks later, these tips will help you maintain their delightful flavor and texture. With proper storage, reheating methods, and a little bit of meal prep, your Halloween celebrations are sure to be a hit!
Nutritional Benefits and Health Information
As a lover of Halloween treats, I often find myself pondering not just how delicious my witches fingers treats are, but also how they fit into a balanced diet. While these spooky snacks are undeniably indulgent, understanding their nutritional content can help us enjoy them mindfully. In this section, we’ll dive into the nutritional benefits, health information, and dietary considerations surrounding witches fingers treats.
Nutritional Profile
At first glance, witches fingers treats may seem like a simple dessert, but they pack a surprising punch in terms of nutrition. The primary ingredients used to create these treats typically include almond flour, butter, sugar, and almond slivers, with a few additional components depending on your recipe. Generally, a single witches fingers treat contains approximately 150-200 calories, depending on size and the specific ingredients used.
Breaking it down further, let’s examine the macronutrient distribution. Each treat usually contains around 10-12 grams of fat, which mainly comes from the butter and almonds. While fats are an essential part of our diets, it’s wise to consume them in moderation. The sugar content can range from 8-12 grams per treat, providing a quick energy boost but also warranting caution for those monitoring their sugar intake.
In terms of carbohydrates, witches fingers treats may have about 15-20 grams per serving, largely from the flour and sugar. The fiber content is relatively low, but using almond flour can introduce a small amount of dietary fiber, which is beneficial for digestion.
Health Benefits
While witches fingers treats are undoubtedly a treat, they do offer some health benefits thanks to their ingredients. Almond flour, for instance, is not just a gluten-free alternative to wheat flour; it also provides healthy fats, protein, and vitamin E. Vitamin E is a powerful antioxidant that helps protect your cells from oxidative stress, promoting overall health.
Additionally, almonds are a great source of magnesium, which plays a crucial role in over 300 biochemical reactions in the body. Including almonds in your diet has been associated with improved heart health and better blood sugar control, making them a smarter choice than many other dessert ingredients.
However, it’s essential to remember that moderation is key. While witches fingers treats can be enjoyed as part of a balanced diet, they should ideally be consumed alongside a variety of other nutrient-dense foods to ensure you’re meeting your health needs.
Dietary Considerations
When crafting witches fingers treats, it’s essential to consider various dietary restrictions. For those who are gluten-sensitive or have celiac disease, using almond flour is a fantastic way to make these treats gluten-free. However, always double-check that the almond flour is certified gluten-free, as cross-contamination can occur during processing.
For individuals with nut allergies, alternatives such as sunflower seed butter and sunflower seed flour can create a similar texture and flavor without the use of almonds. If you’re looking to reduce sugar intake, consider using natural sweeteners like honey or agave syrup. Keep in mind that these substitutions may slightly alter the taste and texture of your witches fingers treats.
Additionally, if you’re mindful of calorie intake, you can modify the recipe by reducing the sugar or butter content. Using unsweetened applesauce as a partial butter replacement can lower calories while adding moisture to the treats.
In comparison to other Halloween treats, witches fingers treats can be a more health-conscious option when made thoughtfully. Traditional candies and chocolates are often loaded with artificial ingredients and high in sugars, while witches fingers can be made with more wholesome ingredients. This allows for a festive treat that doesn’t completely derail your healthy eating habits.
In conclusion, witches fingers treats can be both enjoyable and nutritious when made with care and consideration. Understanding their nutritional profile, health benefits, and dietary modifications can empower you to celebrate Halloween without compromising your health goals. So, as you indulge in these delightful delights, remember that a little awareness can go a long way in balancing enjoyment and well-being!
Frequently Asked Questions About Witches Fingers Treats
Witches fingers treats for Halloween ingredients
To make Witches Fingers treats for Halloween, you’ll need a few key ingredients that create both flavor and an eerie look. Start with almond or peanut butter for the base, as it provides a rich taste and sticky texture. You’ll also need green or yellow food coloring to give the cookies their witchy hue. For a spooky effect, use sliced almonds for the fingernails and chocolate chips or melted chocolate for added decoration. Don’t forget sugar and flour for the cookie dough, along with baking powder, to ensure the cookies rise and have a nice texture.
Witches fingers recipe
To create Witches Fingers cookies, begin by preheating your oven to 350°F (175°C). In a mixing bowl, cream together 1 cup of butter with 1 cup of sugar, then mix in 1 egg and a teaspoon of vanilla extract. Gradually add 2 cups of flour, 1 teaspoon of baking powder, and a pinch of salt to form a dough. Shape the dough into finger-like forms, pressing sliced almonds at the tip for nails. Bake for 12-15 minutes until lightly golden, and after cooling, you can dip the ends in melted chocolate for an extra spooky touch!
Witch finger cookies
Witch finger cookies are a fun and spooky treat perfect for Halloween festivities. These cookies can be made using a basic sugar cookie dough, which you shape into long, thin fingers. Enhance the eerie factor by adding green food coloring to the dough and using blanched almonds as the fingernails. Once baked, you can give the cookies a more ghoulish appearance by drizzling them with red icing or melted chocolate to resemble blood. These cookies not only look great but are also deliciously buttery, making them a hit at any Halloween gathering.
Witch fingers Halloween
Witch fingers are an iconic Halloween treat that adds a creative twist to your spooky celebrations. These cookies are often served at Halloween parties and are sure to elicit gasps and giggles from guests. To make them more festive, consider serving them alongside a creepy punch or as part of a dessert table filled with other Halloween-themed goodies. You can also have fun decorating them with various toppings, like edible glitter or candy eyes, to enhance their fright factor. Don’t forget to involve kids in the decorating process for added fun!
Witch finger cookies recipe easy
If you’re looking for an easy Witch Finger cookies recipe, start with a simple sugar cookie base. Mix together 1 cup of softened butter, 1 cup of sugar, and 1 egg in a bowl. Gradually stir in 2 cups of flour, 1 teaspoon of baking powder, and a few drops of green food coloring for that witchy touch. Shape the dough into fingers, pressing an almond onto the end for the nail, and bake at 350°F (175°C) for 12-15 minutes. For an easy finishing touch, drizzle melted chocolate over the fingers to create a “blood” effect, making these treats both easy to make and visually stunning!


